Table of Contents
Advertisement
PL6610T/PL6610/PL6510/PL6310W/PL6210/
SL6610T/SL6610/SL6510/SL6310W/SL6210/
FL261T/FL261/FL251/FL221/FL211/FL261ST/
FL261S/FL251S/FL221S/FL211S/ LU-P500UT/
LU-P500U/LU-P500F/LU-P500W/ LU-P500X/
LU-S500UT/LU-S500U/LU-S500F/ LU-S500W/
LU-S500X/PF-L500UT/PF-L500U/ PF-L500F/
PF-L500W/PF-L500X/PS-L500UT/ PS-L500U/
PS-L500F/PS-L500W/PS-L500X/ LR660T/
LR660/LR560/LR360/LR260/LR660ST/ LR660S/
LR560S/LR360S/LR260S/ML-560B/ ML-560/
ML-460/ML-260/ML-160/ML-560SB/ ML-560S/
ML-460S/ML-260S/ML-160S/ DWU1846/
DWU1817/D1P1818/DWX1819/ DNX1820/
DWU1847/DWU1821/D1P1822/ DWX1823/
Acer Projector
DNX1824
User's Guide
Copyright © 2018. Acer Incorporated.
All Rights Reserved.
Acer Projector User's Guide
Original Issue: 11/2018
Advertisement
Table of Contents

Related Manuals for Acer PL6610T


Summary of Contents for Acer PL6610T
- Page 1 LU-P500U/LU-P500F/LU-P500W/ LU-P500X/ LU-S500UT/LU-S500U/LU-S500F/ LU-S500W/ LU-S500X/PF-L500UT/PF-L500U/ PF-L500F/ PF-L500W/PF-L500X/PS-L500UT/ PS-L500U/ PS-L500F/PS-L500W/PS-L500X/ LR660T/ LR660/LR560/LR360/LR260/LR660ST/ LR660S/ LR560S/LR360S/LR260S/ML-560B/ ML-560/ ML-460/ML-260/ML-160/ML-560SB/ ML-560S/ ML-460S/ML-260S/ML-160S/ DWU1846/ DWU1817/D1P1818/DWX1819/ DNX1820/ DWU1847/DWU1821/D1P1822/ DWX1823/ DNX1824 User’s Guide Copyright © 2018. Acer Incorporated. All Rights Reserved. Acer Projector User’s Guide Original Issue: 11/2018...
- Page 2 Date of purchase: Place of purchase: Acer and the Acer logo are registered trademarks of Acer Incorporated. Other companies’ product names or trademarks are used herein for identification purposes only and belong to their respective companies. HDMI™, the HDMI logo and High-Definition Multimedia Interface are trademarks or registered trademarks of HDMI Licensing LLC.
- Page 3 Information for your safety and comfort Read these instructions carefully. Keep this document for future reference. Follow all warnings and instructions marked on the product. Turning the product off before cleaning Unplug this product from the wall outlet before cleaning. Do not use liquid cleaners or aerosol cleaners. Use a damp cloth for cleaning.
- Page 4 Product servicing Do not attempt to service this product yourself, as opening or removing covers may expose you to dangerous voltage points or other risks. Refer all servicing to qualified service personnel. Unplug this product from the wall outlet and refer servicing to qualified service personnel when: y the power cord or plug is damaged, cut or frayed y liquid was spilled into the product y the product was exposed to rain or water...
- Page 5 Do not throw this electronic device into the trash when discarding. To minimize pollution and ensure utmost protection of the global environment, please recycle. For more information on the Waste from Electrical and Electronics Equipment (WEEE) regulations, visit http://www.acer-group.com/public/Sustainability/sustainability01.htm Do not stare into the beam Do not stare into beam, RG2 As with any bright source, do not stare into the direct beam, RG2 IEC 62471-5:2015.
- Page 6 First things first Usage otes Doe: y Turn off the product before cleaning. y Use a soft cloth moistened with mild detergent to clean the displayhousing. y Disconnect the power plug from AC outlet if the product is not being used for a long period of time. Don’te: y Block the slots and openings on the unit provided for ventilation.
-
Page 7: Table Of Contents
TABLE OF CO TE TS INTRODUCTION ................9 Package Overview........................9 Standard accessories ........................ 9 Optional accessories ......................... 9 Product Overview ........................10 Connections..........................11 Keypad ............................. 12 Remote control ......................... 13 SETUP A D I STALLATIO ............14 Installing the projector ......................14 Connecting sources to the projector .................. - Page 8 ADDITIONAL INFORMATION ............49 Compatible resolutions ......................49 Image size and projection distance ..................52 Projector dimensions and ceiling mount installation ..............55 Troubleshooting ........................56 Warning indicators ........................57 Specifications ........................... 59 English...
-
Page 9: Introduction
INTRODUCTION Package Overview Carefully unpack and verify that you have the items listed below under standard accessories. Some of the items under optional accessories may not be available depending on the model, specification and your region of purchase. Please check with your place of purchase. Some accessories may vary from region to region. The warranty card is only supplied in some specific regions. -
Page 10: Product Overview
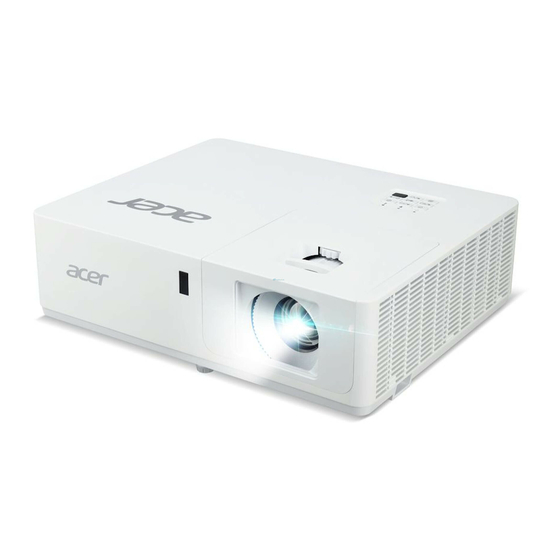
INTRODUCTION Product Overview otee: ‡ Do not block projector intake and exhaust vents. ‡ When operating the projector in an enclosed space, allow at least 50 cm clearance around the intake and exhaust vents. Item Item IR Receivers Ventilation (outlet) Keypad Tilt-Adjustment Feet Lens Shift Dial... -
Page 11: Connections
INTRODUCTION Connections Item 14 IO 15 IO HDMI 2 (v1.4) Connector √ √ HDMI 1(v2.0)(4K) / MHL Connector √ √ USB Power Out (5V 1.5A) Connector √ √ VGA In / VGA In 1 Connector √ √ Composite Connector √ √... -
Page 12: Keypad
INTRODUCTION Keypad Item Item Power LED Menu Lamp LED Keystone Correction Temp LED Information Power Enter Source Re-Sync Four directional select keys English... -
Page 13: Remote Control
INTRODUCTION Remote control Model No:J-25050 MC.JMV11.009 Item Item Infrared transmitter 14. PgUp (not supported) POWER 15. COMPONENT (not supported) Laser button 16. PgDn (not supported) RATIO 17. MEDIA (not supported) Select/Enter KeyPad 0~9 Play/Pause Four directional select keys MENU HDMI™/MHL SOURCE HIDE MODE... -
Page 14: Setup A D I Stallatio
Do not operate the projector in any orientation other that table top or ceiling mount. The projector should be horizontal and not tilted either forwards/backwards or left/right. Any other orientation will invalidate the warranty and may shorten the lifetime of the projector light source or the projector itself. For none standard installation advise please contact Acer. English... - Page 15 SETUP A D I STALLATIO Projector installation notice ‡ Place the projector in a horizontal position. The tilt angle of the projector should not exceed 15 degrees, nor should the projector be installed in any way other than the desktop and ceiling mount and may lead to other unpredictable damages. 15°...
-
Page 16: Connecting Sources To The Projector
SETUP A D I STALLATIO Connecting sources to the projector USB flash drive Smart devices Display Video Output Speakers Screen 3D IR Emitter Audio Output English... - Page 17 SETUP A D I STALLATIO Description Power cord Audio cable HDMI (MHL) cable VGA to component/HDTV adapter VGA cable 3 RCA component cable Composite video cable RS232 cable WirelessHD dongle 10 Wireless dongle Wireless remote control 12 LAN cable 13 12V DC cable 14 3D SYNC cable 15 SPDIF cable 16 USB flash drive...
-
Page 18: Adjusting The Projector Image
SETUP A D I STALLATIO Adjusting the projector image Image height The projector is equipped with elevator feet for adjusting the image height. Locate the adjustable foot you wish to adjust on the underside of the projector. Rotate the adjustable foot clockwise or counterclockwise to raise or lower the projector. Tilt-Adjustment Feet Tilt-Adjustment Ring Zoom, lens shift, and focus... -
Page 19: Remote Setup
SETUP A D I STALLATIO Remote setup Installing / replacing the batteries Two AAA size batteries are supplied for the remote control. Remove the battery cover on the back of the remote control. Insert AAA batteries in the battery compartment as illustrated. Replace back cover on remote control. - Page 20 SETUP A D I STALLATIO Effective range Infra-Red (IR) remote control sensor is located on the top and front sides of the projector. Ensure to hold the remote control at an angle within 40 degrees perpendicular to the projector’s IR remote control sensor to function correctly.
-
Page 21: Using The Projector
USING THE PROJECTOR Powering on / off the projector Lens cap Powering on Remove the lens cap. Securely connect the power lead and signal/source cable. When connected, the Power LED will turn red. Turn on the projector by pressing the button on the projector keypad or remote control. -
Page 22: Selecting An Input Source
USING THE PROJECTOR Selecting an input source Turn on the connected source that you want to display on the screen, such as computer, notebook, video player, etc. The projector will automatically detect the source. If multiple sources are connected, press the button on the projector keypad or the Source button on the remote control to select the desired input. -
Page 23: Menu Navigation And Features
USING THE PROJECTOR Menu navigation and features The projector has multilingual on-screen display menus that allow you to make image adjustments and change a variety of settings. The projector will automatically detect the source. button on the projector keypad or the Menu button on the remote To open the OSD menu, press the control. -
Page 24: Osd Menu Tree
USING THE PROJECTOR OSD Menu tree Main Sub Menu Sub Menu 2 Sub Menu 3 Sub Menu 4 Values Menu Presentation Bright HDR SIM. Cinema Display Mode Game sRGB DICOM SIM. User Off [Default] Blackboard Light Yellow Wall Color Light Green Light Blue Pink Gray... - Page 25 USING THE PROJECTOR Main Sub Menu Sub Menu 2 Sub Menu 3 Sub Menu 4 Values Menu Red [Default] Green Blue Color Cyan Yellow Magenta Color Matching White(*) Hue / R(*) -50 ~ 50 [Default: 0] Saturation / G(*) -50 ~ 50 [Default: 0] Gain / B(*) -50 ~ 50 [Default: 0] Cancel [Default]...
- Page 26 USING THE PROJECTOR Main Sub Menu Sub Menu 2 Sub Menu 3 Sub Menu 4 Values Menu Off [Default] 3D Mode DLP-Link 3D [Default] Auto [Default] 3D Format Top and Bottom Frame Sequential 3D Sync Invert Off [Default] 16:9 Display 16:10 Aspect Ratio...
- Page 27 USING THE PROJECTOR Main Sub Menu Sub Menu 2 Sub Menu 3 Sub Menu 4 Values Menu Audio 1 VIDEO Audio 2 Audio Input Audio 1 Audio HDBaseT Audio 2 Default Audio Input Audio/Mic Input Function Front [Default] Rear Projection Ceiling-top Rear-top 16:9...
- Page 28 USING THE PROJECTOR Main Sub Menu Sub Menu 2 Sub Menu 3 Sub Menu 4 Values Menu English [Default] Deutsch Français Italiano Español Português Polski Nederlands Svenska Norsk/Dansk Suomi ελληνικά 繁體中文 Language 简体中文 日本語 한국어 Русский Magyar Čeština Setup Options ไทย...
- Page 29 USING THE PROJECTOR Main Sub Menu Sub Menu 2 Sub Menu 3 Sub Menu 4 Values Menu HDMI1/MHL HDMI2 VGA IN 1 [Default] Input Source VGA IN 2 Video S-Video HDBaseT Off [Default] High Altitude Options Default [Default] Setup Logo Neutral User Black [Default]...
- Page 30 USING THE PROJECTOR Main Sub Menu Sub Menu 2 Sub Menu 3 Sub Menu 4 Values Menu Serial Number Source Resolution 00x00 Refresh Rate 0.00Hz Display Mode Power Mode (Standby) Light Source Info 0 hr Hours Network Status IP Address Brightness Mode System...
-
Page 31: Display Image Settings Menu
USING THE PROJECTOR Display menu Display image settings menu Display Mode There are many factory presets optimized for various types of images. ‡ Presentation: This mode is suitable for showing in front of public in connection to the PC. Bright: Maximum brightness from PC input. ‡... - Page 32 USING THE PROJECTOR ‡ These options are only available if the 3D mode function is disabled, the Wall Color setting is not set to Blackboard, and the Display Mode setting is not set to DICOM SIM. or HDR SIM.. ‡ In 3D mode, user can only select 3D for Gamma setting.
-
Page 33: Display 3D Menu
USING THE PROJECTOR Brightness Mode Adjust the brightness mode settings. ‡ DynamicBlack: Use to automatically adjust the picture brightness in order to give optimum contrast performance. ‡ Power: Choose the power percentage for brightness mode. Reset Return the factory default settings for color settings. Display 3D menu otee: ‡... -
Page 34: Display Aspect Ratio Menu
USING THE PROJECTOR Display aspect ratio menu Aspect Ratio Select the aspect ratio of the displayed image between the following options: ‡ 4e:3: This format is for 4:3 input sources. ‡ 16e:9: This format is for 16:9 input sources, like HDTV and DVD enhanced for Wide screen TV. ‡... - Page 35 USING THE PROJECTOR 1080p auto mapping rule: Input resolution Auto/Scale Auto H-resolution V-resolution 1920 1080 1440 1080 1440 1080 1024 1440 1080 1280 1024 1440 1080 1400 1050 1440 1080 1600 1200 1440 1080 1280 1920 1080 Wide Laptop 1280 1800 1080 1280...
- Page 36 USING THE PROJECTOR WUXGA auto mapping rule (screen type 16:10): Input resolution Auto/Scale Auto H-resolution V-resolution 1920 1200 1600 1200 1600 1200 1024 1600 1200 1280 1024 1600 1200 1400 1050 1600 1200 1600 1200 1600 1200 1280 1920 1080 Wide Laptop 1280 1920...
-
Page 37: Display Edge Mask Menu
USING THE PROJECTOR 1280 1920 1080 HDTV 1920 1080 1920 1080 Display edge mask menu Edge Mask Use this function to remove the video encoding noise on the edge of video source. Display zoom menu Zoom Use to reduce or magnify an image on the projection screen. Display image shift menu Image Shift Adjust the projected image position horizontally (H) or vertically (V). -
Page 38: Audio Mute Menu
USING THE PROJECTOR Audio menu Audio mute menu Mute Use this option to temporarily turn off the sound. ‡ One: Choose “On” to turn mute on. ‡ Off: Choose “Off” to turn mute off. otee: “Mute” function affects both internal and external speaker volume. Audio volume menu Volume Adjust the volume level. -
Page 39: Setup Projection Menu
USING THE PROJECTOR Setup menu Setup projection menu Projection Select the preferred projection between front, rear, ceiling-top, and rear-top. Setup screen type menu Screen Type (for WXGA/WUXGA model only) Choose the screen type from 16:9 and 16:10. Setup power settings menu Direct Power On Choose “On”... -
Page 40: Setup Hdmi Link Settings Menu
USING THE PROJECTOR Setup HDMI Link settings menu otee: ‡ When you connect HDMI CEC-compatible devices to the projector with HDMI cables, you can control them on the same power on or power off status using the HDMI Link control feature in the projector’s OSD. -
Page 41: Setup Options Menu
USING THE PROJECTOR Setup options menu Language Select the multilingual OSD menu between English, German, French, Italian, Spanish, Portuguese, Polish, Dutch, Swedish, Norwegian/Danish, Finnish, Greek, traditional Chinese, simplified Chinese, Japanese, Korean, Russian, Hungarian, Czechoslovak, Arabic, Thai, Turkish, Farsi, Vietnamese, Indonesian, Romanian, and Slovakian. Closed Captioning Closed Captioning is a text version of the program sound or other information displayed on the screen. -
Page 42: Setup Reset Osd Menu
USING THE PROJECTOR Install and Click Splash Downloader Find the Acer_Splash_downloader_v0.4.zip in the CD user manual. Then click Splash Downloader. If the message says “Projector found”, the projector has been connected successfully. otee: If “Error: No Projector found.”, the projector is not connected. Please retry step 2 and step 3. Select logo file Click the “Browse”... -
Page 43: Network Lan Menu
USING THE PROJECTOR Network menu Network LAN menu Network Status Display the network connection status (read-only). MAC Address Display the MAC address (read-only). DHCP Use this option to enable or disable the DHCP function. ‡ Off: To assign IP, subnet mask, gateway, and DNS configuration manually. ‡... -
Page 44: Network Control Menu
USING THE PROJECTOR Making a direct connection from your computer to the projector* Turn “Off” the DHCP option on the projector. Configure the IP address, Subnet Mask, Gateway, and DNS on projector (“Network > LAN”). Open Network and Sharing Center page on your PC, and assign the identical network parameters to your PC as set on projector. -
Page 45: Setup Network Control Settings Menu
USING THE PROJECTOR Setup network control settings menu LAN_RJ45 function For simplicity and ease of operation, the projector provides diverse networking and remote management features. The LAN / RJ45 function of the projector through a network, such as remotely manage: Power On / Off, brightness, and contrast settings. - Page 46 USING THE PROJECTOR LAN RJ45 Connect an RJ45 cable to RJ45 ports on the projector and the PC (laptop). On the PC (Laptop), select Start > Control Panel > Network Connections. Right-click on the Local Area Connection, and select Property. In the Properties window, select the General tab, and select Internet Protocol (TCP / IP).
- Page 47 USING THE PROJECTOR Click “Properties”. Type in the IP address and Subnet mask, then press “OK”. Press the “Menu” button on the projector. Open on projector Network > LA . Enter the following connection parameters: ± DHCP: Off ± IP Address: 192.168.0.100 ±...
-
Page 48: Info Menu
USING THE PROJECTOR Info menu Info menu View the projector information as listed below: ‡ Serial Number ‡ Source ‡ Resolution ‡ Refresh Rate ‡ Display Mode ‡ Power Mode (Standby) ‡ Light Source Hours ‡ Network Status ‡ IP Address ‡... -
Page 49: Additional Information
ADDITIONAL INFORMATION Compatible resolutions Digital compatibility Digital (HDMI 1.4) B0 / Established B0 / Standard Timing B0 / Detail Timing B1 / Video Mode B1 / Detail Timing Timing 720 x 400 @ 70Hz 1280 x 720 @ 60Hz WXGA: 720 x 480i @ 60Hz 16:9 1920 x 1080p @ 60Hz 640 x 480 @ 60Hz... - Page 50 ADDITIONAL INFORMATION Digital (HDMI 2.0) B0 / Established B0 / Standard Timing B0 / Detail Timing B1 / Video Mode B1 / Detail Timing Timing 3840 x 2160 @ 30Hz 4096 x 2160 @ 24Hz 3840 x 2160 @ 50Hz 3840 x 2160 @ 60Hz 4096 x 2160 @ 50Hz 4096 x 2160 @ 60Hz...
- Page 51 ADDITIONAL INFORMATION True 3D video compatibility Input timing 1280 x 720P @ 50Hz Top-and-Bottom 1280 x 720P @ 60Hz Top-and-Bottom 1280 x 720P @ 50Hz Frame packing HDMI 1.4a 1280 x 720P @ 60Hz Frame packing 3D Input 1920 x 1080i @ 50Hz Side-by-Side(Half) 1920 x 1080i @ 60Hz Side-by-Side(Half)
-
Page 52: Image Size And Projection Distance
ADDITIONAL INFORMATION Image size and projection distance WXGA Series To obtain an image size of 60” set the projector at a distance 1.9 m and 3.0 m from the screen. 60” Desired image size Height: 93 cm from base to top of image 1.9 m 3.0 m... - Page 53 ADDITIONAL INFORMATION WUXGA series To obtain an image size of 60” set the projector at a distance 1.8 m and 2.9 m from the screen. 60” Desired image size Height: 86 cm from base to top of image 1.8 m 2.9 m Desired Distance Desired image size...
- Page 54 ADDITIONAL INFORMATION 1080p series To obtain an image size of 60” set the projector at a distance 1.9 m and 3.0 m from the screen. 60” Desired image size Height: 88 cm from base to top of image 1.9 m 3.0 m Desired Distance Desired image size...
-
Page 55: Projector Dimensions And Ceiling Mount Installation
ADDITIONAL INFORMATION Projector dimensions and ceiling mount installation To prevent damage to your projector, please use the Acer ceiling mount. If you wish to use a third party ceiling mount kit, please ensure the screws used to attach a mount to the projector meet the following specifications: ‡... -
Page 56: Troubleshooting
ADDITIONAL INFORMATION Troubleshooting If you experience a problem with your projector, please refer to the following information. If a problem persists, please contact your local reseller or service center. Image problems No image appears on-screen ‡ Ensure all the cables and power connections are correctly and securely connected as described in the "Installation"... -
Page 57: Warning Indicators
ADDITIONAL INFORMATION Other problems The projector stops responding to all controls ‡ If possible, turn off the projector, then unplug the power cord and wait at least 20 seconds before reconnecting power. Remote control problems If the remote control does not work ‡... - Page 58 ADDITIONAL INFORMATION LED lightning messages Power LED Temp LED Lamp LED Message (Red) (Blue) (Red) (Red) Standby state Steady light (Input power cord) Flashing Power on (Warming) (0.5 sec off / 0.5 sec Power on and Lamp lighting Steady light Flashing (0.5 sec off / 0.5 Power off (Cooling)
-
Page 59: Specifications
ADDITIONAL INFORMATION Specifications Optical Description Maximum resolution 1920x1200@60Hz(RB) ‡ WXGA Native resolution ‡ 1080p ‡ WUXGA Lens Manual zoom and manual focus ‡ WXGA: 20” ~ 300” (51cm ~ 762cm) Image size (diagonal) ‡ 1080p: 20” ~ 300” (51cm ~ 762cm) ‡... - Page 60 ADDITIONAL INFORMATION Regulations and safety notices FCC notice This device has been tested and found to comply with the limits for a Class B digital device pursuant to Part 15 of the FCC rules. These limits are designed to provide reasonable protection against harmful interference in a residential installation.
- Page 61 ADDITIONAL INFORMATION General This product complies with the radio frequency and safety standards of any country or region in which it has been approved for wireless use. Depending on configurations, this product may or may not contain wireless radio devices (such as wireless LAN and/or Bluetooth modules). Canada —...
- Page 62 LU-S500U/LU-S500F/LU-S500W/LU-S500X/PF-L500UT/PF-L500U/PF-L500F/ PF-L500W/PF-L500X/PS-L500UT/PS-L500U/PS-L500F/PS-L500W/PS-L500X/ LR660T/LR660/LR560/LR360/LR260/LR660ST/LR660S/LR560S/LR360S/LR260S/ ML-560B/ML-560/ML-460/ML-260/ML-160/ML-560SB/ML-560S/ML-460S/ ML-260S/ML-160S We, Acer Incorporated, hereby declare under our sole responsibility that the product described above is in conformity with the relevant Union as below and following harmonized standards and/or other relevant standards have been applied: EMC Directive: 2014/30/EU...
- Page 63 Acer America Corporation 333 West San Carlos St., Suite 1500 San Jose, CA 95110 U. S. A. Tel: 254-298-4000 Fax: 254-298-4147 www.acer.com Federal Communications Commission Declaration of Conformity This device complies with Part 15 of the FCC Rules. Operation is subject to the...