Sony BDV-IZ1000W Operating Instructions Manual
Blu-ray disc/dvd home theatre system
Hide thumbs
Also See for BDV-IZ1000W:
- Quick setup manual (2 pages) ,
- Operating instructions manual (88 pages) ,
- Instruction & operation manual (14 pages)

Related Manuals for Sony BDV-IZ1000W


Summary of Contents for Sony BDV-IZ1000W
- Page 1 4-187-302-12(1) Blu-ray Disc/DVD Home Theatre System Operating Instructions BDV-HZ970W / IZ1000W ©2010 Sony Corporation...
- Page 2 Record the serial number in the space provided below. Refer to them whenever you call upon your Sony dealer regarding this product. Model No. BDV-HZ970W Serial No.______________ The following FCC statement...
-
Page 3: Important Safety Instructions
NOTE: This equipment has been tested and found to comply with the limits for a Class B digital device, pursuant to Part 15 of the FCC Rules. These limits are designed to provide reasonable protection against harmful interference in a residential installation. -
Page 4: Copyrights And Trademarks
Grant condition. If you have any questions about this product, contact Sony Customer Information Service Center at 1- 800-222-7669 or visit http:// www.sony.com/ on the Internet. The telephone number below is for FCC-related matters only. -
Page 5: About These Operating Instructions
Gracenote in the United States and/or other countries. • “PhotoTV HD” and the “PhotoTV HD” logo are trademarks of Sony Corporation. • MPEG Layer-3 audio coding technology and patents licensed from Fraunhofer IIS and Thomson. -
Page 6: Table Of Contents
Table of Contents About These Operating Instructions ... 5 Unpacking ... 7 Index to Parts and Control ... 10 Getting Started Step 1: Installing the System ...16 Step 2: Connecting the System ...21 Step 3: Connecting to the Network ...28 Step 4: Setting up the S-AIR Wireless System ...29 Step 5: Performing the Easy... -
Page 7: Unpacking
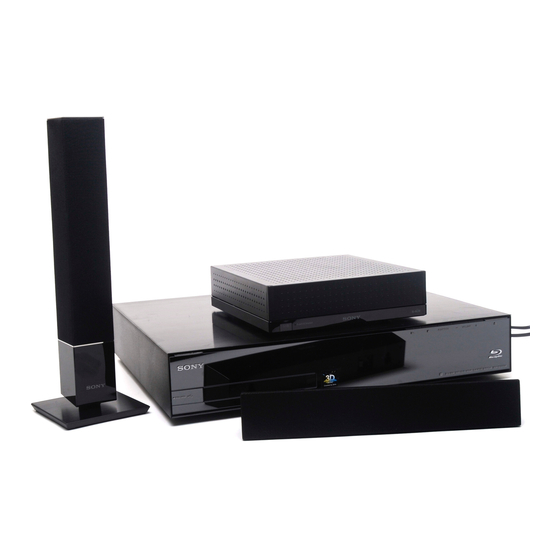
Unpacking BDV-HZ970W • Main unit (1) • Front speakers (2) • Surround speakers (2) • Center speaker (1) • Subwoofer (1) • Bases for the front speakers (2) • Posts for the front speakers (long) (2) • Posts for the front speakers (short) (2) •... - Page 8 BDV-IZ1000W • Main unit (1) • Front and surround speakers • Center speaker (1) • Subwoofer (1) • Front speaker stands (2) • Bases for the front speaker stands (2) • Bases for the surround speakers (2) • Base adapters for the surround speakers (2) •...
- Page 9 Preparing the remote Insert two R6 (size AA) batteries (supplied) by matching the 3 and # ends on the batteries to the markings inside the compartment.
-
Page 10: Index To Parts And Control
Index to Parts and Control For more information, refer to the pages indicated in parentheses. Front panel PUSH OPEN A "/1 (on/standby) Turns on the unit, or sets it to standby mode. B Play operation buttons N (play) Starts or re-starts playback (resume play). Plays a slideshow when a disc containing JPEG image files is inserted. -
Page 11: Front Panel Display
Front panel display About the indications in the front panel display A Displays the current sound format. B Lights up when the system is playing via the PARTY STREAMING function. C Lights up when outputting 1920 × 1080p/24 Hz video signals. D Lights up while virtual 7.1ch decoding is activated. -
Page 12: Rear Panel
Rear panel EZW-RT10 A Wireless transceiver (EZW-RT10) slot (page 27) B S-AIR ID switch (pages 29, 47) C LAN (100) terminal (page 28) D HDMI (IN 1/IN 2) jack (page 24) E HDMI (OUT) jack (page 22) F ANTENNA (75Ω COAXIAL FM) jack (page 26) (USB) port (pages 28, 36) LAN(100) - Page 13 Surround amplifier Front panel S-AIR/STANDBY A "/1 (Power) Turns the surround amplifier on/off. B S-AIR/STANDBY indicator You can check the status of wireless transmission of surround speaker audio signals between the main unit and surround amplifier. Indicator Status Turns green. Wireless transmission between the main unit and the surround amplifier is established...
-
Page 14: Remote Control
Remote control The buttons for system operation only are described below. See “Controlling Your TV or Other Components with the Supplied Remote” (page 57) for the buttons for operation of the connected components. ONE-TOUCH THEATER PLAY BRAVIA Sync AUDIO SUBTITLE D.TUNING YELLOW BLUE... - Page 15 M Playback operation buttons See “Playback” (page 35). ./> (previous/next) Skip to the previous/next chapter, track, or file. REPLAY/ADVANCE Briefly replay the current scenes for 10 seconds./Briefly fast forwards the current scenes for 15 seconds. m/M (fast reverse/fast forward) Fast reverse/fast forward the disc during playback.
-
Page 16: Getting Started
Getting Started Step 1: Installing the System Positioning the speakers For the best possible surround sound, place all speakers at the same distance from the listening position (A). The distance can be between 0 to 23 feet (0.0 to 7.0 meters). If you cannot place the center speaker and surround speakers at the same distance as (A), place them within 23 feet (7.0 meters) of the listening position. - Page 17 To add the optional surround back speakers You can enjoy 7.1 surround sound by purchasing the Wireless Surround Speaker Kit (WAHT-SBP2, optional). The optional product lineup differs depending on the area. For the position of the surround back speakers, refer the illustration below (C). Front left speaker (L) Surround left speaker (L)
- Page 18 Install the speakers on a vertical and flat wall where reinforcement is applied. • Sony is not responsible for accidents or damage caused by improper installation, insufficient wall strength or improper screw installation, natural calamity, etc.
- Page 19 For the surround speakers 8 to 10 mm inch) inch) 5 mm inch) 10 mm inch) BDV-IZ1000W For the center speaker 330 mm (13 inches) 8 to 10 mm 219 mm inches) For the other speakers 8 to 10 mm...
- Page 20 Hang the speakers on the screws. 5 mm 10 mm Rear of the speaker Hole on the back of the speaker inch) inch)
-
Page 21: Step 2: Connecting The System
Step 2: Connecting the System For connecting the system, read the information on the following pages. Do not connect the AC power cord (mains lead) of the unit to a wall outlet (mains) until all the other connections are made. Note •... - Page 22 Connecting the TV (Video connection) This connection sends a video signal to the TV. Depending on the jacks on your TV, select the connection method. Rear panel of the unit To the video input jack of the TV. Method 1: HDMI cable (A) connection If your TV has an HDMI jack, connect to the TV with an HDMI cable.
- Page 23 Connecting the TV (Audio connection) This connection sends an audio signal to the unit from the TV. To listen to TV sound via the system, perform this connection. Rear panel of the unit With a digital audio connection, the system receives a Dolby Digital multiplex broadcast signal and you can enjoy multiplex broadcast sound.
- Page 24 Connecting the other components When another component you wish to connect to the system has an HDMI OUT jack You can connect a component that has an HDMI OUT jack such as a set-top box/digital satellite ® receiver or PLAYSTATION 3, etc., with an HDMI cable.
- Page 25 When the component does not have an HDMI OUT jack Video signals from the system and the components are sent to the TV, and audio signals from the components are sent to the system as follows. System You can enjoy connected components via the system’s speakers. •...
- Page 26 Connecting the antenna (aerial) Rear panel of the unit N N A A N T E O A X IA 75 C Note • Be sure to fully extend the FM wire antenna (aerial). • After connecting the FM wire antenna (aerial), keep it as horizontal as possible. •...
- Page 27 • Please make sure to fully insert the wireless transceiver into the wireless transceiver slot. You should hear a click when the wireless transceiver is inserted correctly. • To avoid inserting the wireless transceiver upside-down, orient it with the Sony logo facing up. Rear panel of the surround amplifier...
-
Page 28: Step 3: Connecting To The Network
[Wired Setup] (page 65), and follow the on- screen instructions to complete the setup. USB Wireless Setup Use a wireless LAN via the USB Wireless LAN Adapter (Sony UWA-BR100* only) (supplied with BDV-HZ970W). The USB Wireless LAN Adapter may not be available in some regions/countries. -
Page 29: Step 4: Setting Up The S-Air Wireless System
WEP applies security to communications to prevent outsiders from intercepting communications or intruding into your wireless network. WEP is a legacy security technology that enables older devices, which do not support TKIP/AES, to be connected. WPA-PSK (TKIP), WPA2-PSK (TKIP) TKIP is a security technology developed to correct for the deficiencies of WEP. -
Page 30: Step 5: Performing The Easy Setup
Press "/1 to turn the surround amplifier When wireless transmission is activated, the S-AIR/STANDBY indicator turns green. S-AIR/STANDBY indicator S-AIR/STANDBY "/1 If the S-AIR/STANDBY indicator does not turn green, see “Surround amplifier” (page 13). For details of the S-AIR function, see “Using an S-AIR Product”... - Page 31 A .C A M IC E C M -A Calibration mic Press [/1 on the unit, and [/1 on the surround amplifier. Switch the input selector on your TV so that the signal from the system appears on the TV screen. The Easy Setup Display for OSD language selection appears.
-
Page 32: Step 6: Selecting The Source
Step 6: Selecting the Source You can select the playback source. FUNCTION Press FUNCTION repeatedly until the desired function appears in the front panel display. Each time you press FUNCTION, the function changes as follows. “BD/DVD” t “D. MEDIA” t “TUNER FM” t “HDMI1”... -
Page 33: Step 7: Enjoying Surround Sound
Step 7: Enjoying Surround Sound After performing the previous Steps and starting playback, you can easily enjoy surround sound. You can also select pre-programmed surround settings that are tailored to different kinds of sound sources. They bring the exciting and powerful sound of movie theaters into your home. X/x/c, Selecting surround settings based on your listening preference Press SYSTEM MENU. - Page 34 Sound from Surround setting “A.F.D. 7.1CH” (AUTO FORMAT DIRECT 7.1CH) “PRO LOGIC” “PLII MOVIE” “PLII MUSIC” “NEO6 CIN” “NEO6 MUS” “2CH STEREO” Note • When you select “A.F.D. 7.1CH,” depending on the disc or source, the beginning of the sound may be cut off while the optimum mode is automatically selected.
-
Page 35: Playback
Playback Playing a Disc For playable discs, see “Playable Discs” (page 76). Switch the input selector on your TV so that the signal from the system appears on your TV screen. Press Z, and place a disc on the disc tray. -
Page 36: Playing From A Usb Device
Displaying the play information You can check the playback information, etc., by pressing DISPLAY. The displayed information differs depending on the disc type and player status. Example: when playing a BD-ROM A Output resolution/Video frequency B Title number or name C The currently selected audio setting D Available functions ( subtitle) -
Page 37: Enjoying An Ipod
• The iPod is charged when connected to the system while the system is turned on. • You cannot transfer songs onto the iPod. • Sony cannot accept responsibility in the event that data recorded to iPod is lost or damaged when using an iPod connected to this unit. -
Page 38: Playing Via A Network
• If [Party Auto Start] (page 66) is not displayed on the for playback operations. You can play the same audio at the same time across all Sony components which are compatible with the PARTY STREAMING function. The component that plays audio for the party through the use of [Start Party] is called the “party host.”... - Page 39 (for the party host only) You can use other components to play the content that is playing on the system. Turn on the system and other Sony components compatible with the PARTY STREAMING function. Make sure that each component is connected to the network.
-
Page 40: Available Options
Available Options Various settings and playback operations are available by pressing OPTIONS. The available items differ depending on the situation. Common options Items Details [Playback History Displays titles/tracks in the List] playback history of a BD-ROM/DVD-ROM/ CD-DA (music CD) using Gracenote technology. - Page 41 [Photo] only Items Details [Slideshow] Starts a slideshow. [Slideshow Speed] Changes the slideshow speed. [Slideshow Effect] Sets the effect when playing a slideshow. [Slideshow BGM] • [Off]: Turns off the function. • [My Music from USB]: Sets the music files registered in [Add Slideshow BGM].
-
Page 42: Sound Adjustment
DVD, etc., “HD-D.C.S.” realizes precise sound effects the way the Movie Sound Designers intended for them to be. • “3D SUR.”: “3D SUR.” is a unique Sony algorithm used for playing 3D (three- dimensional) content that provides a 3D sound... -
Page 43: Enjoying Multiplex Broadcast Sound
Press AUDIO repeatedly during playback to select the desired audio signal. The audio information appears on the TV screen. x BD/DVD VIDEO Depending on the BD/DVD VIDEO, the choice of language varies. When 4 digits are displayed, they indicate a language code. -
Page 44: Using The Sound Effect
Using the Sound Effect C/X/x/c, Enjoying sound at low volume You can enjoy sound effects or dialog, as you would in a movie theater, even at low volume. It is useful for watching movies at night. Press SYSTEM MENU. Press X/x repeatedly until “NIGHT MODE”... -
Page 45: Tuner
Tuner Listening to the Radio You can enjoy radio sound with the system’s speakers. D.TUNING C/X/x/c, FUNCTION TUNING +/– VOL +/– Current station Current band and preset number FM 7 88.00 Press FUNCTION repeatedly until “TUNER FM” appears in the front panel display. - Page 46 Press X/x to select the preset number you want. • You can select the preset number directly by pressing the number buttons. Press “COMPLETE” appears in the front panel display, and the station is stored. Repeat Steps 2 to 6 to store other stations.
-
Page 47: External Audio Device
External Audio Device Using an S-AIR Product About S-AIR products There are two types of S-AIR product. • S-AIR main unit (this unit): This is for transmitting sound. You can use up to three S-AIR main units. (The number of usable S-AIR main units depends on the use environment.) •... - Page 48 To enjoy a 7.1 channel system You can enjoy the more realistic surround sound effect of 7.1 channels when you use the Wireless Surround Speaker Kit (WAHT-SBP2, optional). For details, refer to the operating instructions of the Wireless Surround Speaker Kit. In this case, set [Surround Back] in [Speaker Settings] to [Yes] (page 55).
- Page 49 Identifying the unit with a specific S-AIR sub unit (Pairing operation) For the surround amplifier For the S-AIR receiver When using S-AIR products, neighbors may also receive your system’s sound if IDs are the same, or you may receive sound from neighbors. To prevent this, you can identify the unit with a specific S-AIR sub unit by performing the pairing operation.
- Page 50 If wireless transmission is unstable For the surround amplifier For the S-AIR receiver If you use multiple wireless systems, such as wireless LAN or Bluetooth, the transmission of S-AIR signals or other wireless signals may be unstable. In this case, the transmission may be improved by changing the following [RF Change] setting.
-
Page 51: Other Operations
HDMI function may not work. Refer to the operating instructions supplied with the component. • The Control for HDMI function may not work if you connect other than a Sony component, even if the component is compatible with the Control for HDMI function. - Page 52 Press X/x to select [System Settings], then press Press X/x to select [HDMI Settings], then press The [HDMI Settings] display appears. Press X/x to select [Control for HDMI], then press Press X/x to select the setting, then press • [On]: On. •...
-
Page 53: Calibrating The Appropriate Settings Automatically
can change the output method to the speakers of the TV via the TV menu. • When sound of the TV or other components is output from the speakers of the system, you can adjust the volume and turn off the sound of the system using the TV remote. -
Page 54: Setting The Speakers
A .C A M IC E C M -A Calibration mic Press X/x to select [OK]. To cancel, select [Cancel]. Press [Auto Calibration] starts. The system adjusts the speaker settings automatically. For proper calibration results, please remain quiet during the measurement. Note •... - Page 55 Press X/x to select the item, then press Check the following settings. x [Connection] If you do not connect center or surround speakers, set the parameters for [Center] and [Surround]. Since the front speaker and subwoofer settings are fixed, you cannot change them.
-
Page 56: Using The Sleep Timer
x [Test Tone] The speakers will emit a test tone to adjust [Level]. [Off]: The test tone is not emitted from the speakers. [On]: The test tone is emitted from each speaker in sequence while adjusting level. When you select one of the [Speaker Settings] items, the test tone is emitted from each speaker in sequence. -
Page 57: Controlling Your Tv Or Other Components With The Supplied Remote
(Learning mode)” (page 58). Note • When you replace the batteries of the remote, the remote setting may be reset to the default (SONY) setting. Controlling your components with the supplied remote Press the TV or STB operation mode button that matches the component you want to control. - Page 58 Note • In TV or STB mode, if you press any of the buttons above, the TV or STB operation mode button lights up. (However, depending on the code setting, some buttons may not work, and the TV or STB operation mode button may not light up.) •...
-
Page 59: Saving Power In Standby Mode
• You cannot use z individually. z is used with H, X, or x. When learning, press H, X, or x while pressing z. Point the remotes at each other. Press the button on the other remote that you want to program to the supplied remote. -
Page 60: Settings And Adjustments
Letter Box x [Preset Mode] Auto You can change the preset code of the remote for controlling non-Sony components. For details, see “Changing the preset code of the remote (Preset mode)” (page 58). x [Learning Mode] You can assign a remote code for an operation different from the preset operations of the remote’s buttons. -
Page 61: [Network Update]
You can update and improve the functions of the system. For information about update functions, refer to the following website: http://www.sony.com/blurayhtsupport During a software update, “UPDATING” appears in the front panel display and video signals via HDMI may not be displayed. After the update completes, the main unit automatically turns off. -
Page 62: [Audio Settings]
x [YCbCr/RGB (HDMI)] [Auto]: Automatically detects the type of external device, and switches to the matching color setting. [YCbCr (4:2:2)]: Outputs YCbCr 4:2:2 video signals. [YCbCr (4:4:4)]: Outputs YCbCr 4:4:4 video signals. [RGB]: Select this when connecting to a device with an HDCP-compliant DVI jack. -
Page 63: [Bd/Dvd Viewing Settings]
x [Speaker Settings] To obtain the best possible surround sound, set the speakers. For details, see “Setting the Speakers” (page 54). x [Auto Calibration] You can calibrate the appropriate settings automatically. For details, see “Calibrating the Appropriate Settings Automatically” (page 53). [BD/DVD Viewing Settings] You can make detailed settings for BD/DVD... -
Page 64: [Music Settings]
[Dimmer] [Bright]: Bright lighting. [Dark]: Low lighting. x [HDMI Settings] By connecting Sony components that are compatible with the Control for HDMI function with an HDMI cable, operation is simplified. For details, see “Using the Control for HDMI Function for “BRAVIA” Sync” (page 51). -
Page 65: [Network Settings]
[USB Wireless Setup]: Select this when you use a USB Wireless LAN Adapter. For more information, go to http://www.sony.com/blurayhtsupport x [Network Connection Diagnostics] You can run the network diagnostics to check if the network connection has been made properly. -
Page 66: [Easy Setup]
[Automatic Access Permission]: Sets whether or not to allow automatic access from newly detected DLNA controller. [Smart Select]: Allows a Sony DLNA controller to find the system as the target component to operate by using the infrared ray. You can set this function to on or off. -
Page 67: Additional Information
If you have any questions or problems concerning your system, please consult your nearest Sony dealer. On cleaning discs, disc/lens cleaners • Do not use cleaning discs or disc/lens cleaners (including wet or spray types). -
Page 68: Notes About The Discs
IMPORTANT NOTICE Caution: This system is capable of holding a still video image or on-screen display image on your television screen indefinitely. If you leave the still video image or on-screen display image displayed on your TV for an extended period of time you risk permanent damage to your television screen. -
Page 69: Troubleshooting
Note that if service personnel changes some parts during repair, these parts may be retained. In the event of a problem with the S-AIR function, have a Sony dealer check the entire system together (S-AIR main unit and sub unit). - Page 70 Symptom No picture appears when the video output resolution selected in [Output Video Format] is incorrect. Video signals are only output from the HDMI (OUT) jack when connecting the HDMI (OUT) jack and other video output jacks at the same time. The dark area of the picture is too dark/the bright area is too bright or unnatural.
- Page 71 Symptom Problems and solutions There is no sound from the • Check the speaker connections and settings (pages 21, 54). subwoofer. There is no digital sound from • Set [Control for HDMI] in [HDMI Settings] of [System Settings] to [On] the HDMI (OUT) jack when (page 64).
- Page 72 After checking the above items and fixing any problems, turn on the surround amplifier. If the cause of the problem cannot be found even after checking all the above items, consult your nearest Sony dealer. • Flashes green slowly or turns red.
- Page 73 (mains lead) from the wall outlet (mains), then reconnect after several minutes. A disc cannot be ejected and • Contact your Sony dealer or local authorized Sony service facility. “LOCKED” appears in the front panel display. The Control for HDMI function •...
-
Page 74: Usb Device
• Picture/sound quality may be poor depending on Internet content providers. • Picture/sound quality may be improved by changing the connection speed. Sony recommends a connection speed of at least 2.5 Mbps for standard- definition video and 10 Mbps for high-definition video. -
Page 75: Network Connection
S-AIR ID of the unit and S-AIR sub unit (page 50). Other Symptom Problems and solutions “Exxxx” appears in the front • Contact your nearest Sony dealer or local authorized Sony service facility and panel display. give the error code. -
Page 76: Playable Discs
Playable Discs Blu-ray Disc BD-ROM BD-R DVD-ROM DVD-R/DVD-RW DVD+R/DVD+RW CD-DA (Music CD) CD-ROM CD-R/CD-RW Super Audio CD Since the Blu-ray Disc specifications are new and evolving, some discs may not be playable depending on the disc type and the version. Also, the audio output differs depending on the source, connected output jack, and selected audio settings. -
Page 77: Playable Types Of Files
Playable Types of Files Video File format Extensions 1)5) MPEG-1 Video/PS “.mpg,” “.mpeg,” “.m2ts,” “.mts” MPEG-2 Video/PS, 1)6) DivX “.avi,” “.divx” 1)5) MPEG4/AVC “.mkv,” “.mp4,” “.m4v,” “.m2ts,” “.mts” 1)5) WMV9 “.wmv,” “.asf” AVCHD Music File format Extensions MP3 (MPEG-1 Audio “.mp3”... -
Page 78: Supported Audio Formats
Supported Audio Formats Audio formats supported by this system are as follows. Format LPCM 2ch Function “BD/DVD” “HDMI (IN 1)” “HDMI (IN 2)” “SAT/CABLE” “TV” (DIGITAL IN) a: Supported format. –: Unsupported format. Note • HDMI (IN 1) and HDMI (IN 2) do not input sound in the case of an audio format that contains copy protections such as Super Audio CD or DVD-Audio. -
Page 79: Specifications
Specifications Amplifier Section U.S. models: POWER OUTPUT AND TOTAL HARMONIC DISTORTION: (FTC) Front L + Front R: With 3 ohms loads, both channels driven, from 180 Hz - 20,000 Hz; rated 60 W per channel minimum RMS power, with no more than 1% total harmonic distortion from 250 milli watts to rated output. - Page 80 75 mm × 225 mm × 71 mm (3 in × 8 in × 2 (w/h/d) Mass (approx.) 0.45 kg (1 lb) Subwoofer (SS-WSIZ1) for BDV-IZ1000W Speaker system Speaker unit Rated impedance 2-Way 2-Driver speaker Dimensions (approx.) system, Bass reflex...
- Page 81 Standby power consumption 0.9 W (standby mode) 0.13 W (turned off) Dimensions (approx.) 206 mm × 60 mm × 256 mm (8 in) (w/h/d) with the wireless transceiver inserted Mass (approx.) 1.3 kg (2 lb 14 oz) Wireless transceiver (EZW-RT10/EZW- RT10A) Communication system S-AIR Specification...
-
Page 82: Language Code List
Language Code List The language spellings conform to the ISO 639: 1988 (E/F) standard. Parental Control/Area Code List... -
Page 83: Glossary
Digital Cinema Auto Calibration (D.C.A.C) Digital Cinema Auto Calibration was developed by Sony to automatically measure and adjust the speaker settings to your listening environment in a short period of time. Dolby Digital This movie theater sound format is more advanced than Dolby Surround Pro Logic. - Page 84 192 kHz, and maximum of 7.1ch. HD Digital Cinema Sound (HD-D.C.S.) HD Digital Cinema Sound (HD-D.C.S.) is Sony’s new innovative home theater technology using the latest acoustic and digital signal processing technologies. It is based on precise response measurement data of a mastering studio.
- Page 85 PhotoTV HD “PhotoTV HD” allows for highly-detailed pictures, and photo-like expression of subtle textures and colors. By connecting Sony “PhotoTV HD” compatible devices using an HDMI cable, a whole new world of photos can be enjoyed in breathtaking Full HD quality. For...
-
Page 86: Index
Index Numerics 24p True Cinema 85 3D 35 3D Output Setting 61 A/V SYNC 41 ARC 23 Attenuate - AUDIO 62 Audio 63 Audio DRC 62 Audio Output 62 Audio Return Channel 23, 64 Audio Settings 62 Auto Calibration 53, 63 Auto Display 65 Auto Standby 65 AVCHD 83... - Page 87 Screen Settings 61 SLEEP 56 Slideshow 41 Sound Effect 62 Speaker Settings 54, 63 Connection 55 Distance 55 Level 55 Subtitle 63 Super Audio CD Playback Channel 64 Super Audio CD Playback Layer 64 Surround amplifier 13, 47 System Information 65 SYSTEM MENU 33, 41, 44 Test Tone 56 TV Screen Size Setting for 3D...
- Page 88 The software of this system may be updated in the future. To find out details on any available updates, please visit: http://www.sony.com/blurayhtsupport Printed in Malaysia...