
Related Manuals for Talgil The Dream 2


Summary of Contents for Talgil The Dream 2
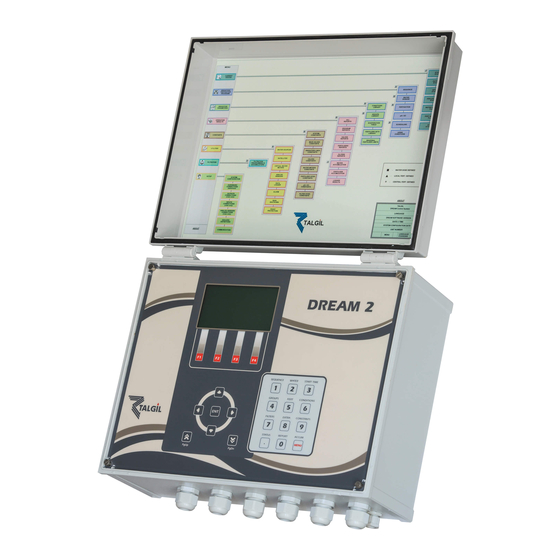
- Page 1 TALGIL COMPUTING & CONTROL LTD. NAAMAN CENTER, HAIFA - ACCO ROAD ISRAEL P.O. BOX 775 KIRYAT MOTZKIN 26119 TEL: 972-4-9506050 - 9506051 FAX: 972-4-8775949 E_mail: talgil33@netvision.net.il THE DREAM 2 controller USER GUIDE 2016...
-
Page 2: Table Of Contents
TABLE OF CONTENTS TABLE OF CONTENTS ........................- 2 - Introduction ........................... - 4 - The Key-board description ....................- 5 - How to Switch-Up and Shut-Down the system ..............- 5 - The Power Supply Board ..................... - 7 - The CPU board ........................ - Page 3 Sensors Logging results ..................... - 33 - Constants ..........................- 34 - System Constants ....................... - 34 - System Reset Time ............................- 34 - Pressure delay ............................- 34 - Fertilizer leakage limit ..........................- 34 - Water pulses before fert ..........................- 34 - Common Scheduling params ........................
-
Page 4: Introduction
DATA BASE up to date, so that users interested in some information about their controllers, can find it in the DATA BASE. The aim of the following manual is to describe the features of the DREAM 2 controllers and teach the users how to program it using the local MMI of the controller. -
Page 5: The Key-Board Description
Switching up and shutting down the DREAM 2 controller are activities that deserve some explanations: Switching up the DREAM 2 from a switched off state is done in 2 steps: 1. Turning ON the Power Switch 2. Pushing the Start button... - Page 6 The internal structure of the DREAM 2 is very much like the structure of a desktop personal computer that has an operating system which handles multiple applications simultaneously. This kind of activity is naturally involved with opening of multiple files as required by the active applications. As in PCs, cutting the power before closing the open files may be a harmful action and therefore should be avoided.
-
Page 7: The Power Supply Board
The Power Supply Board In the following paragraphs we are going to have a look inside the box of the DREAM-2 controller, although the information may seem to be a little technical, we think it can be useful if the user gets familiar with the functions of the switches, the LEDs, the fuses and some main components of his system. -
Page 8: The Cpu Board
from the charging device or from the backup battery, when the charging device is off. In case of AC systems the charging device is the transformer, while in DC systems it is the solar panel. The system is protected from excess current consumption from the 12v DC source, by the 12v DC Fuse (F2). -
Page 9: The Concept Of The Internet Communication
When the DREAM 2 application starts running, a few activities start in parallel: The LCD display connected to the CPU board will start showing some introductory screens until arriving to the Main Menu. The CPU starts scanning all the Interfaces second by second, sending them the required status of the outputs receiving back the status of the inputs. - Page 10 The drawing below demonstrates the physical layout of the communication between users and targets (controllers) in the DREAM 2 system. For setting up the internet communication there are some parameters to be defined. The setting of these parameters is the job of the technical person in charge of the system installation.
-
Page 11: Finding Your Way Inside The Dream
Finding your way inside the DREAM The MAIN MENU of the DREAM includes 8 subjects represented by 8 icons as shown below. Underneath each icon there is a SUBMENU through which we can reach any of the screens included in that subject. Selecting any of the subjects is done by placing the cursor (black background) on the desired icon and hitting the ENTER key. - Page 12 Behind any of subjects of the MAIN MENU there is a submenu that contains a list of screens. The horizontal movements between the screens is accomplished by the function keys F1 = and F4 = . Generally, the horizontal layout of the screens resembles the order of the subjects included in the submenu, so the user can use the to pass through the screens of a selected subject.
-
Page 13: The "About" Screen
UTILITIES – dealing with special functions that support various system activities. FILTRATION – handling the filters flushing programs. SETUP – contains all the necessary activities involved with the system configuration and setup. The contents of the MAIN MENU and the SUBMENUs may vary according to the relevance. -
Page 14: Defining Irrigation Programs
This is the place where we can try and refresh the communication with the Server in case it is lost. Use F4=Serv. This is where we can see the ID number of the controller. This is the place where we can check the status of communication with the server. - Page 15 When the system contains more than a single irrigation line, valves will be referred to by specifying both the line number and the valve number separated by a dot, as shown in the example below, otherwise, valves are referred to by their ordinal number only.
-
Page 16: The Water Dosage Definition
“+”. The sequence defined at the local MMI of the DREAM 2 may contain 28 members at the most. However longer sequences can be defined through the CONSOLE or the SPOT, but then they will not be editable through the local MMI. - Page 17 Notice that : Dosage by volume will be available only if the irrigation line or the water source in use have got real or virtual water meters. When irrigating by evaporation there is no planned value to be inserted, and when working by m3/area the planned value actually contains the planned amount per area and not the total amount to be irrigated.
-
Page 18: Special Dosage Modes
Special Dosage Modes Within this topic we shall explain the Dosage by evaporation Dosage by volume per area. In order to be able to use these special dosage modes, they must be enabled through the DEALERS DEFINITIONS. Both of the two dosage modes are meant to save the calculation effort when defining the amount of water to irrigate. -
Page 19: Dosage By Volume Per Area
EXAMPLE: let's assume that the specific valve was irrigated 3 days ago. The evaporation of the last 3 days was 1.2, 1.3 and 0.8 mm which results in a total of 1.2+1.3+0.8= 3.3 mm. let’s assume that the area covered by the valve equals 50 Dunam (50,000 m ), therefore the amount of evaporated water is 3.3 x 50 = 165 m If the crop factor is 80 % the amount to be irrigated is 165 x 0.8 = 132 m... -
Page 20: Local And Central Fertilizer Dosage
Local and Central fertilizer dosage The DREAM 2 recognizes central and local fertilization sites. The central fertilization enables a number of irrigation lines to share the same fertilizer site, while the local fertilization is intended to serve individual irrigation lines only. The screens used for defining the local and the central fertilizers dosage appear next to each other and the programming of these screens is done in a similar way. -
Page 21: Global Accumulative Fertilizers Limit
2.4.1 Global Accumulative fertilizers limit There is an option to define global seasonal limits per each fertilizer type of each valve so that the system will protect us from fertilizing more than necessary. During each fertigation process, the quantity left to reaching the limit gets smaller and smaller and when becoming zero the injection of the particular fertilizer will not continue. -
Page 22: Irrigation Timing
Irrigation Timing In order for a program to be started at a desired time, it must have a start time and the days of operation defined. Such a program will be considered SCHEDULED. The scheduling is done by the following screen: The optional stop The program time... -
Page 23: Triggering Irrigation Cycles By Accumulated Light
2.5.2 Triggering irrigation cycles by accumulated light The previous paragraph explains how irrigation cycles work by default; however as a special case cycles can be triggered by accumulated light radiation. Instead of defining the desired number of cycles and desired interval, the user defines a threshold of accumulated light that when reached will cause the irrigation cycle to be executed. -
Page 24: Relating Conditions With Programs
3. Relating Conditions with Programs Conditions can be used for causing programs to start/ stop or for enabling / disabling their operation. In this chapter we shall explain how conditions can be related with irrigation programs, however prior to using the conditions they must first be defined. Conditions definition is done at the CONDITIONS LIBRARY (see below). -
Page 25: Manual Start/Stop And Freeze/Release
4. Manual Start/Stop and Freeze/Release All the screens dealing with the irrigation programs definition contain a function key that enables execution of manual start/ stop of programs and freeze/ release commands. When the cursor is placed at the “program number” field, then, the function key F2 turns into the “Action”... - Page 26 programs that are still scheduled for today. In fact this would be the first place to visit when we want to get a general idea about what is going on. List of running Existing programs problems Programs running with problems List of waiting programs Hit F2 for...
- Page 27 The next two screens show the statuses of the digital and analog inputs. In the digital inputs screen each closed contact is marked with a sign and an open contact with sign. Analog inputs will appear with their actual value. A sign indicates that the sensor is disconnected.
-
Page 28: Irrigation/Fertigation Parameters
instead of the RTU number we shall see the number of communication errors of each RTU. Use the ()() keys for moving from one channel to the other. 6. Irrigation/Fertigation Parameters The following paragraph describes some topics which are complimentary to the definition of irrigation and fertigation programs. -
Page 29: Groups Definition
Whenever a combined condition is being defined, an auxiliary screen appears in which the user may define the formula of the combination. AND operator OR operator The formula (1+2+3)&4 means that in order for the combined condition to become TRUE, condition No. 1 or No. 2 or No. 3 must be TRUE, AND conditions No. 4 must also be TRUE. -
Page 30: Evaporation
In order to create a new group, place the cursor at the group number field, press F3="GROUP" and select "New". The system will suggest a free group number which the user can accept or change. The user will have to specify the line number of the valves to be included in the group and then specify the valves one by one. -
Page 31: Fertilizer Sets Library
Fertilizer Sets Library The FERT SETS LIBRARY stores predefined formulas of fertilization to be used by the irrigation programs. Up to 9 formulas can be stored per each fertilization site. In order to be able to use the Fertilizer Sets Library the option must first be enabled at DEALERS DEFINITIONS. -
Page 32: Results Of The Irrigation Activity
7. RESULTS of the irrigation activity Under the title of RESULTS the DREAM 2 supplies information resulting from the activities of the system. This is the place where you may find the EVENTS REPORTS, the ACCUMULATORS and the SENSORS LOG RESULTS. -
Page 33: Accumulations
Clearing the accumulation table Sensors Logging results When analog sensors are used with the DREAM 2 control system, the values of the sensors can be sampled and logged as explained in the paragraph dealing with Sensors Logger Settings. The results of the logging can be... -
Page 34: Constants
8. Constants The constant parameters that belong to a particular application are divided into categories as explained below: System Constants – When set to a nonzero value, will stop all System Reset Time active programs when the specified time arrives. –... -
Page 35: Main Valves' Constants
Main Valves’ Constants Defining the way main valves will be operated: open without delay, open before or after the irrigation valves. When the main valve opens before, it will shut down after the valves, and vice versa. Irrigation lines constants –... -
Page 36: Valves' Constants
Valves’ Constants The valves' constants include per each valve the following information: – Defines the dosage mode that will appear at The default dosage mode the water dosage screen when defining a new job of the specific valve. The possible options are: V –... -
Page 37: Water Meter Constants
Water Meter Constants – defines The water meters' ratio the amount of water represented by each pulse of the water meter. Fertilizer Sites Constants – Fertilizer When pulses fail to arrive injectors equipped with fertilizer meters are expected to supply pulses when activated. -
Page 38: Special Case
– when a fertilizer meter gets out of order and cannot be used for Special case some time, the user should do the following steps: STEP 1 - Delete the connection point of the fertilizer meter from the inputs connections list. STEP 2 - Set the RATIO in the table to be equal to the amount of fertilizer injected by the specific injector within the specified pulse length. -
Page 39: Utilities
9. Utilities Water Sources Water sources having several water pumps can be operated by the DREAM 2 in various ways: Static – In the static mode the combination of pumps to be activated is independent of the flow demand; it will always be the same static combination as specified in the last column. -
Page 40: Satellites
When working by the actual flow (not by the nominal flow) there is only one delay to be defined. This delay specifies the time during which the flow is expected to remain within its new value before a combination change will take place. The user may specify a Flow Limit, which represents the maximal capacity of the source, flow demand beyond this limit will not be granted. -
Page 41: Conditions Depending On Satellites
Prior to using virtual water meters, they must be allocated at the DEALERS DEFINITIONS. The DREAM 2 recognizes three types of virtual water meters according to their uses: For irrigation – measuring the water used by an irrigation line. -
Page 42: Virtual Water Meter For Irrigation
The rest of the definition procedure depends on the selected type of the virtual water meter. 9.3.1 Virtual water meter for irrigation Apart from the formula and the type, a virtual water meter used for irrigation will have a definition of its ratio and a definition of the associated irrigation line. -
Page 43: Virtual Water Meter For Water Sources
Analog Sensors The DREAM 2 is capable of reading analog sensors in various ways. Analog sensors, located close to the controller can be hooked locally, and remote analog sensors can be read by the 2 wired RTU units and by the RF RTU units. The total number of analog sensors recognized by the system must be defined during the SYSTEM CONFIGURATION. -
Page 44: Rain Shutdown
Rain Shutdown The Rain Shutdown is meant to delay irrigation programs when the amount of the daily accumulated rain reaches the user defined limit. The Programs affected by the Rain Delay will be those with priority less than 5. The amount of rain fall that when reached will activate the delay The number of days the delay will last... - Page 45 The following table shows how the “Turn on temperature” is obtained. Critical Plant Temperature Dew Point Range Turn On Temperature Cº Cº Cº -16 to -12 -12 to -9 -9 to -6 -6 to -4 -4 to -2 -2 to -1 -1 to 0 -18 to -13 -13 to -9...
-
Page 46: Sensors Logger Setting
Sensors Logger setting The sampling rate of each sensor can be set at the following screen When the storage allocated for the logger gets full, the new samples will replace the oldest ones. Users who need to keep track of the Analog sensors readings for longer periods can use the “Data Acquisition”... -
Page 47: Filtration
For the sake of flexibility, the Radiation sets enable dividing the 24 hours of the day into three parts and each part may have its own definition of threshold and minimal/maximal intervals. Beginning and ending of the 3 periods Minimal and maximal interval The radiation sensor’s coefficient... - Page 48 The system supplies information about the status of the Filter site, the status of the DP sensor and the time left to the next cycle. During operation the system shows the station which is currently being flushed, and the time left for flushing of that station. Additional information shows the number of flushing cycles executed by time, by DP and the number of consecutive loops executed.
-
Page 49: System Setup
11. System SETUP The setup process of a DREAM 2 system consists of the following steps: Step 1 - Network definition – defining the hydraulic network to be controlled. Step 2 - Hardware definition – defining the hardware used for the control. Step 3 - Connections definition –... - Page 50 Start together – enable synchronizing the opening of various valves by the ◇ “ ” sign. The valves can be of different irrigation lines. The purpose of the synchronization is to enable central fertilization of the valves. All the valves separated by the “...
- Page 51 Flow nominal – the value of the nominal flow that will be set by default to all ◇ the irrigation valves. Flow minimal – the percentage to be reduced from the nominal flow to obtain ◇ the value of the minimal flow that will be set as default to all the irrigation valves. Flow maximal –...
- Page 52 DREAM 2 offers the option of gradual opening/closing of valves. When this option is selected, then instead of closing simultaneously all the valves of the terminating shift and opening simultaneously all the valves of the starting shift, the opening/closing will be executed in a gradual mode: one valve will get closed and one valve will get opened and after a specified delay another pair of valves will follow.
- Page 53 The following screen can be used for notifying the DREAM 2 system about RTUs which are temporarily disabled. Such RTUs will not be checked for having communication problems, will not be send commands for execution and will not be considered when reading inputs.