Table of Contents
Advertisement
Advertisement
Table of Contents

Related Manuals for Smeg Integrated Washer WDI16BA


Summary of Contents for Smeg Integrated Washer WDI16BA
- Page 1 INTEGRATED WASHER DRYER INSTRUCTION MANUAL...
-
Page 2: Table Of Contents
Contents 1. The new washing system 2. Saf ety warnings 3. Installation instructions 4. Description of controls 5. Washing instructions 6. Drying instructions 7. Cleaning and maintenance 8. Troubleshooting 9. Control panel symbols This appliance is marked according to the European directiv e 2002/96/EC on Waste Electrical and Electronic Equipment WEEE). -
Page 3: The New Washing System
1. THE NEW WASHING SYSTEM This new washer dryer is the outcome of years of research. The leading-edge design and the quality of the production processes used to manu- facture this product ensure it will give you many years of excellent service. Its concept satisfies all current and future washing and drying requirements. -
Page 4: Safety Warnings
2. SAFETY WARNINGS Attention! These w arnings are given for safety reasons. Please read them carefully before installing and using the appliance. This manual forms an integral part of the appliance and must therefore be kept intact together with the machine. - Page 5 Do not wash petrol-soaked garments in the washer dryer. Make sure there are no inflammable items (e.g.: lighters, matches, etc.) in pockets before washing. If volatile fluids have been used to clean garments, make sure that the substances have been removed before loading them in the washing machine.
-
Page 6: Installation Instructions
3. INSTALLATION INSTRUCTIONS Important ! The appliance must be installed by a specialised technician according to current regulations. This washer dryer is very heavy. Take care when lifting it. 3.1 UNPACKING The inside of the machine comprises a mov ing assembly which is blocked f or transport purposes by the screws (A) located at the rear of the washer dryer. - Page 7 3.3 ADDITIONAL IMPORTANT INSTALLATION INSTRUCTIONS Caref ully read the installation instructions in point 3 on page 6 of the washer dryer installation manual. After the initial instructions have been adhered to. I.e. remov ing transit bolts and fitting the adjustable feet etc. Using a spirit level, make sure that the washer dryer is completely lev el and the overall height of the legs, in- cluding the rubber foot and the locking nuts, is no greater than 25mm maximum.
- Page 8 3.5 DRAIN CONNECTION Insert the end of the drain hose into a drain pipe hav ing an internal diameter of at least 4 cm and a height ranging between 50 and 90 cm, or attach it (using the relative curv ed plastic prof ile) to a basin or bath tub. Alway s check that the end of the drain hose is securely attached in order to prevent the repulsive f orce of the water f rom moving it out of position.
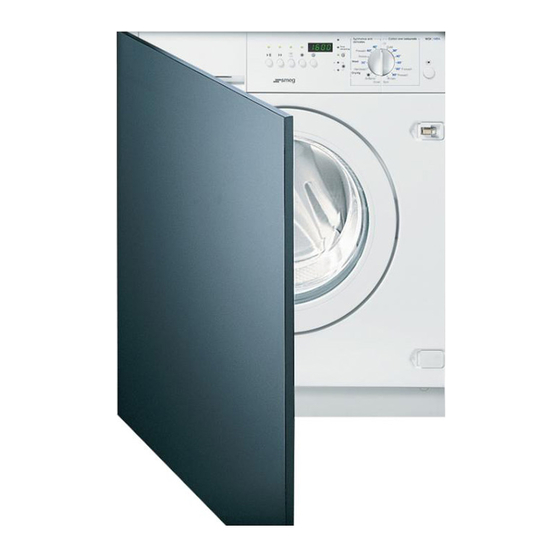
- Page 9 3.7 FITTING T HE FURNIT URE DOORS Once the washer dry er has been correctly installed and commissioned, the f urniture door can be f itted following the dimensions on the template and the instruction enclosed in the washer dry er packaging. Please note that only f urniture doors of a thickness between 16mm and 21mm are compatible with this washer dry er.
- Page 10 3.7.2 Use of the furniture door fixing template Proceed in the following way when applying the wooden panel to the washing dryer: When f itting the f urniture door utilising the door template y ou will need to make sure that the bottom and the top of the f urniture door will line up with the adjacent cabinet furniture doors.
- Page 11 On the opposite side of the f urniture door either insert closing hook “B” or screw in metal plate “C” into the upper side opposite the hinges. Then insert the door buffer ”D” into the remaining position opposite the lower hinge Following this operation the f urniture door will be ready to be f itted onto the washer dryer using the 2 screws “A”...
-
Page 12: Description Of Controls
4. DESCRIPTION OF CONTROLS 4.1 CONTROL PANEL All the commands and controls of the appliance are assembled together on the f ront panel. Models w ithout delayed start option Models w ith delayed start option Description of controls Open door button ON-OFF and programme selection knob Time remaining shown on display LED Spin speed shown on display LED... - Page 13 Open door button ON-OFF and w ashing and drying programme selec- tion knob Time rem aining shown on display LED Time remaining Spin speed show n on dis- play LED Delicate cycle drying time for delicates show n on dis- play LED Intensive cycle drying time shown on display LED...
- Page 14 Display Select spin speed button or stop w ith tub full Select programme and dry- ing time button Select programme and dry- ing time button enabled The display shows the following information: 1. time remaining for the selected programme, given in hours/minutes.
- Page 15 Options buttons Quick wash Button Increase water button Easy-iron button Economy cycle button Extra Rinse button Delicates button Half load button The options that may be available on the washer dryer are shown below. This button reduces the overall duration of the washing cycle. This option is used to wash small loads or less dirty washing in less time.
- Page 16 Options enabled LED's “Start/Pause” button Start-Pause button LED Q Select delayed start but- ton* Select delayed start button LED* Delayed start time show n on display LED* * Only for models featuring the delayed start option 4.2 DET ERGENT T RAY This is located to the left of the control panel.
-
Page 17: Washing Instructions
5. WASHING INSTRUCTIONS 5.1 PREPARING THE WASHING Separate the washing according to the type and colourfastness of the fabrics. Wash whites and coloureds separately. Wash new coloured garments separately f or the f irst time. A label is normally applied to garments giv ing inf ormation on how to clean them. A brief description of these labels is shown below. - Page 18 5.3 PREPARING THE WASHING Where possible, save electricity by washing full loads divided by type of fabric. Introduce loose washing and alternate large items with small ones. For the first f ew times, weigh the wash loads and then rely on y our judge- ment.
- Page 19 5.6 DOSING POWDER DET ERGENT S Normally dirty washing Choose a programme without prewash. Pour the total quantity of detergent indicated on the packs into compartment “2” of the detergent tray. Very dirty washing Choose a programme with prewash. Add ¼ of the recommended quantity of detergent into compartment “1” of the detergent tray and ¾ of the de- tergent into compartment “2”.
- Page 20 D isplay information When the machine is switched on, the display visualises the duration (hours/minutes) and maximum spin speed env isaged f or the programme. These two parameters are display ed alternativ ely for 3 seconds each, together with their relative LED's, until the selected programme starts. Attention! •...
-
Page 21: Starting The Washing Programme
5.11 STARTING THE WASHING PROGRAMME Bef ore starting the selected programme, carefully close the door, open the water tap and add the deter- gent and additiv e Press the “Start-Pause” button. The LED located above the Start-Pause button remains lit throughout the cy cle. -
Page 22: Drying Instructions
To continue draining and spinning, press the spin select button twice. The machine resumes the cycle by draining the water and spinning. To select spin speed, press the button until the required speed is display ed. If you wish to drain the water in the tub without spinning, press the spin select button until 0000 appears on the display. -
Page 23: Approximate Drying Times And Temperatures
• For automatic wash+dry programmes, theref ore, the dry ing temperature depends on which washing pro- gramme is selected. • The washing must hav e been prev iously washed and spun bef ore a dry -only programme can be per- f ormed. -
Page 24: Dry-Only Programme
Example Dry ing times depend on the spin speed: the higher the speed the lower the drying time and, consequently, the lower the power consumption. Choose the highest spin speed compatible with the ty pe of washing. To start the washing programme, automatically f ollowed by the dry ing programme, follow the instructions shown in paragraph 5.11 –... - Page 25 6.5 INT ERRUPTING OR CHANGING T HE DRYING PROGRAMME To interrupt the dry ing programme, proceed as indicated in point 1 of paragraph 5.12 – Interrupting or chang- ing the washing programme. When the machine is paused, the dry ing time can be changed by pressing the select button ( If you wish to stop the programme and remove the washing, y ou should f irst allow the appliance to cool.
-
Page 26: Cleaning And Maintenance
7. CLEANING AND MAINTENANCE Important – Before cleaning or servicing the machine, remove the plug from the socket. 7.1 EXT ERNAL CL EANING • Regular and constant cleaning will keep y our appliance looking like new. • Clean the outer surfaces with soap and water and then dry thoroughly with a soft cloth. •... - Page 27 Pull out the drain hose “A”. Attention: if the hose is hot it means the water is hot or boiling. Place a tray on the f loor and remov e the plug “B” to drain the water. Depending on the quantity of water, it may be necessary to empty the tray sev eral times.
-
Page 28: Troubleshooting
8. TROUBLESHOOTING This product complies with current saf ety regulations gov erning electrical equipment. For saf ety reasons, all tech- nical inspections or repairs must be perf ormed by qualified technicians in order to prevent hazardous situations f or users. If the machine does not work, bef ore calling the Serv ice Centre and spending money unnecessarily, check that the operations indicated in this The machine does not start... -
Page 29: Error Signals
The machine does not spin Draining water from the drum The washing has not been correctly spun Residues of detergent on the washing The washing does not dry Washing results are unsat- isfactory ERROR SIGNALS In the ev ent of faults, the machine will display an error code. Error code Door not closed properly. -
Page 30: Control Panel Symbols
9. CONTROL PANEL SYMBOLS PROGRAMS DRYING HAND WASH PRE-WASH RINSES DRAIN AN D SPIN SECTION COTTON AND COL- OURED WOOL DRYING SINTHETICS AND DELICATES OPTIONS WATER INCREASE NO SPIN OR STOP WHIT FULL TUB DELAY TIMER DELICATES ECONOMY CYCLE QUICK WASH EXTRA RINSE SPIN EASY-IRON... - Page 31 Slightly dirty delicate coloureds Cold Slightly dirty delicate coloureds 30° Normally dirty delicate coloureds 40° Normally dirty resistant coloureds 60° Very dirty washing 60° Extremely dirty washing 90° Drain and spin 0° Rinses 0° Fabric softener 0° Wool and silk 35°...