
Related Manuals for Smeg CV35XS5


Summary of Contents for Smeg CV35XS5
- Page 1 SW ... F UK Instructions for use DE Bedienungsanleitung FR Mode d’emploi NL Gebruiksaanwijzing ES Instrucciones para el uso...
-
Page 2: Table Of Contents
Thank you for purchasing your new freezer from Smeg. Please note that these instruc- tions apply to all freezers in the SW range. Illustrations and fittings may therefore not necessarily correspond exactly to your model. Warning As the refrigerant used in this appliance is a... -
Page 3: Get To Know Your Freezer
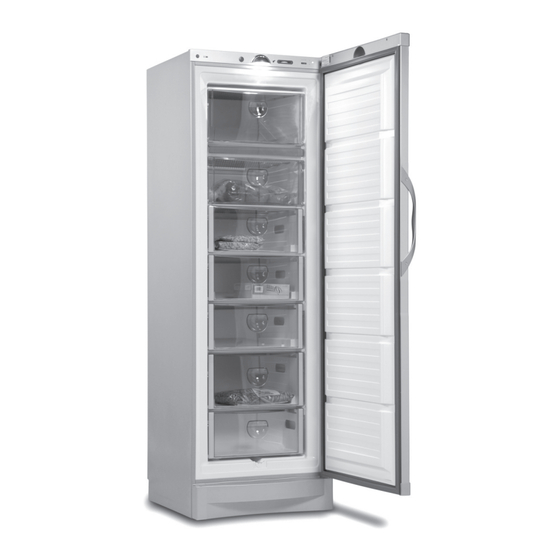
Get to know your freezer Control panel Lighting Freezing tray Freezer shelf Nameplate Sealing strip Freezer drawers Door handle Defrost water drain Kick plate Adjustable feet fig. 1... -
Page 4: Installation And Start-Up
Installation and start-up Placement For safety and operational reasons, the appliance must not be installed outdoors. The appliance should be placed on a level surface in a dry, well ventilated room (max. 75% relative air humidity). Never place the appliance close to sources of heat such as cookers or radiators, and avoid placing it in direct sunlight. - Page 5 The appliance viewed from above If the appliance is placed beside a wall, there must be sufficient room for its door to be opened wide enough to allow the drawers to be pulled out (fig. 4). Distance pieces The distance pieces on the rear of the appliance ensure sufficient air circulation.
-
Page 6: Reversing The Door(S)
Reversing the door(s) The door(s) can be changed from right-hinged to left-hinged and vice versa as follows: 1. Lay the appliance on its back with the door uppermost. 6. Loosen lock nut with the fork wrench enclosed and move the pin. 10. - Page 7 Setting up It is important that the appliance be absolutely level. To level the appliance, remove the kick plate below the door and screw the adjustable feet up or down (figs 8 and 9). If necessary, it is possible to adjust the rear feet before the upright is installed.
-
Page 8: Electrical Connection
Electrical connection The appliance is intended for connection to alternating current. The required volt- age (V) and frequency (Hz) are stated on the nameplate inside the appliance. Power must be connected via an independent wall socket outlet. Technical data This appliance complies with CE marking regulations, directives and standards. -
Page 9: Operation And Function
Freeze is activated. The indicator lamp lights red and the acoustic alarm sounds if the temperature in the freezer is too high. To switch off the acoustic alarm, set the freeze button to O (see fig. 10). The indicator lamp continues to light red as long as the temperature in the freezer remains too high. -
Page 10: Use
To thaw meat, it is advisable to take it out of the freezer the day before it is to be used and place it in a refrigerator to defrost. This ensures the best hygiene and maintains meat quality as much as possible. -
Page 11: Defrosting
The items stored and the humidity of the air gradually cause frost and ice to form in the freezer. A thin layer of frost or ice does not affect freezer performance, but the thicker the layer, the higher the energy consumption. -
Page 12: Cleaning And Maintenance
Cleaning and maintenance Cleaning Disconnect the power supply at the mains socket before cleaning the inside of the cabinet. The cabinet is best cleaned using warm water (max. 65°C) with a little mild detergent. Never use cleaning agents that scour. Use a soft cloth. Rinse with clean water and dry thoroughly. -
Page 13: Fault Finding
High room temperature. Temperature in Temperature setting too high. freezer too high. The quantity of fresh items placed in the freezer at a time is greater than the capacity of the appliance. Remedy Check that power is connected. Reset the fuse. -
Page 14: Spare Parts And Service
Spare parts and service Spare parts When ordering spare parts, please state the type, serial and production numbers of your appliance (see fig. 1 on page 3 and fig. 13). This information is given on the nameplate on the rear of the appliance. The nameplate contains various technical information, including type and serial numbers. -
Page 15: Disposal
Disposal Environmental regulations on disposal must also be observed. When disposing of the appliance you should contact your local authority technical department who will inform you of how collection and recycling of such units take place in your area. This appliance is marked according to the European directive 2002/96/EC on Waste Electrical and Electronic Equipment (WEEE).