Sharp IM-DR420H Operation Manual
1-bit portable minidisc recorder
Hide thumbs
Also See for IM-DR420H:
- Operation manual (63 pages) ,
- Quick start manual (2 pages) ,
- Service manual (52 pages)
Table of Contents
Advertisement
Quick Links
Download this manual
See also:
Operating Manual
1-BIT
If you require any advice or assistance regarding
your Sharp product, please visit our web-site
www.sharp.co.uk/customersupport.
Customers without Internet access may telephone
08705 274277 during office hours (or (01) 676 0648
if telephoning from Ireland).
IM-DR420H(E) (TINSE0554AWZZ)
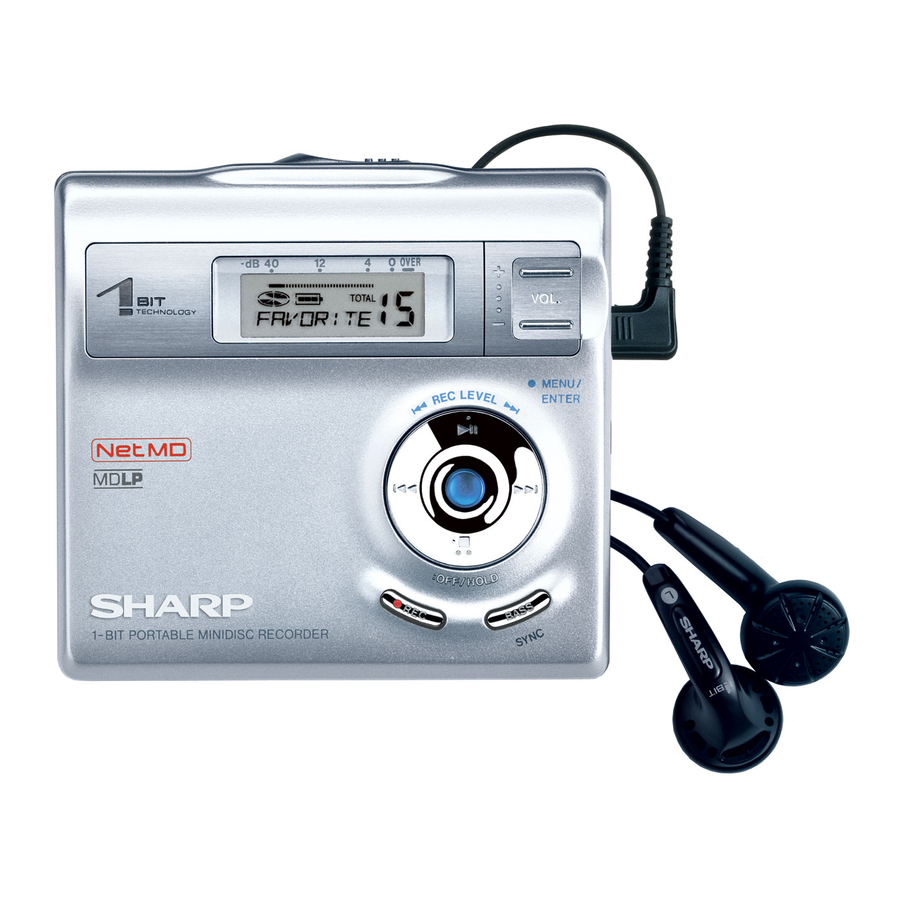
PORTABLE MINIDISC RECORDER
MODEL
IM-DR420H
OPERATION MANUAL
Thank you for purchasing this SHARP product.
For the best performance, read this manual carefully.
It will guide you in operating your SHARP product.
0101
IM-DR420H(E) TINSE0554AWZZ
TINSE0554AWZZ
E
03G R YT 1
1
Advertisement
Table of Contents

Related Manuals for Sharp IM-DR420H


Summary of Contents for Sharp IM-DR420H
- Page 1 08705 274277 during office hours (or (01) 676 0648 if telephoning from Ireland). IM-DR420H(E) (TINSE0554AWZZ) IM-DR420H(E) TINSE0554AWZZ Thank you for purchasing this SHARP product. For the best performance, read this manual carefully. It will guide you in operating your SHARP product. 0101 TINSE0554AWZZ 03G R YT 1...
-
Page 2: Special Notes
" When recording important selections, make a prelimi- nary test to ensure that the desired material is prop- erly recorded. " SHARP is not liable for damage or loss of your record- ing arising from malfunction of this unit. 0303 03/7/21 IM-DR420H_UK_1.fm... - Page 3 IM-DR420H(E) TINSE0554AWZZ ! Notes " Recording and playback of any material may require consent, which SHARP is unable to give. Please refer particularly to the provisions of the Copyright Act 1956, the Dramatic and Musical Performers Protection Act 1958, the Performers Protection Acts 1963 and 1972 and to any subsequent statutory enactments and orders.
- Page 4 ! "4-pole plug earphone" optimizes "Mobile 1-bit digital amplifier" " Sharp has adopted "4-pole plug" earphone that com- pletely separate right and left sound. Enjoy the high quality sound of the "Mobile 1-bit digital amplifier".
-
Page 5: Table Of Contents
Listening through Another System....43 Resuming auto play ......43 IM-DR420H(E) TINSE0554AWZZ Page ! Net MD About Net MD . -
Page 6: Accessories
" You can hear the sound only from one earphone if you use the supplied earphones with other equipment. " Parts and equipment mentioned in this operation manual other than those detailed above are not included. " The AC adaptor may be different from the one in the drawing. IM-DR420H(E) TINSE0554AWZZ AC Adaptor Rechargeable Nickel-... -
Page 7: Names Of Controls And Indicators
Names of Controls and Indicators IM-DR420H(E) TINSE0554AWZZ IM-DR420H(E) TINSE0554AWZZ ! Main unit Reference page 1. Open Lever ......13 2. -
Page 8: Names Of Controls And Indicators
IM-DR420H 1 2 3 9 10 11 IM-DR420H(E) TINSE0554AWZZ ! Display panel Reference page 1. Level Meter ......18, 30 2. -
Page 9: Precautions
" Do not use an external power supply, other than the 3 V DC supplied with this unit, as it may damage the unit. " SHARP is not responsible for damage due to improper use. Refer all servicing to a SHARP authorised serv- ice centre. -
Page 10: Using With The Rechargeable Battery
AC 110 - 240V, 50/60 Hz To the DC IN 3V socket IM-DR420H(E) TINSE0554AWZZ ! Charging the rechargeable battery When the rechargeable battery is used for the first time or when you want to use it after a long period of disuse, be sure to charge it fully. - Page 11 In such a case, wipe off the dirt with a dry cloth. " Do not disassemble the battery. IM-DR420H(E) TINSE0554AWZZ ! Rechargeable battery " A rechargeable nickel-metal hydride battery is the only kind that can be used. Even if the battery is not used, you should charge it at least once every three months because of the special quality of this battery.
-
Page 12: Using With The Ac Adaptor
" This unit can be used with the AC adaptor when the rechargeable or an alkaline battery is in the unit. IM-DR420H(E) TINSE0554AWZZ Using with the Alkaline Battery Use one commercially available alkaline battery (LR6, "AA" size). -
Page 13: Inserting A Minidisc
Lift up the compartment door. Insert a MiniDisc. Insert according to the direction arrow. Close the compartment door. IM-DR420H(E) TINSE0554AWZZ Notes: " Do not place the MiniDisc under the holder. " If any resistance is felt, do not force the MiniDisc into the unit, as it may cause damage to the unit. -
Page 14: Connections
To the wall socket AC 110 - 240V, 50/60 Hz To the DC IN 3V socket To the OPTICAL/ LINE IN socket IM-DR420H(E) TINSE0554AWZZ Supplied R IG LE F connection cable R IG LE F Red : to right... - Page 15 To the DC IN 3V socket To the OPTICAL/ LINE IN socket Note: Some of the above optional accessories may not be available depending on the area. IM-DR420H(E) TINSE0554AWZZ IM-DR420H(E) TINSE0554AWZZ IM-DR420H D IG IT Supplied A L O connection...
-
Page 16: Hold Function
Press and hold down the HOLD button for 2 seconds or more whilst the unit is in the hold mode. "HOLD OFF" will be shown. IM-DR420H(E) TINSE0554AWZZ Move the HOLD switch to the safety position (direction indicated by the arrow). -
Page 17: Before Recording
Do not unplug the AC adaptor. Do not remove the battery. Do not subject the unit to shock. Otherwise, tracks may not be recorded properly. IM-DR420H(E) TINSE0554AWZZ ! To prevent recorded MiniDiscs from being erased accidentally Slide the accidental erase prevention tab, located on the side of the MiniDisc, in the direction indicated by the arrow. -
Page 18: Recording
As for the details, see page 16. Press the REC button. Begin playback on the stereo system con- nected to this portable MD. IM-DR420H(E) TINSE0554AWZZ Press the REC LEVEL button to adjust the recording level. Analogue recording (connecting with analogue... - Page 19 MiniDisc unit recording. Begin playback on the stereo system, the output will be recorded. IM-DR420H(E) TINSE0554AWZZ Notes: ! Complete the operation within 7 seconds whilst select- ing the menus. ! Changing the volume level whilst recording does not affect the recording.
-
Page 20: Playback
Insert a MiniDisc (page 13). Press the button. Playback starts automatically with a playback only MiniDisc or a MiniDisc which is protect- ed against accidental erasure (Auto-play function). IM-DR420H(E) TINSE0554AWZZ Left Right channel channel 4-pole plug To the REMOTE / PHONES socket... -
Page 21: Playback
(Lo) and high (Hi) boost for each setting. Emphasising low (Lo) and high (Hi) sound of BASS 3. BASS 3 Default Frequency IM-DR420H(E) TINSE0554AWZZ During playback, press the MENU/ENTER button. Press the button repeatedly to se- lect "SOUND ADJ" and then press the MENU/ENTER button. -
Page 22: Advanced Playback
When the beginning of the first track is reached during fast reverse, the unit will enter the playback mode. IM-DR420H(E) TINSE0554AWZZ ! To locate the beginning of a track To move to the beginning of the next track: Press the button during playback. - Page 23 During playback, press the MENU/ENTER button. Press the but- ton repeatedly to select "PLAY MODE". Press the MENU/ENTER button. IM-DR420H(E) TINSE0554AWZZ IM-DR420H(E) TINSE0554AWZZ Press the button repeatedly to select the desired playback mode. RANDOM : Random play RANDOM REP : Repeat play of tracks in random order...
-
Page 24: Advanced Recording
When recording is paused, press the MENU/ ENTER button. Press the button repeatedly to se- lect "REC MODE". Press the MENU/ENTER button. IM-DR420H(E) TINSE0554AWZZ Press the button repeatedly to se- lect the desired recording mode. Stereo recording (SP) 2 times long recording (LP2) - Page 25 1/20 of its original size. By employing this system, 2 times and 4 times long recordings are enabled in stereo mode. IM-DR420H(E) TINSE0554AWZZ ! About the recording mode You can select the recording mode from stereo recording, 2 times long recording, 4 times long recording, and mon- aural recording.
- Page 26 Press the MENU/ENTER button. Press the button repeatedly to se- lect "REC MODE". IM-DR420H(E) TINSE0554AWZZ Press the MENU/ENTER button. Select the recording mode (step 4, page 24) and press the MENU/ENTER button. The mode will be set automatically after 7 seconds even if the MENU/ENTER button is not pressed.
- Page 27 " Complete the operation within 7 seconds whilst select- ing the menus. " When making digital recordings using a CD player or an MiniDisc player, track numbers will be created auto- matically regardless of the setting of the auto marker function.
-
Page 28: Advanced Recording
" The track numbers on the playback side may not match the track numbers recorded on the MiniDisc. IM-DR420H(E) TINSE0554AWZZ " When recording, if a programmed playback is per- formed by the source or playback is performed by selecting tracks manually, the MiniDisc track numbers may not be the same as on the source. -
Page 29: Recording From A Microphone
Connect a stereo microphone to the MIC IN socket. Insert a recordable MiniDisc (page 13). Press the REC button. Press the MENU/ENTER button. IM-DR420H(E) TINSE0554AWZZ Press the button repeatedly to se- lect "Mic Level". Press the MENU/ENTER button. Press the button repeatedly to se- lect "Auto-Hi", "Auto-Lo"... - Page 30 -4 dB and 0 dB. Select the recording mode (steps 1 - 5, page 24). Press the button. IM-DR420H(E) TINSE0554AWZZ To interrupt recording Press the button whilst recording. To resume recording, press the button. The track number will be increased by one each time you interrupt recording.
- Page 31 When a sound, such as person speaking, is picked up by the microphone, recording will begin automatically. IM-DR420H(E) TINSE0554AWZZ About pause function The unit automatically pauses when the microphone does not pick up any sound for 3 seconds or more.
- Page 32 10 minutes.) The interval between marks may vary slightly com- pared with the actual recording time. IM-DR420H(E) TINSE0554AWZZ Press the MENU/ENTER button. The mode will be set automatically after 7 seconds even if the MENU/ENTER button is not pressed.
-
Page 33: Changing Default Settings
D.L MODE 2 Cancelled. (*) indicates default setting. IM-DR420H(E) TINSE0554AWZZ ! Beep sound You can eliminate the confirmation sound that beeps when you press a button. ! Auto play You can make the unit not play automatically when you insert a playback-only MiniDisc or an accidental erasure protected MiniDisc. -
Page 34: Checking Displays
" The selected display will not change even after the disc is replaced. IM-DR420H(E) TINSE0554AWZZ ! To check the remaining recording time and the total playing time Whilst in the stop mode, press the MENU/ ENTER button. - Page 35 Press the button to select the play- ing time. Playing time Press the MENU/ENTER button. IM-DR420H(E) TINSE0554AWZZ ! Checking the remaining amount of bat- tery level The remaining amount of battery level is shown by the battery indicator ( ) during operation.
-
Page 36: Titling A Minidisc
Press the MENU/ENTER button. Cursor " The unit will enter the character input mode. " To cancel the operation, press the :OFF/HOLD button. IM-DR420H(E) TINSE0554AWZZ Press the button repeatedly to select the type of characters. (Capital letters) (Lower-case letters) (Numbers and symbols) The first 3 characters in the group of the selected characters will be displayed for about 1 second. - Page 37 > ? (Delete) : erases a character. (Space) : indicates a space. IM-DR420H(E) TINSE0554AWZZ ! To erase a character Press the VOL + or VOL - button to move the cursor to the character you want to erase, and then press the BASS/SYNC button.
- Page 38 " You cannot remove the MiniDisc whilst "TOC" is displayed. "TOC" will not disappear until the re- corded contents have been updated. IM-DR420H(E) TINSE0554AWZZ ! Stamping titles from another MiniDisc Before stamping When there are 2 MiniDiscs on which the same tracks...
- Page 39 When the unit displays "CHANGE MD", re- move the master MiniDisc. Remove it without turning off the power. Or, the oper- ation will be cancelled. IM-DR420H(E) TINSE0554AWZZ Operation of the MiniDisc for stamping Load a MiniDisc for stamping. Press the MENU/ENTER button.
-
Page 40: Editing A Recorded Minidisc
To erase other tracks, repeat steps 1 - 7. Note: Complete the operation within 7 seconds whilst selecting the menus. IM-DR420H(E) TINSE0554AWZZ ! To erase all of the tracks at once Whilst in the stop mode, press the MENU/ ENTER button. - Page 41 The track will be divided into two tracks, and the unit will be paused at the beginning of the second of the two new tracks. IM-DR420H(E) TINSE0554AWZZ ! To combine tracks Start playing the latter of the two tracks to be combined, and press the button.
- Page 42 Press the MENU/ENTER button again. The track will be moved, and the unit will be paused at the beginning of the track. IM-DR420H(E) TINSE0554AWZZ When a track has a name before dividing: The two new tracks will have the same name. However, in the "TOC FULL"...
-
Page 43: Listening Through Another System
" Recording will be made in the analogue mode. " Character information will not be recorded. IM-DR420H(E) TINSE0554AWZZ Resuming auto play When you stop and then restart playback without remov- ing the disc, playback will resume from the point at which the disc was stopped. -
Page 44: About Net Md
Net MD USB connection PC hard disk (BeatJam) IM-DR420H(E) TINSE0554AWZZ Digital audio data can be imported into the hard disk of a PC in the following methods: " Converting the music downloaded via the music distri- bution service on the Internet into ATRAC3 of the OpenMG system. - Page 45 ! Transferring audio data from a PC to MD portable recorder IM-DR420H (check-in/check-out) By using the provided software "BeatJam", you can transfer audio data from the hard disk of the PC to IM- DR420H, the Net MD-support MD portable recorder.
-
Page 46: System Requirements
" You cannot use BeatJam with programs that create virtual CD-ROM drives. " You cannot use BeatJam when more than one Open- MG compatible audio device is connected. IM-DR420H(E) TINSE0554AWZZ Windows Mil- Windows 98 Windows 2000 Professional*1 lennium Edition... -
Page 47: Software Installation
Windows Me, 98SE or 2000. 2. Right click on "OMGBJ" indicating CD-ROM drive and select "Open" from the menu. 3. Double click AUTOPLAY.EXE from the list. IM-DR420H(E) TINSE0554AWZZ Caution: Windows XP/2000 User with Administrator* rights needs to log on. Confirm with the network or computer Administrator if you are in a workgroup. -
Page 48: Connecting To A Pc
Connect your PC and the MD portable recorder with the supplied USB connection cable. AC 110 - 240V, 50/60 Hz To the DC IN 3V socket IM-DR420H(E) TINSE0554AWZZ To the USB port MD portable recorder To the USB socket 03/7/21... - Page 49 " When connecting the unit to your PC, use a battery as well as an AC adaptor. It not only prevents data loss from disconnection, but also speeds up data writing to IM-DR420H(E) TINSE0554AWZZ ! Checking the USB driver Whilst the MD portable recorder is connected to the com- puter, after clicking "Control Panel"...
-
Page 50: Transferring Data
1. Remove the USB connector from the MD portable re- corder. 2. Turn off the MD recorder. 3. Remove the MD. IM-DR420H(E) TINSE0554AWZZ ! Checking in Check-in means to return the tracks from external devices to the PC. You can check-in tracks only to the source PC. -
Page 51: Minidisc System Limitations
MiniDisc, sound may skip. A track number is created in the middle A track number may be created if there are scratches or dust on the MiniDisc. of a track. IM-DR420H(E) TINSE0554AWZZ IM-DR420H LIMITATIONS 03/7/21 IM-DR420H_UK_6.fm... -
Page 52: Error Messages
(Reload the Minidisc or replace it with another one.) " Recording cannot be performed cor- Can't REC rectly due to vibration or shock. IM-DR420H(E) TINSE0554AWZZ ERROR MEANING MESSAGES " Stamp function does not work. Can'tSTAMP (Check the number of tracks.) - Page 53 " Since a track number is currently be- SORRY ing located or updated, the unit can- not accept your command. (Wait a while and try the operation again.) IM-DR420H(E) TINSE0554AWZZ ERROR MEANING MESSAGES " The temperature is too high. TEMP OVER (Turn off the power, and wait a while.)
-
Page 54: Troubleshooting
Many potential "problems" can be resolved by the owner without calling a service technician. If something seems to be wrong with this product, check the following before calling your authorised SHARP dealer or service centre. The unit does not turn on. -
Page 55: Maintenance
To remove condensation: Remove the MiniDisc and leave the unit for approxi- mately 1 hour. The condensation should evaporate and the unit will work properly. IM-DR420H(E) TINSE0554AWZZ Maintenance ! Cleaning When the unit becomes dirty Clean it with a soft cloth. When the unit is excessively dirty, use a soft cloth dampened in water (external sur- faces only). -
Page 56: Specifications
Specifications IM-DR420H As a part of our policy of continuous improvement, SHARP reserves the right to make design and specification chang- es for product improvement without prior notice. The performance specification figures indicated are nominal values of production units. There may be some deviations from these values in individual units. - Page 57 Input impedance level MIC H 0.25 mV 10 k ohms MIC L 2.5 mV 10 k ohms LINE 100 mV 20 k ohms IM-DR420H(E) TINSE0554AWZZ 2 times long 4 times long Continuous Continuous Continuous Continuous recording: play: Ap- recording: play: Ap- Approx.
- Page 58 MEMO IM-DR420H(E) (TINSE0554AWZZ)
- Page 59 MEMO IM-DR420H(E) (TINSE0554AWZZ)
- Page 60 Subject to the terms listed below, Sharp Electronics (U.K.) Ltd. (hereinafter called “the Company”) guarantee to pro- vide for the repair of, or at its option replace this Sharp Equipment, or any component thereof, (other than bat- teries), which is faulty or below standard, as a result of inferior workmanship or materials.
Need help?
Do you have a question about the IM-DR420H and is the answer not in the manual?
Questions and answers