Samsung RF267AE series Service Manual
Samsung refrigerator service guide
Hide thumbs
Also See for RF267AE series:
- Specifications (2 pages) ,
- User manual (44 pages) ,
- Quick start manual (10 pages)
Table of Contents
Advertisement
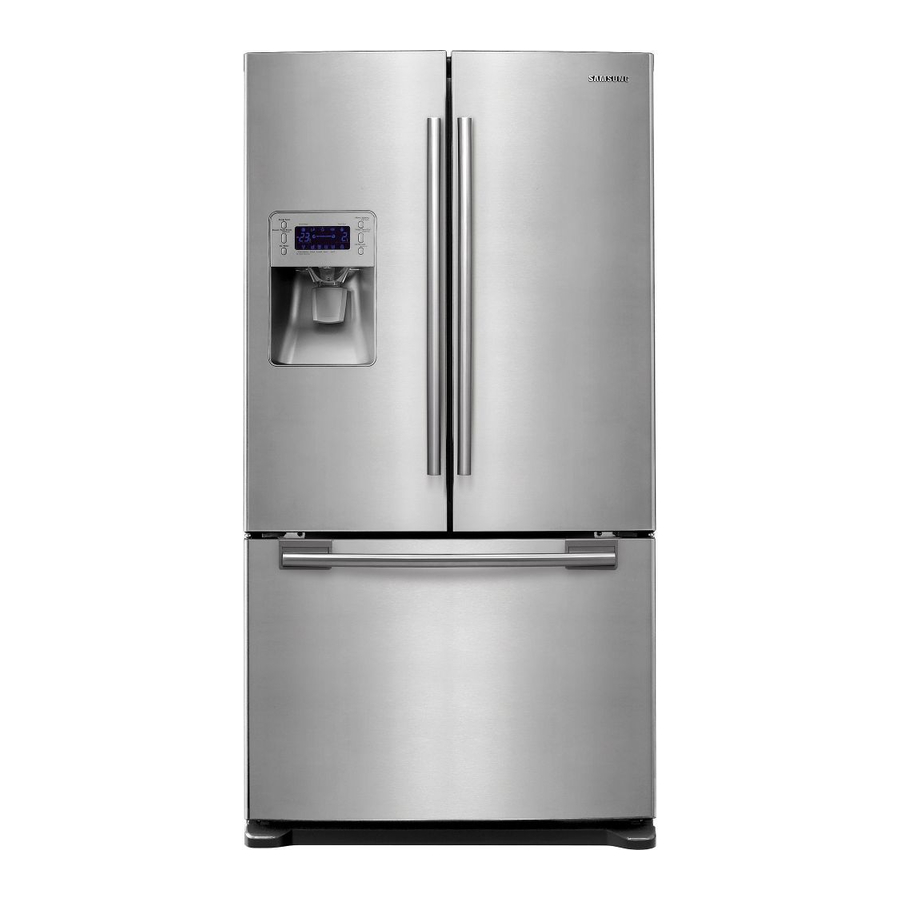
REFRIGERATOR
For the latest parts information, Please access to our service web site
(
North America : http://service.samsungportal.com)
●
REFRIGERATOR
MODEL NAME : RF267AE**
RF26XAE**
MODEL CODE : RF267AERS/XAA
RF267AEPN/XAA
RF267AEBP/XAA
RF267AEWP/XAA
RF26XAERS/XAA
RF26XAEPN/XAA
CONTENTS
1. PRECAUTIONS(SAFETY WARNINGS)
2. PRODUCT SPECIFICATIONS
3. DISASSEMBLY AND REASSEMBLY
4. TROUBLESHOOTING
5 . EXPLODED VIEW & PARTS LIST
6. PCB DIAGRAM
· · · · · · · · · · · · · · · · · · · · · · · · · · · · · · · · · · · · · ·
7. WIRING DIAGRAM
· · · · · · · · · · · · · · · · · · · · · · · · · · · · · · · ·
8. SCHEMATIC DIAGRAM
4
· ·
8
· · · · · · · · · · · · · · · ·
20
· · · ·
46
· · · · · · · · · · · · · · · · · · · · · · · · · · · · · ·
83
· · · · · · · ·
105
111
113
· · · · · · · · · · · · · · · · · · · · · · · ·
Advertisement
Chapters
Table of Contents
Troubleshooting

Related Manuals for Samsung RF267AE series


Summary of Contents for Samsung RF267AE series
- Page 1 REFRIGERATOR For the latest parts information, Please access to our service web site North America : http://service.samsungportal.com) ● REFRIGERATOR MODEL NAME : RF267AE** RF26XAE** MODEL CODE : RF267AERS/XAA RF267AEPN/XAA RF267AEBP/XAA RF267AEWP/XAA RF26XAERS/XAA RF26XAEPN/XAA CONTENTS 1. PRECAUTIONS(SAFETY WARNINGS) 2. PRODUCT SPECIFICATIONS 3.
-
Page 2: Important Safety Notice
The manufacturer or dealer cannot be responsible for the interpretation of this information. SAMSUNG ELECTRONICS AMERICA, INC. Technical Service Guide All rights reserved. This service guide may not be reproduced in whole or in part in any form without written permission from the SAMSUNG ELECTRONICS Company. WARNING Copyright ⓒ2009... -
Page 3: Table Of Contents
3-12) MOTOR DAMPER ······················································· 3-13) WATER FILTER (DISASSEMBLY) 3-14) WATER FILTER (REASSEMBLY) 3-15) GALLON DOOR BIN ····················································· 3-16) VERTICAL HINGED SECTION 3-17) EVAPORATOR COVER IN REFRIGERATOR 3-18) EVAPORATOR IN REFRIGERATOR 3-19) FREEZER DOOR ························································ 3-20) PULL OUT DRAWER ····················································· 3-21) ICE-MAKER ···························································... - Page 4 4-2-8. WHEN ALARM SOUND CONTINUOUS WITHOUT STOP(RELATED WITH BUZZER SOUND) 4-2-9. IF PANEL PCB DOES NOT WORK NORMALLY 4-2-10. IF PANTRY PANEL PCB IS NOT WORKING NORMALLY 4-2-11. WHEN REFRIGERATOR ROOM LAMP DOES NOT LIGHT UP 4-2-12. IF ICE WATER IS NOT SUPPLIED 4-2-13. IF WATER IS NOT SUPPLIED 4-2-14.
- Page 5 → It should be done indiscriminately as before the repair. ● Check the use circumstance of refrigerator. → If the refrigerator is installed at the place that is damp or wet, or status of installation is unstable, change the installation place.
-
Page 6: Precautions(Safety Warnings)
Warning & Caution Pull the power plug out to exchange the interior lamp of the refrigerator. ● It may cause electric shock. Unplug On repair, remove completely dust or other things of housing parts, harness parts, and check parts. - Page 7 Warning & Caution Do not allow users to store narrow and lengthy bottles or foods in a small multi-purpose room. ● It may hurt you when refrigerator door is opened and closed resulting in falling stuff down. Do not allow users to disassemble, repair or alter.
- Page 8 PRECAUTIONS(SAFETY WARNINGS) FLOORING For proper installation, this refrigerator must be placed on a level surface of hard material that is the same height as the rest of the flooring. This surface should be strong enough to support a fully loaded refrigerator, or approximately 660lbs(299kg).
- Page 9 2-1) INTRODUCTION OF MAIN FUNCTION 2-2) SPECIFICATIONS ··················································· 2-3) INTERIOR VIEWS ··················································· 2-4) MODEL SPECIFICATION ··············································· 2-5) MODEL SPECIFICATION &SPECIFICATION CHART 2-6)DIMENSIONS OF REFRIGERATOR (INCHES) 2-7) OPTIONAL MATERIAL SPECIFICATION 2-8) REFRIGERANT ROUTE IN REFRIGERATION CYCLE 2-9) COOLING AIR CIRCULATION ······································· ····························· ·································· ·····································...
-
Page 10: 2-1) Introduction Of Main Function
2. PRODUCT SPECIFICATIONS 2-1) Introduction of main function A newly Developed SAMSUNG bottom mount freezer in 2009 has the following ● ● characteristics. Surround Multi Flow Uniform cooling for each shelf and even in corner in fresh ● ● food compartment by centerpositioned fan and duct with... -
Page 11: Product Specifications
Defrost Thermistor(502AT) Electrical Rating AC115V 60Hz 11.6 Amps Maximum Current Leakage Maximum Ground Path Resistance Energy Consumption NO LOAD PERFORMANCE Ambient Temperature 70℉(21℃) Refrigerator,℉ 34℉(1℃)∼46℉(8℃) 34℉(1℃)∼46℉(8℃) Freezer,℉ -14℉(-26℃)∼8℉(-13℃) -14℉(-26℃)∼8℉(-13℃) Run Time,% REFRIGERATION SYSTEM Refrigerant Charge (R134a) Compressor(BK190CL2C/E02) Compressor oil 0.032" " ,118" " ( ( 0 0 . . 8 8 1 1 m m m m , , 2 2 9 9 9 9 7 7 m m m m ) ) -
Page 12: 2-3) Interior Views (Rf267)
PRODUCT SPECIFICATIONS 2-3) Interior Views (RF267) Refrigerator Ice-Maker Foldable-Shelf Slide-Shelf Vertical Hinged Section Vegetable & Fruit Drawers Tilting Pocket Freezer Light Auto Door Closer Dairy Compartment Water Filter Slide-Shelf Door Bins Quick-Space Glass Shelf Cool Select Pantry Light Pull Out Drawer... -
Page 13: 2-3) Interior Views (Rf26V)
PRODUCT SPECIFICATIONS 2-3) Interior Views (RF26X) -
Page 14: 2-4) Model Specification &Specification Chart
Rated Frequency and Frequency Refrigerant Foaming agent Refrigerant Input Amount Kind of Refrigerator Motor Rated Consumption Power Electric Heater Rated Consumption Power Indirect Cooling Method Refrigerator RF267 / RF26X inch (908mm) inch (740mm) inch (905mm) inch (1744mm) 70 Inch (1778mm) 26 Cu.ft (733.4ℓ) - Page 15 F Defrost-Sensor R Defrost-Sensor F Bimetal-thermo Protector Operating temperature R Bimetal-thermo Protector Operating temperature Model Starting type Oil Charge Freezer Refrigerator Forced and natural convection type 0.032” x 118” (0.81mm x 2997mm) ON(℉) -8℉(-22℃) -2℉(-19℃) -2℉(-19℃) 1℉(-17℃) 8℉(-13℃) 11℉(-12℃) ON(℉) 34℉(1℃) 36℉(2℃)
- Page 16 Conducting at R Defrost DISPENSER Heater Interlock with French Heater FRENCH Heater ICE Duct Heater Interlock with Defrost Heater (FRE) Water Tank Heater Bimetal thermo For Preventing Overheating of Refrigerator Lamp Over load Relay Rated Voltage MOTOR-BLDC(FRE) MOTOR BLDC(ICE ROOM) MOTOR-BLDC(REF) MOTOR-BLDC(CIRCUIT)
-
Page 17: 2-6)Dimensions Of Refrigerator (Inches)
PRODUCT SPECIFICATIONS 2-6)Dimensions of Refrigerator "(908mm) 5/8"(905mm) "(836mm) 29/32 1/5"(5mm) 1.3"(34mm) -
Page 18: 2-7) Optional Material Specification
PRODUCT SPECIFICATIONS 2-7) Optional Material Specification WATER-ASSY ASSY-PACKING LAMP INCANDENT Part Name Part Code FILTER DA29-00003B DA99-00240S 4713-001223 AMOUNT... -
Page 19: 2-8) Refrigerant Route In Refrigeration Cycle
PRODUCT SPECIFICATIONS 2-8) Refrigerant Route in Refrigeration cycle Compressor → condenser → Hot Pipe → Dryer → Capillary Tube → Refrigerator Evaporator → Freezer Evaporator→ Suction Pipe → Compressor Capillary Tube Freezer Evaporator Compressor Muffler Refrigerator Evaporator Hot Pipe Suction Pipe... -
Page 20: 2-9) Cooling Air Circulation
PRODUCT SPECIFICATIONS 2-9) Cooling Air Circulation Refrigerator Freezer... -
Page 21: Disassembly And Reassembly
3-13) WATER FILTER (DISASSEMBLY) ····························32 3-14) WATER FILTER (REASSEMBLY) ····························33 3-15) GALLON DOOR BIN ··································33 3-16) VERTICAL HINGED SECTION ······························34 3-17) EVAPORATOR COVER IN REFRIGERATOR ·······················35 3-18) EVAPORATOR IN REFRIGERATOR ···························36 3-19) FREEZER DOOR ···································37 3-20) PULL OUT DRAWER ··································38 3-21) ICE-MAKER ······································39... -
Page 22: 3-1) Precaution
• Do not install the refrigerator in a damp place or place where it may come in contact with water. - Deteriorated insulation of electrical parts may cause an electric shock or fire. -
Page 23: 3-2) Refrigerator Door
DISASSEMBLY AND REASSEMBLY 3-2) Refrigerator Door Part Name 1. With the door opened, remove the Top Table cap(1⃞) with a Flat head screwdriver, and close the door. 2. Remove the 3 screw holding down the Top Table and remove the Top Table(2⃞). - Page 24 DISASSEMBLY AND REASSEMBLY Part Name 5. Lift the door straight up to remove. Refrigerator Door 6.Remove 2 hex head bolts( 7⃞ ) with 5mm Allen Wrench(3/16") and an screw( 8⃞ ) with Philips screwdriver. How To Do Descriptive Picture [12]...
-
Page 25: 3-3) Door Handle
DISASSEMBLY AND REASSEMBLY 3-3) Door Handle Part Name 1. Remove the Cap Door with a flat-blade(-) screwdriver. Door Handle 2. Remove 4 screws Freezer 3. Lift up the handle to have the Slider Handle Fre(1⃞) pushed back. 4. After having the Slider Handle Fre(1⃞) pushed back, screw up at the hole. -
Page 26: 3-4) Refrigerator Light
DISASSEMBLY AND REASSEMBLY 3-4) Refrigerator Light Part Name 1. Remove the lamp cover by pulling it down as pushing the rear of lamp cover. Refrigerator Light 2. Remove the screw. And separate the LED panel. 3-5) Cover-display & water-dispenser Part Name 1. -
Page 27: 3-6) Water-Dispenser
DISASSEMBLY AND REASSEMBLY Part Name 4. Remove 4 screws of cover- Cover-display display 3-6) Water-dispenser Part Name 1. Disengage the 3 Housing Connect. 2. Remove 2 screws of the CaseIce,Route Assy. Water-dispenser 3. Pull the Case-Ice,Route Assy. 4. Push the hook and remove the Micro Switch. -
Page 28: 3-7) Glass Shelf
DISASSEMBLY AND REASSEMBLY Part Name 1. Assembly shall be the contrary order from the disassemble. Case-Ice and Route shall be assembled inside of hose. Otherwise, assemble cannot be accomplished. Water-dispenser 2. When assembling Cover- Display, first insert it from leftside and then assemble to rightside. -
Page 29: 3-8) Foldable Glass Shelf
DISASSEMBLY AND REASSEMBLY 3-8) Foldable Glass Shelf Part Name Remove 2 screws of the Fold Foldable Glass Glass Shelf Shelf 3-9) Vegetable & Fruit Drawers Shelf Part Name 1. Remove the vegetable & fruit drawer by pulling the roller part and lifting it up. -
Page 30: 3-10) Cool Select Pantry
DISASSEMBLY AND REASSEMBLY 3-10) Cool Select Pantry Part Name 1. Remove the cool select pantry Cool Select Pantry by pulling the roller part and lifting it up. 1. Remove the cool select pantry Cool Select Pantry cover by lifting the central part of the cover while pushing it to Cover the left. -
Page 31: 3-11) Water Tank
2. Disengage the housing Water Tank connector. One water Tube is located in the machine compartment of the refrigerator. Before disassembling the Water Tube, take out the compressor cover. 5. Remove the water valve fixed by the screw. How To Do... - Page 32 6. Disconnect the water tube by pushing the tube fitting apart as shown in the picture. The other Water Tube is located in the Top Table of the refrigerator. Before disassembling the Water Tube, take out the Top table. Water Tank 7.
-
Page 33: 3-12) Motor Damper
DISASSEMBLY AND REASSEMBLY 3-12) Motor Damper Part Name 1. Remove the cool select pantry. Remove the screw part of lower motor damper part and then push the motor damper down. Motor Damper 2. Disengage 2 housing connectors from the rear motor damper. -
Page 34: 3-14) Water Filter (Reassembly)
DISASSEMBLY AND REASSEMBLY 3-14) Water Filter (Reassembly) Part Name 1. Place the part of (ⓐ) arrow (that is indicating in the picture) in the middle of the front filter cover and push it up. Water Filter 2. Turn the water filter counterclockwise until central horizontal line of filter cover and both ends of water filter label... -
Page 35: 3-16) Vertical Hinged Section
DISASSEMBLY AND REASSEMBLY 3-16) Vertical Hinged Section Part Name 1. Remove 2 screw cap parts with a flat-blade(-) screwdriver. (Refer to the picture) 2. Unscrew 2 screws. Vertical Hinged Section 3. Disengage the internal housing connector of the vertical hinge. 4. -
Page 36: 3-17) Evaporator Cover In Refrigerator
DISASSEMBLY AND REASSEMBLY 3-17) Evaporator Cover In Refrigerator Part Name 1. Remove the angle cap with a flat-blade screwdriver. (Refer to the picture) 2. Unscrew 4 screws. 3. Remove the the lower part of angle mid by pulling it out and Evaporator Cover pushing it down. -
Page 37: 3-18) Evaporator In Refrigerator
DISASSEMBLY AND REASSEMBLY 3-18) Evaporator In Refrigerator Part Name 1. Remove the the housing cover by pushing both lateral sides of the housing cover and pulling it out. (Refer to the picture) 2. Disconnect the housing connector part. (Refer to the picture) -
Page 38: 3-19) Freezer Door
DISASSEMBLY AND REASSEMBLY 3-19) Freezer Door Part Name 1. Open the freezer door. Remove the tilting pocket by pushing it to the left. (Refer to the picture) 2. Remove the 2 support tilting pockets with temporary force. (Refer to the picture) 3. -
Page 39: 3-20) Pull Out Drawer
DISASSEMBLY AND REASSEMBLY 3-20) Pull Out Drawer Part Name 1. Slide the drawer in as much as possible Door Handle 2. Lift the drawer up Freezer 3. Remove the pull out drawer by lifting the bottom part of drawer bin and pulling it out. How To Do Descriptive Picture... -
Page 40: 3-21) Ice-Maker
DISASSEMBLY AND REASSEMBLY 3-21) Ice-Maker Part Name 1. Pull the Ice-Bucket lever and out 2. Remove 1 screw of the Cover 3. Disassemble the cover with a flat-blade(-) screwdriver and pull it out. Ice Maker 4. Disengage the 2 housing connector. -
Page 41: 3-22) Freezer Light
DISASSEMBLY AND REASSEMBLY 3-22) Freezer Light Part Name 1. Remove the light by pulling the light cover down while pushing Freezer Light the rear plane of light cover. 3-23) Door Switch In Freezer Part Name 1. Remove the freezer drawer bin by using a flat-blade(-) screwdriver.(Refer to the picture) -
Page 42: 3-24) Evaporator Cover In Freezer
DISASSEMBLY AND REASSEMBLY 3-24) Evaporator Cover In Freezer Part Name 1. Remove the freezer door and freezer drawer bin by pulling out the drawer and then unscrewing 2 screws. Evaporator Cover 2. Lift up the evaporator cover. Freezer 3. Disengage the 3 housing connector and remove the evaporator cover. -
Page 43: 3-26) Machine Compartment
DISASSEMBLY AND REASSEMBLY 3-26) Machine Compartment Part Name 1. Unscrew 5 screws of cover compressor. 2. Disengage the housing connector. (Refer to the picture) 3. Remove the hooker of support circuit motor by lifting the hooker up and pulling it out. 4. - Page 44 DISASSEMBLY AND REASSEMBLY Part Name 1. Disengage the housing connector. Relay O/L 2.Remove Cover Relay 3. Remove the relay O/L with a flat-blade screwdriver. (Refer to the picture) 1. Unscrew the water valve fixed by the screw. 2. Remove the the hook part of the hose by pushing it down.
-
Page 45: Power Cord & Noise Filter Assembly
DISASSEMBLY AND REASSEMBLY Part Name 1. Unscrew 2 screws. 2. Disengage the housing connector. Power Cord & 3. Unscrew 2 earth screws. Noise Filter 4. Remove the cover by pushing the hook up using a flat screwdriver. (Refer to the picture) 5. -
Page 46: 3-27) Electric Box
DISASSEMBLY AND REASSEMBLY 3-27) Electric Box Part Name 1. Pull the refrigerator forward to have enough space to work on the rear side of the appliance. 2. Unscrew 2 screws for the PCB cover. PBA Main 3. Disengage all housing connectors connected with PBA MAIN. -
Page 47: Troubleshooting
4-2-8. WHEN ALARM SOUND CONTINUOUS WITHOUT STOP(RELATED WITH BUZZER SOUND) 4-2-9. IF PANEL PCB DOES NOT WORK NORMALLY 4-2-10. IF PANTRY PANEL PCB IS NOT WORKING NORMALLY 4-2-11. WHEN REFRIGERATOR ROOM LAMP DOES NOT LIGHT UP 4-2-12. IF ICE WATER IS NOT SUPPLIED 4-2-13. IF WATER IS NOT SUPPLIED 4-2-14. -
Page 48: 4-1) Function For Failure Diagnosis
1-3) If manual operation is selected, compressor will run at once without 7 minutes delay in any mode. If the refrigerator is on the defrost cycle at the moment, defrost will be finished and manual operation will begin. (Be careful if manual operation get started at the moment of compressor off, over load could be occurred.) -
Page 49: Display Function Of Communication Error
TROUBLESHOOTING 2) Simultaneous manual defrost(fresh food and freezer compartments) function 2-1) If any key is pressed one more time during manual operation(fresh food compartment), "Fd" shows in the display and then manual operation will be canceled at once and fresh food and freezer compartment will be defrosted. -
Page 50: Self-Diagnostic Function
1) Self-diagnostic function in the Initial power ON 1-1) Micom operates self-diagnostic function to check the temperature sensor condition within 1 second when the refrigerator turned On initially. 1-2) If bad sensor is detected by the self-diagnostic function, the applicable display LED will blink for 0.5 sec. - Page 51 TROUBLESHOOTING Self-diagnosis CHECK LIST Trouble item Ice Maker Sensor Error R-Sensor Error R-DEF-Sensor Error R-FAN Error Ice Maker Error R-DEF, Heater Error Ambient-Sensor Error F-Sensor Error F-DEF-Sensor Error F-FAN Error C-FAN Error Ice Room-Sensor Error F-DEF.-Heater Error Ice Room FAN Error Pantry-Damper-Heater Error Pantry-Sensor Error Panel↔Main Micom Error...
-
Page 52: Self-Diagnostics Check List
TROUBLESHOOTING Self-diagnostics check list Item Display error : separation of sensor housing R-1-ⓐ Ice Maker Sensor Error part, contact error, disconnection, short circuit R-1-ⓑ R-Sensor Error Display error of detecting temperature of sensor: more than 149℉ (+65°C) or less R-1-ⓒ R-DEF-Sensor Error than -58℉(-50°C) Display error during operation of applicable... -
Page 53: Display Function Of Load Condition
When fresh food compartment fan low operates, applicable LED ON When fresh food compartment defrost heater operates, LED ON Initial power ON refrigerator, LED ON When ambient temperature is more than 93℉(34°C), LED ON When ambient temperature is less than 72℉(22°C), LED ON When ambient temperature is between 73℉(23°C) ~ 91℉(33°C), LED ON... -
Page 54: Option Setting Function
3) If Cooling off mode is selected, blinks "OF-OF" on the temperature setting display of the panel and it indicates the refrigerator has entered the Cooling off mode. 4) During Cooling off mode, if fresh food and freezer compartments sensors are higher than 149℉... - Page 55 TROUBLESHOOTING KEY control method after converting to option mode Code Down Code Up Key control in option mode Energy Saver Freezer/Power Freeze Alarm/Lighting Fridge/Power Cool ● If the display changes to option setting mode, all displays will be off except freezer and fridge compartments temperature display as below.
- Page 56 We will skip the explanation of the other functions by the option because it is associated with NOTE refrigerator control function and is not needed at SERVICE. (Please do not set the other options except above SERVICE Manual.) 38¢ (3¡ ) is recommended...
-
Page 57: Option Table
TROUBLESHOOTING 4-1-7. Option TABLE 1) Temperature changing table of freezer compartment Set item MODEL Reference Value Setting value Temp. compensation compartment Code - 1℉(-0.5°C) - 2℉(-1.0°C) - 3℉(-1.5°C) - 4℉(-2.0°C) - 5℉(-2.5°C) - 6℉(-3.0°C) - 7℉(-3.5°C) + 1℉(+0.5°C) + 2℉(+1.0°C) + 3℉(+1.5°C) + 4℉(+2.0°C) + 5℉(+2.5°C) -
Page 58: 4-2) Diagnostic Method According To The Trouble Symptom(Flow Chart)
TROUBLESHOOTING 4-2) Diagnostic method according to the trouble symptom(Flow Chart) DATA1.Temperature table Resistance value and MICOM port voltage of sensor according to the temperature SENSOR CHIP : based on PX41C ℃ ℉ Voltage Resistance 4.694 153319 -56.2 4.677 144794 -54.4 4.659 136798 -52.6... -
Page 59: If The Trouble Is Detected By Self-Diagnosis
TROUBLESHOOTING 4-2-1. If the trouble is detected by self-diagnosis - The error of sensor will be displayed on the front of display. when the error of sensor is detected at initial power ON, the appliance will not operated and display of abnormal sensor part will blink. - Page 60 TROUBLESHOOTING 2) If R Sensor has trouble ERROR Code 2¢ (-17¡ ) is recommended 38¢ (3¡ ) is recommended DATA1. Temperature table ** Measuring point of resistance value according to Sensor ** R : CN30#6 ↔ CN76#1 measuring resistance value ** 0Ω: Short trouble / ∞Ω: Open trouble Refer to circuit diagram in the manual Sensor MICOM/Connector number...
- Page 61 TROUBLESHOOTING 3) If R DEF Sensor has trouble ERROR Code 2¢ (-17¡ ) is recommended 38¢ (3¡ ) is recommended DATA1. Temperature table ** Measuring point of resistance value according to Sensor ** R-DEF : CN30#8 ↔ CN76#1 measuring resistance value ** 0Ω: Short trouble / ∞Ω: Open trouble Refer to circuit diagram in the manual Sensor MICOM/Connector Number...
- Page 62 TROUBLESHOOTING 4) If Ambient Sensor has trouble ERROR Code 2¢ (-17¡ ) is recommended 38¢ (3¡ ) is recommended DATA1. Temperature table ** Measuring point of resistance value according to Sensor ** Ambient : CN31#1 ↔ #4 measuring resistance value ** Placed in the right top table of upper hinge.
- Page 63 TROUBLESHOOTING 5) If F Sensor has trouble ERROR Code 2¢ (-17¡ ) is recommended 38¢ (3¡ ) is recommended DATA1. Temperature table ** Measuring point of resistance value according to Sensor ** F : CN30#3 ↔ CN76#1 measuring resistance value ** 0Ω: Short trouble / ∞Ω: Open trouble Refer to circuit diagram in the manual Sensor MICOM/Connector number...
- Page 64 TROUBLESHOOTING 6) If F DEF Sensor has trouble ERROR Code DATA1. Temperature table ** Measuring point of resistance value according to Sensor ** F-DEF : CN30#4 ↔ CN76#1 measuring resistance value ** 0Ω: Short trouble / ∞Ω: Open trouble Refer to circuit diagram in the manual Sensor MICOM/Connector number F DEF Connector Cn30#4(Orange) to REG1 HEAT-SINK PCB common Ground...
- Page 65 TROUBLESHOOTING 7) If Ice Room Sensor has trouble ERROR Code 2¢ (-17¡ ) is recommended 38¢ (3¡ ) is recommended DATA1. Temperature table ** Measuring point of resistance value according to Sensor ** Ambient : CN31#3 ↔ CN76#1 Measure the resistance value ** 0Ω: Short trouble / ∞Ω: Open trouble Refer to the circuit diagram in this manual...
- Page 66 TROUBLESHOOTING 8) If Pantry Sensor has trouble ERROR Code 2¢ (-17¡ ) is recommended 38¢ (3¡ ) is recommended DATA1. Temperature table ** Measuring point of resistance value according to Sensor ** Pantry : CN30#9 ↔ CN76#1 measuring resistance value ** 0Ω: Short trouble / ∞Ω: Open trouble Refer to circuit diagram in the manual Sensor MICOM/Connector number...
- Page 67 TROUBLESHOOTING 9) If Pantry Room Damper Heater has trouble ERROR Code 2¢ (-17¡ ) is recommended 38¢ (3¡ ) is recommended Measure the resistance between ①-② after CN91 connector open 145ohm ± 7% Initial Damper MICOM power On heater off heater On condition 3.5V~4.8V...
- Page 68 TROUBLESHOOTING 10) If Tank Water Heater has trouble ERROR Code Measure the resistance between #6~#10 after CN79 connector open 72ohm ± 7% Initial Working power On Heater off MICOM 3.5V~4.8V 3.5V~4.8V ☞ Checking method of Tank Water Heater resistance CN78#5(Black) ↔ #4(Brown) ** ∞Ω: Open(wire disconnection, heater disconnection) trouble 0Ω: Short trouble ☞...
-
Page 69: If Fan Does Not Operate(F, R, C - Fan)
4-2-2. If FAN does not operate(F, R, C - FAN) - The refrigerator of this model has BLDC FAN motor. BLDC motor is driven by DC 7~12V. - On the normal condition of COMP ON, it operates together with F-FAN motor. -
Page 70: If Ice Room Fan Does Not Operate
TROUBLESHOOTING 4-2-3. If ICE Room Fan does not operate - This refrigerator has BLDC FAN motor. BLDC motor is driven by DC7~12V. - When COMP ON, normally operates with F-FAN motor. - If there is any trouble, you should select the self-diagnostic function to check the trouble before power off. -
Page 71: If Ice Maker Does Not Operate
TROUBLESHOOTING 4-2-4. If Ice Maker does not operate 1. Water is automatically supplied to the Ice Maker depending on temperature & time condition and Ice Maker Dispenses cubed or crushed ice. 2. Power is applied to the one end of wires. Be careful when disassembling and shall refer to its exploded diagram in any case. -
Page 72: If Defrost Does Not Operate (F,R Def Heater)
TROUBLESHOOTING 4-2-5. If defrost does not operate (F,R DEF Heater) - If defrost has trouble, select the self-diagnostic function to detect the error of defrost heater before Power Off. (Check the function with the self-diagnostic function) R DEF ERROR **Measuring point of resistance value according to heater** F-DEF(Ice Duct parallel) : CN70#7(Brown) ↔... -
Page 73: If Power Is Not Supplied
TROUBLESHOOTING 4-2-6. If Power is not supplied Caution At the power of main PCB, the AC115V power and a high-voltage over DC 170V are occurred.Please take care of yourself during repair and measurement. Check in SMPS PBA ☞ Checking method of voltage CN70 input ;... -
Page 74: If Compressor Does Not Operate
TROUBLESHOOTING 4-2-7. If compressor does not operate Refer to test function in the manual Did buzzer of manual operation sound? (Check certainly after manual operation) 1) Replace MICOM 2) Replace PCB 1) Replace IC72 Driver IC(TD62083AP) 2) Replace PCB Refer to circuit diagram in the manual ☞Checking method of voltage PCB typical Ground CN1#3(Black) and... -
Page 75: When Alarm Sound Continuous Without Stop(Related With Buzzer Sound)
TROUBLESHOOTING 4-2-8. When alarm sound continuous without stop(related with buzzer sound) ① If 'ding-dong'sound continuously Seperate the door switch andcheck if the measured value of unit is changed from 0Ω to ∞Ω according to switch ON/OFF. * FF Door Switch is magnetic switch. (It can be operated when door magnet is combined with it.) Door &... - Page 76 TROUBLESHOOTING ③ If buzzer does not sound Buzzer is installed on the panel PCB in this model. If buzzer does not sound when button is pressed, manual operation is started and door is opened, should separate panel PCB and check the breakage of buzzer and bad soldering. It is very hard to repair the panel PCB because it consists of SMD assemblies.
-
Page 77: If Panel Pcb Does Not Work Normally
TROUBLESHOOTING 4-2-9. If Panel PCB does not work normally ① When lighting of Panel PCB is disabled or only some LED Lamp are disabled Be careful to repair because display of this model is installed in the MICOM of internal PCB. It is recommend to replace PCB MAIN after checking except specified solder touch. -
Page 78: If Pantry Panel Pcb Is Not Working Normally
TROUBLESHOOTING 4-2-10. If Pantry Panel PCB is not working normally You should check the display after door opening because the display of this model operates only when the fresh food compartment door is opened. If Panel Key is not selected Typical PCB Ground REG1 Heater Sink ②... -
Page 79: When Refrigerator Room Lamp Does Not Light Up
If 5V has been sensed over tree minutes afterwards, Door-Open alarm will sound ‘Ding-Dong’for 10 seconds in a one minutes cycle. For that reason, if the door switch has failure, the refrigerator can make a “Ding-Dong”sound with oneminute cycle. Please note the step for its service. -
Page 80: If Ice Water Is Not Supplied
TROUBLESHOOTING 4-2-12. If ICE Water is not supplied 1. Please shut the water supplying prior to repair. 2. Power is applied to the one end of wires. Be careful when disassembling not to get an electric shock. Typical PCB Ground REG1 Heater Sink ☞... -
Page 81: If Water Is Not Supplied
TROUBLESHOOTING 4-2-13. If Water is not supplied ☞ Checking method of Valve resistance (Must power off for checking) Resistance can be changed by input voltage. CN70#1 (Red) ↔ CN73#5 (White-black) - resistance value ; 388(1.6k)Ohm ± 7%) ** 0Ω: Short trouble / ∞Ω: Open trouble typical PCB Ground CN1#3(Black) ☞... -
Page 82: If Cubed Or Crushed Ice Is Not Supplied
TROUBLESHOOTING 4-2-14. If Cubed or Crushed Ice is not supplied Start Are Ices ejected? ① Check the Ice making switch ② Check the DOOR Switch ③ Check the Ice moving motor ④ Check the wiring connections of Ice moving motor ⑤... -
Page 83: If Cover Ice Route Moor(Geard Motor) Is Not Working Normally
TROUBLESHOOTING 4-2-15. If Cover Ice Route Moor(Geard Motor) is not working normally Caution 1. When replacing the Cover Ice Motor, pull out the plug to avoid an electric shock. 2. Be careful! When disassemble the Cover Ice Motor, spring can jumped out and may cause personal injury. 3. -
Page 84: Exploded View& Parts List
5 . EXPLODED VIEW& PARTS LIST 5-1) FREEZER ·························································· 5-2) REFRIGERATOR ····················································· 5-3) CABINET ·························································· 5-4) DISASSEMBLY OF FREEZE DOOR 5-5) DISASSEMBLY OF REFRIGERATOR DOOR LEFT 5-6) DISASSEMBLY OF REFRIGERATOR DOOR RIGHT ········································· ······························ ·····························... - Page 85 EXPLODED VIEW& PARTS LIST 5-1) Freezer...
- Page 86 EXPLODED VIEW& PARTS LIST ■ ■ Parts List of Freezer N N O O C C O O D D E E - - N N O O P P A A R R T T N N A A M M E E DA96-00515B ASSY EVAP FRE 6501-000123...
- Page 87 EXPLODED VIEW& PARTS LIST ■ ■ Parts List of Freezer N N O O C C O O D D E E - - N N O O P P A A R R T T N N A A M M E E 17-1 6002-000213 SCREW-TAPPING...
-
Page 88: Exploded View & Parts List
EXPLODED VIEW& PARTS LIST 5-2) Refrigerator 37-1 37-2 39-1 39-2 39-3 39-4 38-1 38-6 38-3 38-5 38-2 38-4 38-7 38-8 40-2 40-1 40-4 40-3... - Page 89 EXPLODED VIEW& PARTS LIST ■ ■ Parts List of Refrigerator N N O O C C O O D D E E - - N N O O P P A A R R T T N N A A M M E E...
- Page 90 AW-PJT,PP,NATURAL AW-PJT,PP,COOL WHITE AW-PJT AW-SEM AW-SEM,ABS,COOL WHITE AW-SEM,PP,COOL WHITE AW-PJT,SILICON,40±5° ,GRAY AW,PP,COOL WHITE AW-SEM,POM,NTR VP533A-OF-5,MICRO,250V,15A,PBT,GP1006F AW-SEM SILICON,WHITE AW-SEM(SAMSUNG),GPPS,NATURAL AW-SEM(SAMSUNG),ABS,COOL WHITE AW-SEM AW-SEM,SECC1,T1.0,BLACK AW-SEM,HIPS,COOL WHITE AW-SEM,GPPS,NATURAL AW-SEM DC 12V,MAX 600mA PX-41C, 502AT,AW-PJT,-40~110℃,5V AW-SEM,FOAM-PS AW-SEM,PP,COOL WHITE AW-SEM,PC-ABS,COOL WHITE AW-SEM,HIPS,COOL WHITE AW-PJT AW-SEM,TALC PP,COOL WHITE...
- Page 91 EXPLODED VIEW& PARTS LIST ■ ■ Parts List of Refrigerator N N O O C C O O D D E E - - N N O O P P A A R R T T N N A A M M E E...
-
Page 92: 5-3) Cabinet
EXPLODED VIEW& PARTS LIST 5-3) Cabinet 27-4 27-2 27-1 27-3... - Page 93 EXPLODED VIEW& PARTS LIST ■ ■ Parts List of Cabinet N N O O C C O O D D E E - - N N O O P P A A R R T T N N A A M M E E DA90-05502A ASSY CABINET FORM DA90-05502B...
- Page 94 EXPLODED VIEW& PARTS LIST ■ ■ Parts List of Cabinet N N O O C C O O D D E E - - N N O O P P A A R R T T N N A A M M E E DA60-00162A FASTENER-RING DA61-04771A...
- Page 95 EXPLODED VIEW& PARTS LIST ■ ■ Parts List of Cabinet N N O O C C O O D D E E - - N N O O P P A A R R T T N N A A M M E E DA96-00504A ASSY FAN-CIRCUIT 15-1...
-
Page 96: 5-4) Disassembly Of Freeze Door
EXPLODED VIEW& PARTS LIST 5-4) Disassembly of Freeze Door... - Page 97 EXPLODED VIEW& PARTS LIST ■ ■ Parts List of Freezer Door N N O O C C O O D D E E - - N N O O P P A A R R T T N N A A M M E E DA91-02826A ASSY DOOR FOAM FRE DA67-02143A...
- Page 98 EXPLODED VIEW& PARTS LIST ■ ■ Parts List of Freezer Door N N O O C C O O D D E E - - N N O O P P A A R R T T N N A A M M E E DA61-04839A SLIDER-HANDLE FRE DA61-04839B...
-
Page 99: 5-5) Disassembly Of Refrigerator Door Left
EXPLODED VIEW& PARTS LIST 5-5) Disassembly of Refrigerator DoorLeft 12-2 12-1 9-14 9-13... - Page 100 EXPLODED VIEW& PARTS LIST ■ ■ Parts List of Refrigerator Door-Left N N O O C C O O D D E E - - N N O O P P A A R R T T N N A A M M E E...
-
Page 101: 5-5) Disassembly Of Refrigerator Door Left
EXPLODED VIEW& PARTS LIST ■ ■ Parts List of Refrigerator Door-Left N N O O C C O O D D E E - - N N O O P P A A R R T T N N A A M M E E... -
Page 102: 5-6) Disassembly Of Refrigerator Door Right
EXPLODED VIEW& PARTS LIST 5-6) Disassembly of Refrigerator Door Right... - Page 103 EXPLODED VIEW& PARTS LIST ■ ■ Parts List of Refrigerator Door-Right N N O O C C O O D D E E - - N N O O P P A A R R T T N N A A M M E E...
- Page 104 6. PCB DIAGRAM 6-1) PCB LAYOUT WITH PART POSITION ···························106 6-2) PCB LAYOUT WITH PART POSITION (INVERTER BOARD) ·················107 6-3) CONNECTOR LAYOUT WITH PART POSITION (MAIN BOARD) ···············108 ···················109 6-4) PCB LAYOUT WITH PART POSITION (MAIN BOARD) 6-5) CONNECTOR LAYOUT WITH PART POSITION (INVERTER BOARD) ············110...
-
Page 105: Pcb Diagram
PCB DIAGRAM 6-1) PCB Layout with part position 1. DC13V, 5V, GND supplied from SMPS PCB 2. Circuit for controlling Step-Valve (3-Way Valve) * Option 3. FAN MOTOR control part : To supply the power from 8.3V ~ 12V according to the motor types. (F ,R,C,ICE) 4. -
Page 106: 6-2) Pcb Layout With Part Position (Inverter Board)
PCB DIAGRAM 6-2) PCB Layout with part position (Inverter Board) 1. Inrush current protecting area : It prevents an instant inrush of current generated in condenser when plug in. 2. PCB Power Bus : power bus (Hybrid IC). It supplies DC15V and 5V to MICOM. 3. -
Page 107: 6-3) Connector Layout With Part Position (Main Board)
PCB DIAGRAM 6-3) Connector Layout with part position (Main Board) 6-3-1. RF267AE... -
Page 108: 6-4) Pcb Layout With Part Position (Main Board)
PCB DIAGRAM 6-4) PCB Layout with part position (Main Board) 6-3-2. RF26XAE... -
Page 109: 6-5) Connector Layout With Part Position (Inverter Board)
PCB DIAGRAM 6-5) Connector Layout with part position (Inverter Board) - Page 110 7. WIRING DIAGRAM 7-1) Model : RF267AE...
-
Page 111: Wiring Diagram
WIRING DIAGRAM 7-2) Model : RF26XAE... - Page 112 8. SCHEMATIC DIAGRAM 8-1) Whole block diagram 8-1-1. MODEL : RF267AE...
-
Page 113: 8-1) Whole Block Diagram
SCHEMATIC DIAGRAM 8-1) Whole block diagram 8-1-2. MODEL : RF26XAE... -
Page 114: Inverter Board
SCHEMATIC DIAGRAM 8-1) Whole block diagram 8-1-3. Inverter Board... -
Page 115: 8-2) Circuit Diagram
SCHEMATIC DIAGRAM 8-2) CIRCUIT DIAGRAM 8-2-1. MODEL : RF267AE / RF26XAE... -
Page 116: Inverter Board
SCHEMATIC DIAGRAM 8-2) CIRCUIT DIAGRAM 8-2-2. INVERTER BOARD... - Page 118 Jauregui, Santiago de Queretaro, Queretaro Mexico TEL : 52-442-296-9000(9408) FAX : 52-442-240-9072 - This Service Manual is a property of Samsung Electronics Co., Ltd. Any unauthorized use of Manual can be punished under applicable International or domestic law. © Samsung Electronics Co., Ltd.