Motorola APX8500 Installation Manual
Two-way radios
Hide thumbs
Also See for APX8500:
- Manual (274 pages) ,
- Installation manual (95 pages) ,
- User manual (201 pages)
Table of Contents
Advertisement
Quick Links
Advertisement
Table of Contents

Related Manuals for Motorola APX8500


Summary of Contents for Motorola APX8500
- Page 1 APX™ TWO-WAY RADIOS APX8500 MOBILE Page RADIO INSTALLATION MANUAL...
-
Page 3: Foreword
No duplication or distribution of this document or any portion thereof shall take place without the express written permission any portion thereof shall take p ortion thereof s of Motorola Solutions. No part of this manual may be reproduced, distributed, or transmitted in any form or by any means, e reproduc eproduced, distributed, or t ed, distributed, or electronic or mechanical, for any purpose without the express written permission of Motorola Solutions. -
Page 4: Installation Requirements For Compliance With Radio Frequency (Rf) Energy Exposure Safety Standards
RF energy awareness and control for compliance with applicable standards y awarenes y awarenes and regulations. For a list of Motorola Solutions-approved antennas and other accessories, visit the following web site tions-approved antennas ions-approved ante which lists approved accessories for your radio model: http://www.motorolasolutions.com. -
Page 5: Table Of Contents
Radio Operation Wiring for Dash and Remote Configurations ........2-12 2.1.3.1 Dash Mount: Power, Ignition, and Emergency Cable Installation......2-12 2.1.3.2 Remote Mount: Power, Ignition, and Emergency Cable Installation...... 2-13 2.1.4 Ignition Sense Switch (Radio Wide Advance) ..............2-15 2.1.5 Motorola Branded SB9600 Siren/PA Configuration/Programming ......... 2-17 MN003109A01... - Page 6 2.4.1 Selecting an Antenna Site/Location on a Metal Body Vehicle ........2-32 2.4.2 Multiplexers and Vehicle Installation................2-34 2.4.3 QMA Connection (APX8500 Only) ................. 2-34 2.4.4 GPS/GLONASS/Wi-Fi/Antenna Placement (APX8500 Only) ......... 2-34 Speaker ............................2-35 2.5.1 Internal Speaker Disassembly ..................2-36 mbly ..
- Page 7 Disassembly ......................4-9 4.4.1.2 Assembly ....................... 4-10 Motorola Branded SB9600 Siren Connection to APX 8500............4-11 Compatibility of Emergency when Attaching a Motorola Branded SB9600 Siren......4-13 Chapter 5 Motorcycle Radio Installation ..........5-1 Motorcycle Radio Description ......................5-1 5.1.1 Transceiver Enclosure ......................
- Page 8 Minimize the Effect of Poorly Grounded Antennas ................ 7-3 Jump-Start the Vehicle ........................7-3 Eliminate Noise/Howling from PA Speaker ................... 7-3 Appendix A Replacement Parts Ordering..........A-1 Basic Ordering Information ......................A-1 Motorola Online Service and Support.................... A-1 port..port..Accessories Aftermarket Division (AAD) ..................A-2 on (AAD) ...
- Page 9 List of Figures List of Figures Figure 1-1. Front View of O2 Control Head Attached to APX 8500 Mid Power Dash Mount Transceiver and Trunnion .............. 1-1 Figure 1-2. Side View of O2 Control Head Attached to APX 8500 Mid Power Dash Mount Transceiver and Trunnion ............... 1-1 Figure 1-3.
- Page 10 Figure 2-15. Cabling Interconnect Diagram for Dash Mount..............2-9 Figure 2-16. Cabling Interconnect Diagram for Remote Mount .............. 2-10 Figure 2-17. Cabling Interconnect Diagram for 09 Remote Mount (URC is optional) ......2-11 Figure 2-18. APX8500 Mid Power Trunnion Orientation ................. 2-18 on Ori on Or Figure 2-19.
- Page 11 Figure 4-10. J600 Accessory Connector Y-Cable KT000247A01............4-11 Figure 4-11. Pinout for cable KT000247A01 ................... 4-11 Figure 4-12. Interfacing the Y-cable to the Motorola Branded SB9600 Siren and External Accessories 4-12 Figure 4-13. Field adjustment for Emergency Operation with Siren Accessory ........4-13 Figure 4-14.
- Page 12 List of Tables List of Tables Table 2-1. Dash and Remote O2, O3, O5, O7 or O9 Radio Power ON @ J2 ........ 2-14 Table 2-2. Remote O2, O5, O7 or O9 Radio Power ON @ J200............ 2-14 Table 2-3. Ignition Interface Cables ....................
- Page 13 List of Tables Notes 6878215A01...
- Page 14 List of Tables 6878215A01...
-
Page 15: Mobile Radio Model Numbering Scheme
Mobile Radio Model Numbering Scheme xiii Mobile Radio Model Numbering Scheme Typical Model Number: Position: 12 13 Position 1 - Type of Unit Positions 13 - 16 M = Mobile SP Model Suffix L = Table Top Station Positions 2 & 3 - Model Series Position 12 - Unique Model Variations Model Series... - Page 16 Mobile Radio Model Numbering Scheme Notes MN003109A01_aa...
-
Page 17: Commercial Warranty
One (1) Year Motorola Solutions, at its option, will at no charge either repair the Product (with new or ts option, will at no charge ts option, will at n reconditioned parts), replace it (with a new or reconditioned Product), or refund the purchase price of... -
Page 18: General Provisions
Warranty service will be provided by ed warranty serv warranty service locatio Motorola Solutions through one of its authorized warranty service locations. If you first contact the s authorized warranty s authorized warran serv company which sold you the Product, it can facilitate your obtaining warranty service. -
Page 19: Patent And Software Provisions
A. that MOTOROLA SOLUTIONS will be notified promptly in writing by such purchaser of any notice of such claim; B. that MOTOROLA SOLUTIONS will have sole control of the defense of such suit and all UTIONS UTIONS negotiations for its settlement or compromise;... - Page 20 xviii Commercial Warranty Notes MN003109A01_aa...
-
Page 21: Mobile Radio Description
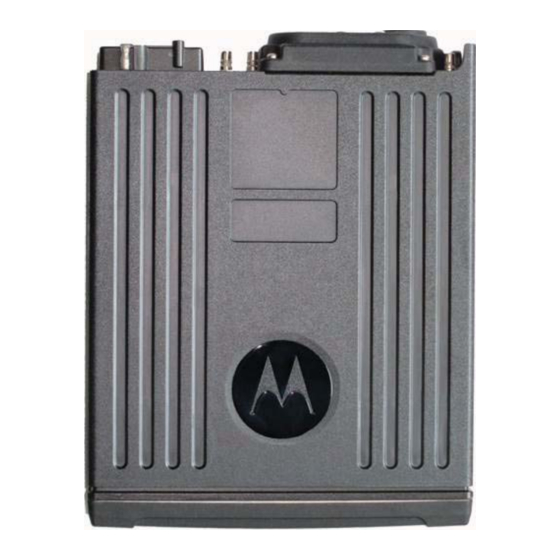
Chapter 1 Introduction This manual covers the installation procedures for ASTRO APX mobile and motorcycle radios with O2, O3, O5, O7 and O9 control heads, and accessories required to complete the radio system. The radio system consists of a control head, radio, antenna, microphone, speaker, cabling, Universal Relay Controller (URC), and accessories. -
Page 22: Figure 1-5. Front View Of O5 Control Head Attached To Apx 8500 Mid Power Dash Mount Transceiver And Trunnion
Introduction Mobile Radio Description Figure 1-5. Front View of O5 Control Head Figure 1-6. Side View of O5 Control Head Attached to APX 8500 Attached to APX 8500 Mid Power Mid Power Dash Mount Transceiver and Trunnion Dash Mount Transceiver and Trunnion Figure 1-7. -
Page 23: Figure 1-11. Front View Of O2 Control Head With Remote Mount And Trunnion
Introduction Mobile Radio Description Figure 1-11. Front View of O2 Control Head with Figure 1-12. Side View of O2 Control Head with Remote Mount and Trunnion Remote Mount and Trunnion 5 5 1 Figure 1-13. Front View of O5 Control Head with with th Figure 1-14. -
Page 24: Figure 1-17. Front View Of O9 Control Head With Trunnion
Introduction Mobile Radio Description Figure 1-17. Front View of O9 Control Head with Figure 1-18. Side View of O9 Control Head with Trunnion Trunnion 61.5 Figure 1-19. Top View of O9 Universal Relay Figure 1-20. Side View of O9 Universal Relay Controller with Trunnion (URC is an Controller with Trunnion (URC is an orderable orderable accessory) -
Page 25: Figure 1-22. Front View Of Sb9600 Whelen Siren
Introduction Mobile Radio Description Figure 1-22. Front View of SB9600 Whelen Siren T-Cable for Dual Control Head Only To Switch Box or Speaker Leads Siren/PA Unit Red Fused Cable Black Chassis Connects to Battery Ground Cable Positive Terminal Figure 1-23. Siren/PA Cable Connections MN003109A01_aa...