
Related Manuals for Samsung DVD-L1200


Summary of Contents for Samsung DVD-L1200
- Page 1 HEADQUARTERS 105 Challenger Road, Ridgefield Park, N.J.07660-0511 TEL: 1-800-SAMSUNG SERVICE DIVISION 400 Valley Road, Suite 201 Mount Arlington, NJ 07856 1-800-SAMSUNG (1-800-726-7864) www.samsungusa.com AK68-00311A...
-
Page 2: Portable Dvd Player
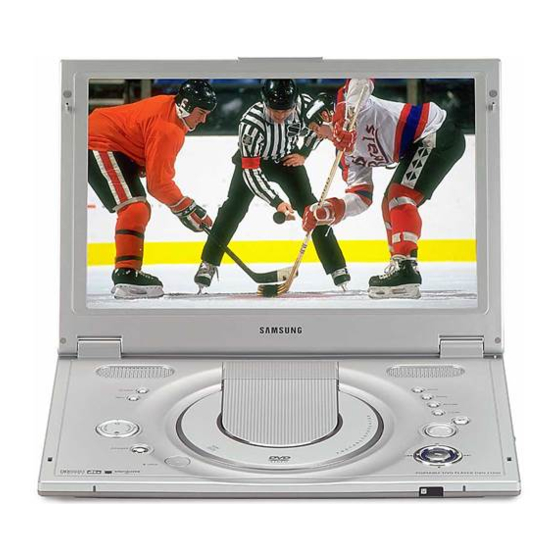
Portable DVD Player DVD-L1200... -
Page 3: Safety Instructions
This symbol is intended to alert the user to the presence of important operating and maintenance instructions in the literature accompanying this product. - Page 4 The DVD should be operated only from the type of power source indicated on the label. If you are not sure of the type of power supply at your home, consult your appliance dealer or local power company. A DVD is intended to be operated from battery power, or other sources, refer to the operating instructions.
- Page 5 When the power-supply cord or plug is damaged. b. If any liquid has been spilled onto, or objects have fallen into the DVD. c. If the DVD has been exposed to rain or water.
-
Page 6: Safety Information
• If the player is exposed to sudden temperature changes from cold to hot. When condensation forms inside the player, the player may not operate correctly. If this occurs, leave the player at room temperature until the inside of the player becomes dry and operational. -
Page 7: Table Of Contents
Connecting to an External Component (Input Select) ........ - Page 8 Using the Zoom & 3D Sound Functions ........
-
Page 9: Features
• You can connect a VCR or camcorder to your DVD player using the AV input/output jacks or you can connect to a TV for a larger screen. Manufactured under license from Dolby Laboratories. “Dolby”, “Pro Logic”, and the double-D symbol (... -
Page 10: Accessories
• Some functions or operations are disc-dependent and may not work in all cases. Follow the instructions shown on the screen. This manual only covers basic disc operations. • may appear during some operations. This mark indicates that the disc in use does not currently support operations explained in this manual. (AD39-00076A) -
Page 11: Disc Type And Characteristics
Both the DVD player and the discs are coded by region. These regional codes must match in order for the disc to play. If the codes do not match, the disc will not play. The Region Number for this player is described on the housing bottom of the player. - Page 12 3. Disc with fingerprints, dirt, and debris. • If the disc surface has dirt or scratches, No Disc will be displayed and the disc will not be played correctly. (Refer to page 5 and clean the surface of the disc.) If the player encounters dirt or scratches while playing, video playback may be interrupted.
-
Page 13: Description-Front Panel
Increases the contrast and sharpness level to compensate for outdoor lighting conditions. • Low light : The optimum mode for low light viewing situations. If the viewing environment is very dark, use this mode to decrease brightmess, and increase contrast and edge sharpness. - Page 14 Left View 1. HEADPHONES A, B, C 2. VOLUME 3. CHARGING INDICATOR 4. REMOTE SENSOR 5. OPEN 6. STANDBY INDICATOR 1. AUDIO IN/OUT / DIGITAL OUT 2. VIDEO IN/OUT / S-VIDEO OUT 3. DC IN 8.4V 4. BATTERY PACK ENGLISH...
- Page 15 ENGLISH Description-Front Panel Bottom View Battery pack separation method 1. BATTERY PACK 2. RELEASE (Battery pack separation switch) 3. OPEN Press in the direction of the arrow. Slide battery pack to the left, then out.
-
Page 16: Tour Of The Remote Control
Tour of the Remote Control 1. DVD POWER OFF Button • When you power off the unit with the remote, it remains in low power consumption mode. To turn the unit on, you must press the main POWER button on the unit. -
Page 17: Using The Remote Control Unit
If this occurs, remove the battery and re-insert in about 5 minutes. • It may be difficult to operate the remote control unit if the remote control sensor on the DVD player is exposed to direct sunlight or strong artificial light. -
Page 18: Connecting Headphones To The Dvd
Important! • Turn the headphone volume down to the minimum setting before connecting. Caution • Once you connect headphones to the DVD, your DVD Player’s speakers will be disconnected. 2. Adjust the volume level by using the VOLUME control dial. -
Page 19: Connecting To An External Component (Input Select)
VCR or other component equipped with external output connectors Important! • Always turn off the DVD Player and other components before you connect any cables. • Refer to owner’s manual of the components you are connecting for more information on those particular components. NOTE: NOTE: •... -
Page 20: Viewing A Video From An External Component
• When not using your DVD player, always remove all connecting cables from the video or audio input/output jacks. • If no signal is input for more than 5 minutes while in the input mode, this unit enters the standby mode. -
Page 21: Connecting To A Tv
To AUDIO INPUT Caution • If you wish to view video on your TV only, close the display panel of your DVD player. Playback will continue and audio to the speakers will be cut off, but you still will be able to use the remote to control the DVD player. -
Page 22: Connecting To A Stereo Component
Connecting to a Stereo Component When you connect the DVD player to an audio system, you can listen to higher quality sound. 2-CH Audio Playback Analog Connection Audio Amplifier Connect to input jacks ANALOG INPUT (White) (Red) Jack/Plug Color Audio (left): White... - Page 23 When playing a Linear PCM Audio encoded disc, you must use the digital connection method shown above. NOTE: NOTE: Only use an optical Digital Cable which has been designed for use with portable DVD. Optical Digital Cable (Sold Separately) DIGITAL...
- Page 24 Caution • To play a DTS disc, you need a DTS processor or amplifier. • If the DTS processor or amplifer you want to use does not have an optical digital input jack, digital connection is not possible. • Refer to owner’s manual of the processor or amplifier for details on connections.
-
Page 25: Using The Ac Adapter
Important! • Always turn off the DVD player before connecting or disconnecting the AC cord. • Be sure to use the supplied AC adapter. Using a different type of adapter may cause malfunction or damage to the product. • When the AC adapter is used for prolonged periods of time, the adapter may heat up. - Page 26 NOTE: NOTE: Connecting the battery pack to the AC Adapter; • You can recharge the battery pack in the DVD player by turning off the player and connecting the AC adapter to the player. Charge Time: Approx. 2.5 hours • Charge time may be longer when using the battery pack in a cold environment.
-
Page 27: Using The Battery Pack
1. Connect the AC cord to the jack on the AC adapter ( ). 2. Connect the DC cord to the DC IN jack on the left side of the DVD player ( ). 3. Plug the other end of the AC cord into an AC outlet ( ). -
Page 28: Battery Level Display
The playing time is affected by environmental temperature and conditions. The playing time becomes very short in a cold environment. The continuous playing times in the operating instructions are measured using a fully charged battery pack at 77°F(25°C). As the environmental temperature and conditions may differ when you actually use the DVD, the remaining battery time may not be the same as the approximate continuous playing time given in these instructions. -
Page 29: Playing A Disc
1. Press the OPEN button to open the disc lid. • The disc lid opens up to around a 60-degree angle. Do not attempt to open the lid to an angle beyond this range. The lid may become damaged. 2. Place a disc gently into the tray. - Page 30 • Make sure that the disc is correctly placed. Otherwise, the disc and/or the DVD player may be damaged. • If the disc is placed upside down in the disc tray or the region number of the DVD is not supported, No Disc will appear on the screen.
-
Page 31: Using The Search & Skip Functions
ENGLISH Using the Search & Skip Functions During play, you can search quickly through a chapter or track or use the skip function to jump to the next selection. Searching through a Chapter or Track During play, press the SEARCH ( •... -
Page 32: Using The Display Function
Refers to the subtitle languages available in the disc. Subtitle You will be able to choose the subtitle languages or, if you prefer, turn them off from the screen. A DVD disc can have up to 32 different subtitles. A surround sound effect is generated using only two front speakers. -
Page 33: Using The Disc And Title Menu
• Depending on the disc, the Title and Disc Menus may not work. • Title Menu will only be displayed if there are at least two titles in the disc. • You can also use the Disc Menu, using the DISC MENU button on the remote. -
Page 34: Using The Function Menu
4. Use the UP/DOWN button to highlight one of the 5 functions. Then press the RIGHT or ENTER button to access the function. NOTE: NOTE: • You can also directly select the parts of these functions using their respective buttons on the remote. ENGLISH... -
Page 35: Repeat Play
• Press ENTER at the point where you want the repeat play to stop (B). • To terminate the function, press the 'CLEAR' button or the 'REPEAT A-B' button again. • A-B REPEAT does not allow you to set point (B) until at least 5 seconds has elapsed after point (A) has been set. -
Page 36: Slow Repeat Play
• The disc will play from A to B repeatedly at the speed you chose. • To terminate the function, press the 'CLEAR' button or the 'REPEAT A-B' button again. • A-B REPEAT does not allow you to set point (B) until at least 5 seconds has elapsed after point (A) has been set. -
Page 37: Adjusting The Aspect Ratio (Ez View)
The top, bottom, left and right of the screen are cut off and the central portion of the screen is enlarged. • Vertical Fit When a 4:3 DVD is viewed on a 16:9 TV, black bars will appear at the left and right of the screen in order to prevent the picture from looking horizontally stretched. - Page 38 For 16:9 aspect ratio discs • 4:3 Letter Box Displays the content of the DVD title in 16:9 aspect ratio. The black bars will appear at the top and bottom of the screen. • 4:3 Pan Scan The left and right of the screen are cut off and displays the central portion of the 16:9 screen.
-
Page 39: Selecting The Audio Language
3. Use the LEFT/RIGHT buttons to select Stereo, RIGHT or LEFT. (On CD) NOTE: NOTE: • This function depends on what languages are encoded on the disc and may not work with all DVDs. • A DVD disc can contain up to 8 audio languages. -
Page 40: Selecting The Subtitle Language
NOTE: NOTE: • This function depends on what languages are encoded on the disc and may not work with all DVDs. • A DVD disc can contain up to 32 subtitle languages. • How to have the same subtitle language come up whenever you play a DVD;... -
Page 41: Changing The Camera Angle
ENGLISH Changing the Camera Angle When a DVD contains multiple angles of a particular scene, you can select the Angle function. Using the ANGLE button Press the ANGLE button to see if an ANGLE ( ) mark is present at the upper left hand corner of the screen. -
Page 42: Using The Bookmark Function
Using the Bookmark Function The Bookmark function lets you select parts of a DVD so that you can quickly find the section at a later time. Using the Bookmark Function (DVD) 1. During play, press the BOOKMARK button on the remote. -
Page 43: Using The Zoom & 3D Sound Functions
Using the Zoom & 3D Sound Functions Using the Zoom Function (DVD) 1. During play or pause mode, press the ZOOM button on the remote. A square will be displayed on screen. 2. Use the UP/DOWN or LEFT/RIGHT button to select the part of the screen you want to zoom in on. -
Page 44: Clips Menu For Mp3/Wma/Jpeg
2. Place the disc in the player. - Place the disc with the labeled side up. 3. Close the cover. - The cover is closed and you should get a screen that looks like the one below. • : File name of currently playing. -
Page 45: Folder Selection
The folder can only be selected in the Stop mode. • To select the Parent Folder Press the RETURN button to go to Parent folder, or use the UP/DOWN buttons to select “..” and press ENTER to go to the parent folder. -
Page 46: Mp3/Wma Play
- Folder : Repeats the song files which have the same extention in the current folder. - Random : Song files which have the same extension in disc will be played in random order. * To resume normal play, press the CLEAR button. - Page 47 • Your MP3 or WMA files should be ISO 9660 or JOLIET format. ISO 9660 format and Joliet MP3 or WMA files are compatible with Microsoft's DOS and Windows, and with Apple's Mac. These two formats are the most widely used.
-
Page 48: Picture Cd Playback
Picture CD Playback 1. Select the desired folder. (See page 44 to select the folder) 2. Use the UP/DOWN buttons to select a Picture file in clip menu and you should get a screen that looks like the one below. - Page 49 • Only CD-R discs with JPEG files in ISO 9660 or Joliet format can be played. • The name of the JPEG file may not be longer than 8 characters and should contain no blank spaces or special characters (. / = +).
-
Page 50: Using The Setup Menu
The Setup menu lets you customize your DVD player by allowing you to select various language preferences, set up a parental level, even adjust the player to the type of television screen you have. 1. With the unit in Stop mode, press the MENU button. -
Page 51: Setting Up The Language Features
ENGLISH Setting Up the Language Features If you set the player menu, disc menu, audio and subtitle language in advance, they will come up automatically every time you watch a movie. Using the Player Menu Language 1. With the unit in Stop mode, press the MENU button. - Page 52 4. Select Subtitle using UP/DOWN buttons, then press the RIGHT or ENTER button. 5. Use the UP/DOWN buttons to select ‘English’. - Select “Automatic” if you want the subtitle language to be the same as the language selected as the audio preference.
-
Page 53: Setting Up The Audio Options
2. Select Setup using UP/DOWN buttons, then RIGHT or ENTER button. 3. Select Audio Setup using UP/DOWN buttons, then press the RIGHT or ENTER button. 4. Use the UP/DOWN buttons to select the desired item. Then press the RIGHT or ENTER button. Digital Output 1. -
Page 54: Setting Up The Display Options
1. 4:3 Letter Box : Select when you want to see the total 16:9 ratio screen DVD supplies, even though you have a TV with a 4:3 ratio screen. Black bars will appear at the top and bottom of the screen. -
Page 55: Setting Up The Parental Control
About the Rating Level ; The Rating Level will work only when Use Password is set to Yes. To unlock the player, use UP/DOWN to select No. Use RIGHT or ENTER to select Rating Level. Press ENTER. - Use UP/DOWN to select the level(e.g. Level 6) and press ENTER. -
Page 56: Cautionary Notes
Doing so may result in deformation of casing and circuitry as well as cause fire or bodily injury. • Do not let water, sand, dust, or other foreign objects in the player. Avoid using or storing the player in a place where there is smoke, steam, or moisture. - Page 57 When Moving the Player • Be sure to remove the disc from the player before packing for moving. It is recommended that you also remove the disc from the player and turn off the power when not using the player. Saving Power •...
- Page 58 1. When not using the battery pack, remove it and store in a cool place. 2. Do not use the AC adapter or battery pack for a prolonged period of time during recharging. You might get a low temperature burn.
- Page 59 You cannot fully charge the battery pack at high temperature. • If the DVD player is overheated and the battery pack’s internal temperature goes up to a certain level, you will not be able to charge the battery pack.
- Page 60 • Many plastic parts are used in this DVD player casing. Do not use volatile chemicals such as benzene or thinner. This might damage the finish. • Wipe the casing with a soft, dry cloth. For excessive dirt, use a cloth dampened in a diluted neutral detergent. and wipe again with a soft, dry cloth.
-
Page 61: Troubleshooting
ENGLISH Troubleshooting If your DVD player does not seem to be functioning properly, check the items below before you contact a Samsung authorized service center. Symptom Power does not turn on or • Make sure the AC power cord is securely plugged into an AC outlet. - Page 62 No picture No sound • Check that the display panel is open. If it is closed, audio will not be output to the speakers. • Check the volume setting. If set to zero, turn up volume level. • Check that the headphones are plugged into the PHONES jack.
- Page 63 • Check that the DC cord of the AC adapter is plugged in correctly. • Remove the DC cord from the battery pack and then re-plug. If the battery pack is installed, remove the DC cord from the battery pack before performing above procedure.
-
Page 64: Specifications
Audio *S/N Ratio Output *Dynamic Range *Total Harmonic Distortion • Samsung Electronics Co., Ltd reserves the right to change the specifications without notice. • Weight and dimensions are approximate. AC 120V, 60 Hz 16 W 3.3 lbs (without battery pack) (W) 14.1 in x (H) 5.2 in x (D) 10.4 in... -
Page 65: Warranty
One (1) Year Parts and Labor This limited warranty begins on the original date of purchase, and is valid only on products purchased and used in the United States, and does not include transportation, installation, removal or reinstallation. Warranty repairs must be performed by SAMSUNG’s authorized service center.