Table of Contents
Advertisement
Advertisement
Table of Contents

Related Manuals for Breville ControlFreak

Summary of Contents for Breville ControlFreak
- Page 1 Control ˚Freak ™ Instruction Book - CMC850...
-
Page 2: Table Of Contents
Contents The Kit Edit Custom Cooking Program Cookware Compatibility Delete Custom Cooking Program Cookware Usage Thermometer Function 24–27 The Interface Probe Control Function 28–31 Control Dial Operation Settings 32–35 Switching On Care and Cleaning Start Cooking Save/Copy Function 37–39 Cancel Cooking Software Update 40–41 Screen Lock... -
Page 3: The Kit
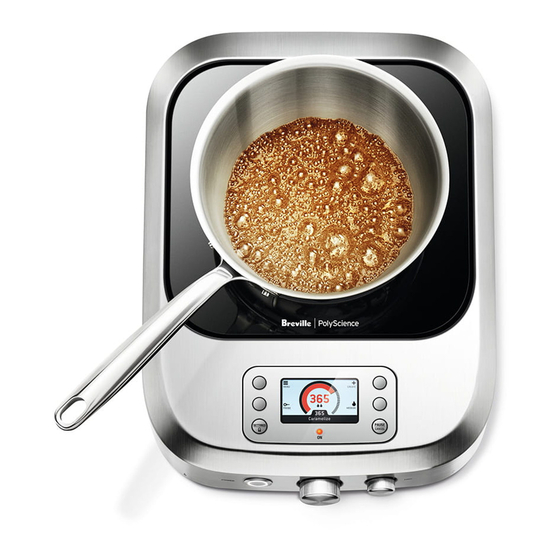
The Kit Probe Pan Sensor Probe Holder/ Pot Clip Probe Jack USB Drive Carry Bag Accessories NOTE Only use induction compatible cookware. -
Page 4: Cookware Compatibility
Cookware Compatibility Stainless steel with base. Stainless steel clad with Cast iron. aluminium or copper/with base. Aluminum, copper. Stainless steel single layer no base (can distort easily). If a magnet attracts firmly to the base of your cookware, it is suitable with the cooker. -
Page 5: Cookware Usage
Cookware Usage Best performance operation. Cookware must touch the sensor Cookware must have Do not use cookware with for correct temperature control. smooth clean bottom. concave or convex base. Sensor will not work. 10"/26cm 4.5"/12cm Cookware smaller than For most even heating, 4.5"/12cm may not work max base ≤... -
Page 6: The Interface
The Interface Current Temperature Temperature Menu Create Your created Create & save cooking programs custom cooking are saved here. programs. Probe Intensity Control speed to the Thermometer set temperature. & probe control FAST functions. Timer Display 02 : 00 Simmer Settings/ Pause/Cancel Lock... -
Page 7: Control Dial Operation
Control Dial Operation Use control dial to navigate menus and to select and confirm cooking options. Menu EDIT EXIT Caramelize 320°F Chicken 120°F INTENSITY °F START Set Pan Temp Rotate Control Dial to select Press Control Dial to confirm Press Control Dial to confirm temperature and scroll through menu selection. -
Page 8: Switching On
Switching On INTENSITY °F Set Pan Temp Power on. Standby screen. Plug in the power cord to power outlet. -
Page 9: Start Cooking
Start Cooking INTENSITY °F Set Pan Temp INTENSITY FAST °F Set Pan Temp 2. Turn control dial to set 1. Standby screen. 3. Cooktop heating to the temperature. set temperature. Pause/Resume Cooking It is possible to pause cooking. No heat will be applied during pause. Resume will continue previous settings. -
Page 10: Cancel Cooking
Cancel Cooking INTENSITY FAST °F Set Pan Temp Press to Resume FAST 1. Cooktop active. 2. Press "PAUSE". 3. Press "PAUSE" again to cancel to standby screen. -
Page 11: Screen Lock
Screen Lock You can lock your screen by making all buttons and dials inactive. Cooking continues as set. INTENSITY Settings Screen Lock EXIT Screen Lock Time and Date º º Press & Hold the Settings/Lock Sounds button to Lock and Unlock screen. SELECT 1. -
Page 12: Pan Temperature Control
Pan Temperature Control INTENSITY °F Set Pan Temp INTENSITY Fº Set Pan Temp Pan Temperature Set Temperature Med High FAST FAST FAST Heating to set temperature. At temperature. Cooling to set temperature. -
Page 13: Intensity
Intensity Heat intensity can be varied to control the heating speed to the set temperature. It can be adjusted while cooking. MEDIUM SLOW FAST Fast (Default). Medium. Slow. Adjust intensity while cooking to control simmer. Fast. Medium. Slow. You can vary the intensity to suit the pan size and load. Large Pan - Fast. -
Page 14: Timer
Timer There is a multifunctional timer installed on your product. It can be set to count up or count down. There are also multiple timer end options. INTENSITY 02 : 00 INTENSITY INTENSITY 02 : 00 01 : 59 1. Set Timer. 2. - Page 15 Timer Count Up INTENSITY 02 : 00 Timer Options EXIT INTENSITY Start Count Down Timer Start Count Up Timer 00 : 01 1. Press timer dial. 2. Select and confirm Start Count 3. Count up begins. Up Timer.
- Page 16 Timer Countdown Timer Options Count Down Timer EXIT BACK Start Count Down Timer 03 : 46 Start Count Up Timer 1. Press timer dial. 2. Select Start countdown timer. 3. Set and confirm. INTENSITY °F 01 : 30 Count Down Started 4.
- Page 17 When Timer Ends Option When Timer Ends Timer Options EXIT SAVE Continue Cooking Cancel Stop Cooking When Timer Ends Keep Warm 140ºF Keep Warm 140ºF Repeat Timer Total Elapse Time 0:20 1. After setting countdown timer, 2. When Timer Ends. 3.
-
Page 18: Create
Create Save custom cooking programs. Temp 1 Temp 1 EXIT EXIT Set Temp Set Temp Set Intensity Set Intensity Add Time Add Time Edit Edit 1. Create. 2. Set Temperature. 3. Set Intensity. Temp 1 Start This Timer... When Timer Ends EXIT BACK BACK... - Page 19 Create - Timer Start Options At beginning For general cooking: • Timer will start as soon as cooking starts. At set temperature For timing doneness in sous vide: • Timer will start when cooker reaches set temperature. At prompt For when you need to start timer after adding ingredients: •...
- Page 20 Recall Saved Custom Cooking Program Menu EXIT EDIT Caramelize 320°F Chicken 120°F FAST START Caramelize 1. Select menu. 2. Select program and 3. Program starts. confirm.
-
Page 21: Create
Create While Cooktop is Active Save current cooking settings as new program while cooking is active. Temp 1 EXIT CREATE 320°C Fast Add Time FAST Edit Caramelize 1. Cooktop active. 2. Create new program. 3. Current settings are displayed, Edit/add Temperature. Temp 1 Temp 1 SAVE... -
Page 22: Edit Custom Cooking Program
Edit Custom Cooking Program Programs can only be edited while cooking is inactive. Menu EDIT EXIT Caramelize 320°F Chicken 120°F EDIT START 1. Select menu. 2. Select program. 3. Select "EDIT". Temp 1 SAVE CREATE BACK EXIT 320°C SAVE Fast ABCD FGHI Add Time... -
Page 23: Delete Custom Cooking Program
Delete Custom Cooking Program Programs can only be deleted when cooking is inactive. SAVE Menu EXIT EDIT Caramelize 320°F Chicken 120°F START 1. Select menu. 2. Select program. 3. Select "DEL". Caramelize BACK Are you sure you want to delete this Menu item? DELETE 4. -
Page 24: Thermometer Function
Probe The Probe can be used in two ways. First, as a thermometer to read the temperature. Second, as probe control, which reads and accurately controls the liquid cooking temperature. Thermometer Function Current Probe Temperature Alarm Temperature (see next page) Insert the probe at the front left foot. - Page 25 Create Thermometer Alarm It is possible to create and save a temperature at which the alarm will sound. Probe Options Thermometer BACK EXIT Thermometer No Alarm INTENSITY Probe Control Set Alarm Probe Control Oil SELECT SELECT 1. Thermometer Alarm. 2. Select Thermometer. 3.
- Page 26 Thermometer Alarm - Recall Probe Options Thermometer BACK EXIT Thermometer No Alarm INTENSITY Probe Control Set Alarm Probe Control Oil Saved Alarms SELECT SELECT 1. Press probe. 2. Thermometer. 3. Saved Alarms. Menu EDIT EXIT Caramelize 320°F Chicken 120°F INTENSITY °F Set Pan Temp START...
- Page 27 Thermometer - Delete Saved Alarms SAVE Thermometer BACK No Alarm INTENSITY Set Alarm Saved Alarms SELECT 1. Select probe. 2. Saved Alarms. 3. Select "DEL". Alarm1 BACK Are you sure you want to delete this saved Alarm? INTENSITY °F Set Pan Temp DELETE Alarm1 BACK...
-
Page 28: Probe Control Function
Probe Control Function Probe Control enables temperature control cooking with 'wet' (liquid) ingredients. It uses the Probe sensors to take the reading directly from the ingredients enabling the cooker to control the temperature with high precision. Water based and Oil based liquids need to be controlled differently due to their varying physical properties. - Page 29 Probe Control Active Interface This indicates that probe control is active INTENSITY Fº Liquid Set Pan Temp Temperature FAST Set Temperature 02 : 00 Probe Control Simmer Probe control displayed - active...
- Page 30 Probe Position • The temperature reading is within the probe tip so ensure the tip is submerged in the liquid to be controlled. • Watch out for evaporation over time, so as not to expose tip out of liquid.
- Page 31 Probe Control - Start/Stop 1. Insert probe. 2. Place probe in liquid. 3. Select probe. Probe Options EXIT Thermometer Probe Control Probe Control Oil FAST SELECT Probe Control 4. Select probe control or probe 5. Set temperature with 6. To stop probe control, while control oil.
-
Page 32: Settings
Settings Time and date. INTENSITY Settings Set Time BACK Time & Date Warranty Start Date 05 : 48 Service Reset º º Sounds Usage Data Software Update Save Data SELECT 2. Time & Date. 3. Set time. 1. Press "Settings | ". Set Year Set Month Set Date... -
Page 33: Settings
Settings Units °C/°F. INTENSITY Settings Temperature Units EXIT BACK Screen Lock º Time and Date º º º Sounds SELECT 2. °C/ °F. 3. Select and confirm. 1. Press "Settings | ". - Page 34 Settings Sounds. INTENSITY Settings Sounds EXIT BACK Screen Lock Volume Time and Date At Temp Sound Startup Sound º º Sounds SELECT 2. Sounds. 3. Adjust volume. 1. Press "Settings | ". Volume BACK Mute All Sounds High 4. Select and confirm.
- Page 35 Factory Defaults If you wish to erase all saved data, then the following will be deleted or reset: • All saved custom cooking programs in menu • All probe alarms • Units default to °F (for 120V North American version) •...
-
Page 36: Care And Cleaning
Care & Cleaning Keep the pan sensor clean, dry Dials are removable and Use damp cloth to clean glass and free from oil build-up on dishwasher safe. surface. and around sensor. Do not use wet cloth to clean Do not use abrasive cleaner or underside of cooker. -
Page 37: Save/Copy Function
NTFS Empty USB Drive. IMPORTANT Do not use any other USB other than USB provided by Breville | PolyScience. Additional USBs can be ordered from www.polyscienceculinary.com NOTE • You can make a backup (SAVE) onto the USB and store on your computer if you need to keep them. - Page 38 Save from Cooker Settings Save/Copy EXIT BACK Software Update Save to USB Factory Defaults Copy from USB About This Cooker Save/Copy Save/Copy SELECT 1. Insert USB drive. 2. Save/Copy. 3. Save to USB. Copy Fail Save Data Save Complete BACK Save Data to USB? Ensure USB is formatted and has enough space...
- Page 39 Copy from USB Settings Save/Copy EXIT BACK Software Update Save to USB Factory Defaults Copy from USB About This Cooker Save/Copy Save/Copy SELECT 1. Insert USB drive. 2. Save/Copy. 3. Copy from USB. Copy from USB Copy Complete BACK Copy from USB now? This will copy all saved Menu Items and Probe Alarms.
-
Page 40: Software Update
Software Update FORMAT FAT32 NTFS 1. Backup Saved data 2. Empty USB Drive. 3. Copy software update onto to computer. USB Drive. UPDATING SOFTWARE New Software Found EXIT Current Version: xxx xx New Version: xxx xx DO NOT REMOVE USB OR DISCONNECT POWER! Update Now 5. - Page 41 INTENSITY Software Update Complete Settings EXIT Software Update Factory Defaults About This Cooker Save/Copy Remove USB SELECT 7. Remove USB Drive upon 8. To check software version, 9. About This Cooker. update completion. Press "Settings | ". About This Cooker BACK Model Number: CMC850 Serial Number: xxxx...
-
Page 42: Software Update Fail/Error
Software Update Fail/Error If USB was removed or there was a power failure during update. Software Update Complete Remove USB Power LED will flash quickly. • Press power button to recover • Wait for about 1 minute. original factory settings. •... -
Page 43: Notification Screens
Notification Screens Hot Area Detected Reminder High Temp Safety Ensure cooker is away from Keep sensor clean and dry. Cooking Paused walls and hot areas. Continue Cooking? Internal ambient temperature For best temperature accuracy If cooking above 475°F/246°C sensor has detected a high keep the sensor clean and dry. -
Page 44: Warning & Error Commands
Warning & Error Commands Sorry, Probe Problem. Can’t Identify Cookware. Sorry I’m Overheated. Please check probe connector is Use Breville or other Leave me plugged in so clean and dry. If this error repeats induction compatible I can cool down quicker. -
Page 45: Consumer Support
Consumer Support Sorry There is a Problem. Please unplug and re-start me. If this error repeats go to the Breville website for help. Sensor rubber broken or sensor Glass, case or screen cracked. Restart or contact Breville stuck down. Customer Service if you are unable to resolve the problem. - Page 48 Breville is a registered trademark of Breville Pty. Ltd. A.B.N. 98 000 092 928. Copyright Breville Pty. Ltd. 2017. Due to continued product improvement, the products illustrated/photographed in this booklet may vary slightly from the actual product. CMC850BSS USC B17...