Advertisement
Quick Links
Advertisement

Related Manuals for EAST COAST LANGHAM


Summary of Contents for EAST COAST LANGHAM
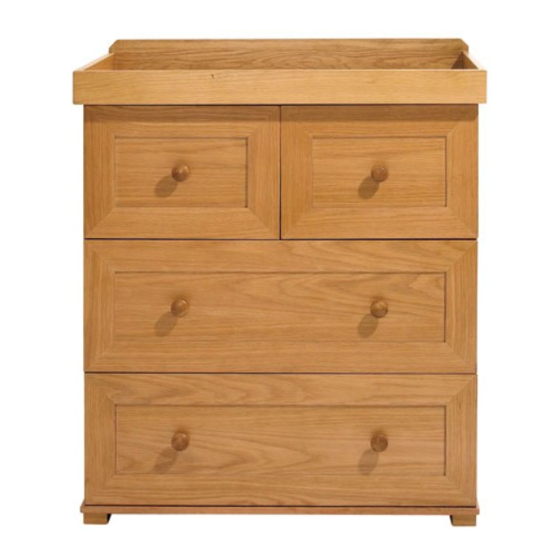
- Page 1 LANGHAM Dresser...
- Page 2 IMPORTANT RETAIN FOR FUTURE REFERENCE: READ CAREFULLY Please read the instructions and warnings carefully before use to ensure safe and satisfactory operation of this product. Your child’s safety is your responsibility. If you have a query with this product or require replacement parts, please contact 01692 408802.
- Page 3 Wooden parts: Right Side Back Panel x 2 Changer Top Left Side Top Front Crossbar x 1 Central Divider Crossbar x 1 Base Frame Top Back Crossbar x 1 Drawer Support x 2 Crossbar x 3 Handle x 6 Large Drawer Base x 2 Small Drawer Base x 2 Foot x 4 Small Drawer Front x 2...
- Page 4 Dresser Assembly 1. Fitting the Back Crossbars. Cam Pin x 3 Cam Nut x 3 Left Side Top Back Crossbar Crossbar Crossbar NOTE: You may find it easier to complete the first 4 stages of the assembly with the Left Side lying flat on the floor or other soft level surface.
- Page 5 Dresser Assembly 3. Fitting the Front Crossbars. Cam Pin x 3 Top Front Crossbar Central Divider Crossbar Cam Nut x 3 Crossbar Insert 3 Cam Pins into the Left Side as shown. Insert 3 Cam Nuts into the Crossbars making sure the arrow on the Cam Nut is facing towards the edge of the part.
- Page 6 Dresser Assembly 5. Attaching the Base. Small Bolt (20mm) x 6 Base Frame To secure the Base Frame to the dresser turn the frame over and insert 6 Small Bolts (20mm) into the holes as shown. Dresser Assembly 6. Attaching the Feet. Medium Bolt (30mm) x 4 Foot x 4 Insert the Feet into the 4 corners using the attached dowels.
- Page 7 Dresser Assembly 7. Fixing the Changing Top. Changer Top Small Bolt (20mm) x 4 Small Bolt (20mm) x 3 Small Bolt (20mm) x 4 Secure the Changer top with 11 Small bolts (20mm) into the underneath of the Left and Right Side, the Central Divider and the Top Crossbar.
- Page 8 Small Drawer Assembly 1. Fitting the Plastic Nuts. Small Drawer Front Small Drawer Back Plastic Nut x 4 Plastic Nut x 4 Fit 4 Plastic Nuts into the Small Drawer Front panel making sure the holes point towards the edge of the piece.
- Page 9 Large Drawer Assembly 1. Fitting the Plastic Nuts. Large Drawer Front Large Drawer Back Plastic Nut x 4 Plastic Nut x 4 Fit 4 Plastic Nuts into the Large Drawer Front panel making sure the holes point towards the edge of the piece.
- Page 10 Large Drawer Assembly 3. Fitting the Drawer Support. Large Drawer Drawer Support Small Woodscrew (25mm) x 4 Attach the Drawer Support to the bottom of the Large Drawer with 4 Small Woodscrews (25mm). Final Drawer Assembly. Fitting the Drawer Handles. Handle Handle x 2 Round Headed Bolt x 2...
- Page 11 Dresser Assembly 9. Fitting the Drawers. Fit the Drawers by locating the plastic wheels on the drawer runners to the metal channels just behind the plastic wheels on the dresser. Note that when inserting the Small drawers there is a larger lip on the side that needs to be on the outside of the dresser.
-
Page 12: Care And Maintenance
Any additional or replacement parts can only be obtained from the manufacturer or the distributor. Complies with BSEN 12221:2008 +A1:2013 Customer Care Hotline For this Product 01692 408802 East Coast Nursery Ltd. Robertson House, North Walsham, Norfolk, NR28 0BX 2990/5...