
Summary of Contents for R&D Automation CFFA3000
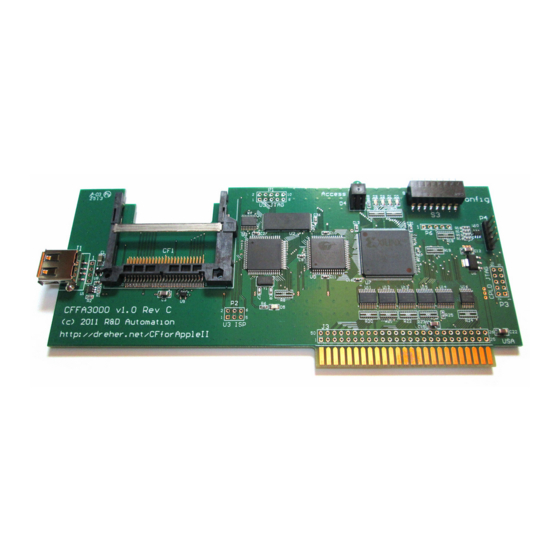
- Page 1 CFFA3000 Compact Flash and USB Flash Interface for Apple II Reference Manual Manual v1.3 for CFFA3000 v1.0 revC © January 2015 R&D Automation, LLC.
-
Page 2: Table Of Contents
Warnings ............................4 Introduction to the CFFA3000 ......................5 Quick Start Instructions ........................6 Keyboarding in the CFFA3000 Menus ....................9 Disk Image Formats Supported ......................11 Storage Devices ..........................12 Restoring an MBR to Media using Windows 7 or later ..............12 Partitioning Media .........................13... -
Page 3: Disclaimer
Disclaimer Plain English Version: Do not use this manual or the CFFA3000 Interface board for any mission-critical applications, or for any purpose in which a bug or failure could cause you a financial or material loss. This product was designed to enhance your Apple II computing experience, but may contain design flaws that could inhibit its proper operation, or result in a loss of the data recorded on the storage devices attached to it. -
Page 4: Warnings
You should avoid electrostatic discharge to the CFFA3000 Interface board. Like all electronics devices, static ―shock‖ can destroy or shorten the life span of the CFFA3000 Interface board. Avoid touching the CFFA3000 Interface board after you have walked across the room, especially over carpet, and especially in dry weather. -
Page 5: Introduction To The Cffa3000
Making backup copies of disks: You can use your normal Disk II card in slot 6, and configure the CFFA3000 to act as a second Disk II controller in slot 7. You can then use any Disk II copying software to copy from slot 6 to slot 7. The resulting disk image files on the CFFA3000 will be backups of the physical disks. -
Page 6: Quick Start Instructions
CFFA3000. One slot for the CFFA3000 itself, and one empty slot for the Disk II emulated hardware. Note: If you are using an Apple IIGS, ensure that the slots the CFFA3000 uses are set to “Your Card” in the IIGS control panel. - Page 7 Figure 1: Selecting "Disk II Assignments" from the menu. b. When assigning Disk II images, pressing the ‗1‘ key will assign the highlighted image to drive 1. Pressing the ‗2‘ key will assign the highlighted image to drive 2: Figure 2: Pressing "1" to assign a disk image to Disk II drive 1. Notes: ...
- Page 8 The greater-than sign (―>‖) indicates the currently mounted disk in the drive in the right-hand column. You can select multiple disks for the drive, and rotate through them with the optional remote pushbutton attachment. The current disk mounted in the Disk II drive (as noted with the greater-than sign (―>‖) may also be selected by highlighting the desired image in the right-hand column and pressing the Return key.
-
Page 9: Keyboarding In The Cffa3000 Menus
1. Press the ‗M‘ key immediately after turning on your Apple II. Note: You can only access the CFFA3000 menu if you are booting either its physical slot or its virtual Disk II slot. The CFFA defaults its virtual Disk II slot to OFF. - Page 10 Use the Delete key, the minus (-) key, or Ctrl-D to remove a disk image from the mounted list on the right-hand of the disk assignment screens. Use Ctrl-B to boot the Apple II when in any of the drive assignmnet menus. This is useful for Apple II and Apple II+ computers that lack the Ctrl-OpenApple-Reset key sequence.
-
Page 11: Disk Image Formats Supported
Disk Image Formats Supported The CFFA3000 recognizes the following types of disk images: .DSK, .DO, .PO 140K images (35 tracks x 4,096 bytes per track), can be used either as Disk II or Block devices. .PO is assumed to be in ProDOS sector order, .DO is assumed to be in DOS sector order, and .DSK sector ordering is auto-detected. -
Page 12: Storage Devices
When formatting a Compact Flash or USB device, ensure that you format it with FAT16 or FAT32 and with a Master Boot Record (MBR) Note: Media formatted FAT12 or NTFS will not work with the CFFA3000. Memory storage devices generally come this way when new. The Mac Disk Utility may not put a MBR on your device by default if you format it yourself;... -
Page 13: Partitioning Media
Master Boot Record (MBR) at all. You can use tools like Disk Utility (Mac) or the CFFA3000 firmware to do that. See Figure 6 for an example. -
Page 14: Usb Memory
"offline" from the perspective of ProDOS. Disk II Emulation The Disk ][ emulation built into the CFFA3000 is compatible with DOS 3.3 and many other Apple II operating systems. The emulation happens at the "nibble" level, even if the disk image is not stored as nibbles. - Page 15 Seeking to half-track or quarter-track positions. The Disk II emulation keeps one track at a time in RAM on the CFFA3000 card. When seeking to another track, it writes the old track to the disk image if there have been any changes, and then it reads the new track.
-
Page 16: Importing Disk Images
Figure 7: Importing Disk Images from Main Menu In the next panel, any slot and drive that is recognized by the CFFA3000 as a viable import candidate may be selected for importing. The left and right arrow keys will scroll through the... - Page 17 Figure 9: Modifying the imported file name As the disk images are produced, they will be added to the root folder of the specified memory device. When importing multiple images, the numeric suffix will be incremented as each disk is imported.
- Page 18 Figure 11: Opportunity to import again with the same parameters...
-
Page 19: Notes To Specific Apple Computer Models
CFFA3000 DIP switch 7 should be set to ON/DOWN for operation in an Apple II In order to have the CFFA3000 act as a virtual Disk II, be sure to set the Disk II slot to ―Your card‖ in the II control panel. - Page 20 The Apple /// can use the CFFA3000 either from within the emulated Apple ][, or as a native SOS device. Under Apple ][ emulation, the /// can boot from a virtual floppy disk image on either the attached Compact Flash card or USB drive, provided it‘s formatted with a Master Boot Record and FAT16 or FAT32.
-
Page 21: Cffa3000 Hardware
CFFA3000 and the remote must be oriented so that pin1 on the remote is connected to pin 1 on the CFFA3000 card. On the remote, pin 1 is the leftmost pin on the board, as viewed in Figure 12. - Page 22 The remote‘s ribbon cable should be oriented as shown in figures 13 and 14 below. Figure 13: CFFA3000 P4 connector to remote, top view Figure 14: CFFA3000 P4 connector to remote, side view...
-
Page 23: Dip Switches - All Off (Up) By Default
DIP Switches – All OFF (UP) by default Switch 1 ON (DOWN) = On an Apple II/II+, use lowercase letters in CFFA3000 menus. Turn this switch on only if your II/II+ has a lowercase chip installed. Switch 2 ON (DOWN) = Disable the use of MouseText characters in CFFA3000 menus even on machines where they are available. - Page 24 Remote Pushbutton LEDs The left button and LEDs apply to Disk II drive 1, and the right button and LEDs apply to Disk II drive 2. Press a button once to advance to the next disk in the list. Press and hold a button to have it blink a number of times corresponding to the index number of the disk in the drive.
- Page 25 (2, 9) = failed to read from CFFA.bin file (2, 10) = no main AVR firmware is present: must install a CFFA.bin The (3, x) blink codes come from the main firmware, when it tries to program the CPLD from a CFFA.xsv file on the CF card.
-
Page 26: Upgrading The Firmware
2. Put CFFA.bin onto the CF card, and insert the CF card into the CFFA3000. 3. The CFFA3000 automatically asks if you would like to install the update, if the version of CFFA.bin is different than the currently running version. Press Y for Yes to update. -
Page 27: Appendix A: Native Sos Apple /// Driver
SOS just as they were before. Firmware Configuration When a CFFA3000 card is running in an Apple ][, it is simple to call upon the firmware to manage disk images. However, the user interface - the configuration system - can‘t run natively on an Apple ///. -
Page 28: Hot-Plugging Memory Devices
Once a memory device has disk images configured on it, they can be left alone and used in the CFFA3000 in the Apple /// without further intervention from the menus. Memory devices can also be swapped, and as long as they have SmartPort configuration information saved on them (the CFFA.CFG file written by the firmware menus) they will be recognized and used by SOS. -
Page 29: Appendix B: Copyright Notices
Appendix B: Copyright Notices Copyright © 2009-2013 R&D Automation, LLC. The CFFA3000 USB support uses components from the LUFA Library: Copyright © 2011 Dean Camera (dean [at] fourwalledcubicle [dot] com) http://www.fourwalledcubicle.com Permission to use, copy, modify, and distribute this software and... -
Page 30: Appendix C: Warranty And Return Information
I guarantee your CFFA3000 Interface board to be free of defects under normal usage for a period of one year from the date you receive the product. This means that if the board fails, and you have treated it properly, I will repair, replace, or refund your money at my discretion, to be determined by me on a case-by- case basis. -
Page 31: Appendix D: Acknowledgements
Appendix D: Acknowledgements I would like to extend my gratitude to the following people who helped make the CFFA3000 project a reality: Dave Lyons David Schmidt Sherry Dreher Tim Hurd Mike Jarvis Vince Briel 2011 Kfest attendees...