Panasonic KX-HNC600 Installation Manual
Home network system
Hide thumbs
Also See for KX-HNC600:
- Installation manual (32 pages) ,
- User manual (120 pages) ,
- Quick setup (2 pages)
Table of Contents
Advertisement
Available languages
Available languages
Quick Links
Thank you for purchasing a Panasonic product.
This document explains how to install the outdoor camera properly.
For details about how to use the system, refer to the User's Guide (page 26).
Please read this document before using the unit and save it for future reference.
For assistance, please contact us at 1-800-272-7033 or visit our Web site:
http://shop.panasonic.com/support for customers in the U.S.A.
Please register your product: http://shop.panasonic.com/support
Printed in China
HNC600_(en_en)_0123_ver.201.pdf
Installation Guide
Model No.
1
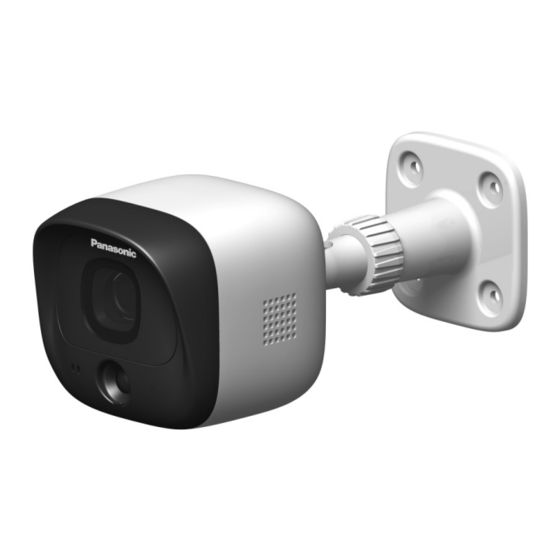
Home Network System
Outdoor Camera
KX-HNC600
2017/01/26
9:24:39
Advertisement
Chapters
Table of Contents

Related Manuals for Panasonic KX-HNC600


Summary of Contents for Panasonic KX-HNC600
- Page 1 Outdoor Camera KX-HNC600 Model No. Thank you for purchasing a Panasonic product. This document explains how to install the outdoor camera properly. For details about how to use the system, refer to the User’s Guide (page 26). Please read this document before using the unit and save it for future reference.
-
Page 2: Table Of Contents
Table of Contents Introduction Accessory information ........3 Important Information About this system .........5 For your safety ..........5 Important safety instructions ......6 For best performance ........6 Privacy and rights of portrait ......7 Other information .........7 Installation Location Wireless communication range ....8 Information about sensor features ....8 Information about night vision mode ..10 Installation location examples ....11... -
Page 3: Accessory Information
10 mm (3/8 inches)/XTB26+10GVW Large screw for attaching safety wire to wall 25 mm (1 inch)/XTB4+25AVW Sensor range cap/PNHG1210Z Additional accessories Please contact your nearest Panasonic dealer for sales information. Accessory item Order number PNJA1159Z DC extension cord Designed for indoor use only. Do not use outdoors. - Page 4 R All other trademarks identified herein are the property of their respective owners. Notice R The hub supports microSD and microSDHC memory cards. In this document, the term “microSD card” is used as a generic term for any of the supported cards. For assistance, please visit http://shop.panasonic.com/support HNC600_(en_en)_0123_ver.201.pdf 2017/01/26 9:24:42...
-
Page 5: Important Information
R Do not connect non-specified devices. designed to provide complete protection R When opening holes in walls for installation from property loss. Panasonic will not be or wiring, or when securing the power cord, held responsible in the event that property make sure you do not damage existing loss occurs while this system is in operation. -
Page 6: Important Safety Instructions
For best performance equipment that could be sensitive to external RF energy. Hub location/avoiding noise The hub and other compatible Panasonic CAUTION devices use radio waves to communicate with each other. Installation and location... -
Page 7: Privacy And Rights Of Portrait
R Wipe the outer surface of the product with a soft moist cloth. R Do not use benzine, thinner, or any abrasive powder. R Do not apply running water to the product. For assistance, please visit http://shop.panasonic.com/support HNC600_(en_en)_0123_ver.201.pdf 2017/01/26 9:24:42... -
Page 8: Installation Location
R The camera’s sensor features are not designed to be used in situations that require high reliability. We do not recommend use of the sensor features in these situations. R Panasonic takes no responsibility for any injury or damage caused by the use of the camera’s sensor features. - Page 9 R If the camera is mounted facing a road, the sensor may detect incorrectly due to interference caused by the heat from passing cars. For assistance, please visit http://shop.panasonic.com/support HNC600_(en_en)_0123_ver.201.pdf 2017/01/26 9:24:42...
-
Page 10: Information About Night Vision Mode
R If the camera is installed in front of a window and points directly at the window, images may be poor when night vision mode is active. For assistance, please visit http://shop.panasonic.com/support HNC600_(en_en)_0123_ver.201.pdf 2017/01/26... -
Page 11: Installation Location Examples
Cars in the street are more likely to cause Approx. 3 m (9.8 feet) false detections. Visitors pass in front of the camera from side to side, cars in the street are less likely to cause false detections. For assistance, please visit http://shop.panasonic.com/support HNC600_(en_en)_0123_ver.201.pdf 2017/01/26 9:24:42... - Page 12 R To prevent faces from being obscured by tall vehicles, adjust the installation position and angle of the camera. For assistance, please visit http://shop.panasonic.com/support HNC600_(en_en)_0123_ver.201.pdf 2017/01/26 9:24:43...
-
Page 13: Do Not Install In These Locations
R Areas where hydrogen sulfide, ammonia, dust, or toxic gases are present R On roads with high traffic (passing cars may cause sensor detections even if they are 5 m (16.4 feet) or more away) For assistance, please visit http://shop.panasonic.com/support HNC600_(en_en)_0123_ver.201.pdf 2017/01/26 9:24:43... - Page 14 – Areas where most of the background is the sky – Areas where direct sunlight reflects off a white wall or background – Bright areas such as those exposed to direct sunlight For assistance, please visit http://shop.panasonic.com/support HNC600_(en_en)_0123_ver.201.pdf 2017/01/26 9:24:43...
-
Page 15: Setup
Confirm the sensor range area and adjust Indicator Status it if necessary using the included sensor range adjustment caps. No power, or LED indicator is turned Green, lit Normal operation Green, blinking Registration mode slowly Motion detected For assistance, please visit http://shop.panasonic.com/support HNC600_(en_en)_0123_ver.201.pdf 2017/01/26 9:24:43... -
Page 16: Registering The Camera
Note: R To cancel without registering the camera, press M N on the hub and on the camera again. R If registration fails, the hub sounds several short beeps. For assistance, please visit http://shop.panasonic.com/support HNC600_(en_en)_0123_ver.201.pdf 2017/01/26 9:24:43... -
Page 17: Installation
R Holes must be made in the wall for cables 294 N (30 kgf). and wires to pass through. Panasonic takes R If the weight of the camera is supported by no responsibility for issues related to the siding only, the siding could become opening holes in walls. - Page 18 R Do not install on gypsum board or concrete blocks. Remove debris. Insert an anchor, tighten the screw, then remove the screw to secure the anchor. For assistance, please visit http://shop.panasonic.com/support HNC600_(en_en)_0123_ver.201.pdf 2017/01/26 9:24:43...
- Page 19 37 mm (1 15/32 inches) Attach the camera mounting stand to an outdoor wall. R Secure the stand to the wall by tightening 4 screws (A). 37 mm (1 15/32 inches) For assistance, please visit http://shop.panasonic.com/support HNC600_(en_en)_0123_ver.201.pdf 2017/01/26 9:24:43...
- Page 20 (B) on the rear or bottom side. R Secure the camera by tightening the screw ( Attaching to the hole on the rear side Attaching to the hole on the bottom side For assistance, please visit http://shop.panasonic.com/support HNC600_(en_en)_0123_ver.201.pdf 2017/01/26 9:24:43...
- Page 21 Outdoors Indoors Note: R Use only the supplied Panasonic AC Note: adaptor PNLV236. R Attach the safety wire while it is bent. R Be sure to connect the DC cable plug R Attach the safety wire high on the wall and AC adaptor plug indoors.
-
Page 22: Appendix
See “Adjusting the infrared sensor range”, page 22. Testing the microphone To test the microphone, speak loudly and clearly into the microphone while a mobile device user is viewing live images from the camera. For assistance, please visit http://shop.panasonic.com/support HNC600_(en_en)_0123_ver.201.pdf 2017/01/26 9:24:43... - Page 23 Cap 4 5 m (16.4 feet) 6 m (19.7 feet) 4 m (13.1 feet) Varies by ambient temperature at the camera installation location. Numeric values are approximate. Detectable area is indicated by For assistance, please visit http://shop.panasonic.com/support HNC600_(en_en)_0123_ver.201.pdf 2017/01/26 9:24:43...
- Page 24 (cars in a street, etc.): Attach one of caps 1-3 as shown in the example ( ) according to the area you do not want to be detected. Example 1 Example 2 For assistance, please visit http://shop.panasonic.com/support HNC600_(en_en)_0123_ver.201.pdf 2017/01/26 9:24:43...
- Page 25 ) on the cap toward the top or at a 45-degree angle according to the type of cap or direction, and attach the cap on the camera, shown in the following illustration. For assistance, please visit http://shop.panasonic.com/support HNC600_(en_en)_0123_ver.201.pdf 2017/01/26 9:24:43...
-
Page 26: Features Available When Using The [Home Network] App
– Notification You can configure the camera to send a notification to the [Home Network] app when the camera detects motion. For assistance, please visit http://shop.panasonic.com/support HNC600_(en_en)_0123_ver.201.pdf 2017/01/26 9:24:43... -
Page 27: Specifications
R Visual sensor detection range Horizontal: approx. 70° Vertical: approx. 50° R IP rating IP55 R Adjustable mounting angles Horizontal: ±90° Vertical: facing forward - facing down approx. 60° (adjustable when mounting) For assistance, please visit http://shop.panasonic.com/support HNC600_(en_en)_0123_ver.201.pdf 2017/01/26 9:24:43... -
Page 28: Fcc And Other Information
TV technician for help. Some devices operate at frequencies that may cause interference to nearby TVs and VCRs. To minimize or prevent such interference, this device should not be placed near or on top of For assistance, please visit http://shop.panasonic.com/support HNC600_(en_en)_0123_ver.201.pdf 2017/01/26 9:24:43... -
Page 29: Customer Services
Appendix Customer services Shop Accessories! for all your Panasonic gear Go to http://shop.panasonic.com/support Get everything you need to get the most out of your Panasonic products Accessories & Parts for your Camera, Phone, A/V products, TV, Computers & Networking, Personal Care, Home Appliances, Headphones, Ba eries, Backup Chargers &... -
Page 30: Limited Warranty (Only For U.s.a.)
If your product does not work properly because of a defect in materials or workmanship, Panasonic Corporation of North America (referred to as “the warrantor”) will, for the length of the period indicated on the chart below, which starts with the date of original purchase (“warranty period”), at its option either (a) repair your product with new or refurbished parts,... - Page 31 Service Center. If the problem is not handled to your satisfaction, then write to: Consumer Affairs Department Panasonic Corporation of North America 661 Independence Pkwy Chesapeake, VA 23320 PARTS AND SERVICE, WHICH ARE NOT COVERED BY THIS LIMITED WARRANTY, ARE YOUR RESPONSIBILITY.
- Page 32 Reconnect the AC adaptor to the camera. Use the Home Network app to access the User’s Guide and refer to the Troubleshooting section. Visit our Web site: http://shop.panasonic.com/support • FAQ and troubleshooting hints are available. For your future reference We recommend keeping a record of the following information to assist with any repair under warranty.
- Page 33 Lea este documento antes de usar la unidad, y guárdelo para consultarlo en el futuro. Para obtener ayuda, comuníquese con nosotros llamando al 1-800-272-7033 o visite nuestro sitio web: http://shop.panasonic.com/support para clientes en los EE. UU. (solo en inglés) Por favor, registre su producto: http://shop.panasonic.com/support PNQX6697XA CC0814WK2126 (E) HNC600_(es_es)_0130_ver.201.pdf...
- Page 34 Tabla de Contenido Ubicación de la instalación Alcance de la comunicación inalámbrica .....3 Información acerca de las características del sensor ..............3 Información acerca del modo de visión nocturna ...............5 Ejemplos de ubicaciones para instalación ...6 No instale en las ubicaciones siguientes .....8 Configuración Nombres de los componentes y funciones ..10 Led indicador ............10...
-
Page 35: Ubicación De La Instalación
No recomendamos el uso de las características del sensor en esas situaciones. R Panasonic no asume ninguna responsabilidad por lesiones o daños provocados por el uso de las características del sensor de la cámara. Método de detección... - Page 36 R Si la cámara está montada cara a una carrete- encienden las luces exteriores. ra, es posible que el sensor no detecte de forma correcta debido a la interferencia generada por el calor de los vehículos que pasan. Para obtener ayuda, visite http://shop.panasonic.com/support HNC600_(es_es)_0130_ver.201.pdf 2017/01/30 14:28:03...
-
Page 37: Información Acerca Del Modo De Visión Nocturna
R Si la cámara está instalada frente a una ventana y apunta directamente a la ventana, es posible que la calidad de las imágenes sea baja cuando el modo de visión nocturna esté activo. Para obtener ayuda, visite http://shop.panasonic.com/support HNC600_(es_es)_0130_ver.201.pdf... -
Page 38: Ejemplos De Ubicaciones Para Instalación
Aprox. 3 m (9.8 pies) neren detecciones falsas. Los visitantes pasan en frente de la cámara de la- do a lado, y es poco probable que los vehículos en la calle generen detecciones falsas. Para obtener ayuda, visite http://shop.panasonic.com/support HNC600_(es_es)_0130_ver.201.pdf 2017/01/30 14:28:04... - Page 39 R Para evitar que los vehículos altos oscurezcan los rostros, ajuste la posición de instalación y el ángulo de la cámara. Para obtener ayuda, visite http://shop.panasonic.com/support HNC600_(es_es)_0130_ver.201.pdf 2017/01/30 14:28:04...
-
Page 40: No Instale En Las Ubicaciones Siguientes
R Áreas donde haya ácido sulfhídrico, amoníaco, R En carreteras con mucho tránsito (es posible polvo o gases tóxicos que los vehículos generen detecciones del sensor incluso si están a 5 m (16.4 pies) o más de distancia) Para obtener ayuda, visite http://shop.panasonic.com/support HNC600_(es_es)_0130_ver.201.pdf 2017/01/30 14:28:04... - Page 41 – Áreas donde la mayor parte del fondo es el cielo – Áreas donde la luz del sol se refleje en una pared blanca o fondo – Áreas brillantes como aquellas expuestas a la luz del sol Para obtener ayuda, visite http://shop.panasonic.com/support HNC600_(es_es)_0130_ver.201.pdf 2017/01/30 14:28:04...
-
Page 42: Configuración
Sin energía, o el Led in- ajuste, si es necesario, con las tapas de ajuste dicador está apagado de alcance del sensor incluidas. Verde, encendido Funcionamiento nor- Verde, parpadeando Modo de registro lentamente Rojo Se detectó movimiento Para obtener ayuda, visite http://shop.panasonic.com/support HNC600_(es_es)_0130_ver.201.pdf 2017/01/30 14:28:04... -
Page 43: Cómo Registrar La Cámara
Nota: R Para cancelar sin registrar la cámara, oprima N en el hub y en la cámara de nuevo. R Si el registro falla, el hub emitirá varios pitidos cortos. Para obtener ayuda, visite http://shop.panasonic.com/support HNC600_(es_es)_0130_ver.201.pdf 2017/01/30 14:28:04... -
Page 44: Instalación
(ø5/32 pulgadas ´ 1 pulgada). Asegúrese de R Se deben hacer orificios en la pared para que que la fuerza nominal de cada tornillo sea como pasen los cables. Panasonic no asume ninguna mínimo de 294 N (30 kgf). responsabilidad ante problemas relacionados R El revestimiento podría dañarse, si el peso de la... - Page 45 R No instale sobre tablas de yeso o bloques de concreto. Retire los restos. Introduzca un taquete, apretando el tornillo, después quite el tornillo para asegurar el taquete. Para obtener ayuda, visite http://shop.panasonic.com/support HNC600_(es_es)_0130_ver.201.pdf 2017/01/30 14:28:04...
- Page 46 R Inserte la punta del soporte (A) en el orificio de colocación del soporte (B) en el lado inferior o posterior. R Asegure la cámara ajustando el tornillo Colocación en el orificio en la parte trasera Para obtener ayuda, visite http://shop.panasonic.com/support HNC600_(es_es)_0130_ver.201.pdf 2017/01/30 14:28:04...
- Page 47 R Coloque el cable de seguridad bien alto para que la cámara no golpee a nadie en caso de que la cámara se desprenda de la pared. R No se cuelgue de la cámara o del soporte. Para obtener ayuda, visite http://shop.panasonic.com/support HNC600_(es_es)_0130_ver.201.pdf 2017/01/30 14:28:04...
- Page 48 Exterior Interior Nota: R Use solo el adaptador de corriente alterna Panasonic PNLV236 que se suministra. R Asegúrese de conectar el enchufe del cable de CC y el enchufe del adaptador de corriente interiores. Nota acerca de las conexiones de alimentación...
-
Page 49: Apéndice
17. Cómo probar el micrófono Para probar el micrófono, hable fuerte y claro en el micrófono mientras un usuario de dispositivo móvil observa las imágenes en vivo desde la cámara. Para obtener ayuda, visite http://shop.panasonic.com/support HNC600_(es_es)_0130_ver.201.pdf 2017/01/30 14:28:04... - Page 50 4 m (13.1 pies) Varía en función de la temperatura ambiente en la ubicación de la instalación de la cámara. Los valores numéricos son aproximaciones. El área de detección se indica con Para obtener ayuda, visite http://shop.panasonic.com/support HNC600_(es_es)_0130_ver.201.pdf 2017/01/30 14:28:04...
- Page 51 (vehículos en la calle, etc.): Coloque una de las tapas 1-3 como se muestra en el ejemplo ( ) de acuerdo con el área que no desea que se detecte. Ejemplo 1 Ejemplo 2 Para obtener ayuda, visite http://shop.panasonic.com/support HNC600_(es_es)_0130_ver.201.pdf 2017/01/30 14:28:04...
- Page 52 ) en la tapa hacia arriba o a un ángulo de 45-grados de acuerdo con el tipo de tapa o dirección y coloque la tapa de la cámara, como se muestra en la siguiente ilustración. Para obtener ayuda, visite http://shop.panasonic.com/support HNC600_(es_es)_0130_ver.201.pdf 2017/01/30...
-
Page 53: Acceso A La Guía Del Usuario
® Internet Explorer ® 8 y versiones anteriores. R Se recomienda Android 4.1 y versiones posteriores. R También puede acceder a la Guía del usuario mediante la página web a continuación. www.panasonic.net/pcc/support/tel/homenetwork/manual/ Para obtener ayuda, visite http://shop.panasonic.com/support HNC600_(es_es)_0130_ver.201.pdf 2017/01/30 14:28:04... - Page 54 Notas HNC600_(es_es)_0130_ver.201.pdf 2017/01/30 14:28:04...
- Page 55 Notas HNC600_(es_es)_0130_ver.201.pdf 2017/01/30 14:28:04...
- Page 56 Notas HNC600_(es_es)_0130_ver.201.pdf 2017/01/30 14:28:04...