Table of Contents
Advertisement
Quick Links
We advise you to read this manual carefully, which contains all the instructions for
maintaining the appliance's aesthetic and functional qualities.
For further information on the product: www.smeg.com
Contents
32
32
33
33
33
34
34
34
35
35
35
36
37
38
38
38
39
39
42
43
48
48
48
48
49
51
52
54
54
54
55
31
Advertisement
Table of Contents

Related Manuals for Smeg SF170X


Summary of Contents for Smeg SF170X
-
Page 1: Table Of Contents
4.6 Extraordinary maintenance 5 Installation 5.1 Electrical connection 5.2 Cable replacement 5.3 Positioning We advise you to read this manual carefully, which contains all the instructions for maintaining the appliance’s aesthetic and functional qualities. For further information on the product: www.smeg.com... -
Page 2: Instructions
Instructions 1 Instructions • Do not insert pointed metal objects (cutlery or utensils) into the 1.1 General safety instructions slots in the appliance. • Do not try to repair the appliance Risk of personal injury yourself or without the intervention •... -
Page 3: Manufacturer Liability
Instructions 1.4 Disposal For this appliance This appliance must be disposed of • Ensure that the appliance is switched off separately from other waste before replacing the bulb. (Directives 2002/95/EC, 2002/ • Do not rest any weight or sit on the open 96/EC, 2003/108/EC). -
Page 4: Identification Plate
Instructions Our appliances are packed in non- 1.7 How to read the user manual polluting and recyclable materials. This user manual uses the following reading • Deliver the packing materials to the conventions: appropriate recycling centre. Instructions Plastic packaging General information on this user Danger of suffocation manual, on safety and final disposal. -
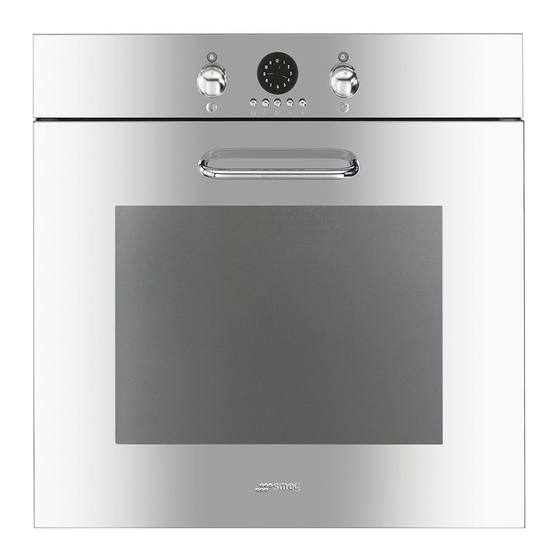
Page 5: Description
Description 2 Description 2.1 General Description 4 Door 1 Control panel 5 Fan 2 Oven light 6 Rack/tray support frames 3 Seal Frame shelf 2.2 Control panel 1 Temperature knob 2 Programming clock This knob allows you to select the cooking Useful for displaying the current time, setting temperature. -
Page 6: Other Parts
Description 3 Function knob Cooling fan The oven’s various functions are suitable for different cooking modes. After selecting the required function, set the cooking temperature using the temperature knob. 2.3 Other parts Shelves The appliance features shelves to position trays and racks at different heights. The The fan cools the appliance and comes into insertion heights are indicated from the operation during cooking. -
Page 7: Available Accessories
Description 2.4 Available accessories Oven tray Some models are not provided with all accessories. Rack Useful for collecting fat from foods placed on the rack above. Deep tray Useful for supporting containers with food during cooking. Tray rack Useful for collecting fat from foods placed on the rack above and for cooking pies, pizzas and baked desserts. -
Page 8: Use
3 Use High temperature inside the oven during use 3.1 Instructions Danger of fire or explosion Improper use • Do not spray any spray products near Risk of damage to surfaces the appliance. • Do not use or leave flammable materials •... -
Page 9: Using The Accessories
3.3 Using the accessories Tray rack The tray rack has to be inserted into the tray. Racks and trays In this way fat can be collected separately Racks and trays have to be inserted into the from the food which is being cooked. side guides until they come to a complete stop. - Page 10 Functions list Turbo The combination of fan assisted Static cooking and traditional cooking As the heat comes from above and allows different foods to be cooked below at the same time, this system on several levels extremely quickly is particularly suitable for certain and efficiently, without odours and types of food.
- Page 11 Fan with circulaire Fan-assisted bottom The combination of the fan and the The combination of the fan with just circulaire heating element the lower heating element allows (incorporated in the rear of the cooking to be completed more oven) allows you to cook different rapidly.
-
Page 12: Cooking Advice
3.5 Cooking advice Advice for cooking desserts/pastries and biscuits General advice • Use dark metal moulds: They help to • Use a fan assisted function to achieve absorb the heat better. consistent cooking at several levels. • The temperature and the cooking time •... -
Page 13: Programming Clock
3.6 Programming clock To save energy • Stop cooking a few minutes before the time normally used. Cooking will continue for the remaining minutes with the heat which has accumulated inside the oven. • Reduce any opening of the door to a minimum to avoid heat dispersal. - Page 14 3. Once the required time is obtained, Timed cooking cooking will start about 5 seconds after Timed cooking is the function the last pressure on which allows a cooking operation 4. The display will show the current time, to be started and then ended after represented by the constantly illuminated a specific length of time set by the segments, and the minutes left to the end...
- Page 15 5. At the end of cooking, the timer will Programmed cooking switch the oven heating elements off, the Programmed cooking is the buzzer will start to sound and the function which allows a cooking numbers on the dial will flash. operation to be started at a set 6.
- Page 16 Display reduced brightness 3. Five seconds after last pressing the key the countdown begins, at the end of To reduce energy consumption in stand-by, which the buzzer activates. briefly press key to reduce the display 4. During the countdown, the current time brightness.
-
Page 17: Cooking Information Table
Cooking information table Runner Weight Temperature Food Function position from Time (minutes) (Kg) (°C) the bottom Lasagne 3 - 4 Static 220 - 230 45 - 50 Pasta bake 3 - 4 Static 220 - 230 45 - 50 Roast veal Fan assisted 180 - 190 90 - 100... -
Page 18: Cleaning And Maintenance
Cleaning and maintenance 4 Cleaning and maintenance In the event you are using specific 4.1 Instructions cleaning products, we recommend running the oven at maximum Improper use temperature for 15-20 minutes in Risk of damage to surfaces order to eliminate any residue. •... -
Page 19: Cleaning The Door Glazing
Cleaning and maintenance 3. To reassemble the door, put the hinges in the relevant slots in the oven, making sure that grooved sections A are resting completely in the slots. Lower the door and once it is in place remove the pins from the holes in the hinges. - Page 20 Cleaning and maintenance 6. Reposition the internal glass pane. Take Cleaning the top section care to centre and insert the 4 pins into The oven cavity is fitted with a tilting heating their housings in the oven door by element which facilitates cleaning the top applying slight pressure.
-
Page 21: Vapor Clean
Cleaning and maintenance 4.5 Vapor Clean Vapor Clean is an assisted cleaning procedure which facilitates the removal of dirt. Thanks to this process, it is possible to clean the inside of the oven very easily. The dirt residues are softened by the heat and water vapour for easier removal afterwards. -
Page 22: Extraordinary Maintenance
Cleaning and maintenance Vapor Clean cycle setting 4.6 Extraordinary maintenance 1. Turn the function knob and the Removing and replacing the oven seal temperature knob to the symbol To remove the oven seal: 2. Set a cooking time of 18 minutes using •... - Page 23 Cleaning and maintenance Replacing the internal light bulb 4. Slide out and remove the light bulb. Live parts Danger of electrocution • Unplug the appliance. 1. Completely remove all accessories from inside the oven. 2. Remove the rack/tray support frames. 3.
-
Page 24: Installation
Installation 5 Installation Fixed connection Fit the power line with an omnipolar circuit 5.1 Electrical connection breaker in compliance with installation regulations. Power voltage The circuit breaker should be located near Danger of electrocution the appliance and in an easily reachable position. -
Page 25: Positioning
Installation 5.3 Positioning Position of the power cable Heavy appliance Crushing hazard • Position the appliance into the cabinet cutout with the help of a second person. Pressure on the open door Risk of damage to the appliance • Never use the oven door to lever the appliance into place when fitting. - Page 26 Installation Fastening bushings Appliance overall dimensions (mm) 1. Remove the bushing covers inserted on the front of the appliance. 2. Mount the appliance into the recess. 3. Secure the appliance to the piece of furniture using screws. 4. Cover the bushings with the previously removed covers.
- Page 27 Installation Mounting under worktops (mm) Make sure that the piece of furniture rear/bottom part has an opening of approx. 60 mm.
- Page 28 Installation Mounting into a column (mm) Make sure that the piece of furniture top/rear part has an opening approx. 35-40 mm deep.