Table of Contents
Advertisement
Refrigerant; HFC-134a
Refer to "HFC-134a COOLING UNIT" Service Manual for handling this refrigerant.
CAUTION AND INFORMATION ...................................................................................................................... 2
Specifications ........................................................................................................................................... 3
Designation Of Various Parts ............................................................................................................. 4
List Of Electrical Parts ........................................................................................................................ 5
Wiring Diagram .......................................................................................................................................... 6
Functions .................................................................................................................................................... 8
Assembling Procedures Of Main Parts And Cautions ............................................................. 11
Modification Procedure Of The Door Open Side ....................................................................... 19
Cooling Unit ............................................................................................................................................. 22
Replacement Parts List ....................................................................................................................... 24
SERVICE MANUAL
REFRIGERATOR-FREEZER
MODELS
SJ-58L-A2G/A2B/A2L
SJ-63L-A2G/A2B/A2L
SJ-68L-A2G/A2B/A2L
SJ-68L-R2G
In the interests of user-safety (Required by safety regulations in some
countries) the set should be restored to its original condition and only
parts identical to those specified should be used.
TABLE OF CONTENTS
SHARP CORPORATION
1
S5004SE52ZPSF
DESTINATION ......................... F
SJ-58L-A2
SJ-63L-A2
SJ-68L-A2/R2
page
Advertisement
Table of Contents

Related Manuals for Sharp SJ-58L-A2G


Summary of Contents for Sharp SJ-58L-A2G
- Page 1 SJ-63L-A2 SJ-68L-A2/R2 SERVICE MANUAL S5004SE52ZPSF REFRIGERATOR-FREEZER MODELS SJ-58L-A2G/A2B/A2L SJ-63L-A2G/A2B/A2L SJ-68L-A2G/A2B/A2L SJ-68L-R2G In the interests of user-safety (Required by safety regulations in some countries) the set should be restored to its original condition and only parts identical to those specified should be used.
-
Page 2: Caution And Information
SJ-58L-A2 SJ-63L-A2 SJ-68L-A2/R2 CAUTIONS AND INFORMATIONS In case of following troubles, the cause is not related with the failure of refrigerator. Please mention the correct way to the customer for the use of refrigerator when the repairing. 1. Some foods freezed in the refrigerator compartment. Do not place food directly in front of cold air outlet. -
Page 3: Specifications
SJ-58L-A2 SJ-63L-A2 SJ-68L-A2/R2 SPECIFICATIONS Items SJ-58L-A2 SJ-63L-A2 SJ-68L-A2/R2 Type 2-Door 2-Door 2-Door Outer dimensions Height 1620mm(63.8") 1720mm(67.7") 1820mm(71.6") (Including spacer) Width 760mm(29.9") 760mm(29.9") 760mm(29.9") Depth 740mm(29.1") 740mm(29.1") 740mm(29.1") Rated storage volume 492 liter (17.4 cu.ft) 535 liter (18.9 cu.ft) 577 liter (20.4 cu.ft) F: 151 liter (5.3 cu.ft) F: 151 liter (5.3 cu.ft) F: 151 liter (5.3 cu.ft) R: 341 liter(12.1 cu.ft) R: 384 liter(13.6 cu.ft) R: 426 liter(15.1 cu.ft) Defrosting... -
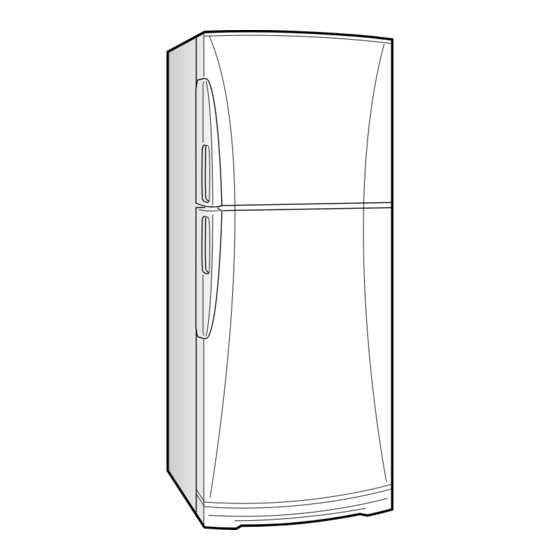
Page 4: Designation Of Various Parts
SJ-58L-A2 SJ-63L-A2 SJ-68L-A2/R2 DESIGNATION OF VARIOUS PARTS The names are the denominations used in the REPLACEMENT PARTS LIST. 1. Freezer Lamp 2. Freezer fan 3. F shelf ass'y 4. Ice cube maker 5. Ice storage box 6. Freezer temp. control box 7. -
Page 5: List Of Electrical Parts
SJ-58L-A2 SJ-63L-A2 SJ-68L-A2/R2 LIST OF ELECTRICAL PARTS ITEMS TYPE NAME RATING SPECIFICATIONS Thermostat MM1-8123 125V 6A (At normal notch) 250V 3A ON/OFF : -19/-24˚C Defrost thermostat US-602S 250V 8A Open/Close : 10/1˚C Thermo. fuse SF70E 250V 10A Working temp. : 70˚C F-fan motor 3R00044A 100V 50/60Hz... -
Page 6: Wiring Diagram
SJ-58L-A2 SJ-63L-A2 SJ-68L-A2/R2 WIRING DIAGRAM Be sure to replace the electrical parts with specified ones for maintaining the safety and performance of the set. : GRAY : BROWN : ORANGE : YELLOW : RED CONNECTED IN TERMINAL BOX : PINK : BLUE CONNECTOR : BLACK... - Page 7 SJ-58L-A2 SJ-63L-A2 SJ-68L-A2/R2 CABINET ASS’Y F LAMP BOX ASS’Y LAMP SOCKET BR-1 F-LAMP(10W) E. V. COVER ASS’Y LEAD EV-COVER ASS’Y GY-1 F-FAN MOTOR OR-1 BR-2 F-THERMOSTAT DEF. THERMO. ASS’Y BL-1 BK-1 FUSE ASS’Y OR-3 (W-1) DEF. HEATER ASS’Y DOOR SWITCH (OR-1) 3 (PUSH CLOSE) BL-2...
-
Page 8: Functions
SJ-58L-A2 SJ-63L-A2 SJ-68L-A2/R2 FUNCTIONS 1. ADJUSTABLE TEMPERATURE CONTROL (1) Temperature control of freezer Thermostat (senses freezer temperature) operates on ON/OFF switchover to control the compressor and cool air circulating fan (F-fan motor) , and allows the freezer temperature to keep at a suitable temperature. However adjust the freezer temp. - Page 9 SJ-58L-A2 SJ-63L-A2 SJ-68L-A2/R2 2. DEFROSTING (1) No defrosting operation is necessary (2) Where is melted frost brought No defrosting operation is necessary. 1. Melted frost is brought into the evaporating As this machine is so designed that a built-in pan at the bottom of the set and is evaporated evaporator cools air and a fan circulates cooled here by the heat of sub condenser.
- Page 10 SJ-58L-A2 SJ-63L-A2 SJ-68L-A2/R2 (4) As a reference to determine the causes of trouble, malfunction and phenomena are described below. Refer to the following when repairing. 1. Disconnection of defrost heater As off-cycle defrosting is performed, the defrosting time is extremely prolonged. Each time defrosting is started, the freezer temperature rises and a portion of ice and stored foods are melted.
-
Page 11: Assembling Procedures Of Main Parts And Cautions
SJ-58L-A2 SJ-63L-A2 SJ-68L-A2/R2 ASSEMBLING PROCEDURES OF MAIN PARTS AND CAUTIONS CAUTION: DISCONNECT THE UNIT FROM THE POWER SUPPLY BEFORE ANY REPAIRING. 1. R-CONTROL COV. ASSEMBLY Damper thermo. RA sealer A R air guider A Defrost timer RA sealer D RA sealer C R fan thermo. - Page 12 SJ-58L-A2 SJ-63L-A2 SJ-68L-A2/R2 (2) Sticking of sealers to R air guider A. [Front side] [Back side] OVERLAP 15mm RA sealer A OVERLAP 15mm Dial sealer RA sealer D A sealer RA sealer A RA sealer B RA sealer C RA sealer A RA sealer A thermo.
- Page 13 SJ-58L-A2 SJ-63L-A2 SJ-68L-A2/R2 2. R LAMP BOX ASSEMBLY R fan motor holder B R-fan motor Propeller fan 80 R fan motor holder A Lamp socket (with lead wires for R-fan motor) Fan clamp Lamp 15W Warning label R lamp box Figure A-5 (1) Fixing of Lamp and Lamp socket.
- Page 14 SJ-58L-A2 SJ-63L-A2 SJ-68L-A2/R2 (2) Fixing of R-fan motor and Fan R fan motor holder B (2)-1 Set R-fan motor holder A to R lamp box by R fan motor holder A tapping screw. Propeller fan 80 R-fan motor (2)-2 Set R-fan motor to R fan motor holder A by machine screw.
- Page 15 SJ-58L-A2 SJ-63L-A2 SJ-68L-A2/R2 3. E.V COVER ASSEMBLY Motor Fan motor U-sealer cushion handle Propeller Fan 100 Fan motor E.V cover sealer A holder B Fan clamp Defrost thermo. ass’y L-band C E.V cover Lead E.V-cover Fan motor ass’y holder A E.V cover sealer B E.V cover sealer C Fuse ass’y...
- Page 16 SJ-58L-A2 SJ-63L-A2 SJ-68L-A2/R2 (2) Fixing of Fan motor and Fan (2)-1 Stick U-sealer handle to Fan motor holder A. Fan motor holder A 0 1mm U-sealer handle U-sealer handle SEC. C-C Figure A-13 (2)-2 Insert the terminals of Lead EV-cover ass'y to R-fan motor.
- Page 17 SJ-58L-A2 SJ-63L-A2 SJ-68L-A2/R2 (3) Setting of Fan motor ass'y , Defrost thermo. ass'y and Fuse ass'y Tapping screw E.V cover E.V cover sealer C L-band C Lead E.V- Defrost cover ass’y thermo. ass’y Tapping more than more than Alminum screw 3.5mm 3.5mm tape...
- Page 18 SJ-58L-A2 SJ-63L-A2 SJ-68L-A2/R2 (5) Setting of F-thermostat (5)-1 Form capillary tube of F-thermostat. R10mm R10mm Note • Bending radius of capillary tube should be R5mm to R10mm. 13mm 42mm 20mm Figure A-19 (5)-2 Insert terminal of Lead EV-cover ass'y. (front side) BROWN (back side) Figure A-20...
-
Page 19: Modification Procedure Of The Door Open Side
SJ-58L-A2 SJ-63L-A2 SJ-68L-A2/R2 MODIFICATION PROCEDURE OF THE DOOR OPEN SIDE It is possible to change the door to left side opening. To modify the door to left side opening, REFRIGERATOR HINGE KITS (for left side opening) SJ-L838LD (optional item )is necessary. These kits are used to change the refrigerator doors from right to left opening. - Page 20 SJ-58L-A2 SJ-63L-A2 SJ-68L-A2/R2 Replacing Handles and Door Parts 1. Remove Screw caps and Screws on each door handle, then remove the handles. Flatten the surface of the screw holes using the handle of a screwdriver, etc., then mount 3 units of F (Door hole covers) on each door.
- Page 21 SJ-58L-A2 SJ-63L-A2 SJ-68L-A2/R2 Mounting the Door/Finishing 1. Apply Silicon grease H to the shaded portion of part A(Bottom hinge L) and attach it to the left side. 2. Insert Lower door and fit Center hinge vertically inverted. Remove washer if installed. Tighten the screws temporarily. 3.
-
Page 22: Cooling Unit
SJ-58L-A2 SJ-63L-A2 SJ-68L-A2/R2 COOLING UNIT Mark: Refrigerant flow Mark: Brazing portion Hot pipe L Hot pipe Hot pipe R (Side condenser) (DP-condenser) (Side condenser) Evaporator Back condenser Suction pipe Sub. condenser Compressor Capillary tube Dryer Figure C-1. Cooling unit... - Page 23 SJ-58L-A2 SJ-63L-A2 SJ-68L-A2/R2 Dryer Capillary tube Charge pipe Hot pipe Evaporator Charge pipe Compressor Suction pipe S.P. connector Sub. condenser Back condenser Figure C-2. Location Suction pipe to S.P connector Suction pipe to Pinch Point Sub. condenser to Compressor’s suction tube hot pipe Charge pipe to Dryer...
-
Page 24: Replacement Parts List
SJ-58L-A2 SJ-63L-A2 SJ-68L-A2/R2 REPLACEMENT PARTS LIST(SJ-58L-A2G/A2B/A2L) REF. NO. PART NO. DESCRIPTION Q'TY CODE 58L-A2G 58L-A2B 58L-A2L ELECTRIC PARTS RTHM-A097CBEZ F-thermostat RSTT-A137CBE0 Starting relay QSWTDA025CBE0 Defrost timer PDMP-A046CBEZ Damper thermo FTHM-A028CBKZ Defrost thermo. ass’y RMOTRA036CBE0 Fan motor QSOCAA073CBEZ Lamp socket RLMP-A002CBE0... - Page 25 SJ-58L-A2 SJ-63L-A2 SJ-68L-A2/R2 REF. NO. PART NO. DESCRIPTION Q'TY CODE 58L-A2G 58L-A2B 58L-A2L 2-72 PSEL-B841CBEZ Ra sealer a 2-73 PSEL-B842CBEZ Ra sealer b 2-74 PSEL-B122CBE0 A-sealer thermo. cap. 2-77 LHLD-A359CBFA T-box holder 2-78 LPLTMA399CBP0 Dryer support 2-79 LBND-A019CBE0 Nylon band 2-80 PBOX-A078CBFA Terminal box...
- Page 26 SJ-58L-A2 SJ-63L-A2 SJ-68L-A2/R2 REF. NO. PART NO. DESCRIPTION Q'TY CODE 58L-A2G 58L-A2B 58L-A2L 5-13 HGRL-A178CBFF Ventilating grille 5-14 USRA-A252CBFA Drain pan 5-15 UYOK-A330CBFA Fruit case 5-16 UYOK-A331CBFA Vegetable case 5-17 UYOK-A328CBFA Ice storage box 5-18 UYOK-A329CBFA Chilled case 5-19 GDORPA066CBRA Chilled door 5-24 FTNA-A301CBKZ...
- Page 27 SJ-58L-A2 SJ-63L-A2 SJ-68L-A2/R2 REPLACEMENT PARTS LIST(SJ-63L-A2G/A2B/A2L) REF. NO. PART NO. DESCRIPTION Q'TY CODE 63L-A2G 63L-A2B 63L-A2L ELECTRIC PARTS RTHM-A097CBEZ F-thermostat RSTT-A137CBE0 Starting relay QSWTDA025CBE0 Defrost timer PDMP-A046CBEZ Damper thermo FTHM-A028CBKZ Defrost thermo. ass’y RMOTRA036CBE0 Fan motor QSOCAA073CBEZ Lamp socket RLMP-A002CBE0 Lamp QACC-A133CBE0 Source cord...
- Page 28 SJ-58L-A2 SJ-63L-A2 SJ-68L-A2/R2 REF. NO. PART NO. DESCRIPTION Q'TY CODE 63L-A2G 63L-A2B 63L-A2L 2-72 PSEL-B841CBEZ Ra sealer a 2-73 PSEL-B842CBEZ Ra sealer b 2-74 PSEL-B122CBE0 A-sealer thermo. cap. 2-77 LHLD-A359CBFA T-box holder 2-78 LPLTMA399CBP0 Dryer support 2-79 LBND-A019CBE0 Nylon band 2-80 PBOX-A078CBFA Terminal box...
- Page 29 SJ-58L-A2 SJ-63L-A2 SJ-68L-A2/R2 REF. NO. PART NO. DESCRIPTION Q'TY CODE 63L-A2G 63L-A2B 63L-A2L 5-13 HGRL-A178CBFF V entilating grille 5-14 USRA-A252CBFA Drain pan 5-15 UYOK-A330CBFA Fruit case 5-16 UYOK-A331CBFA Vegetable case 5-17 UYOK-A328CBFA Ice storage box 5-18 UYOK-A329CBFA Chilled case 5-19 GDORPA066CBRA Chilled door 5-24...
- Page 30 SJ-58L-A2 SJ-63L-A2 SJ-68L-A2/R2 REPLACEMENT PARTS LIST(SJ-68L-A2G/A2B/A2L/R2G) REF. NO. PART NO. DESCRIPTION Q'TY CODE SJ-68L SJ-68L SJ-68L SJ-68L -A2G -A2B -A2L -R2G ELECTRIC PARTS RTHM-A097CBEZ F-thermostat RSTT-A137CBE0 Starting relay QSWTDA025CBE0 Defrost timer PDMP-A046CBEZ Damper thermo FTHM-A028CBKZ Defrost thermo. ass’y RMOTRA036CBE0 Fan motor QSOCAA073CBEZ Lamp socket RLMP-A002CBE0...
- Page 31 SJ-58L-A2 SJ-63L-A2 SJ-68L-A2/R2 REF. NO. PART NO. DESCRIPTION Q'TY CODE SJ-68L SJ-68L SJ-68L SJ-68L -A2G -A2B -A2L -R2G 2-72 PSEL-B841CBEZ Ra sealer a 2-73 PSEL-B842CBEZ Ra sealer b 2-74 PSEL-B122CBE0 A-sealer thermo. cap. 2-77 LHLD-A359CBFA T-box holder 2-78 LPLTMA399CBP0 Dryer support 2-79 LBND-A019CBE0 Nylon band...
- Page 32 SJ-58L-A2 SJ-63L-A2 SJ-68L-A2/R2 REF. NO. PART NO. DESCRIPTION Q'TY CODE SJ-68L SJ-68L SJ-68L SJ-68L -A2G -A2B - A2L -R2G 5-14 USRA-A252CBFA Drain pan 5-15 UYOK-A330CBFA Fruit case 5-16 UYOK-A331CBFA Vegetable case 5-17 UYOK-A328CBFA Ice storage box 5-18 UYOK-A329CBFA Chilled case 5-19 GDORPA066CBRA Chilled door...
- Page 33 SJ-58L-A2 SJ-63L-A2 SJ-68L-A2/R2 DOOR PARTS 3-5-2 4-18 4-18 4-18 4-18 3-25 5-34 3-5-3 3-15 4-18 3-5-1 4-18 3-5-2 5-36 3-15-3 4-18 4-18 4-18 5-37 4-18 3-19 3-18 5-35 3-17 3-15-1 3-15-2 SJ-58L-A2 SJ-63L-A2 SJ-68L-A2/R2...
- Page 34 SJ-58L-A2 SJ-63L-A2 SJ-68L-A2/R2 CABINET PARTS 2-29 2-13 2-99 2-106 5-31 2-105 5-33 2-36 2-104 2-91 5-17 2-103 5-32 2-90 2-93 5-18 1-10 2-37 2-49 4-14 2-36 2-49 2-15 2-12 2-97 2-95 2-95 2-96 2-93 2-96 5-19 2-11 5-26 5-14 2-14 5-24 2-8-2 2-7-2...
- Page 35 SJ-58L-A2 SJ-63L-A2 SJ-68L-A2/R2 CABINET PARTS 2-19 2-63 2-19 2-64 2-21 2-17 2-16 2-65 1-20 2-20 2-22 2-23 1-17 2-28 2-59 1-29 2-30 2-69 2-81 2-51 2-25 90-2 2-66 1-21 4-10 2-72 2-67 2-24 2-78 2-41 6-18 2-84 2-83 1-30 2-79 2-73 2-71 2-38...
- Page 36 SJ-58L-A2 SJ-63L-A2 SJ-68L-A2/R2 2000 SHARP CORP. (05K0.12E) Printed in Japan 52APSF/ 52APLF/ 52APEF/ 56APSF/ 56APLF/ 56APEF/ 60APSF/ 60APLF/ 60APEF/ 60APGF...