Panasonic KX-HNB600 Systems Setup Manual
Home network system
Hide thumbs
Also See for KX-HNB600:
- User manual (120 pages) ,
- Setup manual (24 pages) ,
- Quick setup manual (2 pages)
Table of Contents
Advertisement
Thank you for purchasing a Panasonic product.
This document explains how to configure the hub and access it using a mobile
device. These steps must be followed before you can use the system.
For details about how to use the system, refer to the User's Guide (page 17).
Please read this document before using the unit and save it for future reference.
For assistance, please contact us at 1-800-272-7033 or visit our Web site:
http://shop.panasonic.com/support for customers in the U.S.A.
Please register your product: http://shop.panasonic.com/support
Printed in China
HNB600_(en_en)_0124_ver.201.pdf
System Setup Guide
Model No.
1
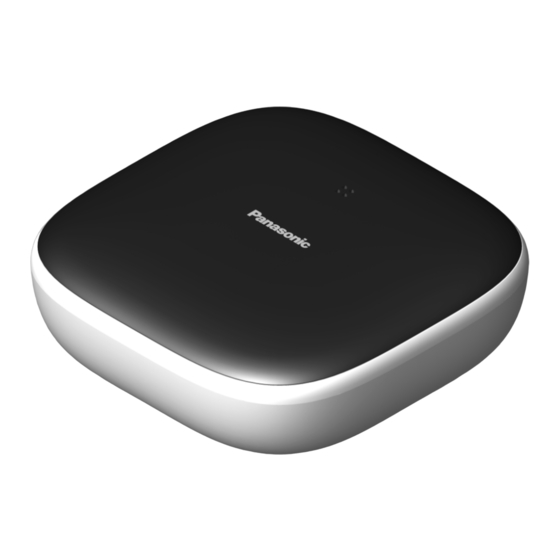
Home Network System
KX-HNB600
2017/01/25
HUB
10:22:31
Advertisement
Chapters
Table of Contents

Related Manuals for Panasonic KX-HNB600


Summary of Contents for Panasonic KX-HNB600
- Page 1 Home Network System KX-HNB600 Model No. Thank you for purchasing a Panasonic product. This document explains how to configure the hub and access it using a mobile device. These steps must be followed before you can use the system. For details about how to use the system, refer to the User’s Guide (page 17).
-
Page 2: Table Of Contents
Table of Contents Introduction Accessory information ........3 Important Information About this system .........6 For your safety ..........6 Important safety instructions ......7 Security cautions ..........7 For best performance ........8 Other information .........8 Setup Part names and functions ......10 LED indicator ..........10 Connections ..........11 ®... -
Page 3: Accessory Information
R All other trademarks identified herein are the property of their respective owners. Notice R The hub supports microSD and microSDHC memory cards. In this document, the term “microSD card” is used as a generic term for any of the supported cards. For assistance, please visit http://shop.panasonic.com/support HNB600_(en_en)_0124_ver.201.pdf 2017/01/25 10:22:34... - Page 4 Introduction Expanding the Panasonic Home Network System The Panasonic Home Network System is a wireless system that lets you create a powerful network of devices, such as cameras, sensors, and smart plugs, and control them all with an easy-to-use app.
-
Page 5: Mobile Devices
R You must configure the hub’s Wi-Fi settings before you can use the app. 8 mobile devices can be registered to the hub, however, only the first 4 can use phone features. For assistance, please visit http://shop.panasonic.com/support HNB600_(en_en)_0124_ver.201.pdf 2017/01/25 10:22:34... -
Page 6: Important Information
R This system is an auxiliary system; it is not R Do not connect non-specified devices. designed to provide complete protection from property loss. Panasonic will not be held responsible in the event that property Installation loss occurs while this system is in operation. -
Page 7: Important Safety Instructions
3. Do not use the telephone to report a gas a factory data reset to erase any data leak in the vicinity of the leak. For assistance, please visit http://shop.panasonic.com/support HNB600_(en_en)_0124_ver.201.pdf 2017/01/25 10:22:35... -
Page 8: For Best Performance
Hub location/avoiding noise R Operating the product near electrical The hub and other compatible Panasonic appliances may cause interference. Move devices use radio waves to communicate with away from the electrical appliances. - Page 9 To protect your privacy/confidentiality, we recommend that you erase information such as phonebook or caller list entries from the memory before you dispose of, transfer, or return the product. Notice For assistance, please visit http://shop.panasonic.com/support HNB600_(en_en)_0124_ver.201.pdf 2017/01/25 10:22:35...
-
Page 10: Setup
For more information, refer to the User’s Guide (page 17). It may take some time for the hub to finish starting up. For assistance, please visit http://shop.panasonic.com/support HNB600_(en_en)_0124_ver.201.pdf 2017/01/25 10:22:35... -
Page 11: Connections
For details about the landline phone features, refer to the User’s Guide (page 17). Note: R Use only the supplied Panasonic AC adaptor PNLV236. R A microSD card (not supplied) is required to record images from cameras. Refer to the information about the available microSD card (page 3). -
Page 12: Wi-Fi ® Settings
R If prompted to select the device to be set up, tap [Hub]. When prompted, tap [Set up the Hub]. When prompted, press MWi-Fi SETUPN on the hub. R The LED indicator blinks in yellow. For assistance, please visit http://shop.panasonic.com/support HNB600_(en_en)_0124_ver.201.pdf 2017/01/25 10:22:35... - Page 13 [OK]. R The hub name setting is used by your mobile device to identify the hub. This is useful when you have multiple hubs. For assistance, please visit http://shop.panasonic.com/support HNB600_(en_en)_0124_ver.201.pdf 2017/01/25 10:22:35...
- Page 14 R If you choose not to customize the device profiles now, you can change them later if desired. For details about For assistance, please visit http://shop.panasonic.com/support HNB600_(en_en)_0124_ver.201.pdf 2017/01/25 10:22:35...
-
Page 15: Registering Another Mobile Device
R To register a mobile device, use the R The app’s home screen is displayed procedure described on page 15. when initial setup is complete. Using the app Start the [Home Network] app. For assistance, please visit http://shop.panasonic.com/support HNB600_(en_en)_0124_ver.201.pdf 2017/01/25 10:22:35... - Page 16 LED indicator blinks slowly in green. R When registration is complete, the hub sounds one long beep. Note: R If registration fails, the hub sounds several short beeps. For assistance, please visit http://shop.panasonic.com/support HNB600_(en_en)_0124_ver.201.pdf 2017/01/25 10:22:35...
-
Page 17: Appendix
R Android 4.1 or later versions are R When using each device on separate floors recommended. or in different buildings R You can also access the User’s Guide at the web page listed below. www.panasonic.net/pcc/support/tel/ homenetwork/manual/ For assistance, please visit http://shop.panasonic.com/support HNB600_(en_en)_0124_ver.201.pdf 2017/01/25 10:22:35... -
Page 18: Wall Mounting
Connect the AC adaptor and the telephone line cord to the hub. R Secure the AC adaptor cord by wrapping it around the hook. For assistance, please visit http://shop.panasonic.com/support HNB600_(en_en)_0124_ver.201.pdf 2017/01/25 10:22:35... - Page 19 (2 types). 83 mm (3 1/4 inches) 102 mm (4 inches) R Fit the slots of the hub onto the corresponding wall phone plate tabs for ( ) and ( ) respectively. For assistance, please visit http://shop.panasonic.com/support HNB600_(en_en)_0124_ver.201.pdf 2017/01/25 10:22:35...
-
Page 20: Specifications
DECT: At least three (3) years from delivery of this 115 mW (max.) product, Panasonic Corporation will give to Wi-Fi: any third party who contacts us at the 100 mW (peak transmission power) contact information provided below, for a... -
Page 21: Fcc And Other Information
Also, you will be advised of 1. Remain on the line and briefly explain to your right to file a complaint with the FCC if the dispatcher the reason for the call. you believe it is necessary. For assistance, please visit http://shop.panasonic.com/support HNB600_(en_en)_0124_ver.201.pdf 2017/01/25 10:22:35... - Page 22 – Consult the dealer or an experienced radio/ TV technician for help. Some devices operate at frequencies that may cause interference to nearby TVs and VCRs. To minimize or prevent such interference, this For assistance, please visit http://shop.panasonic.com/support HNB600_(en_en)_0124_ver.201.pdf 2017/01/25 10:22:35...
-
Page 23: Customer Services
Appendix Customer services Shop Accessories! for all your Panasonic gear Go to http://shop.panasonic.com/support Get everything you need to get the most out of your Panasonic products Accessories & Parts for your Camera, Phone, A/V products, TV, Computers & Networking, Personal Care, Home Appliances, Headphones, Ba eries, Backup Chargers &... -
Page 24: Limited Warranty (Only For U.s.a.)
If your product does not work properly because of a defect in materials or workmanship, Panasonic Corporation of North America (referred to as “the warrantor”) will, for the length of the period indicated on the chart below, which starts with the date of original purchase (“warranty period”), at its option either (a) repair your product with new or refurbished parts,... - Page 25 Service Center. If the problem is not handled to your satisfaction, then write to: Consumer Affairs Department Panasonic Corporation of North America 661 Independence Pkwy Chesapeake, VA 23320 PARTS AND SERVICE, WHICH ARE NOT COVERED BY THIS LIMITED WARRANTY, ARE YOUR RESPONSIBILITY.
- Page 26 Notes HNB600_(en_en)_0124_ver.201.pdf 2017/01/25 10:22:35...
- Page 27 Notes HNB600_(en_en)_0124_ver.201.pdf 2017/01/25 10:22:35...
- Page 28 Make sure the AC adaptor is connected. Use the Home Network app to access the User’s Guide and refer to the Troubleshooting section. Visit our Web site: http://shop.panasonic.com/support • FAQ and troubleshooting hints are available. For your future reference We recommend keeping a record of the following information to assist with any repair under warranty.
- Page 29 Lea este documento antes de usar la unidad, y guárdelo para consultarlo en el futuro. Para obtener ayuda, comuníquese con nosotros llamando al 1-800-272-7033 o visite nuestro sitio web: http://shop.panasonic.com/support para clientes en los EE. UU. (solo en inglés) Por favor, registre su producto: http://shop.panasonic.com/support PNQX6695XA CC0814WK2126 (E) HNB600_(es_es)_0125_ver201.pdf...
- Page 30 Tabla de Contenido Configuración Nombres de los componentes y funciones ..3 Led indicador ............3 Conexiones ............4 ® Configuraciones de Wi-Fi ........5 Registro de otro dispositivo móvil ......8 Registro de otros dispositivos al hub ....8 Apéndice Alcance de la comunicación inalámbrica (DECT) ...............10 Acceso a la Guía del usuario ......10 Montaje en la pared ...........11...
-
Page 31: Nombres De Los Componentes Y Funciones
Led indicador no se encienda durante el funcionamiento normal. Para obtener más información, consulte la Guía del usuario (página 10). Es posible que el hub tarde un tiempo en terminar de iniciar. Para obtener ayuda, visite http://shop.panasonic.com/support HNB600_(es_es)_0125_ver201.pdf 2017/01/25 17:33:55... -
Page 32: Conexiones
Guía del usuario (página 10). Nota: R Use solo el adaptador de corriente alterna Panasonic PNLV236 que se suministra. R Se necesita una tarjeta microSD (no incluida) para grabar imágenes de cámaras. R Para extraer la tarjeta microSD, presiónela hacia dentro primero y luego extráigala. -
Page 33: Configuraciones De Wi-Fi
R Si se le solicita, siga las instrucciones en pantalla y seleccione la región y el país apropiados. R Si se le solicita que seleccione el dispositivo que desea configurar, toque [Hub]. Cuando se le solicite, toque [Configurar el Hub]. Para obtener ayuda, visite http://shop.panasonic.com/support HNB600_(es_es)_0125_ver201.pdf 2017/01/25 17:33:55... - Page 34 2. Espere hasta que el Led indicador del hub se casa. A continuación, toque [Aceptar]. mantenga en amarillo. 3. Repita el procedimiento de configuración inicial (“Configuración inicial para iPhone, iPad”, página 5). Para obtener ayuda, visite http://shop.panasonic.com/support HNB600_(es_es)_0125_ver201.pdf 2017/01/25 17:33:56...
- Page 35 R Paredes de hormigón, piedra, ladrillo o estaño intercomunicador con un auricular R Varias paredes inalámbrico. R Repisas de acero R Vidrio a prueba de incendios Cuando se le solicite, seleccione si desea personalizar perfiles de dispositivos, como el Para obtener ayuda, visite http://shop.panasonic.com/support HNB600_(es_es)_0125_ver201.pdf 2017/01/25 17:33:56...
-
Page 36: Registro De Otro Dispositivo Móvil
R Para registrar un dispositivo móvil, use el R Aparecerá la pantalla de inicio de la procedimiento descrito en página 8 aplicación una vez completada la configuración inicial. Para obtener ayuda, visite http://shop.panasonic.com/support HNB600_(es_es)_0125_ver201.pdf 2017/01/25 17:33:56... - Page 37 Led indicador parpadee lentamente en verde. R Cuando se ha completado el registro, el hub emitirá un pitido largo. Nota: R Si el registro falla, el hub emitirá varios pitidos cortos. Para obtener ayuda, visite http://shop.panasonic.com/support HNB600_(es_es)_0125_ver201.pdf 2017/01/25 17:33:56...
-
Page 38: Apéndice
R Cuando los dispositivos están en pisos o R Se recomienda Android 4.1 y versiones edificios diferentes posteriores. R También puede acceder a la Guía del usuario mediante la página web a continuación. www.panasonic.net/pcc/support/tel/ homenetwork/manual/ Para obtener ayuda, visite http://shop.panasonic.com/support HNB600_(es_es)_0125_ver201.pdf 2017/01/25 17:33:56... -
Page 39: Montaje En La Pared
Conecte el adaptador de corriente y el cable de línea telefónica al hub. R Asegure el cable del adaptador de corriente alterna enrollándolo en el gancho. Para obtener ayuda, visite http://shop.panasonic.com/support HNB600_(es_es)_0125_ver201.pdf 2017/01/25 17:33:56... - Page 40 (tipos 2). 83 mm (3 1/4 pulgadas) 102 mm (4 pulgadas) R Ajuste las ranuras del hub en las pestañas correspondientes de la placa del teléfono ) y ( ) respectivamente. Para obtener ayuda, visite http://shop.panasonic.com/support HNB600_(es_es)_0125_ver201.pdf 2017/01/25 17:33:56...