
Related Manuals for HIKVISION W100 Series

Summary of Contents for HIKVISION W100 Series
- Page 1 W100 Series Mobile NAS W100 Series Mobile NAS User Manual User Manual Download App UD04537B...
- Page 2 INCLUDING, AMONG OTHERS, DAMAGES FOR LOSS OF BUSINESS PROFITS, BUSINESS INTERRUPTION, OR LOSS OF DATA OR DOCUMENTATION, IN CONNECTION WITH THE USE OF THIS PRODUCT, EVEN IF HIKVISION HAS BEEN ADVISED OF THE POSSIBILITY OF SUCH DAMAGES. REGARDING TO THE PRODUCT WITH INTERNET ACCESS, THE USE OF PRODUCT SHALL BE WHOLLY AT YOUR OWN RISKS.
- Page 3 Regulatory Information FCC Information Please take attention that changes or modification not expressly approved by the party responsible for compliance could void the user’s authority to operate the equipment. FCC compliance: This equipment has been tested and found to comply with the limits for a Class B digital device, pursuant to part 15 of the FCC Rules.
- Page 4 Industry Canada ICES-003 Compliance This device meets the CAN ICES-3 (B)/NMB-3(B) standards requirements. This device complies with Industry Canada licence-exempt RSS standard(s). Operation is subject to the following two conditions: (1) this device may not cause interference, and (2) this device must accept any interference, including interference that may cause undesired operation of the device.
-
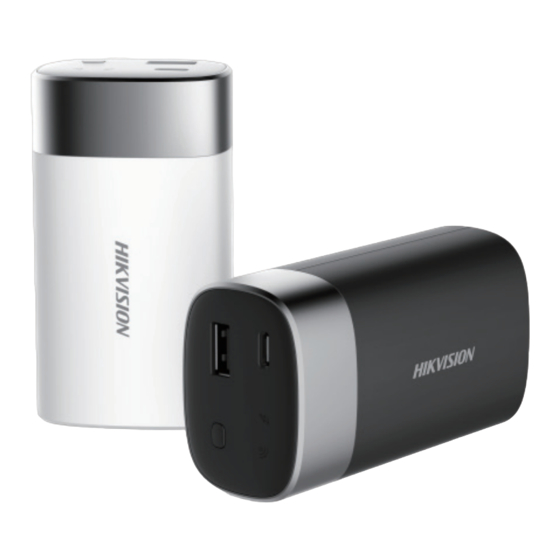
Page 5: Package List
Features Compared with traditional NAS, W100 series mobile NAS (hereinafter referred to as W100) provides following features: • USB Type-C (hereinafter referred to as USB-C) 3.1 interface with a high transmission speed. • Up to 10 users can access W100 simultaneously. Users can share files. -
Page 6: Interfaces And Indicators
Interfaces and Indicators Power Wi-Fi USB-C Indicator Indicator Interface QR Code Reset Button SD Card Slot USB Interface Power Switch USB-C Interface • Attach it to computer USB interface via USB-C cord to charge W100 or transmit data. • Attach it to other device via OTG cable to transmit data. USB Interface • Attach it to other USB device to transmit data. - Page 7 Power Switch • Hold it for 3 seconds to turn on/off W100. - Wi-Fi indicator on: W100 starts up. - Wi-Fi indicator and power indicator off: W100 is shut down. • Press it to check W100 remaining battery. For details, refer to the following Power Indicator description.
-
Page 8: App Connection
App Connection After connecting W100 Wi-Fi in your smartphone, you can configure W100 in HiStor app. Step 1 Download and install the HiStor app first. • Option 1: Scan the QR code in the manual cover. • Option 2: Search HiStor in application store. Step 2 To build connection between W100 and HiStor, connect W100 Wi-Fi in your smartphone. - Page 9 Figure 1 Prompt Figure 2 Home Page...
-
Page 10: App Operation
App Operation You can configure W100 in configuration interface. Step To enter W100 Configuration interface, click in home page and select the W100 Device item. Figure 3 W100 Configuration Interface... - Page 11 Sharing W100 Sharing feature is designed for W100 quick adding. Other users can add W100 by scanning the shared QR code. One W100 can be added by up to 10 users. Step 1 Enter Share Device interface. W100 Configuration interface → Share Device Step 2 Enable Share Device item to generate a QR code.
-
Page 12: Storing Files
Storing Files HiStor enables W100, smartphone, USB device, and SD card to exchange files, including pictures, videos, music, and documents. We take the example of copying files from smartphone to W100 to describe the steps. You can play music and video and rename files here. -
Page 13: Auto Import
Auto Import When Auto Import feature is on, once a storage media is attached to W100, HiStor will automatically import data from the storage media into W100. Step 1 Enter W100 configuration interface. Step 2 Turn on Auto Import. Step 3 Select Import from SD or Import from USB Flash Disk according to your needs. - Page 14 W100 Configuration Connecting WLAN If W100 operation mode is Routing and W100 is connecting with a WLAN, smartphones and devices attached to W100 can access Internet via W100. Step 1 Enter W100 Operating Mode configuration interface. W100 Configuration interface → Operating Mode Step 2 Select Operating Mode as Routing Mode. • Routing Mode: W100 WLAN name is ROUTE-XXX.
- Page 15 Formatting W100 Data in W100 will be erased after format. Step 1 Enter Format Device interface. Internal and external storage media will be listed. W100 Configuration interface → Format Device Step 2 Select a storage media to format and confirm the operation. Some models do not support the format feature. Figure 8 Format...
- Page 16 Upgrading W100 You can upgrade W100. Before you start, ensure the W100 remains at least 50% battery. Auto Upgrade Step 1 Access W100 to Internet. For detailed steps, refer to Step 4 and Step 5 of “Connecting WLAN”. Step 2 W100 will automatically download the latest upgrade package.
-
Page 17: Preventive And Cautionary Tips
Preventive and Cautionary Tips For W100 Main Body • In the use of the product, you must be in strict compliance with the local regulations. • Properly keep the user manual for operation reference. • Purchase SD card from formal channels. SD card with Class 10 speed or above is recommended. -
Page 18: Troubleshooting
Troubleshooting Troubles Reasons/Resolutions • Ensure W100 operating mode is Routing. S m a r t p h o n e fa i l e d to • Ensure W100 has connected to Internet. access Internet via W100. Smartphone accesses When W100 operating mode is P2P, the connected Internet via data cellular smartphone accesses Internet via data cellular.