Advertisement
Quick Links
Dear User:
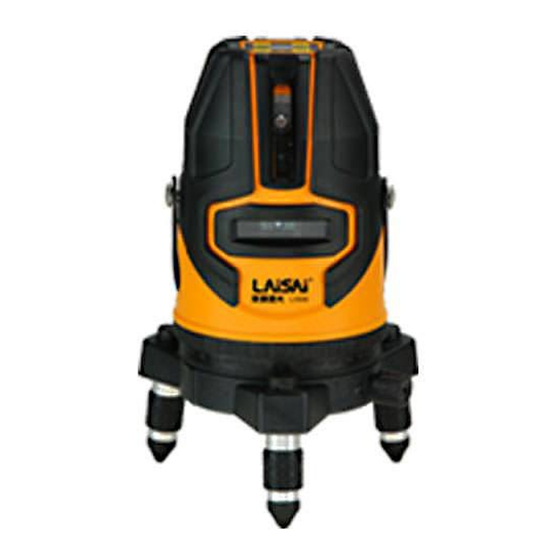
Thank you very much for purchasing LAISAI LS686 line laser, please read this instruction manual before operating it.
1. Features and functions
2. User safety
3. Instrument nomenclature.
4. Operation guide
5. Self-check and calibration
6. Demonstration
7. Technical specification
8. Maintenance
1. Feature and functions
LS686 line laser could separately or simultaneously project self-leveling visible horizontal laser line and vertical line. It
provide the accurate horizontal, vertical references for indoor layout and calibration. This kind of product is featured by
easy manipulation and wide applications.
Features:
※ Touch button
※ Output 5 laser lines and 1 laser dot
(Model number ends with D is combination product of dot and line, could output 3 laser dots)
(-3 series product output 3 laser lines)
※ Form two cross laser lines
※ Compatible both indoor and outdoor application,switchable between the continuous laser and pulse laser.
(All green laser series do not have pulse
※ Self-leveling, laser flash and audible warning when beyond the self-leveling range
※ The alarming function can be shield, and with tilt function.
※ The instrument is 360 degree rotatable and also can fine adjust the angle.
※ Height could be adjusted by the tripod base.
※ Able to connect with the tripod through 5/8'' connecting seat.
Note: This instruction manual is also applicable for lasers with higher output power.
2. User safety
※ The laser output mark is at the output aperture.
※ Do not stare into laser beam directly.
※ Do not disassemble the instrument or attempt to perform any internal servicing by yourself, the servicing work could
only be done by the authorized service center.
※ The instrument complies with the safety classification standards of laser radiation.
Content
function)
Advertisement

Summary of Contents for LAISAI LS686
- Page 1 Dear User: Thank you very much for purchasing LAISAI LS686 line laser, please read this instruction manual before operating it. Content 1. Features and functions 2. User safety 3. Instrument nomenclature. 4. Operation guide 5. Self-check and calibration 6. Demonstration 7.
- Page 2 3. Nomenclature Touching keypad Round vial Laser output window External power supply socket Find adjusting hand wheel Scale board Handle Battery box Locking hand wheel Locking screw 5/8″Screw 4. Instruction manual 4.1 Mount the alkaline batteries: a) Mount 3 AA alkaline batteries into the battery box according to the polarity indication shown in the battery box.The put the battery box back to the instrument.
- Page 3 4.3 Using the adapter Connect the instrument with the adapter by the external power supply socket. Plug the adapter(DC-6V)and use 4.4 Use the Micro USB port Instrument can get power supply from power bank by connect it to the Micro USB port inside the battery box. Micro USB port 4.5 Adjust the adjustable supporting leg When using the instrument, you could adjust 3pcs supporting foot to make the round vial in center, if the laser line flash...
- Page 4 4.7 Place the instrument Could be placed on the horizontal platform directly Could connect with tripod through 5/8’’ in the bottom of instrument 4.8 Operation keypad Tilt mode indication light Receiving mode button Horizontal line controlling button Receiving mode indication Power indication light Vertical line controlling button Vertical...
- Page 5 4.9 ON/OFF(Main unit) Locking is unlocked, the instrument is on, and the power indication light is on. Locking is locked, the instrument is off, and the power indication light is off. Lock Unlock When the instrument is on, if the laser flash with the buzzer sound, which shows the instrument is out of range, please place the instrument to level again.
- Page 6 (Models that end with D can output 2 front When all the laser is on, the output is as the following: dots) 5 lines 3 lines 4.12 Tilt mode button The tilt mode button hides inside the battery box slot(see the following picture). When the instrument is in locking status, push up this switch to enter the tilt mode,mount the battery box, the power LED illumination is lighted, and tilt mode indication LED is flashing.
- Page 7 Measure the distance between point M to the laser line. If e>1mm, the instrument accuracy is out of tolerance, service is needed. 5.2 Self-check the horizontal accuracy (longitudinal) a) As shown in the following figure, stand up two staff which is 5m away (or find a wall which both sides are parallel and the distance is more than 5m).
- Page 8 g) Calculate|(a1-a2)- (b1-b2) |= e,If e is above 1mm, the instrument accuracy is out of tolerance, please contact the seller for servicing. 5.3 Self-calibration & adjustment As shown in the following picture, the instrument have two calibration apertures, A means the left and right adjustment transversely (the error tested by item1), B means the front and back adjustment longitudinal (the error tested by item2).
- Page 9 7. Technical specification Item Parameter Laser wavelength 635nm Laser class ClassⅡ Accuracy ±1mm/5m(1° vial range) Self-leveling range ±3° -10℃~+45℃(Red) Temperature range 0℃~+40℃(Green) 3*AA batteries or Li battery box or Power supply adapter Low voltage indicate Power indication light flash Size φ100×216mm Weight 1.15Kg...

