Table of Contents
Advertisement
Advertisement
Table of Contents

Related Manuals for Neat TREX2G


Summary of Contents for Neat TREX2G
- Page 1 TREX2G Portable receiver User manual NE41 11005-02 v1.4...
- Page 2 A complete Declaration of Conformity can be obtianed from the or organization of such changes or improvements. address below (see “Contact”) NEAT Electronics AB is not responsible for any loss of data, income or any consequential damage whatsoever caused. For more information, details and descriptions, visit our web site: www.
-
Page 3: Table Of Contents
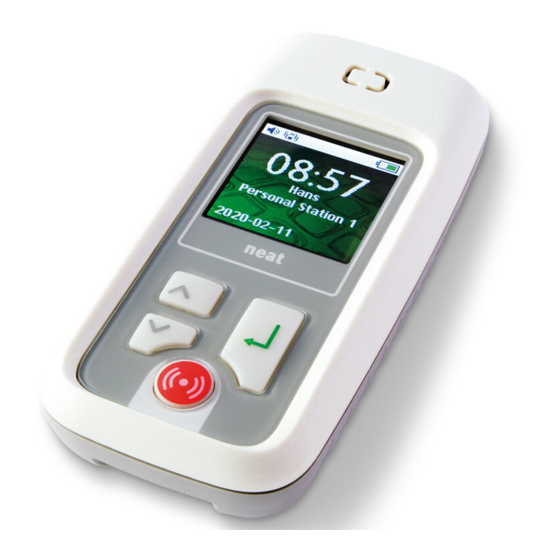
Assistance alarm Misc settings Other settings neat Advanced settings TREX 2G Technical handbook TREX 2G Programmer Troubleshooting Important Safety Notes # Denomination Cleaning Disposal Loudspeaker ① Technical data Display ② Recommended AC adaptors Keypad ③ TREX2G User manual NE41 11005-02 v1.4... -
Page 4: The Keypad
Single Kit! Before using the device for the first time, the battery should be fully charged. Mains charger The AC Adaptor can be used either with the MiniUSB Adaptor (included) or the Charging Cradle (optional). TREX2G User manual NE41 11005-02 v1.4... -
Page 5: Trex 2G First Setup
Power off If TREX2G is powered on when con- necting the mains charger, the Bat- Press for 3 seconds pop up screen appears. tery charging (remove USB cable before power off). General functions • Navigate up and down in the menus by pressing B1 and B2. -
Page 6: Statusbar
• New alarm • RFID enabled • USB connected • Battery charging/battery status Enter the menus Enter the menus by pressing Select hours and minutes by pressing , confirm by pressing Repeat for the date. TREX2G User manual NE41 11005-02 v1.4... -
Page 7: Transmitters
Adding a transmitter Example: adding an ATOM, used in Room 1. After confirming date/time, the current date/time is displayed. Go to > Programming Add transmit- A popup window appears, asking for activation of the transmitter. TREX2G User manual NE41 11005-02 v1.4... - Page 8 TREX2G below and enter the number in the displays the screen. rightmost position. Add transmitter Select equipment Select identification Select from the equipment Select from the drop-down list Trigger Room dropdown list. and confirm. TREX2G User manual NE41 11005-02 v1.4...
-
Page 9: Erase A Transmitter
Saving is confirmed. Confirm selection by pressing The transmitter is saved. Select to confirm the transmit- Save ter settings or to discard. Cancel Erase a transmitter Go to Programming > Erase trans- mitte TREX2G User manual NE41 11005-02 v1.4... -
Page 10: Positions
1 new alarms. The data displayed is: • The transmitter (Room) and number (1). • The equipment (Trigger). • The alarm reason (Alarm). TREX2G User manual NE41 11005-02 v1.4... -
Page 11: Multiple Alarms
If two or more alarms are received at the same time, the displays shows how many new alarms is received. The alarm is displayed except for the letter symbol and now the bottom indicates , i.e. no new alarms. 0(0) TREX2G User manual NE41 11005-02 v1.4... - Page 12 Log mode indicated by 1(2) In log mode, only the last/newest alarm is displayed on the alarm popup screen. The user must enter the alarm list from to acknowledge other alarms. Alarm list TREX2G User manual NE41 11005-02 v1.4...
-
Page 13: Assistance Alarm
Misc settings • Programmed transmitters (default) • All transmitters Other settings Configuration Select whether the TREX2G is alone in Sound Adjust the sound in Preferences > a system. Sound level. • One TREX2G • Many TREX2G (default) -
Page 14: Trex 2G Technical Handbook
Q: The TREX2G does not start should operate in. A: Is the battery fully charged? Alarm display A: Is the TREX2G connected via USB Select whether alarms should be to a computer? If yes, disconnect and displayed in try again. -
Page 15: Important
• Always test the system per instructions prior • Do not warm up the device or use it near fire. • For repairs, contact a NEAT dealer. to use and always check the function of the product after making adjustmentsThis product Cleaning may not be suitable for all persons. -
Page 16: Technical Data
Technical data Battery standby time Approx. 8 days Measures (W x H x D) 48 x 100 x 21 mm Weight Approx. 60g, including battery Temp range +5 - +55oC Battery type Li-Po, 600 mAh RF-Frequency (market depending) 868.7 MHz 869.2 MHz (Social alarms, Category I) 869.4 MHz...