Table of Contents
Advertisement
Advertisement
Table of Contents

Summary of Contents for Samsung SM421
- Page 1 Operation Handbook SM421 Version 1.0 P.N: J68061090A Operation Handbook (2a/8)
- Page 2 Samsung Techwin Co., Ltd. is could happen. Be sure to follow the instructions.
-
Page 3: Table Of Contents
Table of Contents Table of Contents............3 How to Stop the Machine in PART IV Overview - Operation Process........4 Emergency Temporary Stop ............34 Emergency Stop ............38 Machine Overview PART I Name of Each Part ............5 Changing Jobs PART V Name of the Operation Panel ........6 Configuration of MMI ............7 SMT In-Line Process ..........44 Changing Jobs............45... -
Page 4: Overview - Operation Process
Overview SM421 Operation Handbook SM421 Operation Handbook Overview - Operation Process The overall process to operate the SM421 machine is as follows: 1. Checking the machine 2. Turning on the main switch 3. MMI Initialization 4. Supplying the power to the... -
Page 5: Name Of Each Part
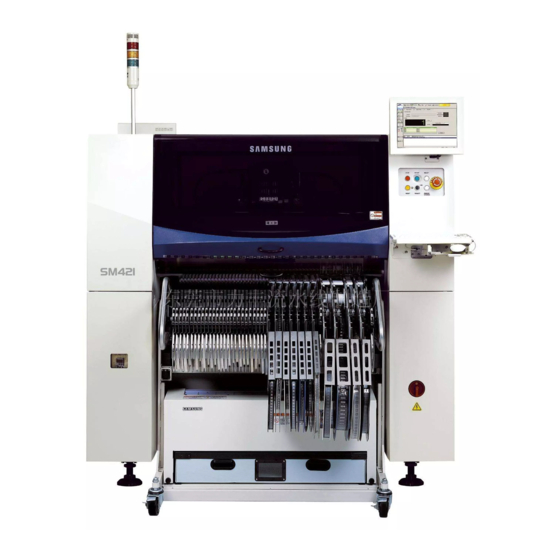
PART I. Machine Overview This part describes the name of each part, teaching box and the configuration of MMI(Man-Machine Interface). SM421 Operation Handbook Name of Each Part 1. Front view of the machine 2. Rear view of the machine [CH1]... -
Page 6: Name Of The Operation Panel
Machine Overview SM421 Operation Handbook Name of the Operation Panel Indication of operation speed (5 steps) SM321 Emergency stop button Selects the operation speed in the Jog Mode. ▲ UP: Increase the speed ▼ Down: Decrease the speed Indicates the movement of each axis and rotation direction. -
Page 7: Configuration Of Mmi
Machine Overview SM421 Operation Handbook Configuration of MMI The configuration of MMI A main menu tool-bar is shown. The state of a Machine - IDLE ● ● FREEZE ● The PCB file name WAIT ● being worked on is PAUSE ●... - Page 8 Machine Overview SM421 Operation Handbook Configuration of MMI The configuration of 'production' screen Indicates work progress Input production quantity Product Initialization (0) Sub-Menu Change unit system Displays PCB Data Tab Dialog For the detailed description about each function of the ‘Production’ menu, refer to...
- Page 9 Machine Overview SM421 Operation Handbook The configuration of 'production' screen ‘Option Setting’ dialog box ‘My PCB’ dialog box ‘Tape Feeder Monitor’ dialog box PART I Machine Overview...
-
Page 10: Procedure Of Power Suppy
This part describes how to supply the PART II. Power supply and Procedure Preparing for Production power and the items to be checked before starting production. SM421 Operation Handbook Procedure of Power Suppy (Check List) 1. Rating voltage and connecting power source [CH1... - Page 11 PART II. Power supply and Procedure Preparing for Production SM421 Operation Handbook 2. Nozzle type and applied part 1. Type of nozzle Nozzle CN020 CN030 CN040 CN065 CN140 CN220 CN400N CN750 CN110 name (Option) (Option) External shape Outside Φ Φ...
- Page 12 PART II. Power supply and Procedure Preparing for Production SM421 Operation Handbook 2. Nozzle type and applied part 2. Nozzle type and applied part Nozzle Material Minimum part Applied part name number width 0402 Chip Dedicated CN020 J90551006A 0.2 ~ 0.5...
- Page 13 PART II. Power supply and Procedure Preparing for Production SM421 Operation Handbook 3. Turning on/off the main switch. 1. Turning on the main switch - Turn Off - Turn On 2. Turning off the main switch - Press the ‘RESET’...
-
Page 14: Procedure Preparing For Production
PART II. Power supply and Procedure Preparing for Production SM421 Operation Handbook Procedure Preparing for Production 1. Inspections 1. Check the power connection [CH1] TRAY [CH2] FEED NEXT INTE RFAC PREV IOUS - Be sure to check around and inside the machine before turning on the main switch. - Page 15 PART II. Power supply and Procedure Preparing for Production SM421 Operation Handbook 1. Inspections 2. Check the air pressure The Range of the rated pressure: 0.45~0.55MPa Pressure Decrease (Counterclockwise) Pressure Increase (Clockwise) 3. Check the main switch is on - Check the room temperature before turning on the first machine (Recommended temperature: above 20℃)
- Page 16 PART II. Power supply and Procedure Preparing for Production SM421 Operation Handbook 2. MMI initialization 1. Turn on the main switch 3. Press the ‘READY’ button 2. Check the MMI initialization and module (automatically) If the power is supplied to the machine, the PC is turned on and the MMI is executed automatically to check each module by initializing the program.
- Page 17 PART II. Power supply and Procedure Preparing for Production SM421 Operation Handbook 3. Return to origin (Homing) 1. Check if the light of the 'ready' button is on 3. It is returned to the origin 2. Press the ‘Start’ button (▼) When the machine is in ‘Ready’...
- Page 18 PART II. Power supply and Procedure Preparing for Production SM421 Operation Handbook 4. Warming-Up 1. Selecting the ‘Utility’ Menu: Displays the Utility screen 2. Selecting the ‘Warmup’ submenu: Open the Warm Up dialog box The warm-up should be performed for about 10 minutes before starting the part placement in order to increase the placement accuracy.
- Page 19 PART II. Power supply and Procedure Preparing for Production SM421 Operation Handbook 4. Warming-Up 3. Click the <Start> button. Perform the warm-up 4. Click the <Stop> button and close the dialog box after performing the warm-up for about 10 minutes...
-
Page 20: Preparation For Production
PART III. Production This part describes the production procedure. SM421 Operation Handbook Preparation For Production 1. Loading the PCB file 1. Select the ‘Product’ menu 2. Click the ‘Open’ icon - Displays the ‘Product Monitor’ screen. - Displays its submenu. - Page 21 PART III. Production SM421 Operation Handbook 1. Loading the PCB file 3. Click the ‘Open’ 4. Select the PCB file - Select the PCB file to work with. - Click the ‘Open’. PART III Production...
- Page 22 PART III. Production SM421 Operation Handbook 1. Loading the PCB file 5. The completion of loading the PCB file - The PCB file loading is complete. The file with extension of .opt is the optimization completed file.
- Page 23 PART III. Production SM421 Operation Handbook 2. Setup the conveyor Adjusting the conveyor width 1. Select the ‘PCB Edit’ menu 2. Select the ‘Board’ submenu PART III Production...
- Page 24 PART III. Production SM421 Operation Handbook Adjusting the conveyor width 3. Enter the X and Y size of PCB in the <7.Board Size> group 4. Click the <Conv. Width> button...
- Page 25 PART III. Production SM421 Operation Handbook 2. Setting conveyor PCB fixing method setup: Select the method to align the PCBs Edge Fixer1: A method of alignment by pushing the PCB from the side with a device attached on the conveyor.
- Page 26 PART III. Production SM421 Operation Handbook Arranging the backup-pins 1. Open front/rear safety door (and press the 'EMG' switch) 3. Press the 'RESET' button Before arranging the backup pins, power Warning off the motor. 2. Press the 'STOP' button 4. Install the backup pins to support the PCB.
- Page 27 PART III. Production SM421 Operation Handbook The backup-pin arrangement 5. Close the front/rear safety door 6. Press the 'READY' button PART III Production...
-
Page 28: Production
PART III. Production SM421 Operation Handbook Production 1. Loading the PCB file 1. Select the ‘Product’ menu 2. Select the ‘Start’ submenu (F2) - Displays the ‘Product Monitor’ screen. - If the ‘Start’ submenu is selected, the PCB program is downloaded... - Page 29 PART III. Production SM421 Operation Handbook 2. Starting production (Automatic production)production 1. Press ‘Start’ button in the operation pannel. Check if there is a worker around the machine before starting production. Warning - Starts production. PART III Production...
- Page 30 PART III. Production SM421 Operation Handbook 2. Starting production (Quantity designated production) 1. Set the production quantity 2. Press ‘Start’ button in the operation pannel. - Starts production. - Select the ‘Start’ submenu after setting the total number of PCBs to be worked in the <Production plan>...
- Page 31 PART III. Production SM421 Operation Handbook Finishing the Production 1. Finishing the Production and shutting down the machine 1. Click the <PCB Stop> button 2. Press the 'RESET' button - Clicking this button during production will stop the production after - Changes the machine status into the finishing the Production of the PCB on work.
- Page 32 PART III. Production SM421 Operation Handbook 1. Finishing the production and shutting down the machine 3. Click the 'Exit' icon in the 'File' menu 4. Shut down the machine -To save the changes and exit MMI, click <Yes> button. - Click the 'Exit' icon in the 'File' menu to close the MMI.
- Page 33 PART III. Production SM421 Operation Handbook 1. Finishing the Production and shutting down the machine 5. Turn off the main switch - Turn off the main switch on the front of the machine when the power of PC is off.
-
Page 34: Temporary Stop
(Continue / Start mode), emergency stop (by manual/ by system) and the restarting the production after emergency stop when checking errors or other items and taking measures during production. SM421 Operation Handbook Temporary stop 1. Continue mode: Halts the production temporarily and then restarts the production 1. - Page 35 PART IV. How to stop the machine in emergency SM421 Operation Handbook 1. Continue mode: Halts the production temporarily and then restarts the production 3. Select the ‘Cont.’ submenu 4. Take measures against the error Resume the production by pressing the 'START' Check the necessary items, take action, and select 'Cont.' submenu.
- Page 36 PART IV. How to stop the machine in emergency SM421 Operation Handbook 2. Start mode: Restarts the production after the occurrence of an error Releasing the 'FREEZE' Mode. 1. Press the 'RESET' button 2. Press the 'READY' button 3. Take measures against the...
- Page 37 PART IV. How to stop the machine in emergency SM421 Operation Handbook 2. System emergency stop: How to take measures against the emergency stop due to the judgment of the system itself Restarting the production 1. Select the ‘Start’ submenu 2.
-
Page 38: Emergency Stop
PART IV. How to stop the machine in emergency SM421 Operation Handbook Emergency Stop 1. The emergency stop by operator The emergency stop by operator 1. Press the ‘EMG’ switch on operation panel or the ‘MOTOR FREE’ button on the teaching box... - Page 39 PART IV. How to stop the machine in emergency SM421 Operation Handbook 1. The emergency stop by operator Releasing 'Emergency Stop' mode 1. Release the pressed ‘EMG’ switch by turning clockwise 2. Press the ‘STOP’ button PART IV How to stop the machine in...
- Page 40 PART IV. How to stop the machine in emergency SM421 Operation Handbook Releasing 'Emergency Stop' mode 3. Find the cause of the emergency 4. Press the 'RESET' button 5. Press the 'READY' button stop, and remove it RRID RRID In case that the machine stops in an emergency state and then the production is restarted, the operator must check if there is any component on the PCB due to emergency stop before pressing the 'READY' button.
- Page 41 PART IV. How to stop the machine in emergency SM421 Operation Handbook 2. System emergency stop: How to take measures against the emergency stop due to the judgment of the system itself 1. Press the ‘STOP’ button to turn off the buzzer 2.
- Page 42 PART IV. How to stop the machine in emergency SM421 Operation Handbook 2. System emergency stop: How to take measures against the emergency stop due to the judgment of the system itself 3. Check the error by referring to the ‘Troubleshooting 4.
- Page 43 PART IV. How to stop the machine in emergency SM421 Operation Handbook 2. System emergency stop: How to take measures against the emergency stop due to the judgment of the system itself 5. Press the ‘READY’ button to supply power to the motor 6.
-
Page 44: Smt In-Line Process
PART V. Changing Jobs This part describes the basic SMT In-Line work process and the method to change the work from the existing work to the new one during operation. SM421 Operation Handbook SMT In-Line Process Magazine Loader Screen Printer... -
Page 45: Changing Jobs
PART V. Changing Jobs SM421 Operation Handbook Changing Jobs 1. Changing the machine status into the 'IDLE' mode Press the 'STOP' button Press the 'RESET' button Check if the machine is in the 'IDLE' mode PART V Changing Jobs... - Page 46 PART V. Changing Jobs SM421 Operation Handbook 2. Removing the feeder Pull the grip back. Remove the cover tape. Remove the feeder.
- Page 47 PART V. Changing Jobs SM421 Operation Handbook 3. Clean the feeder base 5. Remove backup-pin Before removing the backup-pin, power off the Remove the chips or other foreign matter on the feeder base motor. upper surface and in the slot by using the provided brush or Warning another small brush.
- Page 48 PART V. Changing Jobs SM421 Operation Handbook 7. Backup-pin rearrangement 8. Install the feeder ① Fixing the feeder in the slot ② Fixing the grip Install the feeders in the feeder base by referring to the above feeder installation method 9.
- Page 49 SM421 Operation Handbook MEMO PART V Changing Jobs...
-
Page 50: Checking Feeder
PART VI. Additional Check Points This Part provides the troubleshooting measures for the problems that can occur during machine operation. SM421 Operation Handbook Checking Feeder 1. Checking reel hanger Check Points After mounting the feeder, make sure the reel hanger is in contact with the inside of the feeder. - Page 51 PART VI. Additional Check Points SM421 Operation Handbook 2. Checking locker Check Points After mounting the part reel on the feeder, make sure the locker is properly locked. Tape Guide Push Locker If the tape guide and the locker are not locked properly, it may collide with the head during operation.
- Page 52 PART VI. Additional Check Points SM421 Operation Handbook 3. Checking part reel Check Points The tape should extend more than 100 mm from the part adhesion 100mm For smooth feeding of the parts, make sure the point. following conditions are met when you mount the part reel on the feeder.
- Page 53 PART VI. Additional Check Points SM421 Operation Handbook 4. Checking if the feeder is properly mounted on the feeder base 2. Secure the grip after mounting the 1. Check the probe pins of the feeder. 3. Check the LED color of the feeder.
- Page 54 PART VI. Additional Check Points SM421 Operation Handbook 5. Setting the pickup height of the parts - To set the pickup height of the parts, select ‘PCB Edit’ > ‘Feeder Z Pickup’ in MMI. Check Points You should set the pickup height differently depending on whether the part is fed by the paper tape reel or by the emboss tape reel.
- Page 55 PART VI. Additional Check Points SM421 Operation Handbook 6. Operating the machine after changing the reel - When you close the reel arm after reel change, you should lift it slightly. Slow Swing Check Points The machine will operate only if you lift the reel arm upwards when you close the reel hanger.
- Page 56 PART VI. Additional Check Points SM421 Operation Handbook 7. Precautions that need to be taken when you check the reel information 1.You should open the reel arm before you can check If you try to move the reel arm plate sideways as shown in the the reel information.
-
Page 57: Arranging Backup Pins
PART VI. Additional Check Points SM421 Operation Handbook Arranging Backup Pins 1. Determining the positions of the backup pins - When you place the backup pins, you should avoid the hole in the PCB. 1. Place the master PCB in the conveyer. - Page 58 PART VI. Additional Check Points SM421 Operation Handbook 2. Setting the height of backup pins -You should set the height of backup pins after securing the master PCB in the conveyer. 1. Set the height of the backup pins in the sides.
- Page 59 PART VI. Additional Check Points SM421 Operation Handbook 3. Checking the flatness of the PCB - Place and secure the PCB in the conveyer. Then, check if the PCB is flat using a ruler. 1. Checking the flatness of the PCB in a diagonal direction 2.
- Page 60 Samsung Techwin Co., Ltd. Semi-conductor Systems business division (http://www.samsung-smt.com) DongBang Rental B/D 1F, 333-1, Sangdaewon1- dong, Joongwon-gu, Sungnam-shi, Gyeonggi-do, Republic of Korea (Post Code: 462-807)