Table of Contents
Advertisement
Advertisement
Table of Contents

Related Manuals for Polaris Outlaw 9921811


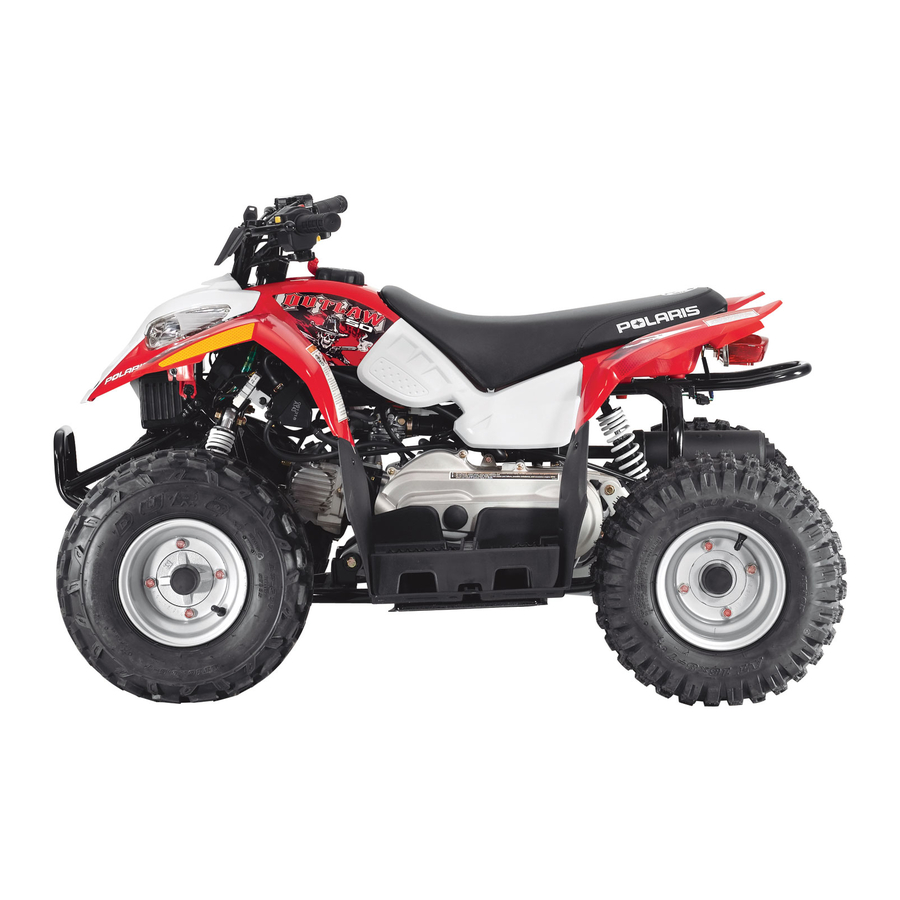
Summary of Contents for Polaris Outlaw 9921811
- Page 3 WARNING The engine exhaust from this product contains chemicals known to the State of California to cause cancer, birth defects or other reproductive harm. A card containing important ATV safety information should be attached to the owner's manual on the next page. If you cannot locate this card, or if it has been removed, please call 1-800-342-3764 for assistance.
- Page 4 Visit us at www.polarisindustries.com...
- Page 5 POLARIS and POLARIS THE WAY OUT are registered trademarks of Polaris Industries Inc. Copyright 2008 Polaris Sales Inc. All information contained within this publication is based on the latest product information at the time of publication. Due to constant improvements in the design and quality of production components, some minor discrepancies may result between the actual vehicle and the information presented in this publication.
- Page 6 ATV. A Polaris ATV is not a toy and can be hazardous to operate. Make sure any child who will operate the ATV takes a training course before operating the ATV. Make sure all operators understand and follow all of the instructions and warnings contained in this owner’s manual.
- Page 7 You must learn how to keep yourself and those around you safe while you're riding. Your parents and Polaris want you to enjoy riding your new ATV, and that's why you need to read and understand the information in your owner's manual. You must also take an ATV training course before you begin riding.
-
Page 8: Table Of Contents
Maintenance ... . . 94 Specifications ... 156 Polaris Products ..158 Troubleshooting ..160 Warranty . -
Page 9: Introduction
Introduction Safety Words and Symbols The following signal words and symbols appear throughout this manual and on your vehicle. Your safety is involved when these words and symbols are used. Become familiar with their meanings before reading the manual. The safety alert symbol indicates a potential personal injury hazard. - Page 10 Failure to follow the warnings and safety precautions contained in this manual can result in severe injury or death. A Polaris ATV is not a toy and can be hazardous to operate. This vehicle handles differently than other vehicles, such as motorcycles and cars. A collision or rollover can occur quickly, even during routine maneuvers like turning, or driving on hills or over obstacles, if you fail to take proper precautions.
-
Page 11: Safety
Safety Safety Training ATV safety training is a top priority for Polaris. When you purchased your new ATV, your dealer instructed you on the authorized ATV RiderCourse you and your eligible family members. This training is included in the purchase price of your ATV. - Page 12 If you purchased a used Polaris ATV, you can take the ATV RiderCourse ATV Enrollment Express at (800) 887-2887 or by visiting www.atvsafety.org. Purchas- ers of a used Polaris ATV will be charged for this training. FOR MORE INFORMATION ABOUT ATV SAFETY, call the Consumer Product...
-
Page 13: Riding Gear
Helmet Wearing a helmet can prevent a severe head injury. Whenever riding a Polaris vehicle, always wear a helmet that meets or exceeds established safety standards. Approved helmets in the USA and Canada bear a U.S. - Page 14 Riding Gear Eye Protection Do not depend on eyeglasses or sunglasses for eye protection. Whenever riding a Polaris vehicle, always wear shatterproof goggles or use a shatterproof helmet face shield. Polaris recommends wearing approved Personal Protective Equipment (PPE) bearing markings such as VESC 8, V-8, Z87.1, or CE.
-
Page 15: Equipment Modifications
The warranty on your Polaris ATV is terminated if any equipment has been added to the vehicle, or if any modifications have been made to the vehicle, that increase its speed or power. -
Page 16: Safety Warnings
Safety Safety Warnings WARNING Failure to operate the ATV properly can result in a collision, loss of control, accident or overturn, which may result in serious injury or death. Be sure to read all of the following warnings about driving hazards and how to avoid them. These warnings are provided for your child's safety. -
Page 17: Operating Without Instruction
Beginning and inexperienced operators should complete the ATV RiderCourse offered by Polaris through the SVIA. They should then regularly practice the skills learned in the course and the operating techniques described in the Owner's Manual. -
Page 18: Handling Gasoline
Safety Warnings Handling Gasoline Gasoline is highly flammable and explosive under certain conditions. • Never allow a child to refuel or handle gasoline. • Always exercise extreme caution whenever handling gasoline. • Always refuel with the engine stopped, and outdoors or in a well ventilated area. •... -
Page 19: Protective Apparel
Safety Safety Warnings Failure to Inspect Before Operating Failure to inspect and verify that the ATV is in safe operating condition before operating increases the risk of an accident. Always inspect the ATV before each use to make sure it's in safe operating condition. -
Page 20: Carrying A Passenger
Safety Warnings Carrying a Passenger Carrying a passenger greatly reduces the operator's ability to balance and control the ATV, which may result in an accident or overturn. Never carry a passenger on this ATV. Using Alcohol or Drugs Operating the ATV after consuming alcohol or drugs could adversely affect operator judgment, reaction time, balance and perception. -
Page 21: Operating On Pavement
Safety Safety Warnings Operating on Pavement Operating an ATV on paved surfaces (including sidewalks, paths, parking lots and driveways) may adversely affect the handling of the ATV and could result in loss of control and accident or overturn. Avoid operating the ATV on pavement. ATV tires are designed for off-road use. -
Page 22: Operating At Excessive Speeds
Safety Warnings Operating at Excessive Speeds Operating the ATV at excessive speeds increases the operator's risk of losing control. Always operate at a speed that's appropriate for the terrain, the visibility and operating conditions, and your experience. Physical Control of the ATV Removing a hand from the handlebars or feet from the footrests during operation can reduce your ability to control the vehicle or cause loss of... -
Page 23: Turning Improperly
Safety Warnings Turning Improperly Turning improperly could cause loss of traction, loss of control, accident or overturn. Always follow proper procedures for turning as described in the owner's manual. Never turn abruptly or at sharp angles. Never turn at high speeds. Practice turning at slow speeds before attempting to turn at faster speeds. -
Page 24: Improper Hill Climbing
Safety Warnings Improper Hill Climbing Improper hill climbing could cause loss of control or overturn. Always follow proper procedures for climbing hills as described in the owner's manual. See page 82. Operating on Steep Hills Operating on excessively steep hills could cause an overturn. -
Page 25: Descending Hills Improperly
Safety Warnings Descending Hills Improperly Improperly descending a hill could cause loss of control or overturn. • Always follow proper procedures for traveling down hills as described in the owner's manual. NOTE: A special technique is required when braking while traveling downhill. See page 85. •... -
Page 26: Crossing Hillsides
Safety Safety Warnings Crossing Hillsides Driving on a sidehill is not recommended. Improper procedure could cause loss of control or overturn. Avoid crossing the side of any hill unless absolutely necessary. If crossing a hillside is unavoidable, always follow proper procedures as described in the owner's manual. -
Page 27: Stalling While Climbing A Hill
Safety Safety Warnings Stalling While Climbing a Hill Stalling, rolling backwards or improperly dismounting while climbing a hill could cause an overturn. Always maintain a steady speed when climbing a hill. If all forward speed is lost If you lose all forward speed: Keep your weight uphill. Apply the front brakes gradually (right lever). -
Page 28: Operating On Slippery Terrain
Safety Safety Warnings Operating on Slippery Terrain Failure to use extra caution when operating on excessively rough, slippery or loose terrain could cause loss of traction, loss of control, accident or overturn. Do not operate on excessively rough, slippery or loose terrain until you've learned and practiced the skills necessary to control the ATV on such terrain. -
Page 29: Operating In Unfamiliar Terrain
Safety Safety Warnings Operating in Unfamiliar Terrain Failure to use extra caution when operating on unfamiliar terrain could result in an accident or overturn. Unfamiliar terrain may contain hidden rocks, bumps, or holes that could cause loss of control or overturn. Travel slowly and use extra caution when operating on unfamiliar terrain. -
Page 30: Skidding Or Sliding
Never modify the ATV through improper installation or use of accessories. All parts and accessories added to the vehicle must be genuine Polaris Industries Inc. or equivalent components designed for use on this ATV and should be installed and used according to approved instructions. -
Page 31: Operating Through Deep Water
Safety Safety Warnings Operating Through Deep Water Operating the ATV through deep or fast-flowing water could cause the tires to float, causing loss of control or overturn. Avoid operating through deep or fast-flowing water. If it's unavoidable to enter water that exceeds the height of the footrests: •... -
Page 32: Improper Cargo Loading
Safety Safety Warnings Improper Cargo Loading Overloading the ATV or carrying/towing cargo may cause changes in handling, which could cause loss of control or an accident. Never haul cargo or tow a load with this ATV. Never tow or pull an object behind the ATV. A wagon, sled or other towed object does not have brakes or steering. -
Page 33: Physical Skills
Safety Safety Warnings Operating on Frozen Bodies of Water Operating on frozen bodies of water may result in serious injury or death if the ATV and/or the operator fall through the ice. Never operate the ATV on a frozen body of water. Operating a Damaged ATV Operating a damaged ATV can result in an accident. -
Page 34: Hot Exhaust Systems
Safety Warnings Hot Exhaust Systems Exhaust system components are very hot during and after use of the vehicle. Hot components can cause burns and fire. Do not touch hot exhaust system components. Always keep combustible materials away from the exhaust system. Use caution when traveling through tall grass, especially dry grass. -
Page 35: Discretionary Warning
If an informational or graphic label becomes illegible or comes off, contact your Polaris dealer to purchase a replacement. Replacement safety labels are provided by Polaris at no charge. -
Page 36: Operation Warning
Safety Safety Labels and Locations Operation Warning WARNING Improper ATV use can result in SEVERE INJURY OR DEATH. Always use an approved helmet and protective gear. Never use on public roads. Never carry passengers. Never use with drugs or alcohol. NEVER operate: without proper training or instruction;... -
Page 37: Age Warning
Safety Safety Labels and Locations Age Warning WARNING Operation of this ATV by children under the age of 6 increases the risk of severe injury or death. Adult supervision required for children under age NEVER permit children under age 6 to operate this ATV. -
Page 38: Tire Pressure Warning
Safety Labels and Locations Tire Pressure Warning WARNING Improper tire pressure or overloading can cause loss of control. Loss of control can result in severe injury or death. • Cold tire pressure: Front: 2.0 psi (13.8 kPa) Rear: 2.0 psi (13.8 kPa) •... - Page 39 Safety Safety Labels and Locations No Passenger Warning WARNING NEVER ride as a passenger. Passengers can cause a loss of control, resulting in SEVERE INJURY or DEATH. 7175378...
-
Page 40: Clutch Cover Warning
Safety Labels and Locations Clutch Cover Warning WARNING NO STEP • Moving parts hazard under belt-clutch guard. To prevent serious injury, do not operate vehicle with guard removed. • Do not touch clutch cover, cover may become hot. • Do not modify engine or clutch. Doing so can cause part failure, possible imbalance, and excessive engine RPM which can result in serious injury or death. -
Page 42: Youth Section
Youth Section... -
Page 43: Know Your Atv
PARENTS: Polaris Youth ATVs are equipped with a speed control system to allow adults to limit the speed of the vehicle for the rider's skill and experience. More information on speed limiting functions can be found beginning on page 122. - Page 44 Before you have an adult start the engine for you for the first time, let's learn about the con- trols on your new ATV. 1. Engine Stop Switch - When the engine is running, push this button down to shut the engine off quickly.
- Page 45 4. Kick-Start Lever - If your battery is too weak to start your ATV, you can push down on the kick-start lever with your foot to start the engine. Have an adult show you how it works. Read more about how to use the kick-start on page 68.
- Page 46 5. Gas Cap - The gas cap has to be taken off when an adult puts gas in your ATV. Never take the gas cap off. Always make sure it's tightly closed. Always have an adult put gas in your ATV.
- Page 47 7. Brake Levers - Squeeze the brake levers toward the handlebar to slow down or stop the ATV. The left lever controls the rear brake. The right lever controls the front brake. Always squeeze both brake levers at the same time. Always squeeze both brake levers at the same time or you could lose control of the ATV and be seriously injured.
- Page 48 8. Ignition Switch - The ignition switch key must be turned on before pushing the start button. You can also use this key to turn off the engine. 9. Tether Strap and Switch - The tether strap must always be attached snugly to your right wrist and to your ATV every time you drive.
- Page 49 Know Your ATV Let's review the three ways to stop the engine of your ATV: 1. Push the engine stop switch down. 2. Pull the tether strap off the ATV. 3. Turn the key off.
-
Page 50: Pre-Ride Check
ATV safely. Never start the engine if you have a sticky throttle. You could be seriously hurt if you ride with a sticky throttle. Have an adult or your Polaris dealer fix the throttle before you ride. - Page 51 Never start the engine if your ATV has sticky brakes. You could be seriously hurt if you ride with sticky brakes. Have an adult or your Polaris dealer fix the sticky brakes before you ride. Have an adult check to see if your ATV needs more gas. Children must never add their own gasoline.
- Page 52 If you used the storage area under the seat, make sure the seat is locked in place. Have an adult check the engine oil level when the engine is cold. The engine is very hot after it has been running and it can burn your skin if you touch it. Children must never check the oil on their own.
-
Page 53: Riding Rules
Riding Rules Now you're ready to learn about riding your Polaris ATV. There are some things you can do and there are some things you must never do. Rules are very important when you're driving an ATV. Adults have riding rules, too. The rules help keep us safe when we ride. - Page 54 Always wear the right kind of clothing and safety gear when riding your ATV. Helmet: Your helmet is very important for safe riding. A helmet can prevent a severe head injury. Eye Protection: Always wear shatterproof goggles or a helmet face shield, and always keep them clean so you can see where you're driving.
- Page 55 Riding Rules Always attach the tether strap to your right wrist and to the ATV before riding. Make sure you know where you're going to drive before your ATV is started. Make sure the area is safe all around your ATV. Your ATV is made for one person.
- Page 56 Riding Rules Never ride alone. An adult should always be watching you in case you need help. Always drive within the sight of an adult. Never ride on public trails. Don't ride your ATV on roads or over railroad tracks. Your ATV makes noise that will keep you from hearing cars, trucks or trains that may be coming towards you.
- Page 57 Respect your ATV; respect your environment; and you will earn the respect of everyone. Enjoy riding your new Polaris ATV!
-
Page 58: Adult Section
Adult Section... -
Page 59: Vehicle Identification Numbers
Remove the spare key and store it in a safe place. An ignition key can be duplicated only by ordering a Polaris key blank (using your key number) and mating it with one of your existing keys. The igni-... -
Page 60: Features And Controls
Features and Controls Main Key Switch Turn the key clockwise to the ON position before starting the engine. To avoid draining the battery, always turn the key to the OFF position when the engine is not running. Always remove the ignition key when the vehicle is not in use. -
Page 61: Choke Lever
Features and Controls Engine Stop Switch Horn Stop Switch The engine will not start or run when the stop switch is down, in the OFF position. Its pur- pose is to provide the operator with a quick means of engine shutdown in case of stuck throttle or other emergency. -
Page 62: Horn Button
Features and Controls Horn Button Use the horn for emergencies and to let others know you’re near. Engine Start Button The start button is located slightly above the choke lever. 1. Attach the tether strap securely to the vehicle and to the rider's right wrist. 2. - Page 63 Features and Controls Throttle Controls WARNING Operating an ATV with sticking or improperly operating throttle controls could cause an accident and lead to severe injury or death. Never start or operate an ATV with a sticking or improperly operating throttle. Always contact your dealer for service if throttle problems arise.
-
Page 64: Throttle Lever
Throttle Lever Press the throttle lever toward the handlebar to increase engine speed and vehicle movement. Engine speed returns to idle when the lever is released. This ATV is equipped with an Electronic Throttle Control (ETC), which is designed to reduce the risk of a frozen or stuck throttle. - Page 65 Features and Controls Brakes Squeeze both brake levers toward the handlebar at the same time to apply the brakes. The left lever controls the rear brakes. The right lever controls the front brakes. WARNING! Applying only one brake could cause loss of control and result in serious injury or death. Always apply both brakes at the same time.
- Page 66 Brakes Parking Brake 1. Squeeze the left brake lever. 2. Push the parking brake lock down to lock the brake lever in place. 3. Release the brake lever. 4. To release the parking brake lock, squeeze and release the brake lever. The parking brake will release automatically.
- Page 67 Lights WARNING Polaris Youth ATVs are not equipped with lights that are designed for driving in the dark. Do not operate this ATV after dark. Use caution and drive at reduced speeds in conditions of reduced visibility. This ATV is designed for off-road use only. Do not operate this ATV on streets or highways.
-
Page 68: Fuel System
Features and Controls Fuel System Gas Cap Gas Cap The fuel tank filler cap is located directly below the handlebars. Use unleaded gasoline with a minimum pump octane of 87. Refer to the specifications section beginning on page 156 for fuel tank capacity. -
Page 69: Fuel Valve
Features and Controls Fuel Valve The fuel valve is located on the left side of the ATV. It has three settings. OFF: For vehicle storage and when transporting. ON: For normal operation. RES: For reserve supply if main supply is exhausted. -
Page 70: Footwell Riser
Footwell Riser The removable footwell risers improve riding ergonomics and provide comfort for shorter operators. An operator will also have better control of the ATV when both feet can remain firmly planted on either the footwells or the risers. If the operator's legs are long enough to comfortably reach the footwells without the risers, the risers can be removed. - Page 71 Features and Controls Kick-Start Lever If the battery becomes too weak to start the engine, use the kick-start lever to start the engine until the battery is serviced. 1. Position the vehicle on a level surface. 2. Lock the parking brake. 3.
- Page 72 Features and Controls Kick-Start Lever 8. If the kick-start lever is not installed, remove the lever from the under-seat storage area. 9. Remove the plug from the kick-start access hole on the left side of the vehicle. Tip: Store the plug in a secure location. Always reinstall the access hole plug whenever the kick-start lever is removed from the vehicle.
-
Page 73: Operation
Break-in Period The break-in period for your new Polaris 4-cycle ATV is defined as the first ten hours of operation, or the time it takes to use the first two full tanks of gasoline. No single action on your part is as important as following the procedures for a proper break-in. - Page 74 Break-in Period 1. Fill the fuel tank with gasoline. Always exercise extreme caution whenever han- dling gasoline. See page 15. 2. Check the oil level. Add the recom- mended oil as needed. Maintain the oil level in the proper range. See page 105. 3.
-
Page 75: Pre-Ride Inspection
Pre-Ride Inspection Failure to inspect and verify that the ATV is in safe operating condition before operating increases the risk of an accident. Always inspect the ATV before each use to make sure it's in safe operating condition. Item Brake system / lever travel Front suspension Rear suspension Steering... - Page 76 Pre-Ride Inspection Item Throttle Engine stop switch Daytime running lights (if equipped) Brakelight Air filter, pre-filter Drive chain Frame nuts, bolts, fasteners Loose or damaged components Riding gear Pre-Ride Checklist Remarks Check for proper operation Check for proper function Check for proper operation Check for proper operation Inspect, clean or replace Check condition and slack;...
-
Page 77: Safe Operation Practices
Safe Operation Practices 1. Complete the recommended safety training before operating this vehicle. See page 8. 2. Do not allow anyone under 6 years of age to operate this vehicle. 3. Never carry a passenger on this ATV. 4. Engine exhaust fumes are poisonous. Never start the engine or let it run in an enclosed area. - Page 78 Safe Operation Practices 7. Drive in a manner appropriate for your skills and operating conditions. Never operate at excessive speeds. Never attempt wheelies, jumps, or other stunts. Never remove your hands from the han- dlebars while operating, and always keep both feet on the footrests. 8.
-
Page 79: Starting The Engine
Operation Starting the Engine NOTICE: Operating the ATV immediately after starting could cause engine damage. Allow the engine to warm up for several minutes before operating. 1. Lock the parking brake. 2. Turn the fuel valve on. 3. Sit on the vehicle. 4. - Page 80 Starting the Engine 6. Push the engine stop switch up to the ON position. 7. Turn the ignition key to ON. 8. Squeeze the rear brake lever and press the start button. The rear brake lever must be engaged for the engine to start. 9.
-
Page 81: Stopping The Engine
Operation Stopping the Engine 1. Release the throttle completely. 2. Apply the brakes until the vehicle stops moving. 3. Stop the engine. There are three ways to stop the engine: • Turn the key off. • Push the engine stop switch down. •... -
Page 82: Driving Procedure
Driving Procedure 1. Wear a helmet and eye protection. 2. Sit upright with both feet on the footrests and both hands on the handlebars. 3. Lock the parking brake. 4. Start the engine and allow it to warm up. 5. Check your surroundings and determine your path of travel. -
Page 83: Making Turns
Operation Making Turns Your ATV is equipped with a solid rear axle, which drives both rear wheels equally at all times. This means that the wheel on the outside of the turn must travel a greater distance than the inside wheel when turning, and the inside tire must slip traction slightly. -
Page 84: Driving Over Obstacles
Driving Over Obstacles Follow these precautions when operating over obstacles: 1. Always check for obstacles before operating in a new area. 2. Look ahead and learn to read the ter- rain. Be constantly alert for hazards such as logs, rocks and low hanging branches. -
Page 85: Driving Uphill
Operation Driving Uphill Braking and handling are greatly affected when operating in hilly terrain. Improper procedure could cause loss of control or overturn. Whenever traveling uphill, fol- low these precautions: 1. Drive straight uphill. ° 2. Avoid steep hills (15 3. - Page 86 Driving Uphill 5. Keep both feet on the footrests. 6. Shift body weight uphill. 7. Proceed at a steady rate of speed and throttle opening. Opening the throttle suddenly could cause the ATV to flip over backwards. 8. Never go over the top of any hill at high speed. An obstacle, a sharp drop, or another vehicle or person could be on the other side of the hill.
- Page 87 Operation Driving on a Sidehill (Sidehilling) Driving on a sidehill is not recommended. Improper procedure could cause loss of control or overturn. Avoid crossing the side of any hill unless absolutely necessary. If crossing a sidehill is unavoidable, follow these precautions: 1.
-
Page 88: Driving Downhill
Driving Downhill When driving downhill, follow these precautions: 1. Avoid steep hills (15 ° 2. Shift body weight uphill. Transfer your weight to the rear of the vehicle. 3. Drive straight downhill. 4. Slow down. Excessive speed when traveling downhill can cause loss of control. 5. -
Page 89: Turning Around On A Hill
Operation Turning Around on a Hill If the vehicle stalls while climbing a hill, never back it down the hill! Use the K-turn to turn around. 1. Stop the vehicle and lock the parking brake while keeping body weight uphill. 2. - Page 90 Turning Around on a Hill 4. Staying uphill of the ATV, turn the handle- bars full left. 5. While holding the brake, release the park- ing brake lock and slowly release the brake, allowing the ATV to roll around to your right until it's pointing across the hill or slightly downward.
-
Page 91: Parking On A Hill Or Incline
Operation Parking on a Hill or Incline Avoid parking on a hill or incline if possible. If it's unavoidable, follow these precautions: 1. Stop the engine. 2. Lock the parking brake. 3. Always block the rear wheels on the downhill side as shown in the illus- tration. -
Page 92: Driving On Slippery Surfaces
Driving on Slippery Surfaces Whenever riding on slippery surfaces such as wet trails or loose gravel, or during freezing weather, follow these precautions: 1. Do not operate on excessively rough, slippery or loose terrain. 2. Slow down when entering slippery areas. 3. -
Page 93: Driving Through Water
Operation Driving Through Water Your ATV can safely operate through shallow water. The recommended maximum depth for your ATV is below the bottom of the footrests. Follow these precautions when operating through water: 1. Determine water depth and current before entering water. - Page 94 Driving Through Water 4. After driving through water, dry the brakes by applying light pressure to the levers (while moving) until braking action is normal. If you do not perform this procedure, your brakes may be ineffective. NOTICE: Serious engine damage can result if the vehicle is not thoroughly inspected after operating in water deeper than the footrest level.
-
Page 95: Emission Control Systems
Operation on Public Lands in the U.S.A. Your Polaris vehicle has a spark arrestor that was tested and qualified to be in accordance with the USDA Forest Service Standard 5100-1C. Federal law requires that this spark arres- tor be installed and functional when the vehicle is operated on public lands. -
Page 96: Exhaust Emission Control System
The engine and related components must be main- tained at Polaris specifications to achieve optimal performance. Engine idle speed is the only adjustment Polaris recommends that the operator perform. Any other adjustments should be performed by an authorized Polaris dealer. -
Page 97: Maintenance
Maintenance Periodic Maintenance Chart To help you perform routine maintenance, a tool kit is provided in the storage compartment under the seat. Maintenance intervals in the following charts are based upon average riding conditions and an average vehicle speed of approximately 10 miles per hour. Vehicles subjected to severe use must be inspected and serviced more frequently. -
Page 98: Periodic Maintenance Chart
Inspect, clean, lubricate, adjust and replace parts as necessary. When inspection reveals the need for replacement parts, use genuine Polaris parts available from your Polaris dealer. Service and adjustments are critical. If you're not familiar with safe service and adjustment procedures, have a qualified dealer perform these operations. - Page 99 WARNING Improperly performing the procedures marked with a could result in component failure and cause an accident, which may result in serious injury or death. Always have an authorized Polaris dealer perform these services. Maintenance Chart Key Perform these operations more often under severe use, such as in dirty or wet condi- tions, to purge water or dirt contamination from grease fittings and other critical components.
- Page 100 Periodic Maintenance Chart Item Steering Front suspension Rear suspension Tires Brake lever travel Brake system Wheels/fasteners Frame fasteners Engine oil level Air filter, pre-filter & main element Air box sediment tube Headlamp/tail lamp Maintenance Interval (whichever comes first) Hours Calendar Miles (Km) Daily Daily...
- Page 101 Brake lever travel/brake freeplay Spark plug Idle speed Choke Perform these procedures more often for vehicles subjected to severe use. Emission-Related Service Have an authorized Polaris dealer perform these services. Maintenance Interval (whichever comes first) Hours Calendar Miles (Km) Daily Weekly...
- Page 102 Periodic Maintenance Chart Item Battery Engine oil change Transmission oil Oil pre-filter screen General lubrication Valve clearance Carburetor float bowl Throttle cable/ETC switch Choke cable Maintenance Interval (whichever comes first) Hours Calendar Miles (Km) Monthly 200 (320) 300 (480) 12 M 400 (640) 12 M 400 (640)
- Page 103 Fuel filter Engine mounts Exhaust muffler/pipe Ignition timing Perform these procedures more often for vehicles subjected to severe use. Emission-Related Service Have an authorized Polaris dealer perform these services. Maintenance Interval (whichever comes first) Hours Calendar Miles (Km) 500 (800)
- Page 104 Periodic Maintenance Chart Item Wiring Clutches (drive and driven) Front wheel bearings Spark arrestor Toe adjustment Maintenance Interval (whichever comes first) Hours Calendar Miles (Km) 12 M 1000 (1600) Inspect for wear, routing, security; 12 M 1000 (1600) Inspect; clean; replace worn parts 12 M 1000 (1600) Inspect;...
-
Page 105: Lubrication Guide
Perform these procedures more often for vehicles subjected to severe use Lube Polaris Synthetic Youth Oil or Synthetic SAE 40 Premium AGL Synthetic Gearcase Lube Polaris Chain Lube or SAE 80/ Polaris All Season Premium Grease or grease conforming to NLGI No. 2 Method See page 104. - Page 106 Maintenance Lubrication Guide Grease Points Grease Points...
-
Page 107: Engine Oil
Always check and change the engine oil at the intervals outlined in the Periodic Maintenance Chart beginning on page 94. Oil may need to be changed more frequently if Polaris oil is not used. Do not use automotive oil. See page 158 for the part numbers of Polaris products. -
Page 108: Engine Oil Check
Engine Oil Check Maintain the oil level within the safe range on the dipstick. Do not overfill. 1. Position the vehicle on a level surface. 2. Remove the dipstick. Wipe it dry with a clean cloth. 3. Reinstall the dipstick completely. 4. -
Page 109: Engine Oil Change
Maintenance Engine Oil Change 1. Position the vehicle on a level surface. 2. Clean the area around the pre-filter plug. 3. Start the engine. Allow it to idle for two to three minutes. 4. Stop the engine. CAUTION! Hot oil can cause burns to skin. Do not allow hot oil to contact skin. - Page 110 Engine Oil Change 5. Place a drain pan under the engine crankcase. 6. Remove the pre-filter plug. Allow the oil to drain completely. 7. Wash the oil pre-filter screen with solvent to remove debris. Allow the screen to air dry. 8.
- Page 111 Engine Oil Change 10. Reinstall the pre-filter drain plug. Torque to 11 ft. lbs. (15 Nm). 11. Remove the dipstick. Add 29 oz. (850 ml) of the recommended oil. Do not overfill. See the specifications section beginning on page 156 for capacities. 12.
-
Page 112: Fuel Filter
Maintenance Fuel Filter The Polaris ATV is equipped with an in-line fuel filter. This filter should be replaced by your dealer at the intervals recommended in the Periodic Maintenance Chart beginning on page 94. Do not attempt to clean the fuel filter. -
Page 113: Transmission Oil Check
Always check and change the oil at the intervals outlined in the Periodic Maintenance Chart begin- ning on page 94. Polaris recommends the use of AGL Synthetic Gearcase Lubricant. See page 158 Fill Plug for the part numbers of Polaris products. -
Page 114: Transmission Oil Change
Maintenance Transmission Oil Change 1. Position the vehicle on a level surface. 2. Remove the fill plug. 3. Place a drain pan under the gearcase. 4. Remove the drain plug. Allow the oil to drain completely. 5. Clean and reinstall the drain plug. Torque to 14 ft. lbs. (19 Nm). 6. -
Page 115: Spark Plugs
NOTICE: Using non-recommended spark plugs can result in serious engine damage. Always use Polaris-recommended spark plugs. Spark plug condition is indicative of engine operation. The spark plug firing end condition should be read after the engine has been warmed up and the vehicle has been driven at higher speeds. - Page 116 Maintenance Spark Plugs Normal Plug The normal insulator tip is gray, tan or light brown. There will be few combustion deposits. The electrodes are not burned or eroded. This indicates the proper type and heat range for the engine and the service. The tip should not be white. A white insulator tip indicates overheat- ing, caused by use of an improper spark plug or incorrect carburetor/throttle body adjust- ments.
-
Page 117: Vehicle Immersion
Maintenance Cylinder Head Torque Have your dealer check the ATV cylinder head for proper torque at the first service, or after 25 hours. Vehicle Immersion If the vehicle tips or overturns in water deeper than the footrest level, or if the engine stops during or after operating in water, restarting WILL result in serious engine damage. - Page 118 Vehicle Immersion 5. Loosen the carburetor drain screw. 6. Turn the engine over several times using the electric start. 7. Dry the spark plug and reinstall it, or replace it with a new plug. 8. Tighten the carburetor drain screw. 9.
- Page 119 • Always follow all recommended maintenance procedures. See your dealer as outlined in the owner's manual. • This CVT system is intended for use on Polaris products only. Do not install it in any other product. • Always make sure the CVT housing is securely in place during operation.
-
Page 120: Cvt Drying
Maintenance Constant Variable Transmission (CVT) System CVT Drying There may be some instances when water is accidently ingested into the CVT system. Use the following instructions to dry it out before operating. The drain plug is located on the bot- tom of the CVT cover. -
Page 121: Spark Arrestor
Maintenance Spark Arrestor To remove accumulated carbon, clean the spark arrestor at the intervals recommended in the Periodic Maintenance Chart beginning on page 94. WARNING Failure to heed these warnings could result in serious injury or death. • Do not perform service on the spark arrestor while the system is hot. Allow components to cool sufficiently before proceeding. - Page 122 Spark Arrestor 1. Remove the three bolts and remove the arrestor from the end of the muffler. 2. Use a non-synthetic brush to clean the arrestor screen. A synthetic brush may melt if components are warm. If necessary, blow debris from the screen with com- pressed air.
- Page 123 Carburetor Your Polaris ATV is calibrated at the factory for optimal performance at altitudes ranging from zero to 6,000 feet (1800 m) and temperatures of +40 degrees F. (4 degrees C.) or higher. Above 6000 feet (1800 m) the engine air/fuel mixture becomes overly rich and the engine loses approximately 3% of its power for each 1000-foot (304.8 m) increase in elevation.
- Page 124 Carburetor If the engine idle speed is not satisfactory, and all other conditions are favorable, the carbure- tor can be adjusted. 1. Start the engine. 2. Lock the parking brake. 3. Allow the engine to run for approximately five minutes. 4.
-
Page 125: Speed Control System
The dealer CANNOT, under any circumstances, either prior to the sale or later, even at the consumer's request, remove or adjust any speed limiting devices. Your Polaris ATV has an adjustable throttle limiting screw. Speed limiting devices may be adjusted/removed only by consumers when they determine that their child is capable of han- dling the additional speed. - Page 126 Maintenance Speed Control System Throttle Stop Speed Control System Use the following procedure to control how far Jam Nut the throttle opens. Screw 1. Loosen the jam nut. 2. Turn the screw inward to reduce speed or outward to increase speed. 3.
-
Page 127: Throttle Cable Adjustment
Maintenance Throttle Cable Adjustment Always check the throttle for smooth operation before riding. Periodically check the throttle freeplay. It should be kept between 1/16" and 1/8" (1.5 - 3.2 mm). If adjustment is required, turn the adjustment nut until the freeplay falls in to the acceptable limit. -
Page 128: Brake Freeplay
Maintenance Brake Freeplay Measure Freeplay Check (measure) the freeplay of the front and rear brakes at the intervals rec- ommended in the Periodic Maintenance Chart beginning on page 94. If the free- play isn’t at specification, adjust the freeplay as outlined on the following pages. - Page 129 Brake Freeplay Front Brake Adjustment 1. Position the vehicle on a level surface. 2. Elevate the front of the vehicle by placing a suitable stand under the frame. The front tires should be slightly off the ground. 3. While rotating the left front wheel, tighten the upper front brake adjuster nut on the right-hand control.
- Page 130 Brake Freeplay Front Brake Adjustment 5. While rotating the right front wheel, tighten the lower front brake adjuster nut on the right-hand control. 6. When you begin to feel a slight drag in wheel rotation, loosen the adjuster nut one full turn.
- Page 131 Brake Freeplay Rear Brake Adjustment 1. Position the vehicle on a level surface. 2. Elevate the rear of the vehicle by placing a suitable stand under the frame. The rear tires should be slightly off the ground. 3. While rotating the rear wheels, tighten the rear brake wing nut at the rear brake drum.
-
Page 132: Brake Lever Travel
Brake Lever Travel Check brake lever travel at the intervals recommended in the Periodic Maintenance Chart beginning on page 94. When freeplay specifications can no longer be obtained through adjustment as outlined on the preceding pages, use the following information to determine when to service the brakes. -
Page 133: Toe Alignment
Do not attempt to adjust tie rod alignment. All tie rod adjustments should be performed by an authorized Polaris dealer. 1. Position the vehicle on a level surface. 2. Place the handlebars in a straight-ahead position. - Page 134 1/8" to 1/4" (3-6 mm) toe out alignment. 5. Repeat the measurement procedure on the other side of the vehicle. 6. If you discover improper alignment, see your Polaris dealer for service. Maintenance...
-
Page 135: Steering Inspection
Maintenance Steering Inspection Check the steering assembly periodically for loose nuts and bolts. If any are found, have your dealer tighten them before operating the ATV. Camber and Caster The camber and caster are non-adjustable. Shock Spring Adjustment The rear shock absorber springs are adjustable to increase or decrease spring tension. -
Page 136: Drive Chain
Drive Chain Lubricate the drive chain with Polaris chain spray lube or an approved chain lube at the gen- eral lubrication interval specified in the Periodic Maintenance Chart beginning on page 94. Lubricate more often under severe use, such as in dirty or wet conditions. See page 158 for the part numbers of Polaris products. -
Page 137: Drive Chain Slack
Maintenance Drive Chain Slack 1. Check the amount of chain slack by moving the vehicle slightly forward to gain slack at the top side of the chain. 2. The chain should have 1/4"-1/2" (6-12 mm) deflection. If the chain needs adjustment, use the procedure on page 135. -
Page 138: Drive Chain Slack Adjustment
Drive Chain Slack Adjustment 1. Loosen the four rear housing mount bolts. 2. Loosen the chain adjuster lock nut. 3. Turn the chain adjuster clockwise to 1/4"-1/2" (6-12 mm) deflection. 4. Tighten the chain adjuster lock nut to 18 ft. lbs. (25 Nm). Hold the adjuster stud securely while tightening the nut to avoid breaking the stud. -
Page 139: Air Filter
Maintenance Air Filter 1. Remove the seat. See page 43. 2. Release the air box cover clips and remove the cover. 3. Remove the foam air filter. Wash the foam filter in warm soapy water, then rinse and let dry. If the filter is damaged, install a new foam filter. - Page 140 Maintenance Air Filter 5. Clean away any oil or sediments in the air box. 6. Reinstall the filter and air box cover. Secure the clips. 7. Reinstall the seat. NOTICE: Never operate the ATV with the filter element removed. Dirt will enter the engine causing rapid wear and severe damage to the engine.
-
Page 141: Handlebar Adjustment
Improper adjustment of the handlebars or incorrect torquing of the adjuster block tightening bolts can cause limited steering or loosening of the handlebars, resulting in loss of control and possible serious personal injury or death. Follow the adjustment procedures exactly, or see your Polaris dealer for service. - Page 142 Maintenance Tires WARNING Operating your ATV with worn tires, improperly inflated tires, non-standard tires or improperly installed tires will affect vehicle handling and could cause an accident resulting in serious injury or death. Always follow all tire maintenance procedures as outlined in this manual and on the labels on the vehicle. Always use original equipment size and type when replacing tires.
-
Page 143: Wheel Removal
Tire Tread Depth Always replace tires when tread depth is worn to 1/8" (3 mm) or less. Wheel Removal 1. Stop the engine and lock the parking brake. 2. Loosen the wheel bolts slightly. 3. Elevate the side of the vehicle by placing a suitable stand under the footrest frame. -
Page 144: Axle And Wheel Nuts
5. Securely tighten the bolts to 22 ft. lbs. (30 Nm). Axle and Wheel Nuts All nuts with a cotter pin installed must be service by an authorized Polaris dealer. Wheel Hub Tightening Front wheel bearing tightness and spindle nut retention are critical component operations. - Page 145 Tail Light Lamp Replacement If the brakelight doesn't work, the lamp may need to be replaced. 1. Remove the two screws securing the lens cover. Remove the lens cover. 2. Remove the lamp and replace it with a new recommended lamp. 3.
- Page 146 Daytime Running Lights Lamp Replacement If the daytime running lights do not operate, replace the lamps. Polaris recommends that you install replacement lamps obtained from your authorized Polaris dealer. 1. Disconnect the lights from the harness. 2. Remove the rubber cover from the back of the light assembly.
- Page 147 When removing the battery, always disconnect the negative (black) cable first. When reinstalling the battery, always connect the negative (black) cable last. The battery in your Polaris ATV is a sealed battery. The sealing strip cannot be removed. Never add water to this type of battery.
- Page 148 Battery Battery Removal 1. Remove the three bolts securing the battery mounting bracket to the vehicle. 2. Remove the mounting bracket and battery. 3. Disconnect the black (negative) battery cable first. Disconnect the red (positive) battery cable last. 4. Loosen the two nuts securing the battery plate to the top of the battery.
- Page 149 Battery Battery Installation Always install a fully charged battery. Using a new battery that has not been fully charged can damage the battery and result in a shorter life. It can also hinder vehicle performance. If recharging is necessary, use a .5 amp battery charger. 1.
- Page 150 Keeping your ATV clean will not only improve its appearance but it can also extend the life of various components. NOTICE: High water pressure may damage components. Polaris recommends washing the vehicle by hand or with a garden hose, using mild soap.
- Page 151 Cleaning Washing the ATV The best and safest way to clean your Polaris vehicle is with a garden hose and a pail of mild soap and water. 1. Use a professional-type washing cloth, cleaning the upper body first and the lower parts last.
- Page 152 • Transmission seals • Brakes If warning and safety labels are damaged, contact your Polaris dealer for free replacement. Grease all zerk fittings immediately after washing. Allow the engine to run for a while to evaporate any water that may have entered the engine or exhaust system.
- Page 153 Polishing Polaris recommends the use of common household aerosol furniture polish for polishing the finish on your Polaris vehicle. Follow the instructions on the container. Polishing Tips • Avoid the use of automotive products, some of which can scratch the finish of your vehi- cle.
- Page 154 Maintenance Storage Exterior Make necessary repairs and clean the vehicle as recommended. See page 147. Battery Storage Remove the battery from the vehicle, ensure that it's fully charged, and store it out of the sun in a cool, dry place. Check battery voltage each month during storage and recharge as needed to maintain a full charge.
- Page 155 Storage Stabilize the Fuel Polaris Carbon Clean is a fuel stabilizer and fuel system dryer. It cleans the fuel system, the combustion chamber and the exhaust ports. It also prevents bacterial growth and promotes better starting after the storage period.
- Page 156 Maintenance Storage Engine Oil Change the oil. See page 106. Air Filter / Air Box Inspect and clean (or replace) the pre-cleaner and air filter. Clean the air box. Drain the sedi- ment tube. Fluid Levels Inspect fluid levels. Change fluids as recommended in the Periodic Maintenance Chart beginning on page 94.
- Page 157 Maintenance Storage Lubricate Inspect all cables and lubricate all areas of the vehicle as recommended in the Periodic Main- tenance Chart beginning on page 94. Storage Area/Covers 1. Make sure tire pressure is at specification. 2. Using suitable supports under the frame, raise the vehicle slightly so that the tires are not touching the ground.
-
Page 158: Transporting The Atv
6. Always tie the frame of the ATV to the transporting unit securely with suitable straps or rope. The rack, bumper or handlebars do not offer enough support for tie-down while transporting the unit. Accessories Polaris has a wide range of accessories available for your ATV. Please see your Polaris dealer. Maintenance... -
Page 159: Specifications
Specifications Rider Capacity Maximum Weight Capacity Displacement Cooling Engine type Lubrication Oil Capacity Fuel Capacity Fuel Reserve Capacity Starting Drive System Final Drive Front Suspension Rear Suspension Outlaw 50 1 Rider 90 lbs. (41 kg) 49cc Air Cooled 4-Stroke Wet Sump 30 oz. - Page 160 Front/Rear Brakes Parking Brake Front Tires Rear Tires Dry Weight Length/Width/Height Wheel Base Ground Clearance Brake Light Daytime Running Lights Outlaw 50 Drum Mechanical Lock 16 x 6.5 - 7 (2 psi/13.8 kPa) 16 x 8 - 7 (2 psi/13.8 kPa) 210 lbs.
-
Page 161: Polaris Products
Polaris Products Part Number Description 2876248 Synthetic Youth Oil (qt/.95 l) 2876249 Synthetic Youth Oil (gal/3.8 l) 2872175 Semi-Synthetic 20W-40 Oil (qt/.95 l) 2872176 Semi-Synthetic 20W-40 Oil (gal/3.8 l) 2870791 Fogging Oil, Aerosol 2873602 Premium AGL Synthetic Gearcase Lubricant (qt/.95 l) - Page 162 Part Number Description 2871322 All Season Premium Grease (3 oz./89 ml) 2871423 All Season Premium Grease (14 oz./414 ml) 2871326 Carbon Clean Plus Grease Miscellaneous Additives Polaris Products...
-
Page 163: Troubleshooting
Troubleshooting See your Polaris dealer if you're unable to identify solutions using the following charts. Engine Turns Over, Fails to Start Possible Cause Out of fuel Clogged fuel valve or filter Water is present in fuel Fuel valve is turned off... - Page 164 Incorrect spark plug gap or heat range Troubleshooting Solution Recharge battery with .5 amp charger Check all connections and tighten Check all connections and tighten Solution Replace with recommended fuel See your Polaris dealer Set gap to specs or replace plugs...
- Page 165 Incorrect ignition timing Mechanical failure Exhaust system leak Solution Inspect, clean and/or replace spark plugs Set gap to specs or replace plugs Replace with new fuel See your Polaris dealer See your Polaris dealer See your Polaris dealer See your Polaris dealer...
- Page 166 Electronic throttle control malfunction Other mechanical failure Troubleshooting Solution Inspect, clean and/or replace spark plugs See your Polaris dealer Set gap to specs or replace plugs Check all connections and tighten Replace with new fuel Recharge battery with .5 amp charger...
- Page 167 Fuel is very high octane Incorrect jetting Solution Add or change fuel, clean the fuel system Replace with recommended fuel Replace filter See your Polaris dealer Solution Inspect, clean and/or replace spark plugs Replace with lower octane fuel See your Polaris dealer...
- Page 168 Inspect and replace Replace with new fuel Inspect, clean and/or replace spark plugs Inspect, clean and/or replace spark plugs See your Polaris dealer Set gap to specs or replace plugs Check all connections and tighten Recharge battery with .5 amp charger...
-
Page 169: Warranty
Polaris dealer. REGISTRATION At the time of sale, the Warranty Registration Form must be completed by your dealer and submitted to Polaris within ten days. Upon receipt of this registration, Polaris will record the registration for warranty. No verification of registration will be sent to the purchaser as the copy of the Warranty Registration Form will be the warranty entitlement. - Page 170 This warranty does not cover the use of unauthorized lubricants, chemicals, or fuels that are not compatible with the ATV. The exclusive remedy for breach of this warranty shall be, at Polaris' exclusive option, repair or replace- ment of any defective materials, or components or products. THE REMEDIES SET FORTH IN THIS WAR- RANTY ARE THE ONLY REMEDIES AVAILABLE TO ANY PERSON FOR BREACH OF THIS WARRANTY.
- Page 171 ALL IMPLIED WARRANTIES (INCLUDING BUT NOT LIMITED TO THE IMPLIED WARRANTIES OF MERCHANTABILITY AND FITNESS FOR A PARTICULAR PURPOSE) ARE LIMITED IN DURATION TO THE ABOVE SIX MONTH WARRANTY PERIOD. POLARIS FURTHER DISCLAIMS ALL EXPRESS WARRANTIES NOT STATED IN THIS WARRANTY. Some states do not allow limitations on how long an...
- Page 172 HOW TO OBTAIN WARRANTY SERVICE If your ATV requires warranty service, you must take it to a Polaris dealer authorized to repair Polaris ATVs. When requesting warranty service you must present your copy of the Warranty Registration form to the dealer.
- Page 173 In the country where your vehicle was purchased: Warranty or Service Bulletin repairs must be done by an authorized Polaris dealer. If you move or are traveling within the country where your vehicle was purchased, Warranty or Service Bulletin repairs may be requested from any authorized Polaris dealer who sells the same line as your vehicle.
- Page 174 You may also be required to obtain documentation from Polaris Industries in order to register your vehicle in your new country. If Purchased From A Private Party: If you purchase a Polaris product from a private citizen outside of the country in which the vehicle was originally purchased, all warranty coverage will be denied. Notice If your vehicle is registered outside of the country where it was purchased, and you have not followed the proce- dure set out above, your vehicle will no longer be eligible for warranty or service bulletin coverage of any kind.
- Page 175 Polaris standard limited warranty for this vehicle. Polaris warrants that this vehicle is; (1) designed, built, and equipped to conform at the time of initial sale with the requirements of 40 CFR 1051 and, (2) free from defects in materials and workmanship that may keep it from meeting these requirements.
- Page 176 Warranty U.S.A. EPA Emissions Limited Warranty The exclusive remedy for breach of this limited warranty shall be, at the exclusive option of Polaris, repair or replacement of any defective materials, components or products. THE REMEDIES SET FORTH IN THIS LIM- ITED WARRANTY ARE THE ONLY REMEDIES AVAILABLE TO ANY PERSON FOR BREACH OF THIS WARRANTY.
-
Page 177: Maintenance Log
Present this section of your manual to your dealer each time your vehicle is serviced. This will provide you and future owners with an accurate log of maintenance and services performed. DATE SERVICE INTERVAL 10 Hours (Break-in) 40 Hours 50 Hours 80 Hours TECHNICIAN SERVICE PERFORMED / COMMENTS... - Page 178 Maintenance Log DATE SERVICE TECHNICIAN SERVICE PERFORMED / COMMENTS INTERVAL 100 Hours 120 Hours 150 Hours...
- Page 179 Maintenance Log DATE SERVICE TECHNICIAN SERVICE PERFORMED / COMMENTS INTERVAL...
- Page 180 Maintenance Log DATE SERVICE TECHNICIAN SERVICE PERFORMED / COMMENTS INTERVAL...
-
Page 181: Index
Index Accessories....155 Age Restrictions ....13 Air Filter ....136-137 Axle and Wheel Nuts . - Page 182 Periodic Maintenance Chart. . 94-101 Polaris Products ....158 Polishing....150 Pre-Ride Inspection .
- Page 183 Index Safety Warnings ... 13-31 Handling Gasoline ..15 Hot Exhaust Systems ..31 Improper Cargo Loading .
- Page 184 Tail Light ....142 Tether Strap....45 Throttle .