
Related Manuals for NEC DS1-MP10RX series


Summary of Contents for NEC DS1-MP10RX series
- Page 1 Operation Guide for the MultiPresenter Stick DS1-MP10RX series (Compatible with Ver. 1.01) To ensure safe use of the MultiPresenter Stick, be sure to read the includ- ed Important Information before using the stick.
- Page 2 MultiPresenter Stick are made with the current firmware version. ▸ ▸ IMPORTANT A commercially available wired network adapter (a product verified by NEC) must be purchased in order to connect the MultiPresenter Stick to a wired LAN. For details, refer to the NEC website. http://www.nec-display.com/global/support/solution/mp10rx.html About trademarks • MultiPresenter is a trademark or registered trademark of NEC Display Solutions, Ltd.
-
Page 3: Table Of Contents
Contents 1. What can be done with the MultiPresenter Stick ..................4 2. Packaged Items ..............................6 3. Names of parts ..............................7 4. Basic operation (from connecting to devices to displaying images) ............ 8 4-1. Connecting the MultiPresenter Stick to an image display device and turning on the power ..........8 4-2. -
Page 4: What Can Be Done With The Multipresenter Stick
The MultiPresenter Stick includes a built-in wireless LAN function. In addition, when a commercially available wired network adapter whose operation has been verified by NEC is used, the MultiPresenter Stick can be connected to a wired LAN as well. - Page 5 Simple connection by PIN code (4-digit number) The unique INTELLIGENT CONNECTION function allows connection simply by inputting a PIN code (4-digit number), elimi- nating the need for wireless LAN connection operations. Furthermore, in addition to the INTELLIGENT CONNECTION func- tion, it is also possible to connect to existing networks (Infrastructure function). Android / iOS Windows / OS X WEB server functions...
-
Page 6: Packaged Items
2. Packaged Items Check that all the packaged items are present. MultiPresenter Stick 1 pc HDMI extension cable 1 pc ▸ ▸ NOTE The packaged HDMI extension cable is exclusive use for the MultiPresenter Stick. Do not use it able for other products. AC adapter 1 pc ▸ ▸ NOTE The AC adapter is exclusive use for the MultiPresenter Stick. -
Page 7: Names Of Parts
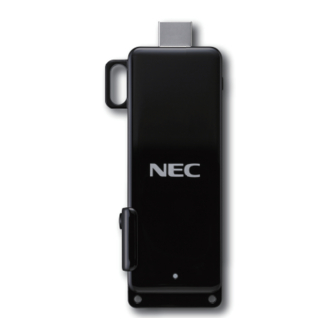
3. Names of parts Use the included HDMI extension cable to connect to the HDMI input port on a display ① HDMI output port or projector. This turns the power on and off. ② Power button To turn the power off, press and hold the button (for about 5 seconds). These discharge the heat inside the frame. ③ ⑨ Exhaust vents NOTE: Do not block the exhaust vents. -
Page 8: Basic Operation (From Connecting To Devices To Displaying Images)
4. Basic operation (from connecting to devices to displaying images) 4-1. Connecting the MultiPresenter Stick to an image display device and turning on the power Connect the included HDMI extension cable to the Multi- Presenter Stick. Connect the other end of the HDMI extension cable to the HDMI input port on a display or projector. -
Page 9: Making The Multipresenter Stick's Initial Settings
4-2. Making the MultiPresenter Stick’s initial settings The MultiPresenter Stick’s initial settings can be made in two ways: by using a computer or smartphone and by connecting a commercially available USB mouse. When making the initial settings using a computer or smartphone, the wireless LAN connection can be made with either the “INTELLIGENT CONNECTION”... -
Page 10: Making The Initial Settings Using A Computer Or Smartphone
4-2-1. Making the initial settings using a computer or smartphone First, connect the computer or smartphone to the same network as the MultiPresenter Stick (SSID displayed on the screen). * The following explanation is for Windows 7. Click the wireless LAN icon on the task tray. From the list of wireless networks, select the SSID shown on the screen (“SetupMultiPresenter_1234567890” (NOTE: the 1234567890 section differs from product to product)), then click [Connect]. - Page 11 Switch the SSID of the computer or smartphone to the SSID dis- played on the screen of the display or projector. • For the procedure for switching the SSID, see steps the previous page. SSID Screen on the display or projector Input the URL displayed on the screen of the display or projector into the web browser. NOTE: Perform steps within 3 minutes of each other. If no operation is performed within 3 minutes, start over from step the previous page.
-
Page 12: Making The Initial Settings Using A Commercially Available Usb Mouse
4-3-2. Using an Android device or an iOS device • For Android: Access Google Play and install the MultiPresenter application on the device. • For iOS: Access the App Store and install the MultiPresenter application on the device. ▸ ▸ REMARKS • The user’s manuals for MultiPresenter for Windows/OS X and for MultiPresenter for Android/iOS can be downloaded from NEC’s MultiPresenter website. -
Page 13: Connecting The Multipresenter Application To The Multipresenter Stick And Displaying Images
4-4. Connecting the MultiPresenter application to the MultiPresenter Stick and displaying images 4-4-1. Using a computer (Windows or OS X) • Connecting with the INTELLIGENT CONNECTION function Connect the MultiPresenter Stick to the display or projector, turn on the power and display the start-up screen. Launch the MultiPresenter application. The target device screen is displayed. Input the PIN code displayed on the start-up screen on the target device screen. Once the connection with the MultiPresenter Stick is completed, the computer screen is displayed on the display or projector screen. - Page 14 ▸ ▸ IMPORTANT When using an iOS device, the Wi-Fi settings must be made manually in order to connect with reception devices (such as the MultiPresenter Stick and a projector) by wireless LAN. • Connection procedure On the home screen, tap “MultiPresenter”. The MultiPresenter application is launched and the target device screen is displayed. Input the PIN code displayed on the start-up screen of the reception device or on the on-screen menu in the target device screen.
-
Page 15: Connecting To Multiple Multipresenter Sticks
▸ ▸ ADDITIONAL EXPLANATIONS Connecting to multiple MultiPresenter Sticks It is possible to connect from one computer or smartphone to multiple MultiPresenter Sticks (up to about 5) and display their images. On the MultiPresenter application’s target device screen, perform the operation to select [Multiple]. Set the wireless LAN mode of the MultiPresenter Sticks to be connected to Infrastructure and connect all the MultiPresenter Sticks to the same network. -
Page 16: Web Server Functions
5. Web server functions 5-1. Connecting computers or smartphones to the MultiPresenter Stick’s web server 5-1-1. Using a computer * The following is an example of the operation for Windows 7 when connected with the INTELLIGENT CONNECTION func- tion. This explanation starts from the point at which the MultiPresenter Stick’s start-up screen is displayed. Click the wireless LAN icon on the task tray. -
Page 17: Using A Smartphone
The web server screen is divided into three tabs: [WEB SHARING], [MultiPresenter] and [SETTINGS]. 5-1-2. Using a smartphone * The following is an example of the operation for an iOS device when connected with the INTELLIGENT CONNECTION function. This explanation starts from the point at which the MultiPresenter Stick’s start-up screen is displayed. On the home screen, tap the “Settings” icon. Tap “Wi-Fi”. From the list of networks, tap the SSID displayed on the start-up screen. When connecting for the first time, the password input screen appears. -
Page 18: Using The Multipresenter Application To Display The Web Server Screen
The web server screen is divided into three tabs: [WEB SHARING], [MultiPresenter] and [SETTINGS]. ▸ ▸ ADDITIONAL EXPLANATIONS Using the MultiPresenter application to display the web server screen The MultiPresenter application can be used to display the web server screen. Connect your computer or smartphone to the network to which the MultiPresenter Stick is connected. Launch the MultiPresenter application. -
Page 19: Using A Web Browser To Transfer Files Between Devices (Web Sharing)
5-2. Using a web browser to transfer files between devices (web sharing) • The images displayed with the MultiPresenter Stick can be displayed for approximately 5 seconds each on the web browser’s screen and the desired images can be saved on your device (Web Capture function). • Text can be added on the currently displayed screen and memos can be created for up to 10 pages. Memos you have created can be saved on your device as images. • Files on your device can be uploaded to the MultiPresenter Stick’s web server and shared among devices connected to the MultiPresenter Stick on the network. - Page 20 Description http://<the MultiPresenter Stick’s IP address> ① Displays the names of shared files stored on the MultiPresenter Stick’s web server. Files can be downloaded to your device by clicking the file name. ② NOTE 1: The files stored on the web server are automatically deleted when all the sessions are closed. (By default) NOTE 2: A separate application may be required to use files downloaded on a tablet devices, etc. Calls out files to be shared from the device currently being used and uploads them to the web server.
-
Page 21: Controlling The Number Of Panels Or Moderator, In The Multipresenter Managed Mode (Multipresenter)
5-3. Controlling the number of panels or moderator, in the MultiPresenter Managed mode (MultiPresenter) The MultiPresenter operating modes include the Free mode and the Managed mode. ▸ ▸ ADDITIONAL EXPLANATIONS About the MultiPresenter “Free mode” and “Managed mode”” • Free mode The Free mode is a mode for freely connecting from the MultiPresenter application installed on a computers or smartphone. -
Page 22: Displaying The Multipresenter Screen
5-3-2. Displaying the MultiPresenter screen Connect the MultiPresenter application of other devices to the MultiPresenter Stick. In the MultiPresenter application, select the file and send the image to the MultiPresenter Stick. On the web server screen, click the [MultiPresenter] tab. A display like the one below appears. 5-3-3. -
Page 23: Changing The Order Of The Images On The Screen
No./Name Description • The thumbnails of the images sent from the MultiPresenter application to the MultiPres- enter Stick are displayed here. ① Thumbnail Gallery • The standby screen is displayed if no file is selected with a MultiPresenter application connected to the MultiPresenter Stick. • This section is displayed in black if no MultiPresenter application is connected. ② Focus • The focus is displayed with a light blue frame. • Changes the number of panels into which the screen is split here. Patterns 2×1, 2×2, 3×3, ③ SPLIT PATTERN 4×4 and 1+12 can be selected according to the purpose of the meeting. ④... -
Page 24: Using A Web Browser To Change The Multipresenter Stick's Settings (Settings Tab)
Displays a screen for downloading the MultiPresenter application (for Windows/OS X) from the MultiPresenter Stick. DOWNLOAD For the latest version of the MultiPresenter application (for Windows, OS X, iOS and An- droid), see the NEC MultiPresenter website. INFORMATION Displays the MultiPresenter Stick’s device information and network information. MODERATOR MENU Displays the Moderator menu. -
Page 25: Moderator Menu
Displays a screen for downloading the MultiPresenter application (for Windows/OS X) from the MultiPresenter Stick. DOWNLOAD For the latest version of the MultiPresenter application (for Windows, OS X, iOS and An- droid), see the NEC MultiPresenter website. • MODE Select whether to set MultiPresenter to the Free mode or Managed mode. • WEB CONTROL PASSWORD... -
Page 26: Administrator Menu
Displays a screen for downloading the MultiPresenter application (for Windows/OS X) from the MultiPresenter Stick. DOWNLOAD For the latest version of the MultiPresenter application (for Windows, OS X, iOS and An- droid), see the NEC MultiPresenter website. • MODE Select whether to set MultiPresenter to the Free mode or Managed mode. • WEB CONTROL PASSWORD When in the Managed mode, set whether to enable or disable the password used by the moderator to connect to the web server. - Page 27 Menu item name Description • OUTPUT RESOLUTION Select the resolution of the output from the MultiPresenter Stick. The resolution can be set to AUTO, 1920x1080, 1280x800 or 1024x768. DEVICE • DISPLAY LANGUAGE Select the language displayed on the screen. One of 11 languages can be selected: Japa- nese, English, French, German, Italian, Spanish, Portuguese, Swedish, Russian, Chinese (simplified) and Korean. Set the device name displayed for MultiPresenter application device searching and the NAME host name registered to the DNS via the DHCP server. This is set to the MultiPresenter Stick’s serial number upon shipment from the factory.
-
Page 28: Setting The Method Of Connecting To A Wireless Or Wired Lan
6. Setting the method of connecting to a wireless or wired LAN 6-1. Wireless LAN settings To display the wireless LAN settings screen, select the [SETTINGS] tab on the web server screen, then select [ADMINISTRATOR MENU] → [NETWORK] → [WIRELESS LAN], in that order. • About profiles The MultiPresenter Stick’s wireless LAN function includes the three types of profiles described below. Profile name Description Easily connect with the MultiPresenter application installed on a computer or... -
Page 29: Infrastructure Setting Items
6-1-2. INFRASTRUCTURE setting items Below we describe the setting items available when the [INFRASTRUCTURE] profile is selected. Menu item Description DHCP/IP ADDRESS/SUBNET Set these according to the instructions of your network administrator. MASK/GATEWAY Use this to conduct a site survey and display the access points that were found. • Up to 64 access points are displayed. -
Page 30: Wired Lan Settings
To display the wired LAN settings screen, select the [SETTINGS] tab on the web server screen, then select [ADMINISTRATOR MENU] → [NETWORK] → [WIRED LAN], in that order. ▸ ▸ IMPORTANT A commercially available wired network adapter (a product verified by NEC) must be purchased in order to connect the MultiPresenter Stick to a wired LAN. Menu item Description DHCP/IP ADDRESS/SUBNET Set these according to the instructions of your network administrator. -
Page 31: Displaying The Multipresenter Stick's Settings Menu
7. Displaying the MultiPresenter Stick’s settings menu The MultiPresenter Stick’s settings menu can be displayed and the MultiPresenter Stick’s settings can be changed. Display the MultiPresenter Stick’s start-up menu. Connect a commercially available USB mouse to the MultiPresenter Stick. The settings icon ( ) appears in the lower right of the start-up screen. HDMI input port AC adapter Settings icon... -
Page 32: Appendix
8. Appendix 8-1. Troubleshooting Refer to Symptom Check page Check that the power indicator on the MultiPresenter Stick is lit. Check that the wireless LAN function on the device you are us- − ing is enabled. When the MultiPresenter Stick’s wireless LAN profile is set to [INTELLIGENT CONNECTION] or [SIMPLE ACCESS POINT], select the MultiPresenter Stick’s SSID. - Page 33 Refer to Symptom Check page As far as possible, set the MultiPresenter Stick in a position in which it is visible from the device from which images are being sent. − Also try moving the device from which images are being sent closer and changing the direction of the antenna.
-
Page 34: Frequently Asked Questions
Can images be transferred simultane- NEC recommends using a maximum of 4 MultiPresenter Sticks. The num- ously to multiple MultiPresenter Sticks? ber of MultiPresenter Sticks that can be used may be lower than this when sending videos. - Page 35 Question Answer The shared files are automatically deleted when all the web sharing de- vices are disconnected. (by default) Are shared files sent from a web brows- This auto deletion function can be disabled at the [AUTO DELETE] item er to the MultiPresenter Stick using the under [SETTINGS] → [ADMINISTRATOR MENU] → [WEB SHARING] on the web sharing function saved as such? web server screen.
-
Page 36: Updating The Firmware Version
MultiPresenter Stick’s start-up screen. ▸ ▸ NOTE • For firmware version numbers early than “1.01”, the version number is not display on the start-up screen. Use a web browser on a computer to access the NEC down- load page. • URL: http://www.nec-display.com/dl/en/soft/multipresenter/mp10rx/eula.html On the download page, check whether the MultiPresenter Stick’s firmware has been updated. - Page 37 Select the update file saved in step Once the update is completed successfully, the screen at the right is displayed. Click the [RESTART] button. When the start-up screen is displayed after restarting, check the version number in the lower right of the screen. ▸ ▸ NOTE If an error occurs during updating, one of the error codes below is displayed. Error code Description File is too large.
-
Page 38: Index
Index AC adapter ..................6, 8 GATEWAY ..................29, 30 ACCESS PASSWORD ..............25, 26 Google Chrome ...................5 access point ..............8, 10, 28, 29 Google Play ..................12 ADMINISTRATOR MENU ............24, 26 GUIDE DISPLAY ................25, 26 Android ..................4, 12, 13 App Store.................... 12 AUTO DELETE ................ - Page 39 SSID ..............8, 10, 11, 16, 17, 29 start-up screen ............11, 12, 31, 36 NAME .................... 27, 31 STATIC ................... 26, 28 network .............4, 5, 9, 16, 17, 28, 30 strap hole ....................7 NEXT ..................... 23 SUBNET MASK ..............28, 29, 30 Normal menu ..................