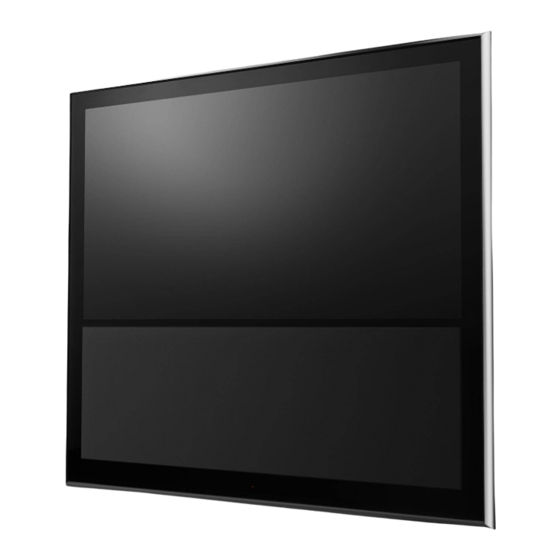
Bang & Olufsen BeoVision 10-32 Getting Started
Beovision 10 series
Hide thumbs
Also See for BeoVision 10-32:
- Manual (41 pages) ,
- User manual (28 pages) ,
- Getting started (28 pages)
Advertisement
Advertisement

Related Manuals for Bang & Olufsen BeoVision 10-32


Summary of Contents for Bang & Olufsen BeoVision 10-32
- Page 1 BeoVision 10 ...
- Page 3 Dear Customer This Getting Started contains information about the daily use of your Bang & Olufsen product and connected equipment. The Getting Started explains usage of more than one model, all models may not be available on your market. We expect your retailer to deliver, install and set up your product. Your television offers more features and functions than described in this Getting Started. Among other things; Timer functions and auto standby. These and other features are described in more detail in a Guide. The Guides are found on www.bang-olufsen.com/guides On www.bang-olufsen.com you can also find further information and relevant FAQs about your product. Your Bang & Olufsen retailer is your first stop for all your service queries. To find your nearest retailer, visit our website … www.bang-olufsen.com Technical specifications, features and the use thereof are subject to change without notice. 3510803 1102...
- Page 4 Read these instructions. WARNING: To reduce the risk of fire or electric shock, do not expose this Keep these instructions. appliance to rain or moisture. Do not expose this equip m ent to dripping or Heed all warnings. splashing and ensure that no objects Follow all instructions. filled with liquids, such as vases, are Use only with the cart, stand, tripod, bracket, or placed on the equipment. Do not use this apparatus near water. table specified by the manufacturer, or sold with the apparatus. When a cart is used, use caution To completely disconnect this equipment Clean only with dry cloth. when moving the cart/apparatus combination to from the AC Mains, disconnect the mains avoid injury from tip-over. plug from the wall socket. The disconnect Do not block any ventilation openings. Install in device shall remain readily operable. accordance with the manufacturer’s instructions. Unplug this apparatus during lightning storms or when unused for long periods of time. The lightning flash with arrowhead Do not install near any heat sources such as symbol within an equilateral triangle, radiators, heat registers, stoves, or other apparatus Refer all servicing to qualified service personnel. is intended to alert the user to the (including amplifiers) that produce heat. Servicing is required when the apparatus has been presence of un i nsulated “dangerous Do not defeat the safety purpose of the polarized damaged in any way, such as power-supply cord ...
-
Page 5: Table Of Contents
Contents Daily use 6 How to use your remote control 8 Introduction 10 Change picture format and speaker combinations Installation and setting up 12 Set up your television – BeoVision 10-32 14 Set up your television – BeoVision 10-40/46 15 Cleaning 16 Connection panels – BeoVision 10-32 17 Connection panels – BeoVision 10-40/46 18 First-time setup of your television ... -
Page 6: How To Use Your Remote Control
How to use your remote control Beo4 operation Your television can be operated with the Beo4 remote control. The Beo4 display shows you the activated source or function Switch on the TV* Switch on a connected set-top box Select channels and enter information in on-screen menus LIGHT RADIO 0 – 9 Display extra “buttons”... - Page 7 Beo6 operation Your television can also be operated with the Beo6 remote control as described in this Getting Started and the Guide, but you can also operate your television with Beo5 which is operated similarly to Beo6. Soft button, touch screen to select* Switch on a source or select a function Back up through Beo6 displays Bring up Scene buttons, such as Zones or Speaker Press again to return Living Room Bring up digits to select, for example, channels Press again to return V.MEM RADIO N.MUSIC N.RADIO Pause and stop playback...
-
Page 8: Introduction
Introduction Navigate in menus and select settings using your remote control. Pressing MENU twice brings up the menus for the selected source. Display and menus V. MEM MENU MENU Switch on TV Switch on connected equipment Show menu Information about the selected source is shown in the display. On-screen menus allow you to adjust settings. Menu name TV SETUP SLEEP TIMER Menu options PLAY TIMER OPTIONS Information field select Example of on-screen menu Important Remote control On the first pages in this Getting Started, you will find an overview of the buttons on Beo4 and Beo6. For general information about remote control operation, see the Guide enclosed with your remote control. ... - Page 9 Navigate in menus 0 – 9 BACK BACK Select option/ Enter data Bring up Select option Move Press and hold to When a menu is on the screen, you can move setting sub-menu/ backwards exit menus between menu options, reveal settings or enter store through menus data. setting BEO4 SETTING menu In the OPTIONS menu, you can bring up the BEO4 SETTING menu. In this menu you must set up your television to be operated with a Beo4 with or without a navigation button. Remember to set your Beo4 remote control to the correct mode. See the Beo4 Guide or contact your Bang & Olufsen retailer for further information. This Getting Started and the Guide describe operation with the BEO4 SETTING menu set to NAVIGATION BUTTON . ...
- Page 10 Picture format and speaker combinations Picture settings are preset from the factory to neutral values which suit most viewing situations. However, if you wish, you can adjust these setting to your liking. You can also select different speaker combinations. Select picture format 1–4 Bring up FORMAT in your Beo4 display* Select format* Move picture up or down* or The TV automatically adapts the picture to fill out 3 as much of the screen as possible when you select select variation a source, but you can select a format yourself. FORMAT 1 FORMAT 2 FORMAT 4 FORMAT 3 Standard* Zoom Wide Extended The picture is For a genuine The bars can be For panoramic ...
- Page 11 Contents – Installation and setting up 12 Set up your television – BeoVision 10-32 14 Set up your television – BeoVision 10-40/46 15 Cleaning 16 Connection panels – BeoVision 10-32 17 Connection panels – BeoVision 10-40/46 18 First-time setup of your television Cautions – Connect all cables before connecting or – Ensure that the television is positioned, set up reconnecting any of the products in your and connected in accordance with the system to the mains. instructions in this Getting Started. – No naked flame sources, such as lighted – Place your television on a firm, stable surface. candles should be placed on the apparatus. To prevent injury, use Bang & Olufsen approved – To prevent the spread of fire, keep candles or stands and wall brackets only! other open flames away from this product at – Do not place any items on top of your all times. television. ...
-
Page 12: Set Up Your Television - Beovision
Set up your television – BeoVision 10-32 The television has several placement options. Follow the guidelines for placement and connection. Placement options The TV can be placed on a motorised stand or Due to the weight of the TV, any moving or lifting mounted on a wall bracket. Refer to of the TV should be performed by qualified www.bang-olufsen.com for available stands and personnel – using the proper equipment. brackets or contact your Bang & Olufsen retailer. Handling We recommend that you place the TV in the Three protection profiles have been enclosed with packaging while you fasten the wall bracket or the the TV. Use these when moving the TV to avoid bracket for the stand to the back of the TV. scratching the frame. Wall bracket and stand The wall bracket can manually be turned left and/or right depending on your setup. Remember to leave enough space around the TV to allow it to turn and tilt freely. Important Ventilation To ensure proper ventilation, allow enough space around the screen. Do not cover the fans. At over h eating (flashing standby indicator and an on-screen warning), switch the TV to standby, not off, in order for the TV to cool down. You cannot operate the TV during this time. ... -
Page 13: Cleaning
Overview 1 Mounting bracket for wall bracket. Locate the connection panel and other important items: 2 Mounting slot for stand or wall bracket. 3 Cover for the connection panel. Here you also find the mains supply connection. Pull out at the bottom to remove the cover. 4 Depending on your setup lead the cables through the hole in the middle of the cover or remove the right (1A) or left cover (1B). The middle part of the cover can be removed using a pair of tongs. Run cables You can fasten the cables to either side or in the If you have a motorised stand, make sure that middle, depending on wall bracket or stand there is enough slack in the cables to allow the placement. TV to turn to either side before you fasten the cables with cable strips to make a neat bundle. Fasten the speaker cover When the TV is placed on a wall bracket or stand During cleaning it is recommended to remove the you can attach the speaker cover. speaker cover. Avoid spraying liquid directly on Hold the speaker cover with both hands and guide the screen as this may damage the speakers, use a the pins through the holes at the bottom. Then soft cloth instead. carefully attach it to the top and adjust its position Carefully remove the speaker cover by supporting before letting go. ... - Page 14 Set up your television – BeoVision 10-40/46 The television has several placement options. Follow the guidelines for placement and connection. Placement options The TV can be placed on a motorised stand or Due to the weight of the TV, any moving or lifting mounted on a wall bracket. Refer to of the TV should be performed by qualified www.bang-olufsen.com for available stands and personnel – using the proper equipment. brackets or contact your Bang & Olufsen retailer. Handling We recommend that you place the TV in the Three protection profiles have been enclosed with packaging while you fasten the wall bracket or the the TV. Use these when moving the TV to avoid bracket for the stand to the back of the TV. scratching the frame. Wall bracket and stand Set the maximum angle the TV will turn on the stand. The wall bracket can manually be turned 45˚ left or right depending on your setup. Remember to leave enough space around the TV to allow it to turn and tilt freely. Important Ventilation To ensure proper ventilation, allow enough space around the screen. Do not cover the fans. At over h eating (flashing standby indicator and an on-screen warning), switch the TV to standby, not off, in order for the TV to cool down. You cannot operate the TV during this time. ...
- Page 15 Overview Locate the connection panel and other important 1 Mounting bracket for wall bracket. items: 2 Mounting bracket for stand. 3 Cover for the connection panel. Here you also find the mains supply connection. Pull out at the bottom to remove the cover. 4 Depending on your setup lead the cables through one of the three holes. Remove the part of the cover using a pair of tongs. Run cables You can fasten the cables to either side or in the If you have a motorised stand, make sure that middle, depending on wall bracket or stand there is enough slack in the cables to allow the placement. TV to turn to either side before you fasten the cables with cable strips to make a neat bundle. Fasten the speaker cover When the TV is placed on a wall bracket or stand During cleaning it is recommended to remove the you can attach the speaker cover. speaker cover. Avoid spraying liquid directly on Hold the speaker cover with both hands and the screen as this may damage the speakers, use a attach it at the bottom first. Then carefully attach soft cloth instead. it to the top and adjust its position before letting go. Carefully remove the speaker cover by supporting it in the side and at the bottom. Cleaning Maintenance Regular maintenance, such as cleaning, is the responsibility of the user. ...
-
Page 16: Connection Panels - Beovision
Connection panels – BeoVision 10-32 Any equipment you connect to the main connection panel must be registered in the CONNECTIONS menu. Mains supply HDMI IN (A, B and C) POWER LINK AERIAL For High Definition Multimedia Interface video Sockets for connection of a Bang & Olufsen Not for use. source or PC. The sources can be registered to any subwoofer and/or external loudspeakers. See the of the AV socket groups. To expand the number Guide for further information. STAND of HDMI sockets, connect an HDMI Expander/ For connection of a motorised stand. Matrix to the HDMI C socket. VGA (AV3) For connection of a PC to receive analogue AV4 SPDIF (1–2) graphics. 21-pin sockets for connection of additional video Digital audio input socket, e.g. DVD player. You can equipment, such as a DVD player, set-top box, a AV 3 (R, L, video) use the socket in conjunction with an AV socket or decoder or video recorder. HDMI socket. ... -
Page 17: Connection Panels - Beovision 10-40/46
Connection panels – BeoVision 10-40/46 Any equipment you connect to the main connection panel must be registered in the CONNECTIONS menu. Mains supply CAMERA ~ – Mains supply POWER LINK (FRONT – REAR) AV3 (video, L, R) Connection to the mains supply. Use for connection of external loudspeakers in a For audio connection (right and left sound surround sound setup. See the Guide for further channel respectively) and video signals from an AV (1–2 and 4) information. external source. 21-pin sockets for connection of additional video equipment, such as a DVD player, set-top box, a POWER LINK (SUB) VGA (AV3) decoder or video recorder. Use for connection of a Bang & Olufsen subwoofer. For connection of a PC to receive analogue graphics. PUC (1–4) RF OUT For IR control signals to external equipment Not for use. -
Page 18: First-Time Setup Of Your Television
First-time setup of your television This first-time setup procedure is activated when the TV is connected to the mains and switched on for the first time. If you want to change your setup at a later date, you can access the same menus and update your settings. Switch on the TV Switch on Wait for the TV to start up. Select settings Select setting Accept and go to next menu item You are led through the first-time setup sequence when you switch on the TV for the first time.* Some menus may not appear depending on your setup. MENU LANGUAGE Set the on-screen menu language STANDBY SETTINGS Make standby settings for the TV CONNECTIONS Register connected equipment This Getting Started describes operation with Beo4 in MODE 1 and the BEO4 SETTING menu set to NAVIGATION BUTTON, see also page 9. Please remember to set your Beo4 with navigation button to the MODE corresponding to the setting you make in the BEO4 SETTING menu, see the Beo4 Guide for further information. Information Connections Select the type of equipment connected to each socket, the sockets used, *NOTE! When you have selected the preferred the product name, and the source name. settings in a menu, you may have to press the ... - Page 19 Calibrate the stand STAND ADJUSTMENT At ‘SET LEFTMOST At ‘SET RIGHTMOST Accept Set the maximum angle the TV will turn – left and POSITION’ turn left to the POSITION’ turn right to the right. The motorised movement of the TV will not point you wish to restrict point you wish to restrict the work until the calibration process has been the movement to movement to completed. You can only tilt the TV manually. Set stand positions STAND POSITIONS Set preferred preset position for the TV to turn to, when it is switched on and off. Speaker setup SPEAKER TYPE First-time setup of loudspeakers applies only to speakers for TV viewing. Set up the speakers to optimise sound from your SPEAKER DISTANCE* See the Guide for further information. listening position. SPEAKER LEVEL* ADJUSTMENT Adjust volume, bass, treble and loudness and preset two default speaker combinations. Select a different speaker combination at any time. Calibration You need to calibrate the stand before you can use the motorised ...
- Page 20 Manufactured under license from This product is in conformity with For the US-market only! the provisions of the Directives NOTE: This equipment has been tested and found Dolby Laboratories. Dolby, Pro Logic, 2004/108/EC and 2006/95/EC. to comply with the limits for a class B digital and the double-D symbol are device, pursuant to part 15 of the FCC Rules. registered trademarks of These limits are designed to provide reasonable Dolby Laboratories. protection against harm ...
- Page 21 Waste Electrical and Electronic Equipment Electrical and electronic equipment, parts and contamination of nature with the hazardous (WEEE) – Environmental protection batteries marked with this symbol must not be substances which may be present in electrical and disposed of with normal household wastage; all electronic products and equipment. electrical and electronic equipment, parts and Your Bang & Olufsen retailer will advise you of the batteries must be collected and disposed of correct way of disposal in your country. separately. When disposing of electrical and electronic If a product is too small to be marked with the equipment and batteries by use of the collection symbol, it will appear in the User guide, on the systems available in your country, you protect the ...