
Related Manuals for Philips 0


Summary of Contents for Philips 0
- Page 1 DTR6610/00 User manual Manuele d'utilizzo Käyttäjän opas Bruksanvisning Manual del usuario Benutzerhandbuch...
- Page 2 "digivastaanotin". Tässä käyttöohjeessa laitteesta käytetään nimitystä "vastaanotin". VÄLKOMMEN TILL DEN DIGITALA TELEVISIONEN Grattis till ditt köp av den digitala markmottagaren DTR 6610 från Philips. Denna mottagare ger dig tillgång till gratis digital markbunden television, radio, interaktiva och utvalda kodade kanaler. Den inbyggda MHP-funktionen gör din mottagare kompatibel med de interaktiva MHP-applikationer som finns i vissa kanaler.
-
Page 3: Safety Instructions
- One SCART cable - One Phone cord (adapter not supplied) - One RF coaxial cable - User Manual - Philips guarantee card - Stand for using the receiver in the upright position. Warning: Plastic bags can be dangerous. To avoid suffocation keep the bag away from babies and children. -
Page 4: Quick Installation Guide
Quick installation guide Please refer to the safety section before connecting your receiver. TV set 2 Q U I C K I N S TA L L AT I O N G U I D E Integrate your receiver in your existing installation as shown below. - Page 5 Then, a screen appears that allows you to select the language. Highlight the desired language by pressing and then press OK. You are prompted to confirm your choice by pressing OK again. Next, highlight the country where you operate the receiver by pressing You are prompted to confirm your choice by pressing OK again.
-
Page 6: Table Of Contents
Contents Safety Instructions ___________________1 Unpacking ___________________________1 Receiver in upright position ___________1 Quick installation guide _______________2 Contents ____________________________4 Product description ______________6 Front view _____________________6 Rear view ______________________8 Smart card reader _______________9 Preparing, setting and using your Remote Control _________________9 Installation of batteries ____________9 Setting of your remote control _____9 2.2.1 Mode setting ____________________9... - Page 7 Main Menu _____________________23 Change the setting of your receiver _______________________24 Channel Manager _______________24 6.1.1 How to skip a channel _____________24 6.1.2 How to move a channel ___________24 6.1.3 How to rename a channel __________25 6.1.4 How to lock a channel _____________25 Specially for parents _____________25 6.2.1 Decoder Lock ___________________25...
-
Page 8: Product Description
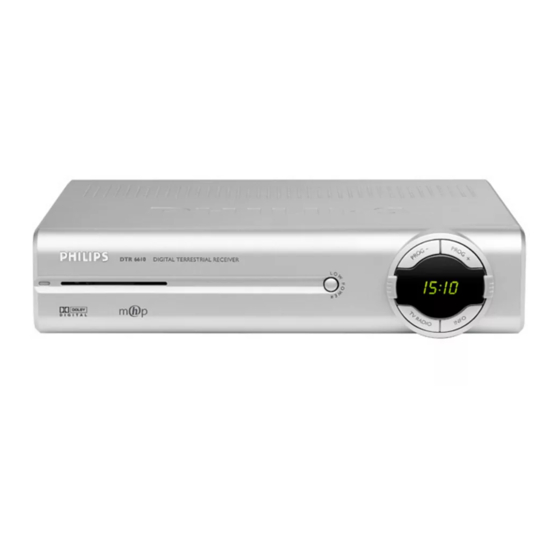
1 Product description 1.1 Front view Slot for stand positionning: Smart Card slot: LOW POWER button with red indicator: Rotating display, including the following buttons: PROG-/PROG+ TV/RADIO INFO 6 P R O D U C T D E S C R I P T I O N See Receiver in upright position on page 1. - Page 9 Front Panel Display The front panel LED display gives you information about the current state of your receiver. Refer to the table below. Status indicator table First installation setting. Channel installation is in progress. Current time displayed in 24-hour format when the box is in the standby mode.
-
Page 10: Rear View
1.2 Rear view Telephone Line*** VCR SCART* (1) Digital Audio* Serial* Aerial In* 230V~50Hz 15W max.** TV SCART* (1)(2) L/R Audio Output* RF Out* SELV: Safety Extra Low Voltage. Hazardous Voltage. TNV 3: Telecommunication Network Voltage 3. SCART is also called Euroconnector or Peritel. The supply SCART lead is suited for RGB format which allows the best picture quality. -
Page 11: Smart Card Reader
• Position them as shown in the diagram in the battery compartment. • Replace the cover. The Philips batteries supplied with your receiver's remote control do not contain heavy metals such as Mercury or Nickel Cadmium. Nevertheless in many countries exhausted batteries may not be disposed of with your household waste. -
Page 12: Volume And Mute Control Setting
TV. The factory setting of your remote is set to allow the control of the volume /mute of a Philips TV set. If your TV set has a different brand check in the TV brand list what code(s) might apply then change the setting of your remote control according to the method described in chapter 9.1. -
Page 13: Using The Remote To Control Your Digital Receiver -The Remote Control Is Set To Stb Mode
2.3 Using the remote to control your digital receiver –The remote control is set to STB mode Standby Switches your receiver into the standby mode. MODE Selects the remote control mode (STB, TV, VCR, DVD, AMP- TUNER). RED, GREEN, YELLOW, BLUE Contextual buttons used in MHP applications. -
Page 14: Connection And Installation
3 Connection and Installation 3.1 Connections 3.1.1 Connect the receiver to your TV and VCR Incorporate the receiver in your existing installation as shown below / decoder receiver. TV set Plug your aerial lead plug into the "AERIAL IN" socket of your digital receiver. Connect the "RF OUT"... -
Page 15: Connect Your Hifi Appliance
3.1.2 Connect your HiFi appliance Depending on your HiFi /Audio receiver equipment, you might have several options to connect your digital receiver. • Analogue connection Connect the L/R audio output sockets to the relevant L/R audio input sockets of your audio equipment by means of a double CINCH cable (not supplied). -
Page 16: Installation Error
3.3 Installation error Scanning failed. Before starting a new scanning, check: • the aerial cable; • the aerial cable connection to your digital receiver. Refer to the connection diagrams in chapter 3.1.1; • channel(s) availability in the region corresponding to your area; •... -
Page 17: Wake Up Your Receiver Or Switch To Standby
Radio Label TV Channel List 4.3 Wake up your receiver or Switch to standby • You watch TV or listen to radio, press the standby button to switch your receiver to standby. • Your receiver is in standby, to wake it up: - Either press the P+, P-, RADIO or any digit button on the remote control. -
Page 18: How To Use The Channel Banner
4.6 How to use the channel Banner Channel Banner appears at the bottom of the screen when you tune your receiver to a new channel or when you press the m and facilitates surfing through channels and programs. When you are in the Channel Banner, you can only browse through channels belonging to the currently selected channel list. -
Page 19: How To Select Current /Next Programs
Current Program Info Channel Number Entry Box Option Menu 4.6.2 How to Select Current /Next Programs The Channel Banner allows you to display information concerning the current program and the next program broadcast on the selected channel. Press what is broadcast next on the currently selected channel. If you select one of the future programs, pressing OK allows you to set/cancel a reminder. -
Page 20: How To Display More Program Info
Subtitle Language If available, you can select among different subtitle languages. Teletext Language If available, you can select among different teletext languages. Display Format For information on available formats, refer to chapter 6.4.2.1. 4.8 How to Display More Program Info icon displayed in the Channel Banner informs that pressing the m m key displays some additional... -
Page 21: Country Specifics
Applications Window Once the application is running follow the instruction given by the application played on screen. To quit the interactive application, press and hold the EXIT key for at least 2 seconds. You can also quit the application by following the on-screen descriptions brought to you by the application itself or tuning to a different channel by pressing P+/ P- Please note that if you do not want any interactive... -
Page 22: Reminders And Timers
Setting a Reminder Setting a Timer Viewing Timer Pop-up Recording Interruption Pop-up 20 DAY T O DAY O P E R AT I O N 4.10 Reminders and Timers 4.10.1 Difference Between Reminder and Timer The aim of the reminder/timer is to remind you that the program you scheduled for viewing is about to start. -
Page 23: Reminder/Timer Conflicts
4.10.3 Reminder/Timer Conflicts Your receiver allows you to set up to 8 reminders/timers. Each subsequent reminder/timer is checked against any conflicts with the previously set reminders/timers. If you set a reminder or timer and such a conflict occurs, a conflict pop-up appears. You will be prompted to press EXIT to cancel the current reminder, or to press OK to get access to Timer Manager. -
Page 24: Program Guide
Program Guide Category selection Setting a reminder in Program Guide 22 DAY T O DAY O P E R AT I O N 4.11 Program Guide Your receiver gives you access to a Program Guide. To display all programs broadcast on the currently tuned GUIDE channel press the contains all programs of the current day and highlight is... -
Page 25: Main Menu
5 Main Menu Your receiver offers Menu System that allows you to change the way many of the features of your receiver operate. To gain access to the Menu, press the MENU key. The Main Menu consists of 7 submenus. To evoke one of the submenus, highlight its name using and then press OK. -
Page 26: Change The Setting Of Your Receiver
6 Change the setting of your receiver Channel Manager Skipping a Channel Moving a Channel Within a List 24 C H A N G E T H E S E T T I N G O F YO U R R E C E I V E R 6.1 Channel Manager Allows you to change the organization of the TV and Radio channel lists. -
Page 27: How To Rename A Channel
Renaming a Channel Locking a Channel For parents Submenu Receiver lock 6.1.3 How to rename a channel The Rename Channels command allows you to rename any channel on the list. Once you select the Rename Channels command in the Modify option, the selected list of channels appears. -
Page 28: Parental Control
Parental Level Enter PIN Code Your preferences Submenu 26 C H A N G E T H E S E T T I N G O F YO U R R E C E I V E R 6.2.2 Parental Control The Parental Level option allows you to set the current parental level, for example 13 Years. -
Page 29: Language Options
Display Option Screen Language Options Screen Channel Banner Duration Specifies how long the Channel Banner remains displayed. Volume Bar Blocks the volume bar from being displayed. Transparency Changes the transparency of the on-screen display. Application AutoSTART Defines whether MHP applications are to be launched automatically once you tune to a channel on which external applications are broadcast. -
Page 30: Installation
Installation Submenu Local Time Submenu Settings Submenu 28 C H A N G E T H E S E T T I N G O F YO U R R E C E I V E R 6.4 Installation Allows you to configure your system, set up your modem, search for existing channels, check receiver's status, set up local time, and restore factory settings of your receiver. - Page 31 TV Settings Screen Aspect TV screen format = 4:3 ratio Display broadcast format = 16:9 format Letter-box full picture with black bars at the top and bottom Pan-Scan picture cut-off on the left and right Full screen full picture squeezed to fit System Settings Screen 6.4.2.1 Installation / Settings / TV Settings The TV Settings screen contains two options: TV...
- Page 32 Modem Settings Screen Virtual Keyboard Modem Connection 30 C H A N G E T H E S E T T I N G O F YO U R R E C E I V E R 6.4.2.3 Installation / Settings / Modem Settings Your receiver is equipped with an internal modem.
-
Page 33: Installation / Signal Meter
Decoder Upgrade Settings Select Country Signal Meter 6.4.2.5 Installation / Settings / Decoder Upgrade Settings Select Upgrade Settings from the Settings submenu. In this screen you can change the way your decoder is upgraded. If you set Auto Upgrade to Yes, your decoder will automatically initiate the upgrade procedure when available. -
Page 34: Installation / Channel Search
Channel Searching Decoder Status Submenu Receiver Upgrade Factory Reset 32 C H A N G E T H E S E T T I N G O F YO U R R E C E I V E R 6.4.4 Installation / Channel Search Once you select the Channel Search item from the Installation submenu, you will have two channel search methods to choose from. -
Page 35: Advanced Settings
• First of all, consult User Manual of your recorder equipment to check if it supports Easy Recording. Please note that most Philips VCR/DVD recorders support one of the two Easy Recording options: either Prepare Record (to be checked first) or Record Link. -
Page 36: Change The Remote Control And Receiver "Device" Settings
7.2 Change the Remote Control and receiver "Device" Settings If you have other equipment in your home and the Philips remote control of your digital receiver interferes with them, you can change the setting of your remote control and the setting of your receiver as well. -
Page 37: Programming The Remote Control For Your Stb, Tv, Video Recorder, Dvd And Tuner - Amplifier
Philips audio/video appliances. If you have other brands of appliances, or if the presets do not control your Philips appliance, please follow the procedure here below. -
Page 38: Using Your Remote Control For Your Tv
2- Battery change. If the battery change takes more than 1 minute the remote control may return to the "Philips brand factory settings". Therefore you shall proceed with a new setting of your remote control, with the help of the table above, for your non Philips branded appliances. -
Page 39: Using Your Remote Control For Your Vcr
8.3 Using your remote control for your VCR VCR mode (VCR) Note: Some of the functions described below may not be available or may not have the same behaviour for all appliances. - Fast rewind - Pause - Stop - Play - Fast forward - Subtitle On/Off. -
Page 40: Using Remote Control For Your Dvd Player
8.4 Using Remote Control For Your DVD Player DVD mode (DVD) Note: Some of the functions described below may not be available or may not have the same behaviour for all appliances. - Search reverse - Pause - Stop - Play - Fast forward - Teletext On/Off. -
Page 41: Using Remote Control For Your Tuner / Amplifier
Note: Some of the functions described below may not be available or may not have the same behaviour for all appliances. (*) Indicates the commands which are only available for Philips Tuner / Amplifiers. - Selects DVD source. - Selects STB receiver source. -
Page 42: Troubleshooting Guide
9 Troubleshooting guide Check the guide below for a possible cause of the problem you are experiencing. The most common problems that arise are related to cable connections. Make sure that your receiver is properly connected. Symptom Nothing lights up on your receiver's front panel. -
Page 43: Technical Specifications
- Multibrand remote control(TV, VCR, DVD, Audio AMP-Tuner) - Automatic recording via: Timer programming by tagging in banner and Easy recording for Philips VCR and DVD+RW recoders - Now & Next program in banner - EPG list per channel based on EIT schedule...