Table of Contents
Advertisement
Advertisement
Table of Contents

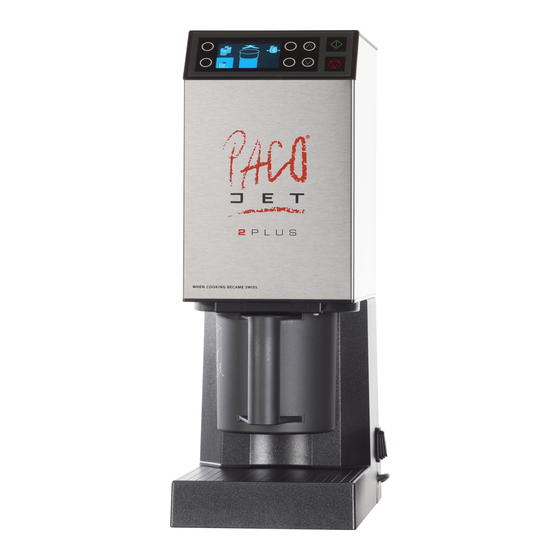
Summary of Contents for Pacojet PACOJET 2
- Page 1 Original Instruction Manual in German Read this Instruction Manual prior to use...
-
Page 2: Table Of Contents
PACOJET 2 Instruction Manual Warning Introduction What is PACOJET 2? Important notes Package contents Setting up and connecting power Installation location Connecting the machine to an electrical power supply PACOJET 2 control components Review of machine controls ON/OFF switch Control panel... -
Page 3: Warning
6.3.2 After the cutting/chopping procedure 6.4 Utilizing the machine for mixing/whipping fresh, liquid foods 6.4.1 Mixing/Whipping procedure PACOJET 2 may only be used in accordance with this 6.4.2 After the mixing/whipping procedure instruction manual. Failure to comply with the instruc- tions can result in damage to the machine, risk of injury... - Page 4 The use of other accessories not authorised by edge of the blades! (Section 6.3) Pacojet is not permitted. Install the PACOJET 2 on a level surface away from Read the instruction manual for PACOJET 2 and famil- water splash, sinks and any equipment producing iarise yourself with the machine and its handling, op- steam. Ensure that there is adequate space. The main...
-
Page 5: Introduction
The Pacojet Coupe Set is not part of the standard equipment delivered with PACOJET 2; it is available as an option. The Pacojet Coupe Set is designed exclusively for chopping, mixing and beating fresh, non-frozen foods with a Pacojet machine. Please comply strictly to the instructions... -
Page 6: Package Contents
Using this instruction manual as a reference, please take a complete inven- tory of the package to ensure the components are complete. Contents should include: one PACOJET 2 kitchen machine one rinsing insert of green nitrile rubber one protective outer beaker (polyamide) -
Page 7: Setting Up And Connecting Power
Setting up and connecting power Installation location The PACOJET 2 machine should only be installed in a dry location with ade- quate ventilation on a stable, flat surface measuring at least 50 cm × 50 cm. The PACOJET 2 machine must sit firmly and level, with its placement position ensuring the free-flow of cooling air for the rear intake vent. Likewise, ensure Inspect to determine whether any items are missing or defective. Should there is ample clearance underneath the machine for the free-flow of exhaust this be the case, please contact the place of business where the unit was air without any obstructions. -
Page 8: Connecting The Machine To An Electrical Power Supply
Î Control panel (5.3) The PACOJET 2 machine should only be used when the voltage and power frequency of the electrical source conform to those on the data plate. The volt- age of the electrical source must conform to that indicated on the data plate. The data plate is located on the bottom side of the machine. -
Page 9: Control Panel
(UP/DOWN graphic, section 5.9), and au- The PACOJET 2 control panel has two function buttons: START and STOP/ tomatically end the cycle. This method of operation RESET/HOME. It also features a high resolution colour screen, four selector... -
Page 10: Pacotizing Mode
2- or 4-blade-cutter must be positioned within the spray system package. guard with the help of the cutter tongs (as supplied within the Pacojet Coupe Set package) and correctly secured onto the magnetic, splined shaft of the To access further settings in the pacotizing mode, PACOJET 2 machine. -
Page 11: Mixing/Whipping Mode
Pacojet Coupe Set package) must be positioned within the spray guard and correctly secured onto the magnetic, splined shaft of the PACOJET 2 machine. There are two cleaning cycle options on the left side Then the pacotizing beaker and the protective outer of the display screen. -
Page 12: Rinsing Cycle
Brightness Language counter” and “Version”. Portion counter After a processing task has been completed, the PACOJET 2 automatically Version returns from the previous mode selected and programmed processing option back to the default factory settings for “pacotizing” and “overpressure”. Using the up- and down-arrow buttons, select the desired setting option and... -
Page 13: Up/Down Display
5.11 Pacotizing according to portions c) Resetting chosen processing options: There Reset are two selection possibilities. PACOJET 2 can be set so that any chosen processing options Simply by pressing the START button, the entire Beaker change will be reset to default settings either after each... -
Page 14: Beaker Content Fill Level And Portion Quantity Display During Pacotizing
5.12 Beaker content fill level and portion quantity display during pacotizing When a pacotizing cycle has been initiated, PACOJET 2 can detect overfill immediately when The display screen indicates the programmed por- the pacotizing blade meets the frozen surface. In tioning details prior to pacotizing and additionally,... -
Page 15: Handling The Pacojet
In addition to pacotizing with the PACOJET 2, the optional Pacojet Coupe Set is available to process fresh, non-frozen food items (sections 5.7.2, 5.7.3, 6.3 and 6.4). - Page 16 Press the start button. e) Mount the protective outer beaker containing the pacotizing beaker onto the machine, rotating it securely into working position clockwise, i.e. turning it from right to left-forward. j) The PACOJET 2 will automatically process through the cycle as selected.
-
Page 17: Detailed Description Of The Pacotizing Process
k) Upon completion of the processing cycle, the 6.2.3 Detailed description of the pacotizing process shaft and pacotizing blade return to the start po- sition, the beaker is depressurized automatically Insertion of the pacotizing blade with the spray guard into the and the pacotizing cycle ends. - Page 18 To avoid damage to the PACOJET 2 or injury to operators, the machine will cycle ends. only function when the protective outer beaker is properly mounted in the IMPORTANT! machine.
-
Page 19: After A Pacotizing Cycle
Should no further beakers be immediately proc- Demount the protective outer beaker by lower- essed, a rinsing cycle of the PACOJET 2 food ing it down from the machine. The spray guard processing system must be consequently imple- with the pacotizing blade will rest on the paco- mented using the cleaning kit provided. -
Page 20: Cutting/Chopping Procedure
“Normal pressure” button before starting the processing cycle. When the START button has been pressed, the PACOJET 2 will proceed through the chosen processing cycle fully automatically. Upon completion of IMPORTANT! Î the processing cycle, the shaft and the 2- or 4-blade cutter attachment re- turn to the start position, the beaker is depressurized automatically and the Never fill the pacotizing beaker above the maximum fill-line. Overfilling beak-... -
Page 21: Utilizing The Machine For Mixing/Whipping Fresh, Liquid Foods
(e.g. when whipping cream). Disregard of this warning may When the START button has been pressed, the PACOJET 2 will proceed cause excessive contaminant ingress into the machine. -
Page 22: After The Mixing/Whipping Procedure
Never spray the machine with water, a high-pressure steam washer or any other similar device! Initial cleaning PACOJET 2 and all of its accessories must be meticulously cleaned before its first use. Use a ready available dishwashing liquid for this purpose. The pacotizing beakers must also be thoroughly cleaned prior to the first... -
Page 23: Cleaning Of The Direct Food Contact Zone
• ECOLAB Micro Quat Extra ® • after an extended period of time during which PACOJET 2 has not been in • Procter & Gamble Milton Sterilizing Fluid • before the first processing task of the day Consult your point of purchase to inquire about appropriate detergents for your country, as country specific differences may prevail. -
Page 24: Cleaning Cycle Procedure
Fill the pacotizing beaker with hot water to about 2 cm from the beaker brim. The cleaning cycle is a part of the full cleaning procedure for PACOJET 2, which consists of pre- rinsing, cleaning and final-rinsing. d) Insert the pacotizing beaker into the protective outer beaker and mount in place, securing by rotating in a clockwise direction. -
Page 25: Cleaning The Depressurization Hose
The process of cleaning with the blue cleaning insert and disinfecting deter- Mount the protective beaker onto the machine, rotating clockwise. gent will protect the PACOJET 2 food processing system from germs accu- mulation and also, cleanse any remaining food trace elements after a rinsing Press the START button and remove the protective beaker after the cleaning cycle. -
Page 26: Cleaning Accessories
Beaker lids should only be cleaned in a dishwasher under certain condi- tions to preserve the integrity of their shape. They are temperature resistant ! PACOJET 2 can overload if the machine cannot process the specific between −25 °C and +85 °C. Please verify the temperature range of your food preparation. -
Page 27: Information
? PACOJET 2 does not create overpressure during a processing cycle Information The surface of the spray guard is not smooth. Since the spray guard also Technical Data PACOJET 2 provides a seal during of the processing cycle, the contact surfaces must be clean and fully intact. -
Page 28: Accessories
Pacotizing beaker kit, large (10 chrome steel beakers with lids) Pacojet Coupe Set Only applicable to EU countries: Protective outer beaker Pacotizing blade Standard Do not dispose of the PACOJET 2 in a household waste bin! According to EU- Pacotizing blade Gold Directive 2002/96/EC on electronics and electronic equipment waste and its Spray protector application according to national laws, unneeded electronic equipment must... - Page 29 © 2012 Pacojet AG Pacojet AG Bundesstrasse 5 CH-6300 Zug Switzerland info@pacojet.com www.pacojet.com...