
Related Manuals for XCAT Basic

Summary of Contents for XCAT Basic
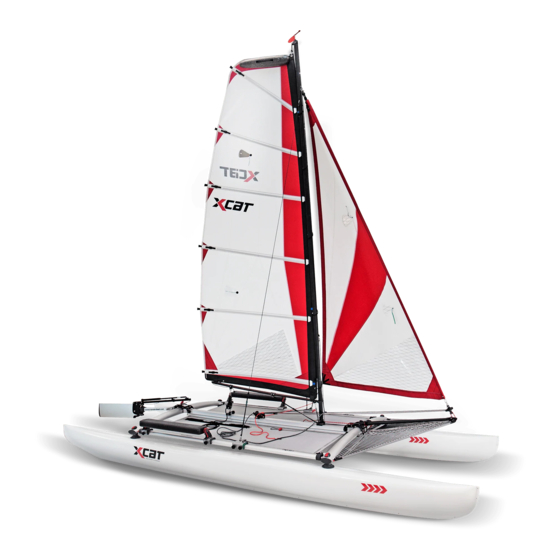
- Page 1 Assembly manual Operating instructions Small craft – Owner's manual (ISO 10240:2004) X-Cat Basic / Sail / RowMotion / RowMotion Pro...
-
Page 2: Table Of Contents
Position of identification number and builder`s plate ..........7 Declaration of conformity ................8 How to set up the X-Cat Basic ..............10 How to dismantle the X-Cat Basic ..............13 How to set up the X-Cat Sail ................ 15 How to dismantle the X-Cat Sail .............. - Page 3 Description of the flange spanner ..............48 Adjusting the cross bar ....................48 Opening up the hulls ....................... 50 Overview of knots ..................52 Description of tacking sequence ..............53 Instruction manual Page 3 updated: 03-2016...
-
Page 4: Introduction To Small Craft Owner's Manual
1. Introduction to small craft owner's manual This manual has been compiled so that you are in a position to enjoy your boat in safety. In addition to detailed information about the boat itself, information is also provided on accessories supplied/fitted as well as operating instructions. Please read this information carefully and make yourself acquainted with the boat before using it. -
Page 5: Description / Technical Data
2. Description / Technical data a. Model code X-CAT (Cross-Cat) row and sail catamaran b. Design category Design category: C Boats in design category C are designed for use in wind conditions up to Beaufort scale 6 with the corresponding wave height. Such conditions can occur on exposed inland water, estuaries and coastal water in moderate weather conditions. -
Page 6: Weight Of The Boat Fully Laden
e. Weight of the boat fully laden Weight of the boat fully laden: 325 kg Consisting of plain boat (55 kg) + forwards rowing system RowMotion-Pro (13 kg) and sail option (17 kg) + maximum load (240 kg) f. Main dimensions of the boat Lmax 5.0 m Bmax... -
Page 7: Position Of Identification Number And Builder`s Plate
j. Position of identification number and builder`s plate The builder`s plate is located one on of the cross bar The identification number is located at the rear side of the hull after the flange. Instruction manual Page 7 updated: 03-2016... -
Page 8: Declaration Of Conformity
3. Declaration of conformity Declaration of conformity for recreational small craft in terms of design and construction in accordance with directive 94/25/EG updated by directive 2003/44/EG Name of boat manufacturer: Row & Sail GmbH Gewerbezeile 9 4040 Lichtenberg / Linz Austria Module used for design and construction: Identification number:... - Page 9 This declaration of conformity is issued as the sole responsibility of the manufacturer. I hereby declare on behalf of the manufacturer that the vessel described above meets all the specified requirements. Name and position: Ing. Jochum Bierma - Managing Director Signature: Place, date: Lichtenberg/Linz, 14/01/2014...
-
Page 10: How To Set Up The X-Cat Basic
4. How to set up the X-Cat Basic X-Cat Basic components 1. Hulls 3. Cross-bars 2. Side beams and centre beam rolled up with trampoline Instruction manual Page 10 updated: 03-2016... - Page 11 1. Insert one of the cross-bars into the recesses at the front end of each hull. The spigot has to point to the middle of the boat. 2. Slide the centre beam (with the arrow pointing to the front) onto the cross-bar and gradually lower the free end until its weight is supported completely by the cross-bar Arrow down...
- Page 12 5. Support the rolled-up side beams on your knee and undo the velcro band 6. Next, unroll the first side beam and push down over the retention pins until it clicks into place. Then, unroll the second side beam and click into the retention pins. 7.
-
Page 13: How To Dismantle The X-Cat Basic
5. How to dismantle the X-Cat Basic 1. Release the retention pins, roll up the first side beam until it rests on the centre beam. Then, roll up the second side beam (anti-clockwise) until it reaches the centre beam. Support on one knee and secure with velcro band. - Page 14 3. Lift one of the cross-bars evenly and detach from centre beam 4. Detach rolled-up trampoline from second cross-bar 5. Remove the rear cross-bar from the hulls (Caution: the hulls may fall over) Instruction manual Page 14 updated: 03-2016...
-
Page 15: How To Set Up The X-Cat Sail
6. How to set up the X-Cat Sail Sail option components 1 Main sail 6 Main sheet 2 Jib sail 7 Sheet cleat mounting 3 Upper and lower section of mast 8 Rudder 4 Wind vane 9 Jib sprit with mast foot 5 Shroud blocks Anti capsize float Instruction manual... - Page 16 1. Hook in jib sprit 2. Place mast foot on centre beam and push it over the bolts Instruction manual Page 16 updated: 03-2016...
- Page 17 3. Fit endless line to mast foot 4. Fit the port and starboard shroud blocks Instruction manual Page 17 updated: 03-2016...
- Page 18 5. Attach the rudder, insert the belt hook into the slot and secure with lever 6. Fit the main sheet and jib sheet cleat mounting to the centre beam Instruction manual Page 18 updated: 03-2016...
- Page 19 7. Release the rope grip, take the shrouds from the top of the mast and pull the halyard until the pulley is right at the top. 8. Lay the top section of the mast on the boat and insert the lower section of the mast. (lugs for the jib sail at the top) Instruction manual Page 19...
- Page 20 9. Secure the rope grip and halyard S-hook to the mast using the elastic line. 10. Secure the shrouds to the port and starboard blocks using the shackles. The green shroud tensioner must always be fitted to the starboard side and the red to the port side. Green shroud to the green mark.
- Page 21 11. Insert the burgee 12. Fit the jib sail to the lug on the mast using the quick-release shackle. Fit the front end of the jib sail to the jib furler using the quick-release shackle. Instruction manual Page 21 updated: 03-2016...
- Page 22 13. Raise the mast and insert the base into the mast foot 14. Thread the jib sheets through the rollers on the shroud blocks and tie the ends together using a simple knot Instruction manual Page 22 updated: 03-2016...
- Page 23 15. Undo one end of the barber hauler, thread through the cleat block and then connect up again Instruction manual Page 23 updated: 03-2016...
- Page 24 16. Lift the bottom end of the mast slightly to thread the mail sail loops onto the mast, starting with the top of the sail. NOTE: blue dots must be on top. Blue dot upwards 17. Pull the jib sprit line until the jib furler is right at the end of the jib sprit and then secure the line in the clam cleat Secure line in clam cleat Instruction manual...
- Page 25 18. Take S-hook and hook into top of main sail 19. Raise main sail and pull halyard pulley right down to hook into mast foot. Hang elastic line on front of mast foot Instruction manual Page 25 updated: 03-2016...
- Page 26 20. Attach boom yoke, Cunningham, vang and main sheet 21. Detach elastic rope, wind round tab, pull tight and secure in clam cleat Instruction manual Page 26 updated: 03-2016...
-
Page 27: How To Dismantle The X-Cat Sail
7. How to dismantle the X-Cat Sail 1. Release ropes from cleats 2. Roll up jib sail and secure endless line in the cleat 3. Undo knot and pull sheets through the pulleys Instruction manual Page 27 updated: 03-2016... - Page 28 4. Undo shackles and pull out of cleats Hold the sheets taught while pulling on the endless line until the sheets are completely rolled up. Then secure the sheets with 2 half hitches. 6. Release halyard and lower the main sail 7.
- Page 29 8. Loosen jib sprit line 9. Remove mail sail from mast by lifting the mast slightly. Instruction manual Page 29 updated: 03-2016...
- Page 30 10. Roll up sail (start in the middle) and secure with velcro band 11. Lift mast out of foot and lay down 12. Undo shackles connecting the jib sail to the jib furler and the mast 13. Detach the shrouds from the shroud blocks Instruction manual Page 30 updated: 03-2016...
- Page 31 14. Separate the upper and lower sections of the mast 15. Remove the burgee 16. Release and remove the shroud blocks 17. Remove the jib sprit and the mast foot 18. Release the lever on the rudder, undo the hooks and remove the rudder. 19.
-
Page 32: How To Set Up The X-Cat Rowmotion Pro
8. How to set up the X-Cat RowMotion Pro RowMotion Pro components 1. Forward rowing oars 4. Foot stretcher unit 2. Stopper 5. Small Bag (Bag for stopper, roller seat and foot stretcher) 3. Roller seat 1. Put the roller seat on the center beam. 2. - Page 33 3. The foot stretcher could be adjusted to the foot length by the retention pin. 4. Mount the stopper on the correct end position on the center beam. 5. Mount the forward rowing oars at the numbers on the side beam. (Always put the red oar to the red marked side beam and the green oar to the green marked side beam) Instruction manual Page 33...
-
Page 34: How To Set Up The X-Cat Rowmotion
9. How to set up the X-Cat RowMotion X-Cat RowMotion components 1. Rowlocks 4. Roller seat 2. Rowing oars 5. Foot stretcher unit 3. Stopper 6. Small Bag (Bag for stopper, roller seat and foot stretcher) 1. Put the roller seat on the center beam. 2. - Page 35 3. The foot stretcher could be adjusted to the foot length by the retention pin. 4. Mount the stopper on the correct end position on the center beam. 5. Mount the rowlocks on the side beams. (Blue handle to blue nut) Instruction manual Page 35 updated: 03-2016...
- Page 36 6. Put the Oars into the rowlocks. (Red oar to red marked side beam, green oar to green marked side beam) Instruction manual Page 36 updated: 03-2016...
-
Page 37: How To Install The Bow-Mesh
10. How to install the bow-mesh 1. Stick the trunnion of the lateral mesh-rods into the mounting part on the jib sprit. 2. Fix the other end of the lateral mesh rods at the cross beams by the retention pin. 3. - Page 38 4. By bending the rod you can mount the rear rod on the side beams. Instruction manual Page 38 updated: 03-2016...
-
Page 39: Righting The Boat Afer Capsizing
11. Righting the boat afer capsizing 1. Remove ropes of the 2. Climb to the upper hull headsail cleat-holder 3. Grab the jipsheet 4. Step back to the lower hull 5. Lean back as far as possible 6. The X-Cat raises into upright position Instruction manual Page 39 updated: 03-2016... -
Page 40: Entering The Boat On Water
12. Entering the boat on water The easiest way to enter the boat on water is directly over the hulls like shown on the picture. Instruction manual Page 40 updated: 03-2016... -
Page 41: How To Stow The Mast
13. How to stow the mast 1. Place the shrouds over the top of the mast 2. Pass the shrouds around the yoke and then hook the S-hook into the shackles 3. Then pass the halyard around the yoke 4. Back up over the top of the mast and secure in place with the rope grip and elasticated rope Instruction manual Page 41 updated: 03-2016... -
Page 42: How To Use The Jib Sail And Jib Sail Cleat
14. How to use the jib sail and jib sail cleat To unfurl the jib, take the endless line out of the clam cleat and pull on the red jib sheet You can then fix the sheet in the cleat block To fix the jib sail on one side, secure the red sheet in the cleat block. -
Page 43: How To Use The Rudder
15. How to use the rudder 1. Release the tiller toggle 2. Pull the knot out of the slot and carefully lower the rudder 3. When the rudder is lowered, secure the green line in the safety cleat and move the safety cleat forwards. Instruction manual Page 43 updated: 03-2016... - Page 44 The safety cleat will release if the rudder collides with an underwater obstruction or runs aground. To reset the rudder you just need to press the cleat into position and secure the green line in the cleat. Instruction manual Page 44 updated: 03-2016...
-
Page 45: How To Tighten The Shrouds
16. How to tighten the shrouds As a rule, the shrouds are too loose if they sag when you lift the front end of the X-Cat slightly by the jib sprit. If this is the case, there are three different ways of tightening the shrouds. 1. - Page 46 2. Attach jib to the second link on the jib furler (instead of the first link). This should only be used as a short-term solution. 3. Tighten the jib sprit cables Instruction manual Page 46 updated: 03-2016...
-
Page 47: How To Install The Anti-Capsize Protection
17. How to install the anti-capsize protection Thread the retention belt in the following sequence: 1. through the first float 2. through the sail 3. through the second float 4. back through the second float 5. back through the sail 6. -
Page 48: Description Of The Flange Spanner
18. Description of the flange spanner a. Adjusting the cross bar The clamping force hast to be adjusted so, that the clamping lever is still good to open and to close, but the fixed cross-bar could not be pulled out of the hulls. Additionally the contact surface of the lever should be greased regularly that it keeps running smooth. - Page 49 2. Put the provided flange spanner onto the nut. 3. For adjusting turn the spanner into the necessary direction. Clockwise force gets increased, anticlockwise force gets reduced. Spannkraft Instruction manual Page 49 updated: 03-2016...
-
Page 50: Opening Up The Hulls
a. Opening up the hulls If there is water in the hulls, you can open them easily with the provided flange spanner. Follow these steps: 1. Open the flange by twisting anticlockwise and pull them out. 3. That the water could run out of the hulls, turn them around Attention: Do not leave them opened for days! 4. - Page 51 6. Before screwing the flange in again, it is important to grease the marked positions. 7. put the flange into the hulls and close them by twisting the spanner clockwise. The front and the rear flange have to be tightened with the same force. Instruction manual Page 51 updated: 03-2016...
-
Page 52: Overview Of Knots
19. Overview of knots Bowline Figure eight knot English knot Overhand knot Instruction manual Page 52 updated: 03-2016... -
Page 53: Description Of Tacking Sequence
20. Description of tacking sequence Instruction manual Page 53 updated: 03-2016... - Page 54 How to execute a perfect turn with the X-CAT Do not move the rudder too suddenly at the start of the turn. You might want to turn away from the wind just before starting the turn in order to build up a bit more speed. Move your body forward as far as you can reach with the tiller extension as you initiate the turn.
- Page 55 Instruction manual Page 55 updated: 03-2016...
- Page 56 Row&Sail GmbH Gewerbezeile 9 4040 Lichtenberg/Linz Austria Tel.: +43 (0) 7239 / 20275 Fax: +43 (0) 7239 / 20275 – 30 office@rowandsail.com www.x-cat.com Instruction manual Page 56 updated: 03-2016...