
Related Manuals for Pioneer AVIC-5201NEX


Summary of Contents for Pioneer AVIC-5201NEX
-
Page 1: Installation Manual
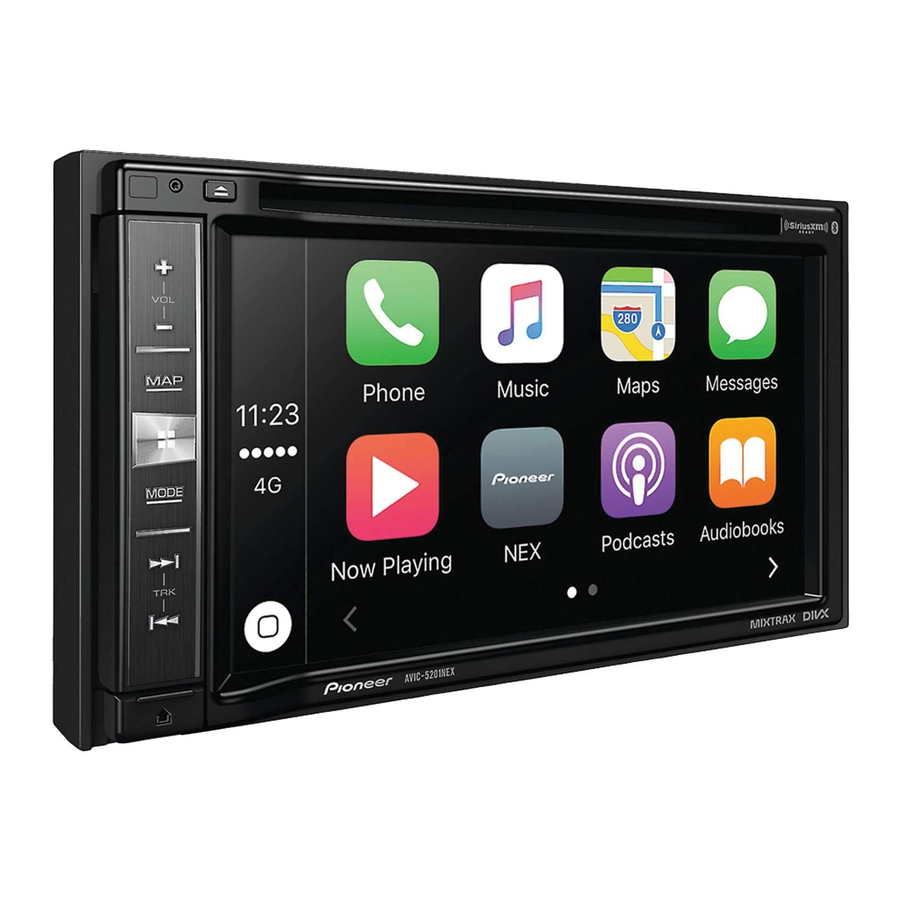
AVIC-5201NEX MULTIMEDIA NAVIGATION RECEIVER RÉCEPTEUR DE NAVIGATION MULTIMÉDIA Installation Manual Manuel d’installation... -
Page 2: Table Of Contents
Contents ■ Precautions ......3 Installing the GPS antenna ........13 Installation notes ..........13 Your new product and this manual......3 When installing the antenna inside the Important safeguards ..........3 vehicle (on the dashboard or rear shelf ) ..14 ■ Installing the microphone ........14 Connection ......4 Parts supplied ............14 Precautions before connecting the system .. -
Page 3: Precautions
WARNING you in the operation of your vehicle. It is Pioneer does not recommend that you not a substitute for your attentiveness, install this product yourself. This product is judgment and care when driving. -
Page 4: Connection
Connection To prevent damage • To avoid short-circuiting, cover the disconnected lead with insulating tape. It is especially important to insulate all unused speaker leads, which if left uncovered may WARNING cause a short circuit. • Use speakers over 50 W (maximum input •... -
Page 5: Parts Supplied
Parts supplied Connecting the power cord (1) This product 14 cm (5-1/2 in.) Yellow To terminal supplied with power regardless of Yellow/black (MUTE) ignition switch position. If you use equipment with a mute This product Power cord function, connect that equipment to the To electric terminal controlled by ignition Audio Mute lead. -
Page 6: Connecting The Power Cord (2)
The position of the speed detection circuit and the position of the parking brake switch vary This is connected so that this product can detect depending on the vehicle model. For details, consult your authorized Pioneer dealer or an installation whether the vehicle is moving forwards or backwards. -
Page 7: Connecting The System
Connecting the system required for the activation on the followings (refer to Operation Manual.): • the label on the packaging of this product • the label on this product • the “Firmware Information” screen iDatalink adapter input Please refer to the instruction manual for the iDatalink adapter (sold separately).* This product... -
Page 8: Connecting To Separately Sold Power Amp
Connecting to separately sold power amp Connecting an iPod / iPhone Android device or an Android device Pandora Refer to Connecting AVICSYNC App via the USB port (Android device) on Find your device and the function you Power amp page 10. want to operate from the list below, and (sold separately) RCA cables... -
Page 9: Connecting An Iphone With Lightning Connector
Connecting via the RGB input Connecting via the RGB input Connecting an iPhone Connecting an iPhone (iPhone) (iPhone) with Lightning connector with 30-pin connector The following cables are required for the The USB interface cable for iPod / iPhone connection. (CD-IU201S) (sold separately) is required NOTES NOTES... -
Page 10: Connecting Via The Usb Port (Android Device)
Connecting via the USB Connecting a rear view Connecting the external Rear view camera (ND-BC8) port (Android device) camera video component (sold separately) The USB interface cable for use with When this product is used with a Android devices (CD-MU200) (sold rear view camera, it is possible to Using AV input To video output... -
Page 11: Using An Aux Input
Connecting the video component Using an AUX input Connecting the rear CAUTION Be sure to use a mini-jack AV cable (CD-RM10) display This product (sold separately) for wiring. If you use other This product cables, the wiring position might differ resulting in disturbed images and sounds. -
Page 12: Installation
Installation Before installing • Consult with your nearest dealer if installation requires drilling holes or other modifications of the vehicle. 30° • Do not install this product where it may Precautions before • Before making a final installation of (i) obstruct the driver’s vision, (ii) impair this product, temporarily connect the installation the performance of any of the vehicle’s... -
Page 13: Parts Supplied
heater outlet. Installing the GPS antenna Parts supplied CAUTION Do not cut the GPS antenna lead to shorten it or use an extension to make it longer. Altering the antenna cable could result in a short circuit or malfunction and permanent damage to this product. -
Page 14: When Installing The Antenna Inside The Vehicle (On The Dashboard Or Rear Shelf)
When installing the antenna inside the vehicle Installing the Attach the microphone clip to the (on the dashboard or rear shelf) sun visor. microphone WARNING • Install the microphone in a place where Do not install the GPS antenna over any sensors or vents on the dashboard of the vehicle, its direction and distance from the as doing so may interfere with the proper functioning of such sensors or vents and may driver make it easiest to pick up the... -
Page 15: Adjusting The Microphone Angle
Adjusting the microphone angle After installation Microphone The microphone angle can be adjusted. Microphone base Microphone clip Mount the microphone on the After installing this at a safe place that the vehicle is performing steering column. normally. product Install the microphone on the steering column, keeping it away Reconnect the negative (–) terminal from the steering wheel. - Page 16 Table des matières ■ Précautions ......3 Pièces fournies ............13 Installation à l’aide des trous de vis sur le Votre nouveau produit et ce manuel ..... 3 côté de ce produit ..........13 Importantes mesures de protection....... 3 Serrer la plaque avant amovible .....13 ■...
-
Page 17: Précautions
Pioneer véhicule. Respectez toujours les règles uniquement, qui a reçu une formation de conduite sécuritaire et toute la spéciale et a l’expérience des appareils... -
Page 18: Connexion
Connexion Pour éviter les dommages • Pour éviter le court-circuitage, recouvrez le fil déconnecté de ruban isolant. Il est tout particulièrement important d’isoler tous les fils de haut-parleur non utilisés, car ils peuvent MISE EN GARDE causer un court-circuit s’ils sont dénudés. •... -
Page 19: Pièces Fournies
l’amplificateur d’antenne. Une telle connexion Connecter le cordon d’alimentation (1) pourrait causer une consommation de courant excessive et un dysfonctionnement. Ce produit Pièces fournies 14 cm Jaune Vers la borne alimentée, quelle que soit la Jaune/noir (MUTE) position du contacteur d’allumage. Si vous utilisez un équipement avec Rouge une fonction silence, connectez cet... -
Page 20: Connecter Le Cordon D'alimentation (2)
La position du circuit de détection de vitesse et la position du commutateur de frein à main varient le véhicule avance ou recule. Connectez le fil violet/ selon le modèle du véhicule. Pour plus de détails, contactez votre détaillant Pioneer agréé ou un blanc sur le fil dont la tension varie lorsque la marche installateur professionnel. -
Page 21: Connecter Le Système
REMARQUE Connecter le système * Avant d’utiliser et/ou de connecter l’adaptateur iDatalink Maestro, vous devrez flasher le module Maestro avec le micrologiciel de véhicule et d’unité principale adéquat. Vous trouverez le numéro d’appareil requis pour l’activation aux emplacements suivants (reportez-vous au Mode d’emploi.) : Entrée d’adaptateur iDatalink •... -
Page 22: Connecter À Un Amplificateur De Puissance Vendu Séparément
Connecter à un amplificateur de puissance vendu Connecter un iPod / iPhone Appareil Android séparément ou un appareil Android Pandora Reportez-vous à AVICSYNC App Connecter par le port USB (appareil Android) Trouvez votre appareil et la fonction à la page 10. à... -
Page 23: Connecter Un Iphone Avec Connecteur Lightning
Connecter par l’entrée RGB REMARQUE Connecter un iPhone avec Connecter un iPhone avec (iPhone) Connectez le câble USB au port USB 1 lorsque connecteur Lightning connecteur 30 broches vous utilisez « Pandora » comme source. Les câbles suivants sont requis pour la connexion. -
Page 24: Connecter Par Le Port Usb (Appareil Android)
Connecter par le port Connecter une caméra Connecter le composant Caméra de recul (ND-BC8) USB (appareil Android) de recul vidéo externe (vendue séparément) Le câble d’interface USB pour appareils Lorsque ce produit est utilisé avec Android (CD-MU200) est requis pour la une caméra de recul, il est possible Utiliser l’entrée AV Vers la sortie vidéo... -
Page 25: Utiliser Une Entrée Aux
Connecter le composant vidéo Utiliser une entrée AUX Connecter l’afficheur ATTENTION Pour le câblage, assurez-vous d’utiliser un câble arrière Ce produit AV à mini-prise (CD-RM10) (vendu séparément). Ce produit Si vous utilisez d’autres câbles, la position de câblage peut être différente, ce qui affectera Ce produit l’image et le son. -
Page 26: Installation
Installation loin possible des autres fils d’antenne. • Installez ce produit horizontalement Évitez de les plier, de les poser ou faire sur une surface dont la tolérance est courir ensemble, ou de les croiser. Le de 0 à 30 degrés (sans dépasser 5 bruit électromagnétique augmenterait degrés sur la gauche ou sur la droite). -
Page 27: Pièces Fournies
Installer l’antenne GPS ATTENTION Ne coupez pas le fil d’antenne GPS pour le raccourcir, et n’utilisez pas une rallonge pour l’allonger. L’altération du câble d’antenne peut entraîner un court-circuit ou un Ne recouvrez pas cette zone. dysfonctionnement, et endommager ce •... -
Page 28: Lorsque Vous Installez L'antenne À L'intérieur Du Véhicule (Sur Le Tableau De Bord Ou La Tablette Arrière)
Lorsque vous installez l’antenne à l’intérieur du véhicule Installer le microphone Fixez l’attache de microphone au (sur le tableau de bord ou la tablette arrière) paresoleil. • Installez le microphone dans un emplacement où son orientation et sa MISE EN GARDE distance par rapport au conducteur N’installez l’antenne GPS sur aucun détecteur ou évent du tableau de bord du véhicule, car cela rendront la voix du conducteur plus... -
Page 29: Installation Sur La Colonne De Direction
Installation sur la colonne de Après l’installation direction Détachez la base de microphone de l’attache de microphone, en glissant Après l’installation de ce vérifier dans un endroit sûr que le véhicule la base tout en appuyant sur la fonctionne normalement. produit languette. - Page 32 Col.Lomas de Chapultepec, México, D.F. 11000 TEL: 52-55-9178-4270 FAX: 52-55-5202-3714 先鋒股份有限公司 台北市內湖區瑞光路407號8樓 電話 : 886-(0)2-2657-3588 先鋒電子(香港)有限公司 香港九龍長沙灣道909號5樓 電話 : 852-2848-6488 © 2017 PIONEER CORPORATION. All rights reserved. © 2017 PIONEER CORPORATION. Tous droits de reproduction et de traduction réservés. < CRD5002-A > UC...