Table of Contents
Advertisement
Quick Links
Download this manual
See also:
User Manual
Advertisement
Table of Contents

Related Manuals for 2gig Technologies GC3


Summary of Contents for 2gig Technologies GC3
- Page 1 Call 800-229-6693 2GIG ® GC3 Security & Automation System User Guide www.HPIsecurity.com An Authorized Dealer 10004670 A OWNER'S INSTRUCTION NOTICE WARNING: Not to be removed by anyone except occupant...
- Page 2 The 2GIG, GC3, GoControl, and Linear logos are registered trademarks of Nortek Security & Control LLC in the United States and/or other countries. Other Nortek Security & Control trademarks may also appear in these materials. Other names or brands may be claimed as the property of others. For more information, contact your 2GIG alarm dealer for pricing or visit www.nortekinc.com, www.nortekcontrol.com, or http://www.2gig.com.
-
Page 3: Table Of Contents
CONTENTS NTRODUCTION About this Guide Document Conventions Technical Support O YSTEM VERVIEW System Features and Capabilities Additional Accessories Setup and Installation Operational Concepts Features to Limit False Alarms Use and Care of the System Limitations of Alarm Products OUCHSCREEN ASICS Waking the Touchscreen About the Home Screen System Status Messages... - Page 4 System Info and Usage History System Info Dealer Info 10 S S YSTEM ETTINGS Users Sounds Bypass Sensors Smart Home Settings Menu Screen Date/Time System Tests Firmware Update Replace the GC3 Cellular Radio Module Index Copyright © 2016 Nortek Security & Control LLC...
-
Page 5: Introduction
NTRODUCTION Before you get started, review the following information: About this Guide Document Conventions Technical Support Copyright © 2016 Nortek Security & Control LLC... -
Page 6: About This Guide
About this Guide Touchscreen Navigation This guide is designed for end users of the GC3 Security & Automation This table describes the action words used to inform users of methods for System. It provides general system information, safety precautions, and touchscreen navigation. -
Page 7: Ystem Overview
O YSTEM VERVIEW This chapter includes the following information: System Features and Capabilities Additional Accessories Setup and Installation Operational Concepts Features to Limit False Alarms Use and Care of the System Limitations of Alarm Products Copyright © 2016 Nortek Security & Control LLC... -
Page 8: System Features And Capabilities
This lets installers customize the sensor names at or above 85 dB can lead to Noise-Induced that display on the GC3 Panel , as well as for the audible system Hearing Loss (NIHL). announcements. For example, when someone opens the front door, the system can be set up to announce "front door."... -
Page 9: Setup And Installation
Examples of alert conditions include dealer. The alarm must always be installed in accordance with your AC power loss at the GC3 Panel, low battery conditions at a sensor, and country's national electrical installation regulations and/or all applicable more. -
Page 10: Features To Limit False Alarms
2 System Overview Proprietary & Confidential Features to Limit False Alarms For compliance with ANSI/SIA CP-01-2010: Control Panel Standard - Features for False Alarm Reduction, the installer can set a variety of different options designed to limit occurrences of a False Alarm. Table 2-1 ANSI/SIA CP-01-2010 Features to Limit False Alarms ANSI/SIA CP-01-2010... - Page 11 Installation & Programming Guide. "Q27: Cross sensor timeout, in seconds (10-120)" on page 59 of the GC3 Installation & Programming Guide. "Q25: Swinger shutdown count (1-6)" on page 58 of the GC3 4.3.2 Swinger Shutdown Swinger Shutdown Count (1-6) Installation & Programming Guide.
-
Page 12: Use And Care Of The System
2 System Overview Proprietary & Confidential Use and Care of the System or by passing traffic. Finally, alarm warning devices, however loud, may not warn hearing-impaired people or awaken deep To care for the system, observe the following: sleepers. Humidity and Liquids Do not expose the system to water, rain, While smoke detectors have played a key role in reducing extreme humidity, perspiration, or other liquids. -
Page 13: Ouchscreen Basics
OUCHSCREEN ASICS This chapter includes the following information: Waking the Touchscreen About the Home Screen System Status Messages System Icons Using the Inbox Using Bookmarks System Logo Viewing the Weather Forecast Using the System Menus Responding to Trouble Alerts Copyright © 2016 Nortek Security & Control LLC... -
Page 14: Waking The Touchscreen
3 Touchscreen Basics Proprietary & Confidential Waking the Touchscreen Table 3-1 Home Screen Features During periods of inactivity, the touchscreen automatically times out and enters sleep mode. To place it into full-power mode, you must wake the This feature… Does this… To learn more…... -
Page 15: System Status Messages
Proprietary & Confidential 3 Touchscreen Basics System Status Messages At the top-left of the screen, different messages appear to reveal the current system state. Figure 3 System Status Messages This table describes the different system status messages on the system. Table 3-2 System Status Messages This system status message…... -
Page 16: Using The Inbox
3 Touchscreen Basics Proprietary & Confidential Using the Inbox Reading Incoming Messages There are three (3) types of messages that arrive in the Inbox: Alerts, Your security provider has the ability to transmit messages about system Alarms, and Messages. When a new message arrives, the Messages upgrades, additional services, special regional weather alerts, and so on. - Page 17 Proprietary & Confidential 3 Touchscreen Basics 1. Open the desired message. 2. After reading the text, tap Mark as Unread. Figure 10 Enter Your Code to Read the Message 6. When the message appears, read the text. Figure 13 Messages > Mark as Unread Button The system marks the message as unread.
-
Page 18: Using Bookmarks
The bookmarked screen now becomes the default home screen the logo and then enter the Installer Code to access the Installer for the system. After 30 seconds of inactivity the panel will Toolbox menu. See the GC3 Installation & Programming Guide. automatically display the bookmarked screen. NOTE: The logo may be changed to the security dealer's logo. -
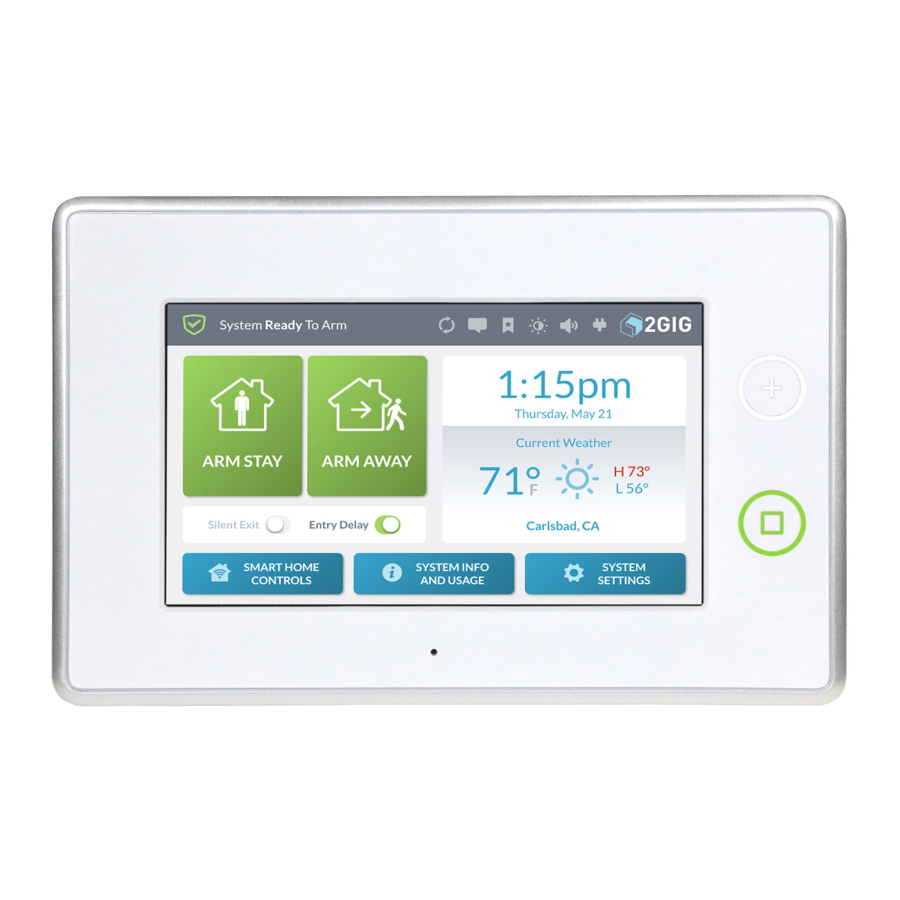
Page 19: Viewing The Weather Forecast
Proprietary & Confidential 3 Touchscreen Basics Viewing the Weather Forecast If your Remote Service Provider provides weather forecasts and you have added this option as part of your service agreement, you can view five-day weather forecasts on the Home screen of the touchscreen display. Figure 19 Five-Day Weather Forecast Copyright ©... -
Page 20: Using The System Menus
Tap the Smart Home Controls button on the Home screen to reveal the Smart Home Controls menu. These options give users the ability to operate any smart home devices (if installed) directly from the GC3 Panel. To learn about options in this menu, see "About the Smart Home Controls Menu"... -
Page 21: Responding To Trouble Alerts
The system sounds six (6) alert tones every minute, until the alert Monitoring the System for Trouble Conditions is acknowledged. The system monitors the GC3 Panel and its sensors so it can notify you when the following trouble conditions occur: NOTE:... - Page 22 3 Touchscreen Basics Proprietary & Confidential THIS PAGE INTENTIONALLY LEFT BLANK Copyright © 2016 Nortek Security & Control LLC...
-
Page 23: Urglary Protection
URGLARY ROTECTION This chapter includes the following information: Overview Important Concepts Sample Burglary Alarm Plan Arm the System Force Bypassing Use the Quick Exit Button In the Event of an Exit Error To Disarm the System Transmit a User Duress Report In the Event of a Burglary Alarm Copyright ©... -
Page 24: Overview
Front Door, Back Door, Basement Window, Laundry Room, and so on. During programming, the installer may also create a voice descriptor for each zone. The GC3 Panel uses the voice descriptor in two ways: As a verbal announcement to notify occupants when a perimeter sensor is open, closed, or when an alarm is set off. -
Page 25: Sample Burglary Alarm Plan
PIR - MOTION DETECTOR GB - GLASS BREAK SENSOR PAD - WIRELESS KEYPAD ES - EXTERNAL SIREN GARAGE MAIN AND SIDE GARAGE DOOR SENSORS (WITH ENTRY/EXIT DELAY) diag-gc3-burglary-floor-plan-en Figure 1 Sample Burglary Alarm Plan Copyright © 2016 Nortek Security & Control LLC... -
Page 26: Arm The System
If you have purchased a key fob (or multiple fobs) to detects breaking glass (if glass break detectors have been installed). control the GC3 Security & Automation System, you can also To learn how to arm the system in Stay Mode, see "Arm the System (Stay arm the system using your key fob. -
Page 27: Force Bypassing
Opening a Sensor When the System is Disarmed When a protected door or window is opened while the system is disarmed, the GC3 Panel responds as follows: The system status message on the touchscreen reads System Not Ready to Arm. -
Page 28: Use The Quick Exit Button
4 Burglary Protection Proprietary & Confidential Figure 4 Enter the Master Code to Bypass Sensors Figure 9 Enter Your Code to Cancel Bypass This changes the system's status back to System Not Ready to 3. When the system status message changes to System Ready to Arm and moves the sensor to the Sensors Not Ready list. -
Page 29: In The Event Of An Exit Error
Exit Delay countdown expires (for example, the an active, four-digit user code. You must enter a code before the door you exit from doesn't close behind you), the GC3 Panel sounds the Entry Delay countdown expires. -
Page 30: Transmit A User Duress Report
4 Burglary Protection Proprietary & Confidential 1. At the Home screen or from one of the menus, tap the system logo. Figure 18 System Logo 2. At the Enter your code to disarm the system screen, enter the four-digit Duress Code. Figure 15 Enter Your Code to Disarm the System The system is disarmed. - Page 31 Clearing an Alarm be configured to a maximum of 45 seconds. If an alarm occurs while you are away, the GC3 Panel's Piezo Sounder will sound for a preset amount of time (as defined by the Burglary Bell Cutoff To silence the alarm sounder: Time and/or the Fire Bell Cutoff Time).
- Page 32 4 Burglary Protection Proprietary & Confidential a. If you enter your code before the Alarm Cancel Time countdown expires, the following message appears. Figure 25 Alarm Report Already Transmitted…Cancel Being Sent Message NOTE: Consult your installer to determine how the Alarm Cancel Time setting is configured on your system.
-
Page 33: Ire Carbon Monoxide Protection
& C ARBON ONOXIDE ROTECTION This chapter includes the following information: Overview Important Concepts National Fire Alarm and Signaling Code Recommended Smoke Alarm Placement Emergency Action Plan In the Event of a Fire Alarm Silence a False Fire Alarm In the Event of a Carbon Monoxide Alarm Clear the Alarm History Copyright ©... -
Page 34: Overview
5 Fire & Carbon Monoxide Protection Proprietary & Confidential Overview During setup, a professional installer typically configures a variety of wireless and wired sensors to provide the dwelling with continuous, 24-hour-a-day, heat, smoke, and gas protection. Most systems are installed with both Wireless Smoke/Heat/Freeze Alarms and Wireless Carbon Monoxide Detectors. Important Concepts To help you get the most out of your fire, heat, and gas protection system, it is useful to understand these concepts. -
Page 35: Emergency Action Plan
Clear Alarm History button will not permit you upright, since smoke rises and may overcome you. Air is typically to clear any history until the GC3 Panel receives a clearest near the floor. message from the sensor that it has returned to 7. -
Page 36: Clear The Alarm History
5 Fire & Carbon Monoxide Protection Proprietary & Confidential industry professional to evaluate all possible sources of CO gas in the dwelling. Clear the Alarm History After an alarm is activated on the system while you are way, a notification message appears in the Alarm History. To clear the alarm history: 1. -
Page 37: Mergency Eatures
MERGENCY EATURES This chapter includes the following information: 24-Hour Alarm Buttons Activate a Manual Panic, Fire, or Emergency Alarm Copyright © 2016 Nortek Security & Control LLC... -
Page 38: 24-Hour Alarm Buttons
Emergency Report to the Central Station. Activate a Manual Panic, Fire, or Emergency Alarm You can activate a panic, fire, or emergency alarm using the GC3 Panel. To activate a manual alarm: 1. Press the Alarm button on the GC3 Panel. -
Page 39: Emote Control
EMOTE ONTROL This chapter includes the following information: Remote Control Devices Operate the System with a Key Fob Copyright © 2016 Nortek Security & Control LLC... -
Page 40: Remote Control Devices
The GC3 Security & Automation System can be paired to work with a maximum of 32 wireless Activating an Alarm Using a Key Fob key fobs. -
Page 41: Mart Home Controls
MART ONTROLS This chapter includes the following information: About the Smart Home Controls Menu Navigate to the Smart Home Controls Menu Lights Locks Thermostats Scenes Add a New Room Copyright © 2016 Nortek Security & Control LLC... -
Page 42: About The Smart Home Controls Menu
About the Smart Home Controls Menu The Smart Home Controls menu gives users the ability to control Z- Wave smart home devices at the GC3 Panel. The system supports a maximum of 232 Z-Wave devices. Navigate to the Smart Home Controls Menu To navigate to the Smart Home Controls menu: 1. -
Page 43: Scenes
Proprietary & Confidential 8 Smart Home Controls Figure 8 Smart Home Controls > Scenes E x a m p l e s : W h e n C r e a t e S c e n e s There are a wide variety of scenes that you can create. Some of the more common include: Leaving for the Day: Create a scene named "Leave"... - Page 44 8 Smart Home Controls Proprietary & Confidential Figure 11 Enter a Name for the New Scene Figure 14 Add or Remove Items > Lights > Add Device When the device is added to the scene, the icon changes to 6. Create a new scene (see "Add a New Scene" on the previous YELLOW.
-
Page 45: Add A New Room
Proprietary & Confidential 8 Smart Home Controls 2. At the Home screen, tap Smart Home Controls. Figure 19 Scene > Edit Scenes > Delete Scene 3. At the Smart Home Controls menu, tap Scenes. 4. At the Delete Scene <Name> message, tap Delete. 4. - Page 46 8 Smart Home Controls Proprietary & Confidential 1. Navigate to the Smart Home Controls menu. See "Navigate to the Smart Home Controls Menu" on page 42. 2. At the Smart Home Controls screen, tap Rooms. Figure 24 Enter a Name for the New Room 6.
- Page 47 Proprietary & Confidential 8 Smart Home Controls Figure 27 Add or Remove Items—Add Device 9. Choose one of these options: To add other devices to the room, tap Back. To save the room as is, tap any area outside of the drop- down menu to close it.
- Page 48 8 Smart Home Controls Proprietary & Confidential THIS PAGE INTENTIONALLY LEFT BLANK Copyright © 2016 Nortek Security & Control LLC...
-
Page 49: Ystem Nfo And Usage
YSTEM NFO AND SAGE This chapter includes the following information: System Info and Usage History System Info Dealer Info Copyright © 2016 Nortek Security & Control LLC... -
Page 50: History
This reveals the History screen. See "Filtering the History conditions are triggered and cleared. Screen" below. Alerts: Keeps a record of when the GC3 Panel or a zone issue an alert. For example, low battery, AC power loss, or tamper Filtering the History Screen conditions. -
Page 51: System Info
Proprietary & Confidential 9 System Info and Usage System Info The System History screen shows the following information about your GC3 Panel (depending on the features that are active in your system): Z-Wave Home ID Serial Number Firmware Version Build Version... - Page 52 9 System Info and Usage Proprietary & Confidential Figure 10 Dealer Info Screen This screen provides you with the following information: Dealer Name: Reveals the company name for your 2GIG alarm dealer. Dealer Address: Reveals the mailing address for your 2GIG alarm dealer.
- Page 53 10 S S YSTEM ETTINGS This chapter includes the following information: Users Sounds Bypass Sensors Smart Home Settings Menu Screen Date/Time System Tests Firmware Update Replace the GC3 Cellular Radio Module Copyright © 2016 Nortek Security & Control LLC...
-
Page 54: System Settings Users
10 System Settings Proprietary & Confidential Users been created: the Master User (which is active) and the Duress user (which is grayed out). The Users menu lets you add, edit, and delete users from the system. NOTE: To use this feature, you must know the four-digit Master User Code. - Page 55 Proprietary & Confidential 10 System Settings Figure 5 Distress User Code 8. At the Confirm code for user Duress, enter the code again and tap Done. 9. At the Edit Duress User screen, tap the pencil icon in the Name row if you want to change the user name. Figure 8 Enter New User Name 6.
- Page 56 10 System Settings Proprietary & Confidential Change the User Status to Active or Inactive To change the user status to active or inactive: 1. Open the Edit User page. See "Editing a User" above. 2. If you want to make the user profile inactive, move the Active slide control to the left.
- Page 57 Proprietary & Confidential 10 System Settings Figure 17 Enter User Name 5. Tap Done. 4. Tap Done. Adding a User Schedule To add a schedule: Change a User Code 1. Open the Edit User page. See "Editing a User" on the previous To change a user code: page.
-
Page 58: Sounds
10 System Settings Proprietary & Confidential e. Tap f. Tap to save the schedule. to save the schedule. Adding a Date Schedule Delete a User If a user requires access to your dwelling on a specific date, you If an occupant of your dwelling moves away and no longer needs access to can create a schedule for them. -
Page 59: Bypass Sensors
Proprietary & Confidential 10 System Settings 1. At the Home screen, tap System Settings. Figure 21 Sounds Screen Figure 18 Home Screen > System Settings 4. Swipe up or down to move the desired sound control into view. 5. Touch and hold the desired control and then swipe to the left to NOTE: To use this feature, you must know the four- lower the volume or swipe to the right to raise the volume:... -
Page 60: Smart Home Settings Menu
Smart Home Settings Menu NOTE: This menu is only available to installers. The Smart Home Settings menu provides installers with access to a variety of Z-Wave settings for the GC3 Security & Automation System. Copyright © 2016 Nortek Security & Control LLC... - Page 61 Smart Home Settings menu, users who know the Master Smart Home Settings menu has been enabled on User code can access a variety of Z-Wave settings for the GC3 Security & your system. Typically, this button is grayed out and Automation System.
- Page 62 10 System Settings Proprietary & Confidential TIP: The Control Panel issues a double-beep when a device is successfully added to the network. Figure 32 Listening for Devices to Add—Add Devices Now 3. Walk to and trigger the device. For example, if you are adding a Z-Wave light bulb, turn the light bulb ON.
- Page 63 Proprietary & Confidential 10 System Settings TIP: Typically, you can trigger a device on the network by either powering the device OFF/ON, pressing a button once or twice, or flipping a switch on the device. Every device is different. When the system successfully removes the device, it appears on the Listening for Devices to Remove screen.
- Page 64 10 System Settings Proprietary & Confidential Figure 43 Check Network—Start Figure 46 Rediscover Network—Start The system scans the network for unresponsive nodes and While the system is rediscovering the network it displays the indicates the status of each scanned node. status of each node as it is checked. Figure 44 Check Network—Status Figure 47...
- Page 65 Resetting the controller will delete all node the Smart Home Settings Menu" on page 61. information from the GC3 Control Panel. Any 2. At the Smart Home Settings menu, tap View All Devices. devices that were part of the mesh network will need to be manually removed from the network before they can be added to a network.
- Page 66 10 System Settings Proprietary & Confidential Figure 54 Smart Home – View All Devices Figure 57 Smart Home Devices – Hide Confirmation 4. To view the options available for a device, tap the menu button ( 2. Tap Hide to prevent the device from appearing on Smart Home Control screens.
- Page 67 Proprietary & Confidential 10 System Settings Identify This option lets you identify a device from the control panel. Tapping Identify activates the device (for example, a light module will turn on and then turn off). This feature can be helpful if you add multiple devices to the system without renaming them at the time of installation.
- Page 68 10 System Settings Proprietary & Confidential Figure 66 Smart Home Devices – New Device Name Figure 69 Smart Home Devices – Listening For Replacement Device 3. Tap t to return to the Smart Home Settings menu. 3. Walk to and trigger the replacement device on the network. For Replace example, if you are replacing a Z-Wave light bulb, turn the light bulb ON.
- Page 69 Learn Controller The GC3 Panel can be added to an existing Z-Wave network as a "secondary" controller (this process is also called "copy" or "replication"). When the GC3 Panel acts as a secondary controller, devices can only be Figure 73 Smart Home Settings—Advanced Settings...
-
Page 70: Screen
Figure 77 Home—System Settings Figure 80 Advanced Settings—Controller Learn The GC3 Panel displays a "Learning Z-Wave Controller" 3. Enter the Master User Code to access the System Settings message and waits for a signal from the primary controller. The screen. - Page 71 Proprietary & Confidential 10 System Settings 3. Tap t to return to the System Settings menu. 4. Tap t to return to the Home screen. Adjusting the Dim Brightness The Dim Brightness refers to the brightness level of the touchscreen when backlit. To adjust the dim brightness: 1.
-
Page 72: Date/Time
3. Tap t to return to the System Settings menu. Date/Time 4. Tap t to return to the Home screen. The Date/Time screen lets you modify the time displaying on the GC3 Panel's touchscreen. The date and time are also logged on system alarms and reports. - Page 73 1. At the Home screen, tap System Settings. 2. Tap Sensors Test. This places the GC3 Panel into Walk Test Mode and transmits a 2. Enter the Master User Code to access the System Settings Walk Test Started report to the Central Station.
-
Page 74: Firmware Update
8. Scroll down the screen and tap Siren Audio Test. WARNING!! If a RED bar appears, it indicates the This tests the internal siren on the GC3 Panel. When the test is test failed. To protect your dwelling and its complete, tap one of these buttons: occupants from adverse events, contact your 2GIG Tap this button if you did not hear the siren. -
Page 75: Replace The Gc3 Cellular Radio Module
2. When the Update system icon and the Firmware Update Available from USB Device message appears, tap Update. Figure 93 Update Firmware Screen The GC3 Panel turns BLACK and in a few moments, the Updating Firmware message appears. IMPORTANT: During the update process, do NOT... - Page 76 9. Tap Done. (Optional) Lock/Unlock the Cellular Radio Module Door The Cellular Radio Module fits into the bay on the side of the GC3 Panel and features a built-in door lock under the faceplate. The Control Panel ships with the door-lock screw in the UNLOCK position. To limit the possibility of someone removing the door, installers have the option of moving the screw to the LOCK position.
- Page 78 A L A R M D E A L E R I N F O R M A T I O N Company Name: Your Account Number: Installation Date: R E M O T E S E R V I C E P R O V I D E R Company Name: Your Account Number:...
-
Page 79: Index
Proprietary & Confidential Index navigation touchscreen 6 2-way voice 8 microphone 8 24-hour backup safety battery 8 notations 6 services technical support 6 speaker 8 accessories 8 support alarm dealers 6 services 6 alarms system false 10 capabilities 8 alerts 9 features 8 cellular radio module 8, 75 technical support 6... - Page 80 Proprietary & Confidential Call 800-229-6693 THIS PAGE INTENTIONALLY LEFT BLANK www.HPIsecurity.com An Authorized Dealer Copyright © 2015 Nortek Security & Control LLC...