
Related Manuals for Sony PCM-7040


Summary of Contents for Sony PCM-7040
- Page 1 DIGITAL AUDIO RECORDER PCM-7040 OPERATION MANUAL [English] 1st Edition (Revised 1) Serial No. 20001 and Higher (UC) Serial No. 50001 and Higher (CED)
- Page 2 The material contained in this manual consists of information that is the property of Sony Corporation and is intended solely for use by the purchasers of the equipment described in this manual. Sony Corporation expressly prohibits the duplication of any...
- Page 3 Table of contents WARNING WARNING (For the customers in the United Kingdom) THIS APPARATUS MUST BE EARTHED. To prevent fire or shock hazard, do not expose the unit to rain or moisture. IMPORTANT To avoid electrical shock, do not open the cabinet. The wires in this mains lead are coloured in Refer servicing to qualified personnel only.
-
Page 4: Table Of Contents
English Table of Contents Chapter 1 Overview Chapter 4 Recording 1-1 Principal Features .......... 1-1 4-1 Preparing for Recording 1-1-1 General ........... 1-1 4-1-1 Checking the Initial Settings ....4-1 1-1-2 Features ..........1-1 4-1-2 Selecting the Audio Output Signals ..4-1 4-1-3 Selecting the Recording Mode .... - Page 5 Table of contents Chapter 7 Menu Operations Chapter 9 Warning Indicators and Error Messages 7-1 About the Menus ..........7-1 7-1-1 General Description of the Menus ..7-1 9-1 Warning Indicators ........9-1 7-1-2 Setting the Display and Settings to the 9-1-1 Warning Indicator Lamps ......
-
Page 6: Chapter 1 Overview
You can carry out automatic electronic editing using range of ±12.5 percent of normal playback speed. two PCM-7040 units together with the RM-D7300 You can vary the recording speed within a range of Digital Audio Editor (optional). You can store the –0.2 to +0.2 percent. - Page 7 1-1 Principal Features Chapter 1 Overview...
-
Page 8: Chapter 2 Location And Function Of Parts And Controls
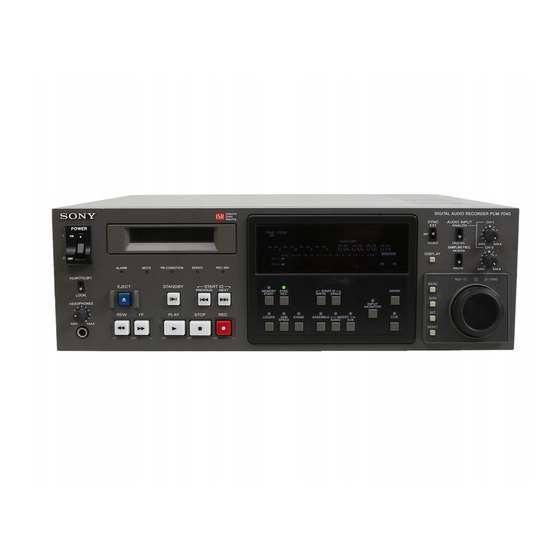
2-1 Front Panel 7 8 9 SYNC AUDIO INPUT CH-1 ANALOG POWER VIDEO DIGITAL SAMPLING CH-2 44.1 kHz DISPLAY 48 kHz ALARM MUTE PB CONDITION SERVO REC INH REMOTE (9P) MENU START EJECT STANDBY PREVIOUS NEXT START ID MEMORY SYNC WREITE ERASE MARK... - Page 9 2-1 Front Panel 8 SYNC signal selector REC (record) key Selects a synchronizing signal (synchronization mode). When pressed together with the PLAY key, lights and EXT: External synchronization (word sync) mode is causes recording to start. The PLAY key also stays lit selected.
- Page 10 !¥ !» @… @“ @£ @¢ SYNC AUDIO INPUT CH-1 ANALOG POWER VIDEO DIGITAL SAMPLING CH-2 44.1 kHz DISPLAY 48 kHz ALARM MUTE PB CONDITION SERVO REC INH REMOTE (9P) MENU START EJECT STANDBY PREVIOUS NEXT START ID MEMORY SYNC WREITE ERASE MARK...
- Page 11 2-1 Front Panel @™ MARK key START ID WRITE and ERASE keys Has the following functions: Use these keys to write an ID as subcode data or to • Setting a locate point erase such an ID. When this key is pressed, the time code currently WRITE: Press this key to write an ID in ASSEMBLE displayed in the tape time display area is set as a or INSERT SUB mode.
- Page 12 INSERT AUDIO key and indicator When this key is pressed, the indicator lights and the unit goes into INSERT AUDIO mode. In INSERT AUDIO mode, you can record only the audio signals (for insertion) on a tape. INSERT SUB (subcode) key and indicator When this key is pressed, the indicator lights and the unit goes into INSERT SUB mode.
-
Page 13: Display
2-2 Display While the unit is on, the display shows information relevant to the current state of the unit. Refer to this section as required. Basic display When you turn on the unit, the display will show Upon initialization, the basic display showing the initializing information for several seconds. - Page 14 Whole display This section explains all the information that may appear in the display. Tape time display area Input/set data display area TIME CODE START ID VIDEO EXT SYNC EXT TIME CODE GEN SET EBU SMPTE WRITE ERASE 2529.9730 D-IWORD GEN TIME CODE U-BIT TIME ABS TIME...
- Page 15 2-2 Display 4 Lock range indicator 6 Generator mode indicator Indicates “WIDE” when the wide range is selected for Displays “FREE FUN” when the generator mode is set external synchronization. (You do this by setting the to FREE RUN. (You do this by setting the setup setup menu “SYNC NARROW”...
-
Page 16: Connector Panel (Rear)
2-3 Connector Panel (Rear) AC IN ANALOG DIGITAL TIME CODE REF VIDEO WORD SYNC INPUT INPUT INPUT INPUT 75Ω 75Ω INPUT INPUT CH-1 CH-2 CH-1 CH-2 INPUT OUTPUT INPUT OUTPUT INPUT OUTPUT OUTPUT MONITOR REMOTE(37P) REMOTE(9P) RS232C REMOTE(8P) CH-1 CH-2 !“... - Page 17 2-3 Connector Panel (Rear) 5 WORD SYNC signal input/output section Signal name Signal name number number WORD SYNC INPUT connector (BNC type) Inputs an external word sync signal. 75-ohm termination switch L-STOP STATUS OUT L-STOP COMMAND IN ON: The input word sync signal is terminated in 75 L-FF STATUS OUT L-FF COMMAND IN ohms.
- Page 18 0 REMOTE (9P) connector (D-SUB 9-pin) • All signals conform to the RS-232C standard. • Their output levels are as follows: This is a 9-pin serial remote signal connector for ON: +5 V or more OFF: -5 V or less connecting, for example, the RM-D7300 Digital Audio Editor.
- Page 19 2-12 Chapter 2 Location and Function of Parts and Controls...
-
Page 20: Chapter 3 Preparations
To see the accumulated operation time of the head drum, choose “Hour-t (HOUR TIME)” of the Setup menu. When you replace the head drum, also replace the lithium battery for memory backup. For the replacement, consult qualified Sony personnel. Chapter 3 Preparations... -
Page 21: Configuration Examples
Tape recorder OUT 2 OUT 1 Analog audio signal Analog audio signal ANALOG INPUT CH-1 ANALOG INPUT CH-2 PCM-7040 Switch Setting AUDIO INPUT selector (front panel): ANALOG ANALOG OUTPUT CH-1 ANALOG OUTPUT CH-2 Analog audio signal Analog audio signal... - Page 22 Video sync signal generator generator Video sync signal Time code REF VIDEO INPUT TIME CODE INPUT PCM-7040 TIME CODE OUTPUT Switch Settings SYNC signal selector (front panel): VIDEO Setup menu Setting Time code reader rEc tc (REC TIME CODE): inPut When you want to record the time code of the time code generator.
- Page 23 3-2 Configuration Examples Connection for digital audio signals Connect as follows when you want to make digital copies (to input digital audio signal and copy the signal). Example 1: When the recorder is a controlled device Player Switch Setting SYNC signal selector (front panel): INT INPUT MONITOR key (front panel): Turned off DIGITAL OUTPUT...
- Page 24 Example 2: When the recorder is a controlling device Player Switch Settings SYNC signal selector (front panel): EXT INPUT MONITOR key (front panel): Turned off Setup menu setting din Sync (DIN SYNC): on or oFF DIGITAL INPUT WORD SYNC INPUT DIGITAL OUTPUT Time code Digital audio signal...
- Page 25 3-2 Configuration Examples Connecting with video equipment Connect the units as in the illustration below to synchronize with the video equipment. VTR (Sony BVH, BVU, video sync signal Sync (video) signal BVW, DVR series, etc.) generator Video sync signal Time code...
- Page 26 Connecting with RM-D7300 The editing ability of the system works most efficiently when this unit is used as a recorder and a player with the RM-D7300 Digital Audio Editor as an editing controller. A configuration example is shown below. DIGITAL OUTPUT Digital audio signal TIME CODE...
-
Page 27: Supplying The Power And Initial Settings
“E910”: Calls the connection setting with BVE-910 / 2000 / 9100 “b 4000”: Calls the connection setting with DMX-B4000 “Hd-ntSc”: Calls the setting for converting from HD to NTSC system “tELE_S”: Calls the setting with Sony’s tele-cine system “tELE_F”: Calls the connection setting with FOSTEX’s tele-cine system year... -
Page 28: Selecting The Sampling Frequency
3-3-3 Selecting the Sampling 3-3-4 Selecting the Input Signal Frequency This unit inputs either analog audio signals or digital audio signals. Select one of the two types of input Select the sampling frequency for recording using the signals with the AUDIO INPUT selector. SAMPLING FREQ selector. -
Page 29: Selecting The Sync Signal
3-3 Supplying the Power and Initial Settings 3-3-5 Selecting the Sync Signal 3-3-6 Selecting the REMOTE/ LOCAL Setting One of the following sync signals is required for synchronized operation. Select the appropriate signal Select the REMOTE (9P)/LOCAL setting according to with the SYNC signal selector. -
Page 30: About Dat Cassettes
3-4 About DAT Cassettes For the types of DAT cassettes usable with this unit 3-4-2 Preventing Accidental see section “Specifications”. Erasure To prevent accidental erasure, set the safety tab on the 3-4-1 Loading and Unloading cassette to the position shown below. If you insert a Cassettes cassette with the tab hole open, the REC INH indicator lights which prevents you from recording. - Page 31 3-12 Chapter 3 Preparations...
-
Page 32: Chapter 4 Recording
4-1 Preparing for Recording ON (the indicator is on): The unit outputs the input 4-1-1 Checking the Initial signal. You can check the sound which is going Settings to be recorded, or the playback sound of the player connected to this unit. Check the following settings before you start recording. - Page 33 4-1 Preparing for Recording Recording mode Continuation of track pattern Simultaneous Punch-in/ Recording mode (recorded play-after- punch-out signals on all record channels) Monitor Assemble recording Record mode select keys and indicators Insert (Leading heads: — audio record/Trailing Insert sub Heads: play) ASSEMBLE: Records both audio signal and —...
-
Page 34: Notes On Time Code
4-1-4 Notes on Time Code What is time code? Electronic editing of recorded digital audio signals requirs precise information about the editing point. The time address is recorded on the subcode area of a DAT tape for this purpose, and the recorded data is called “time code”. -
Page 35: Recording Procedure
If you want to use a different level, and the time code mode (in ASSEMBLE mode) is please consult a qualified Sony service technician for displayed on the Level meters and in the tape time resetting. - Page 36 Notes Setting and displaying the input signal • The format of time code used in recording and gain playback follows the setting of the setup menu, and not the format of the input time code or that of the To set and display the gain of the analog audio and tape ID.
- Page 37 4-2 Recording Procedure The increments, that depend on the gain setting, “6 dB” (6 dB): –∞ to +6 dB are shown below. “0 dB” (0 dB): –∞ to +0 dB Gain (dB) Increments (dB) Press the SET key. –∞ to –55.0 2 to 5 The display stops flashing and the upper limit –55.0 to –50.0...
-
Page 38: Recording The Time Code
the time code continuously according to the To set the cross fade time, turn the search dial recorded time code on the tape. while holding down the DATA key. The display flashes. ON (FREE RUN): The unit generates the time code To increase the cross-fading time: Turn the at all times having no relation to the tape running search dial clockwise. - Page 39 4-2 Recording Procedure Setting the start time value of the time Recording procedure of the time code code generator Sets the start time value of the internal time code generator. Make this setting in the STOP mode, while ejecting the cassette, or when a cassette is not inserted. The set data will change if the unit enters a mode other than the STOP mode.
-
Page 40: Recording The User Bit
4-2-3 Recording the User Bit Repeat steps 3 and 4 until you complete the setting for all digits. Setting the user bit Press the SET key. The flashing stops and the setting is stored. Sets the user bit of the internal time code generator. Make this setting in the STOP mode, while ejecting the cassette, or when a cassette is not inserted. -
Page 41: Writing And Erasing
4-2 Recording Procedure While this is being done, “SHort id” lights and 4-2-4 Writing and Erasing Start “WRITE” lights in red on the display. ID/Skip ID/End ID When End ID is selected, the End ID is written to the tape for 9 seconds. This unit can write Start ID, Skip ID and End ID in the While this is being done, “End id”... -
Page 42: Writing/Renumbering The Program Number
Erasing Start ID/Skip ID/End ID The unit can locate and erase IDs as follows. The setting of recording mode: INSERT SUB mode Press the DISPLAY key to set the display to “Pno”. This operation puts this unit in the program number write mode. - Page 43 4-2 Recording Procedure Renumbering program numbers Press the SET key while holding down the DATA key. You can renumber Program numbers. The unit searches for the Start IDs from the point Set the initial value and perform renumbering in the you selected.
-
Page 44: Chapter 5 Playback
5-1 Playback Cuing 5-1-1 Playback Procedures Search dial STANDBY key DATA key CUE mode key Check that the INPUT MONITOR indicator is To select shuttle mode turned off. Press the CUE mode key. The indicator lights (cue mode) and the tape stops Press the PLAY key. -
Page 45: Locating Specific Points On A Tape
5-1 Playback Display during cuing mode 5-1-3 Locating Specific Points on While cuing, the unit indicates the cue speed on the a Tape display. This unit can locate a specific tape point quickly. The “time code locate” locates a desired point using the time code, the “start ID locate”... - Page 46 Setting the time code to be located with the menu unit stores the sound around the locate point to sound operation memory and enters memory start standby mode. If you want to start playback right after location Press the PLAY key when you press the LOCATE key, or during the search operation.
- Page 47 5-1 Playback To reset an IN or OUT point to “0”, press the Start ID locating procedure DATA key while holding down the RESET START ID PREVIOUS key key. The data for all digits is reset to “0”. (4) Press the SET key. The display stops flashing and setting terminates.
- Page 48 Press the DISPLAY key to set the display to Searching for an unrecorded part (blank) “P– – L– –”. * * * * * * Program number (01 to 799), End ID or blank part Current Program number While holding down the DATA key, turn the search dial to set the Program number locate point.
- Page 49 5-1 Playback Chapter 5 Playback...
-
Page 50: Chapter 6 Advanced Operations
6-1 Controlling the Playback/Recording Speed The set variable speed value is retained even when the 6-1-1 Controlling the Playback power is turned off. Speed—Variable-Speed Playback You can change the playback speed using the search To perform –0.1 % playback (time code dial. -
Page 51: Controlling The Recording Speed -Variable-Speed Recording
6-1 Controlling the Playback/Recording Speed To perform +0.1% recording (time code 6-1-2 Controlling the Recording 30HzDF) with a film-based system (Sony Speed—Variable-Speed Recording format) You can vary the recording speed by –0.2% to +0.2%. Perform variable-speed recording in the following cases. - Page 52 Press the PLAY key while holding down the REC Sampling frequency: 48 kHz becomes 47.952 kHz key. and 44.1 kHz becomes 44.056 kHz Recording starts. Output AES/EBU sampling frequency ID: 48 kHz “VARI SPEED” flashes on the display for 48 kHz, and 44.1 kHz for 44.1 kHz Recorded time code ID: 30 HzNDF Sampling frequency: 48 kHz becomes 48.048 kHz and 44.1 kHz becomes 44.1441 kHz...
-
Page 53: Other Advanced Operations
6-2 Other Advanced Operations will restore the new sound data in the memory. 6-2-1 Outputting Playback Signals Note that this operation may take about 10 Immediately after Pressing the seconds. After the unit restores the sound data, the PLAY Key—Memory Start Function PLAY key flashes again. - Page 54 To find the precise edit point from a video editor Time code Correction starting You can set the sound memory to the mode that point Memory start enables you to find the precise start point using function starting point memory jog. In this case, you can not perform memory start, but you can use this mode to find the edit point from the video editor using memory jog and to determine the time code of the audio signal.
-
Page 55: Eliminating Noise-Spot Erase
6-2 Other Advanced Operations Find the precise point you want to write the Press the SET key. selected ID using the search dial, and press the MARK key at that point. Press the INSERT AUDIO key. This unit enters the insert audio mode. Press the DATA key for memory rehearsal and check the sound. -
Page 56: Time Code Synchronized Operation With
Note Note To carry out spot erase, make sure that the time code is While “rE-cHASE” is set to “oFF” in the setup menu, recorded on the tape. once the unit has synchronized with the external time code, the unit releases chase synchronization automatically, and the CHASE indicator goes off. - Page 57 6-2 Other Advanced Operations To increase the number: Turn the search dial To chase the external time code value to make the clockwise. playback time code value agree with the external To decrease the number: Turn the search dial time code counterclockwise.
- Page 58 To clear the set value Correcting the input time code using the Press the RESET key while holding down the DATA instant chase lock function key. The set value is cleared and the input time code is displayed in the time code indication area. This unit cannot read a time code input at less than 1/16 times normal speed.
- Page 59 6-2 Other Advanced Operations To rehearse, press the PLAY key while holding Punching-in/punching-out during down the CHASE key. rechasing “cHASE rEH” appears on the display. The unit enters chase mode. The sound played back from The unit can punch-in at a specified IN point and the controlling device is output from the punch-out at an OUT point during synchronous MONITOR output connectors at the IN point after...
-
Page 60: Chapter 7 Menu Operations
7-1 About the Menus 7-1-1 General Description of the Menus The menus available with this unit are categorized into To change the DISPLAY key menu’s function two groups. One is the DISPLAY key menu and the settings, use the DISPLAY key together with the other the dial menu. -
Page 61: Default Values
7-1 About the Menus 7-1-2 Setting the Display and 7-1-3 Setting/Recalling the Setup Settings to the Default Values Menu When using the expanded menu, you will select many Storing customized data for the setup menus, usually sequentially. But you can go back menu quickly to the first menu if that saves time. - Page 62 Recalling the stored data You can recall the stored data, factory-set data, and preset data. You can operate this unit by the recalled data. Turn the search dial while holding the MENU key down and set the display to :“- -rcL - -”. Turn the search dial while holding the DATA key down to select recalling data.
-
Page 63: Display Key Menu Operations
7-2 DISPLAY Key Menu Operations 7-2-1 DISPLAY Key Menu 7-2-3 DISPLAY Key Menu List Operations DISPLAY key Functions menu There are the following three methods to change the display. LOCATE POINT Sets the time code of the locate point for the time code locate operation. •... -
Page 64: Dial Menu Operations
7-3 Dial Menu Operations The dial menu consists of three menus: preset menu Turn the search dial, or press the FF/REW or (setting the data), display menu (display the NEXT/PREV keys while holding the MENU key information) and setup menu (setting the setup). down to select the setup menu. -
Page 65: Dial Menu
7-3 Dial Menu Operations 7-3-4 Dial Menu Preset menu in Pt (IN POINT) [SEt id] (SETUP ID MENU) out Pt (OUT POINT) id rEc (REC ID) cLoSE oPEn GAin rnG (GAIN RANGE) S–id Auto (ID AUTO REC) inP GAin (INPUT GAIN) LSYnc tH (LEVEL SYNC THRESHOLD) croS FAdE (CROSS FADE TIME) LSYnc bt... -
Page 66: Dial Menu Lists
Hd-ntSc GRADE) menu display from basic HD system to NTSC display and expanded system display. tELE-S : for the Sony’s tele-cine baSic* : Sets to the basic system display. tELE-F : for the FOSTEX’s : Sets to the expanded EnHAncEd tele-cine system display. - Page 67 (recording prohibited) HD system to NTSC rEc tc (REC TC) system Selects the recording time code. tELE-S : for the Sony’s tele-cine int* : internal time code generator system inPut : external time code input tELE-F : for the FOSTEX’s...
- Page 68 The display that The display that appears and the Data Functions appears and the Data Functions meaning of the meaning of the display display cHASE-Au (CHASE tc rEGEn (INPUT TC Selects the timing to output Selects to regenerate the AUDIO) REGENERATE) the playback sound during external time code.
- Page 69 7-3 Dial Menu Operations (Continued) The display that The display that appears and the appears and the Data Functions Data Functions meaning of the meaning of the display display L SYnc bt (LEVEL rLb StoP (ROLLBACK Selects the blank time for Selects to stop with roll back SYNC BLANK TIME) STOP)
- Page 70 The display that The display that appears and the appears and the Data Functions Data Functions meaning of the meaning of the display display 37 out-10 (37 PIN 37 in-35 (37 PIN Selects the status signal Selects the command signal RESERVED RESERVED mode of 37-pin parallel...
- Page 71 7-3 Dial Menu Operations The display that The display that appears and the appears and the Data Functions Data Functions meaning of the meaning of the display display Auto inP (AUTO Changes the monitoring Selects the hold mode of the o-HoLd (OVER HOLD INPUT) mode according to the tape...
- Page 72 (Continued) The display that The display that appears and the appears and the Data Functions Data Functions meaning of the meaning of the display display tc rtn (TIME CODE Selects to send back TIME E-Hold (ERROR HOLD) Selects the hold mode of the MISSING RETURN) CODE MISSING upon MUTE and PB CONDITION...
- Page 73 7-14 Chapter 7 Menu Operations...
-
Page 74: Chapter 8 Application Systems
Video sync signal REF VIDEO INPUT BVE-9100/9000/ 9-pin remote 2000/910/900/600 PCM-7040 Video Editor Settings of this unit Set “SYnc Pb” in the setup menu to “EnAbLE”. Set the REMOTE (9P)/LOCAL selector to Press the SYNC REC key so that the incicator REMOTE (9P). - Page 75 1 2 3 4 5 6 7 8 • Set the time code format correctly by using “rEF tcF” PCM-7040 in the setup menu. This unit does not automatically 01 00 88 71 03 7C 00 00...
- Page 76 Operation example: When using the BVE-9100 When using a video editor that can not control memory jog Press the JOG key while holding down the CTRL key. Then, press the JOG key again. Settings of this unit The unit stores the played-back sound, around the point where the JOG key is pressed, to sound Set the setup menu “JoG ctL”...
- Page 77 Set the TC/CTL selector on the front panel to TC. Set the SYNCHRONIZE selector on the front panel to ON1 or ON2. To use the PCM-7040 as a recorder, set the SYNCHRONIZE selector to ON1. When using the PCM-7040 as a recorder, set the PREROLL TIME selector to 10.
-
Page 78: Editing Between This Unit And Digital/Analog Vtr
AES/EBU PCM-7040 9-pin remote Notes • When the sampling frequency of the PCM-7040 differs from that of the VTR, connect the equipment using analog audio signal or connect them via the Sampling Rate Converter. • You do not need to connect the time code. - Page 79 8-2 Systems with Editing Capability and Their Applications Notes • Set the time code format by using “rEF tcF” in the • The “VIDEO” indication appears when the video setup menu because this unit does not automatically sync signal is input to this unit and the setting of “rEF distinguish between the drop frame time code and the tcF”...
-
Page 80: Chapter 9 Warning Indicators And Error Messages
9-1 Warning Indicators When the PB CONDITION Indicator Comes 9-1-1 Warning Indicators The following five warning indicators are on the front When the tape playback results are poor, in other panel. words, the error rate is high, and repetitive interpolation or muting is about to begin, the PB CONDITION indicator comes on. -
Page 81: Error Messages
Errors are classified into levels 1 through 5 according Notes to the gravity. If the ALARM indicator comes on, inspection or repairs are necessary. Note the displayed error code and contact a qualified Sony service technician. ALARM MUTE Continue to Level... -
Page 82: Error Codes
Error code Meaning Error level 9-2-2 Error Codes 2-24 Tape guide position error. 2-25 Pinch roller error. The numbers appearing on the display together with 2-30 Head drum motor has the “Error” or “cAution” indication in the event of stopped. error occurrence are referred to as error codes. -
Page 83: Displaying The Error Correction Code List
Press the RESET key while holding down the DATA limit for checking. Consult key. qualified Sony personnel. While the “Ecc” is not displayed, you can clear the list 2-50 The setting of DIP switch by pressing the EJECT key and removing the cassette. -
Page 84: Warnings By Flashing Indicators
9-3 Warnings by Flashing Indicators If there is any erroneous connection or data setup, the Flashing Description/remedy See ... indicator unit cannot function normally. If such an abnormal condition exists, the associated indicator on the display A digital audio signal is input to the unit: •... -
Page 85: Operating Error Warnings
9-3 Warnings by Flashing Indicators Flashing Description/remedy See ... indicator VARI SPEED The unit records at a speed that may be See section “6- varied by ±0.2%. 1-2. Controlling the Recording Speed— Variable-Speed Recording” (page 6-1). Time code The frame value of the R-TIME or ABS area in the TIME recorded on the tape is invalid. -
Page 86: Appendix
Specifications Head Rotary head (4-head) General Head height difference between a pair of heads (leading and trailing Power requirements heads): 4.5 T 120 V(±10%) 60 Hz Drum rotation 2,000 r/min (standard recording/ (for U.S.A. and Canada) playback) 230 V (+6%, –10%) 50/60 Hz Tape speed 8.15 mm/sec. - Page 87 Specifications Maximum level: +24 dBs 9-pin serial remote Impedance: 10 kilohms/600 ohms, Format: serial balanced Level: RS-422 Connector: XLR-3-31 Connector: D-SUB 9-pin (female) Analog audio output 37-pin parallel remote Reference level: +4 dBs Format: parallel Maximum level: +24 dBs Level: TTL compatible Impedance: below 50 ohms, Connector: D-SUB 37-pin (female) balanced...
-
Page 88: Index
Index Error codes 9-3 Error levels 9-2 AFTER CUE MODE 7-11 Dial menu Error messages 9-2 ALARM (When the ALARM indicator Dial menu 7-6 ERROR CODE 7-7 comes on) 9-1 Dial menu list 7-7 ERROR HOLD 7-13 ANALOG AUDIO INPUT level controls Dial menu operations 7-5 ERROR THRESHOLD 7-13 DIGITAL audio input/output section 2-9... - Page 89 Index Selecting the peak level hold time of the Outputting playback signals level meters (PEAK HOLD TIME) immediately after pressing the PLAY SAMPLING FREQ selector 2-2 7-12 key—Memory start function 6-4 Sampling frequency Selecting the release time for the level Playback procedure 5-1 Sampling frequency indicator 2-6 meters (RELEASE TIME) 7-12...
- Page 90 Selecting whether to automatically locate a SYNC PB 7-10 TIME CODE BASE 7-8 start ID when a cassette is inserted SYNC signal selector 2-2 TIME CODE input/output section 2-9 (AUTO ID SEARCH) 7-10 Synchronization TIME CODE MISSING RETURN 7-13 Selecting whether to automatically locate a Chase synchronized operation 6-7 start ID when detecting a skip ID External sync data A-1...
- Page 91 Sony Corporation Printed in Japan PCM-7040 (UC/CED,英) 1997.03.13 Image & Sound Communication Company © 1996 3-858-359-02(1) Published by Engineering Service Dept.