
Related Manuals for Philips XZ5800


Summary of Contents for Philips XZ5800
- Page 1 Series S5000 XZ5800, S5230, S5210, S5095, S5091, S5090, S5082, S5081, S5080, S5079, S5078, S5077...
- Page 5 English 简体中文...
-
Page 6: General Description
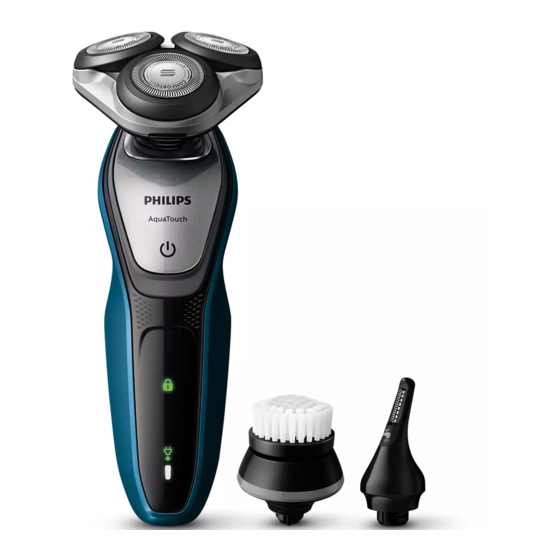
English Introduction Congratulations on your purchase and welcome to Philips! To fully benefit from the support that Philips offers, register your product at www.philips.com/welcome. General description Click-on trimmer attachment (S5230/04, S5210/04, S5082/61, S5081/04, S5079/04, S5078/04 only) Protection cap for shaving unit... -
Page 7: Important Safety Information
English Important safety information Read this important information carefully before you use the appliance and its accessories and save it for future reference. The accessories supplied may vary for different products. Danger Keep the supply unit dry. Warning To charge the battery, only use the detachable supply unit (HQ8505) provided with the appliance. - Page 8 If your shaver comes with a cleaning system, always use the original Philips cleaning fluid (cartridge or bottle, depending on the type of cleaning system). Always place the cleaning system on a stable, level and horizontal surface to prevent leakage.
- Page 9 English Electromagnetic fields (EMF) This Philips appliance complies with all applicable standards and regulations regarding exposure to electromagnetic fields. General This shaver is waterproof. It is suitable for use in the bath or shower and for cleaning under the tap. For safety reasons, the shaver can therefore only be used without cord.
-
Page 10: Battery Fully Charged
English Battery fully charged Note: When the battery is full, the display switches off automatically after 30 minutes. Note: This appliance can only be used without cord. Battery charge indicator with 1 light When the battery is fully charged, the battery charge indicator lights up white continuously. -
Page 11: Travel Lock
English Cleaning reminder Clean the shaver after every shave for optimal performance. When you switch off the appliance, the cleaning reminder flashes to remind you to clean the appliance. Travel lock You can lock the appliance when you are going to travel. - Page 12 Charge the shaver before you use it for the first time and when the display indicates that the battery is almost empty. Charging takes approx. 1 hour (XZ5800, S5230/04, S5210/04, S5095/58, S5090/58, S5081/04) or 8 hours (S5091/50, S5082/61, S5080/03, S5079/04, S5078/04, S5077/04).
-
Page 13: Using The Appliance
English Using the appliance Note: This appliance can only be used without cord. Switching the appliance on and off To switch on the appliance, press the on/off button once. 2 To switch off the appliance, press the on/off button once. Shaving Skin adaptation period Your first shaves may not bring you the result you... - Page 14 English To shave with shaving foam or shaving gel, follow the steps below: Apply some water to your skin. 2 Apply shaving foam or shaving gel to your skin. 3 Rinse the shaving unit under the tap to ensure that the shaving unit glides smoothly over your skin.
- Page 15 English Using the click-on attachments Note: The accessories supplied may vary for different products. The box shows the accessories that have been supplied with your appliance. Removing or attaching the click-on attachments Make sure the appliance is switched off. 2 Pull the attachment straight off the appliance. Note: Do not twist the attachment while you pull it off the appliance.
- Page 16 Use the rotating cleansing brush attachment with your daily cleansing cream. The cleansing brush attachment removes oil and dirt, contributing to a healthy and oil-free skin. (XZ5800/69, S5095/58, S5091/50, S5090/58 only) Attach the attachment to the appliance ('click'). 2 Moisten the attachment with water.
- Page 17 English 7 After approx. 20 seconds move the appliance to your other cheek and start cleansing this part of your face. 20 sec. 8 After approx. 20 seconds move the appliance to your forehead and start cleansing this part of your face.
-
Page 18: Cleaning And Maintenance
English 4 Slowly move the attachment around to remove all unwanted hairs in your nostrils. 5 Clean the attachment after use (see 'Cleaning and maintenance'). Trimming ear hair When trimming ear hair, make sure your outer ear channels are clean and free from wax. Attach the attachment to the appliance ('click'). - Page 19 English Never dry the shaving unit with a towel or tissue, as this may damage the shaving heads. Switch on the appliance. 2 Rinse the shaving unit under a warm tap. 3 Switch off the appliance. Press the release button to open the shaving unit. 4 Rinse the hair chamber under the tap.
- Page 20 Cleaning the cleansing brush attachment Clean the cleansing brush attachment every time you have used it. (XZ5800/69, S5095/58, S5091/50, S5090/58 only) Switch off the appliance. 2 Detach the brush head from the brush base. 3 Clean the parts thoroughly with warm water and soap.
- Page 21 English Cleaning the nose trimmer attachment Clean the nose trimmer attachment every time you have used it. (S5091/50, S5082/61 only) Make sure the appliance is switched off. 2 Rinse the cutting element of the nose trimming head with hot water. 3 Switch on the appliance and rinse the cutting element once more to remove any remaining hairs.
- Page 22 2yrs you to replace the shaving heads every two years. Replace damaged shaving heads immediately. Always replace the shaving heads with original Philips shaving heads (see 'Ordering accessories'). Replacement reminder (S5230/04, S5210/04 only) The replacement reminder indicates that the shaving heads need to be replaced.The shaving unit symbol and arrows light up when you switch off the appliance.
- Page 23 English 4 Turn the retaining rings anticlockwise and remove them. Place them aside in a safe place. 5 Remove the shaving heads from the shaving head holder. Throw away the used shaving heads immediately to avoid mixing them with the new shaving heads.
- Page 24 English Turn the ring clockwise until your hear a click to indicate that the ring is fixed. Note: Hold the shaving head holder in your hand when you reinsert the shaving heads and reattach the retaining rings. Do not place the shaving head holder on a surface when you do this, as this may cause damage.
-
Page 25: Ordering Accessories
We strongly advise you to take your product to an official collection point or a Philips service centre to have a professional remove the rechargeable battery. Follow your country’s rules for the separate collection of electrical and electronic products and rechargeable batteries. - Page 26 English Removing the rechargeable appliance battery Only remove the rechargeable battery when you discard the appliance. Before you remove the battery, make sure that the appliance is disconnected from the mains and that the battery is completely empty. Take any necessary safety precautions when you handle tools to open the appliance.
-
Page 27: Warranty And Support
4 Take out the battery holder and cut the battery tags with a pair of cutting pliers. Warranty and support If you need information or support, please visit www.philips.com/support or read the international warranty leaflet. Warranty restrictions The shaving heads (cutters and guards) are not covered by the terms of the international warranty because they are subject to wear. - Page 28 English Shaver Problem Possible cause Solution The appliance The appliance is Unplug the appliance and does not work still attached to the press the on/off button to when I press the wall socket. For switch on the appliance. on/off button. safety reasons, the appliance can only be used without...
- Page 29 English Problem Possible cause Solution To clean the shaving heads thoroughly, remove the shaving heads from the shaving head holder one by one (see 'Replacement'). Then separate the cutter from its guard and rinse each matching set under the tap. After rinsing, place the cutter back into its corresponding guard.
- Page 30 English Problem Possible cause Solution The nose The cutting element Clean the cutting element trimmer of the attachment by rinsing it under the tap attachment does is very dirty, for with hot water. Switch on not work. instance because the appliance and rinse the some nasal mucus cutting element once more has dried inside the...
- Page 31 5 开/关按钮 6 手柄 7 小插头插座 8 电池充电指示灯(1 级指示) 9 “拔出插头即可使用”符号 10 旅行锁符号 11 更换提醒(仅限 S5210/04 、S5230/04) 12 清洗提示(仅限 S5210/04 、S5230/04) 13 卡入式洁面刷附件(仅限 XZ5800/69 、S5095/58、S5091/50, S5090/58) 14 洁面刷附件保护盖(仅限 XZ5800/69 S5091/50、S5095/58、S5090/58) 15 鼻毛修剪器附件保护盖 (仅限 S5091/50, S5082/61) 16 卡入式鼻毛修剪器附件 (仅限 S5091/50, S5082/61)...
- Page 32 简体中文 17 电源部件(适配器) 18 小插头 随附的附件可能因产品而异。 包装盒上 会显示随附于您产品的附件。 重要安全信息 使用本产品及其附件之前,请仔细阅读本 重要信息,并妥善保管以供日后参考。 随附的附件可能因产品而异。 危险 - 保持电源部件干燥。 - 警告符号注释: 禁止在打开的水龙头 下进行清洗。 警告 - 要给电池充电,请仅使用产品随附的 可拆卸电源部件 (HQ8505)。 - 电源部件中包含一个变压器。 请勿自行更换电源部件的插头, 否则将导致严重后果。 - 本产品适合由 8 岁或以上年龄的儿 童以及肢体不健全、感觉或精神上有 障碍或缺乏相关经验和知识的人士使 用,但前提是有人对他们使用本产品 进行监督或指导,以确保他们安全使 用,并且让他们明白相关的危害。...
- Page 33 简体中文 切勿让儿童玩弄本产品。 不要让儿童 在无人监督的情况下对本产品进行清 洁和保养。 - 将手持部分与电源软线分开后,才能 在水中清洗手持部分。 - 在自来水龙头下清洗剃须刀之前, 务必拔掉其电源插头。 - 使用前,请务必检查产品。 请勿使用损 坏的产品,否则可能对人体造成伤害。 请务必用原装型号更换损坏的部件。 - 切勿拆开本产品更换充电电池。 警告 - 切勿将清洁系统或充电座浸入水中, 也不要在水龙头下冲洗。 - 警告符号注释:禁止用在打开的水龙 头下进行清洗。 - 切勿使用温度高于 80°C 的热水冲洗 剃须刀。 - 只能将本产品用于用户手册中所示的 原定用途。 - 出于卫生的目的,本产品只能供一个 人使用。 - 切勿使用压缩气体、钢丝绒、研磨性 清洁剂或腐蚀性液体 (例如汽油或丙酮)来清洁产品。 - 如果剃须刀随附清洁系统,应始终使...
- Page 34 前,应始终确保滤芯仓已关闭。 - 清洁系统准备就绪时,切勿移动, 以免清洁液漏出。 - 冲洗剃须刀时,水可能从产品底部的 插口漏出。 这是正常的,而且没有危 险,因为所有电子元件都封闭在剃须 刀内部的密封电源部件中。 - 请勿在包含电动空气清新器的墙壁插 座上或其周围使用电源部件,以免电 源部件受到不可修复的损坏。 电磁场 (EMF) - 本 Philips 产品符合所有有关暴露于电 磁场的适用标准和法规。 概述 - 符号注释:适合于在洗澡或淋浴时使 用。 允许在盛水的浴缸、淋浴、洗脸 盆或其他器皿附近使用本器具。 - 该剃须刀具有防水性能。 适合在沐浴 或淋浴时使用,也可以放在水龙头下 清洗。 出于安全原因,该剃须刀在使 用时不能连接电线。 - 本产品适合在 100 - 240 伏的电源电...
- Page 35 简体中文 显示屏 充电 注意: 充电期间按开/关按钮,“拔出 插头即可使用”符号会呈白色闪烁, 提醒您需断开产品与电源插座的连接。 电池充电指示灯(1 级指示) 快速充电(仅限 XZ5800, S5230/04、S5210/04、S5095/58 、S5090/58、S5081/04): 电池电量耗 尽后,当您将产品连接到电源插座时,电 池充电指示灯会快速闪烁。 产品包含的电量足够完成一次剃须时, 电池充电指示灯开始缓慢闪烁。 如果产品继续充电,电池充电指示灯会 缓慢闪烁,直至产品充满电。 电池已完全充满 注意: 电池充满电后,显示屏会在 30 分钟后自动关闭。 注意: 本产品只能在不接电源的情况下 使用。 电池充电指示灯(1 级指示)...
- Page 36 简体中文 电池充满电后,电池充电指示灯将呈白 色持续亮起。 电池电量不足 电池充电指示灯(1 级指示) 当电池的电量几乎耗尽时, 电池充电指示灯会呈橙色闪烁。 “拔出插头即可使用”提醒 产品配有“拔出插头即可使用”提醒。 “拔出插头即可使用”符号闪烁,提醒 您需先断开产品与电源部件的连接才能 启动产品。 清洗提示 每次剃须后请清洁剃须刀,以获得更好 性能。 关闭产品时,清洗提示符号闪 烁,提醒您需要清洁产品。...
- Page 37 简体中文 旅行锁 您可以在携带本产品旅行之前将其锁 住。 旅行锁可防止本产品被意外启动。 启用旅行锁 1 按住开/关按钮 3 秒钟以进入旅行锁模 式。 3 sec. 启用旅行锁后,旅行锁符号会持续亮 起。 旅行锁启用后,旅行锁符号将闪 烁。 解除旅行锁 1 按开/关按钮 3 秒钟。 旅行锁符号闪烁,然后持续亮起。 现在可以再次使用本产品。 更换提醒 为获得更好剃须效果,建议每两年更换 一次剃须刀头。 本产品配有更换提示, 它会提醒您更换剃须刀头。 剃须刀头部 件符号和箭头亮起,表示需要更换剃须 刀头。 注意: 更换剃须刀头后,您需要通过按 开/关按钮 7 秒来重置更换提醒。 (仅限 S5210/04、S5230/04)...
- Page 38 简体中文 充电 首次使用剃须刀之前,或当显示屏指示电 池电量几乎耗尽时,请先为剃须刀充电。 充电大约需要 1 小时(XZ5800, S5230/04、S5210/04、 S5095/58、S5090/58、S5081/04)或 8 小时(S5091/50, S5082/61、S5080/03、 S5079/04、S5078/04、S5077/04)。 注意:不能在充电时使用本产品。 用电源部件充电 1 确保产品电源已关闭。 2 将电源部件插入电源插座, 然后将小插头插入本产品。 3 充电之后,从电源插座上拔下电源部 件,并从产品上拔下小插头。 使用本产品 注意: 本产品只能在不接电源的情况下 使用。 打开或关闭产品 1 要打开本产品,请按一下开/关按钮。 2 要关闭产品,请按一下开/关按钮。...
- Page 39 简体中文 剃须 皮肤适应期 前几次剃须可能不会带给您预期效果, 并且您的皮肤可能会受到轻度刺激。 这是正常的。 您的皮肤和胡须需要时间 适应任何新的剃须系统。 为了让您的皮 肤适应这款新产品,我们建议您在 3 周 时间内定期(至少每周 3 次)仅使用本 产品剃须。 干用剃须 1 启动产品。 2 将剃须刀头在您的皮肤上作迂回运动。 注意: 划圈动作比直线动作的剃须效 果更好。 3 使用 (请参见 '清洁和保养')后要清洁本 产品。 湿剃 您也可以先用剃须泡沫或剃须啫喱将脸 弄湿,然后再用本产品进行剃须。 要用剃须泡沫或剃须啫喱剃须, 请按照下面的步骤执行操作: 1 用水润湿皮肤。...
- Page 40 简体中文 2 在皮肤上涂抹剃须泡沫或剃须啫喱。 3 在水龙头下冲洗一下剃须刀头部件, 确保剃须刀头部件可以在您的皮肤上 顺畅滑动。 4 启动产品。 5 将剃须刀头在您的皮肤上作迂回运 动。 注意: 不要用力按压剃须刀,这样做 可能会导致皮肤疼痛。 注意: 定期冲洗剃须刀头部件,确保 其能够继续在您的皮肤上顺畅滑动。 6 擦干面部。 7 使用 (请参见 '清洁和保养')后要清洁 本产品。 注意: 确保冲洗干净本产品上的所有 泡沫或剃须啫喱。 使用卡入式附件 注意: 随附的附件可能因产品而异。 包装盒上会显示随附于您产品的附件。 拆卸或安装卡入式附件 1 确保产品电源已关闭。...
- Page 41 3 将附件的凸缘插入本产品顶部的槽 内。 然后,按下附件将其安装到本产 品上(可听到“咔哒”一声)。 使用修剪器附件 您可使用修剪器附件修剪鬓角和须髭。 (仅限 S5230/04, S5210/04, S5082/61, S5081/04, S5079/04, S5078/04) 1 将附件安装到产品上(可听到 “咔哒”一声)。 2 启动产品。 3 将修剪器附件垂直放在皮肤上, 向下移动产品,同时轻轻按压。 4 使用 (请参见 '清洁和保养')后要清洁 附件。 使用洁面刷附件 将旋转洁面刷与日常洁面产品一起使 用。 洁面刷可去除油脂和污垢,焕发健 康无油脂的肌肤。 (仅限 XZ5800/69, S5095/58, S5091/50, S5090/58) 1 将附件安装到产品上(可听到 “咔哒”一声)。...
- Page 42 简体中文 2 用水湿润附件。 注意: 切勿在洁面刷附件干燥的情况 下使用产品,否则可能会刺激皮肤。 3 用水润湿面部,并将洁面乳涂抹到脸 上。 4 将附件置于面颊上。 5 启动产品。 6 在鼻子至耳朵之间的皮肤上轻轻地移 动附件。 请勿过分用力地将附件压在 皮肤上,以确保舒适护理 。 注意: 切勿清洁眼部周围的敏感区域。 20 sec. 7 约 20 秒后,可将本产品移至另一侧 面颊,开始清洁这部分面部皮肤。 20 sec. 8 约 20 秒后,可将本产品移至前额, 开始清洁这部分面部皮肤。 轻轻将刷 头从左向右移动。 注意: 建议您不要过度清洁,任何部 20 sec. 位的清洁时间不要超过...
- Page 43 简体中文 9 护理后,洗脸并擦干。现在您可以 进行日常面部护肤的下一步了。 10 使用 (请参见 '清洁和保养')后要清洁 附件。 使用鼻毛修剪器附件 您可以使用鼻毛修剪器附件修剪鼻毛和/ 或耳毛。 (仅限 S5091/50, S5082/61) 修剪鼻毛 修剪鼻毛时,请确保鼻腔保持清洁。 1 将附件安装到产品上(可听到“咔 哒”一声)。 2 启动产品。 3 将附件小心地插入其中一个鼻孔。 附件插入鼻孔的深度不得超过 0.5 厘米。 4 缓缓地来回移动附件,以剃掉鼻孔中 所有多余的毛发。 5 使用 (请参见 '清洁和保养')后要清洁 附件。 修剪耳毛 修剪耳毛时,请确保外耳道保持清洁, 没有耳垢。 1 将附件安装到产品上(可听到 “咔哒”一声)。...
- Page 44 简体中文 3 缓缓地沿着耳缘移动附件,以剃掉突 出耳缘的毛发。 4 将附件插入外耳道。 附件插入耳道的深度不能超过 0.5 厘米,否则可能损伤鼓膜。 5 缓缓地转动附件,以剃掉外耳道中所 有多余的毛发。 6 使用 (请参见 '清洁和保养')后要清洁 附件。 清洁和保养 注意: 随附的附件可能因产品而异。 包装盒上会显示随附于您产品的附件。 在水龙头下冲洗剃须刀 每次剃须后请清洁剃须刀,以获得更好 性能。 警告: 使用热水要当心。 切记先检查 水温是否太高,以防烫手。 不要用毛巾或纸巾擦拭剃须刀头部件, 因为这样可能会损坏剃须刀头。 1 启动产品。 2 用温水冲洗剃须刀头部件。...
- Page 45 简体中文 3 关闭产品。 按下释放按钮,打开剃须 刀头部件。 4 在水龙头下冲洗胡茬储藏室。 5 用温水冲洗剃须刀头支架。 6 小心甩干多余的水,然后使剃须刀头 支架干燥。 7 合上剃须刀头支架 (可听到“咔哒”一声)。 清洁卡入式附件 注意: 切勿用毛巾或纸巾擦干修剪器或 胡须造型器附件,可能会损坏修剪齿。 清洁修剪器附件 每次使用后都要清洁修剪器附件。 (仅限 S5230/04, S5210/04, S5082/61, S5081/04, S5079/04, S5078/04 ) 1 打开装有修剪器附件的产品。...
- Page 46 简体中文 2 在温水水龙头下冲洗附件。 3 清洁完成后,关闭产品。 4 小心地甩干多余的水,然后将附件晾 干。 提示: 为获得更好效果,请每隔六个月 用一滴缝纫机油润滑附件齿部。 清洗洁面刷附件 每次使用后都要清洗洁面刷附件。 (仅限 XZ5800/69, S5095/58, S5091/50, S5090/58) 1 关闭产品。 2 从洁面刷基座上卸下刷头。 3 用温水和肥皂彻底清洗部件。 4 用毛巾擦干洁面刷附件。 清洁鼻毛修剪器附件 每次使用后都要清洁鼻毛修剪器附件。 (仅限 S5091/50, S5082/61) 1 确保产品电源已关闭。 2 用热水冲洗鼻毛修剪刀头的修剪部件。 3 打开产品,再次冲洗修剪部件,以清 除任何剩余的毛发。 然后再次关闭产 品。...
- Page 47 简体中文 存放 建议您将产品及其配件晾干后再将保护 盖放在配件上,或将剃须刀存放在收纳 袋中。 注意: 随附的附件可能因产品而异。 包装盒上会显示随附于您产品的附件。 将保护盖盖在剃须刀上,以防积聚灰尘。 将保护盖放在洁面刷附件上,以防产品 积聚灰尘。 将保护盖盖在鼻毛修剪刀头上。 更换 更换剃须刀头 为获得更好剃须效果,建议每两年更换 2yrs 一次剃须刀头。立即更换损坏的剃须刀 头。 务必使用原装飞利浦剃须刀头 (请参见 '订购配件')进行更换。 更换提醒(仅限S5230/04、S5210/04)...
- Page 48 简体中文 更换提醒表示需要更换剃须刀头。 关闭产品时,剃须刀头部件符号和箭头 亮起。 1 关闭产品。 2 按下释放按钮,打开剃须刀头部件。 3 将剃须刀头支架从剃须刀头部件的底 部抽离。 4 逆时针旋转固定环并将其取下。 将其存放在安全的地方。 5 从剃须刀头支架上卸下剃须刀头。 立即扔掉用过的剃须刀头,以免与新 的剃须刀头混淆。...
- Page 49 简体中文 6 将新的剃须刀头装到剃须刀头支架中。 注意: 确保剃须刀头凸起部位正好插入 凹陷部位。 7 将固定环放回剃须刀头上,然后顺时 针旋转以重新安装固定环。 各固定环均具有两个凹槽和两个凸 缘,正好装入剃须刀头支架的凸缘和 凹槽内。 - 顺时针旋转固定环,直至听到 “咔哒”一声,表明固定环已就位。 注意: 当您重新插入剃须刀头并重新安装 固定环时,请将剃须刀头支架握在手中。 当您执行此操作时,切勿将剃须刀头支架 放在平面上,否则可能会造成损坏。...
- Page 50 刀头部件的槽内。 合上剃须刀头支架 (可听到“咔哒”一声)。 9 仅限 S5230/04、S5210/04: 要重置更 换提醒,请按住开/关按钮约 7 秒钟。 7 sec. 更换洁面刷附件 每 3 个月应更换一次刷头,或当刷毛在 更短时间内出现变形或损坏时更换。 订购配件 要购买附件或备件,请访问 www.shop.philips.com/service 或联系 您的飞利浦经销商。 您还可以联系所在 国家/地区的飞利浦客户服务中心(请参 阅全球保修卡了解详细联系信息)。 可选配以下附件和备件: - SH50 飞利浦剃须刀头 - HQ110 飞利浦剃须刀头清洁喷雾剂 - RQ111 飞利浦胡须造型器附件 - RQ585 飞利浦洁面刷附件 - RQ560、RQ563 飞利浦洁面刷头...
- Page 51 简体中文 - JC301、JC302、JC303、 JC304、JC305 清洁滤芯 - HQ8505 电源部件 注意: 配件可用性可能因国家/地区而 异。 回收 - 弃置本产品时,请不要将其与一般生 活垃圾放在一起,应将其交给政府指 定的回收中心。 这样做将有利于环 保。 - 此产品包含内置充电电池;请勿将充 电电池与一般生活垃圾一起弃置。 强 烈建议您将自己的产品送到官方收集 点或飞利浦服务中心,让专业人士移 除充电电池。 - 遵循您的国家/地区有关分类回收电子 电气产品和充电电池的规定。 正确弃 置产品有助于避免对环境和人类健康 造成不良后果。 取出可充电的产品电池 警告: 仅在丢弃本产品时方可取出充电 电池。 卸下电池之前,请确保产品与电 源断开连接并且电池电量已耗尽。 警告: 当您使用工具打开产品时, 请采取必要的安全保护措施。 警告:...
- Page 52 简体中文 1 使用螺丝刀取出后面板中的螺钉。 拆除后面板。 2 将钩子向外掰,取出电源部件。 3 脱开安全钩,取下电源部件的前面 板。 4 取出电池舱,用一把钢丝钳剪下电池 标签。 保修和支持 如需信息或支持,请访问 www.philips.com/support 或阅读国际保 修卡。 保修条款 由于剃须刀头(刀片和网罩)属于易磨 损物品,因此不在国际保修条款的涵盖 范围之列。...
- Page 53 简体中文 故障种类和处理方法 本章归纳了使用本产品时最常见的一些 问题。如果您无法根据以下信息解决问 题,请访问 www.philips.com/support 查阅常见问题列表,或联系您所在国家/ 地区的客户服务中心。 剃须刀 问题 可能的原因 解决方法 按下开/关钮 产品仍然连接着 拔掉产品插头并按开/ 时,产品不 电源插座。 出 关按钮打开产品。 工作。 于安全原因,该 产品在使用时不 能连接电线。 充电电池的电量 给电池充电 (请参见 已耗尽。 '充电')。 旅行锁已被激 按住开/关按钮 3 秒钟 活。 以禁用旅行锁。 剃须刀头部件被 彻底清洁剃须刀头或 污染或损坏,导 将其更换。 有关如 致马达无法运...
- Page 54 简体中文 问题 可能的原因 解决方法 毛发或污垢堵塞 对剃须刀头进行常规 了剃须刀头。 或彻底清洁。 要彻底清洁剃须刀 头,请将剃须刀头从 剃须刀头支架上逐一 (请参见 '更换')卸下。 然后,分离刀片和网 罩,并在水龙头下冲 洗每个刀片和网罩套 装。 冲洗后,将刀片 放回对应的网罩中。 最后,将剃须刀头装 回到剃须刀头支架 (请参见 '更换')中。 我更换了剃 产品尚未重置。 按住开/关按钮大约 须刀头,但 7 秒钟以重置产品。 仍然显示更 换提醒。 显示屏上突 此符号是更换提 更换剃须刀头 (请参 然出现剃须 醒。 见 '更换')。 刀头符号。 水从产品底...
- Page 55 简体中文 问题 可能的原因 解决方法 鼻毛修剪器 产品移动过快。 缓缓地来回移动附 附件拉拔毛 件,以剃掉鼻孔中所 发。 有多余的毛发。 鼻毛修剪器 附件的修剪部件 在热水龙头下冲洗修 附件不工 非常脏,因为修 剪部件,对其进行清 作。 剪部件内部沾有 洁。 打开产品,再次 一些干鼻涕(举 冲洗修剪部件,以清 个例子)。 除任何剩余的毛发 如果在水龙头下冲洗 鼻毛修剪器未能疏通 修剪部件,请将其浸 入盛有温水的玻璃杯 中几分钟。 然后启动 产品,并在水龙头下 冲洗。...
- Page 56 简体中文 飞利浦多功能理容电动剃须刀 飞利浦电动剃须刀 XZ5800, S5095, S5090 S5230, S5210, S5081 飞利浦多功能理容电动剃须刀 飞利浦电动剃须刀 S5082, S5079, S5078, S5077 S5080, S5091 保留备用 05/08/2016...
- Page 57 简体中文 产品中有害物质的名称及含量 有害物质 部件名称 铅 汞 镉 六价铬 多溴联苯 多溴二苯醚 (Pb) (Hg) (Cd) (Cr (VI) ) (PBB) (PBDE) PCB’s 集成电路板 Electrical contact pins 电接触片 Power plug 电源插头 本表格依据SJ/T 11364的规定编制。 O : 表示该有害物质在该部件所有均质材料中的含量均在 GB/T 26572 规定的限量要求以下。 X: 表示该有害物质至少在该部件的某一均质材料中的含量超出GB/T 26572规定的限量要求。 4222.002.5976.1 4222.002.5976.1_cHR.indd 1 07-06-16 12:02...
- Page 58 >75% recycled paper >75% 4222.002.5772.4...