Table of Contents
Advertisement
Available languages
Available languages
56SB, 56SX,
56STB, 56STX,
56DTB, 56DTX,
76SB, 76SX,
76STB, 76STX,
76DTB y 76DTX
COCINA A GAS
GAS COOKERS
LA INSTALACIÓN DEL PRODUCTO DEBERÁ SER REALIZADA SOLAMENTE
POR INSTALADORES AUTORIZADOS POR LA SUPERINTENDENCIA DE
ELECTRICIDAD Y COMBUSTIBLES. (SEC)
THE PRODUCT INSTALLATION MUST BE MADE ONLY BY INSTALLERS
AUTORIZED BU THE SUPERINTENDENCE OF ELECTRICITY AND FUELS.
(SEC)
MANUAL DE INSTRUCCIONES
INSTRUCTION MANUAL
LEA ATENTAMENTE ESTE MANUAL ANTES DE PONER EN
FUNCIONAMIENTO ESTE ARTEFACTO.
READ THIS MANUAL CAREFULLY BEFORE ATTEMPTING
TO OPERATE THE APPLIANCE.
Advertisement
Table of Contents

Related Manuals for Electrolux 56SB


Summary of Contents for Electrolux 56SB
- Page 1 56SB, 56SX, COCINA A GAS MANUAL DE INSTRUCCIONES 56STB, 56STX, GAS COOKERS INSTRUCTION MANUAL 56DTB, 56DTX, 76SB, 76SX, LA INSTALACIÓN DEL PRODUCTO DEBERÁ SER REALIZADA SOLAMENTE 76STB, 76STX, POR INSTALADORES AUTORIZADOS POR LA SUPERINTENDENCIA DE ELECTRICIDAD Y COMBUSTIBLES. (SEC) 76DTB y 76DTX LEA ATENTAMENTE ESTE MANUAL ANTES DE PONER EN FUNCIONAMIENTO ESTE ARTEFACTO.
-
Page 2: Table Of Contents
ATENCIÓN Este manual atiende a las cocinas a gas modelos 56SB, 56SX, 56STB, 56STX, 56DTB, 56DTX, 76SB, 76SX, 76STB, 76STX, 76DTB y 76DTX. Luego, observe el modelo Para el Usuario / Instalador... - Page 3 CUIDADOS CON ALIMENTOS Y APARATOS jas de papel aluminio, principalmente la Para manejar o retirar los alimentos del base. horno, póngase guantes térmicos de pro- Verifique siempre si los botones están en tección. la posición “ ” (apagado) cuando la coci- No utilice cacerolas con fondo redondeado, na no está...
-
Page 4: Descripción Del Fogón
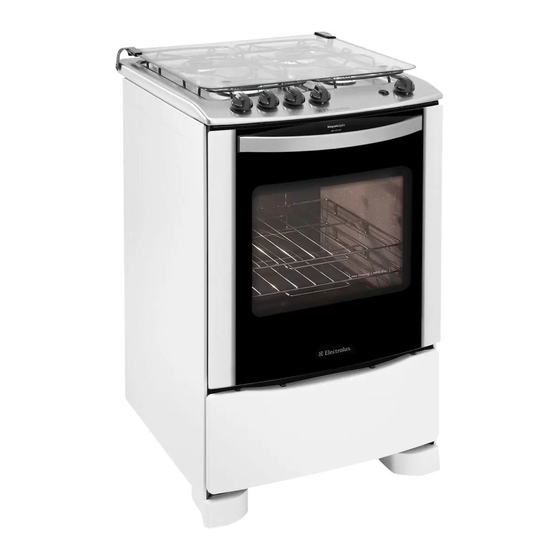
2. Descripción del Fogón Piezas - modelos 76SB, 76SX, 76TBE, 76TXE, 76STB, 76STX, 76DTB y 76DTX 1. Tapa de cristal Piezas - modelos 56SB, 56SX, 56TBE, 2. Rejas (trempes) 56TXE, 56STB, 56STX, 56DTB y 56DTX 3. Botones del control de la cocina 4. - Page 5 Modelos: 56SB y 56SX Modelos: 76SB y 76SX Entrada de gas Quemador Quemador Semi rápido Rápido Mesa Quemador Quemador Rápido Semi rápido Panel de Control...
-
Page 6: Instalación
Posicionamiento de la cocina 3. Instalación Después de sacar el empa- que, remueva cuidadosamen- te toda la película plástica, Para su tranquilidad, hay una Red de Servicios principalmente de la mesa, Tecnicos altamente calificada para instalar su donde protege al acero inoxi- cocina. - Page 7 Piezas necesarias para instalar su Procedimientos para instalación de cocina la bombona P13 con tubo flexible (piezas no cubiertas por la garantía) Instalación con bombona: metálico 1. Regulador de presión exclu- 1. Con una llave de 22 mm. y sivo para su cocina. otra de 26mm, fije una de las 2.
- Page 8 Antes de conectar, certifíquese: IMPORTANTE - el enchufe o disyuntor utilizados para conexión Utilice siempre un regulador de presión para son de fácil acceso, aun después de tener insta- cualquier tipo de bombona. Su ausencia puede lada la cocina; causar exceso de presión y vaciado de gas. - el cable de alimentación deberá...
-
Page 9: Cómo Usar
2. Pulse y gire el botón del horno hacia la izquierda; 3. Después de encendido, siga con el botón pul- * Para las cocinas 56SB/SX y 76SB/SX, la tem- sado por más 10 segundos. De lo contrario, el peratura minima del horno es 180ºC. - Page 10 10 segundos. Hasta que Funcionamiento del Grill (Parrilla) - la llama siga encendida y luego regule la llama. (Excepto 56SB/56SX y 76SB/76SX) Si la llama no enciende o apaga accidentalmente, El grill es una resistencia eléctri- grill vuelva inmediatamente el botón a la posición...
-
Page 11: Limpieza Y Mantenimiento
Botón del grill 5. Limpieza y Mantenimiento Como el botón del horno es el mismo que prende el grill, después de utilizar la cocina, certifíquese que está apagado. La luz al lado del botón indica Limpieza General si el grill está funcionando o no, cuando está apa- Antes de realizar cualquier gada, significa que está... - Page 12 Para montarla, ejecute la operación contraria, con cuidado para que el encaje se introduzca en el local (Modelos 56SB y 56SX) correcto. 1. Abra totalmente la puerta del horno; 2. Presione la traba hasta el final para Cuidados con el horno autolimpiante soltar el vidrio (fig.
-
Page 13: Soluciones De Problemas
6. Solución de Problemas Servicio de Atención al Consumidor. Si su cocina presente algún problema de funcionamiento, antes de llamar al Servicio Tecnico, verifique si la causa no es de fácil resolución o si no es falla en el uso, lo que puede ser corregido de modo fácil y rápido, sin tener que esperar al tecnico. -
Page 14: Sugerencias Y Consejos
Semi rápido 12cm 22cm uniformemente blanca y opaca, a menos que sea * Las cocinas 56SB, 56SX, 76SB y 76SX no salmón, trucha u otro que tenga coloración. tienen llama triple Consejos para cocimiento al horno Para asar carne: La carne a ser asada en el horno deberá... - Page 15 El grado de cocimiento puede ser verificado con entonces directamente sobre la estantería, con un tenedor; si está firme, significa que está cocido una forma grande en la estantería inferior para a punto. colectar las gotitas y la grasa. Las piezas de carne roja deberán ser retiradas del Después de cocido, se aconseja guardar, por lo refrigerador con una hora de adelanto, para que menos, 15 minutos antes de cortar la carne para...
- Page 16 Tiempo Pescado Temperatura ºC estantería (min.) Pescado entero relleno (2.5kg) Tabla de Tiempos y Temperaturas – horno grande (modelos 56STB, 56STX, 56DTB, 56DTX, 56SB y 56SX) Cocimiento al horno Posición en la Tiempo Dulces Temperatura ºC estantería (min.) Tarta mediana Posición en la...
-
Page 17: Especificaciones Técnicas
8. Especificaciones técnicas Modelo Altura con tapa cerrada (Mm.) mínima 930/940 930/940 Altura con tapa abierta (Mm.) - mínima 1510 1510 Altura de la mesa (Mm.) – mínima Ancho (Mm.) Profundidad (Mm.) Profundidad con puerta del horno abierta (Mm.) 1120 1120 Tensión (V) 127/220... -
Page 18: Tabla De Características
9. Tabla de características (Modelos 56STX, 56STB, 56DTB y 56DTX) 56STB 56STX 56DTB 56DTX 56SB/56SX características Tapa balanceada removible Sí Sí Sí Sí Quemador semi rápido Quemador rápido Quemador de llama triple Bloqueo de gas – horno(s) Sí Sí Sí... -
Page 19: Esquema Eléctrico
10. Esquema Eléctrico 56STB / 56STX / 76STX / 76STB 56DTB / 56DTX / 76DTB / 76DTX... - Page 20 56SB / 56SX / 76SB / 76SX...
-
Page 21: Recetas
11. Recetas Tarta de chocolate Ingredientes: Modo de preparación: 3 ½ tazas de harina de trigo En un recipiente hondo, mezcle los ingredientes 2 tazas de azúcar secos, menos el fermento, agregue los huevos, el 1 taza de aceite aceite, la leche y el agua, poco a poco. Mezcle bien 1 taza de chocolate en polvo con un batidor y agregue el fermento. - Page 22 Costilla (1.5kg) Ingredientes para el condimento: Modo de preparación: ½ cebolla picada Mezcle todos los ingredientes del condimento y 3 cucharas llenas de condimento completo cubra la carne. Lleve para asar envuelto en papel con pimienta aluminio y sáquelo a la mitad del cocimiento. ½...
- Page 23 IMPORTANTE: a) Mantener los alrededores del aparato libres de materiales combustibles, gasolina y otros vapores o líquidos flamables; b) No obstruir la salida de los gases de combustión del horno o asador; c) No debe utilizarse como calefactor de ambiente; d) Si huele a gas: Abra las ventanas, no accione interruptores elétricos, apague todas las flamas cerrando la válvula general de paso y llame inmediatamente al...
- Page 24 Congratulations! You are a special customer who just purchased Avoid accidents. After unpacking the cooker, a product with Electrolux global quality. In this keep the packaging materials out of reach of manual, you can find all information for your children.
- Page 25 Make sure that the oven is ON before closing 10. Call Electrolux Service Station to check the the door. problem. If you stay away from home for an extended period, close the gas valve.
- Page 26 2. Cooker Description Parts - models 76SB, 76SX, 76TBE, 76TXE, 76STB, 76STX, 76DTB and 76DTX Parts - models 56SB, 56SX, 56TBE, 1. Glass lid 56TXE, 56STB, 56STX, 56DTB and 56DTX 2. Grids (trivets) 1. Glass lid 3. Burners control knob 2.
- Page 27 Models: 56SB and 56SX Models: 76SB and 76SX Gas inlet Medium Large Burner Burner Cooktop Medium Medium Burner Burner Control panel...
-
Page 28: Positioning The Cooker
3. Installation After removing the packaging, carefully remove all plastic film, mainly of the cooktop, For your tranquility, Electrolux has a highly where it protects the stainless qualified Service Station Network to install your steel. Do not use the cooker cooker. -
Page 29: Gas Installation
Parts required to install your Procedures for installing the P13 gas cooker cylinder with flexible metal hose (parts not covered by warranty) Gas cylinder installation: 1. Using a 22 mm and a 26 1. Exclusive pressure regulator mm wrenches, attach one for your cooker. - Page 30 For your safety, ask an electrician to install to check the condition of the electric the ground wire in your residence. network of the installation place or o contact the Electrolux Service Station. Our products leave the factory into 220V;...
-
Page 31: Oven Lighting
1. Actuate the spark, keeping the button pressed; 2. Press the oven knob and turn it counterclockwise; 3. After lightening it, keep knob pressed for 10 * For models 56SB/SX and 76SB/SX, the seconds, otherwise, safety device blocks the gas minimum temperature of oven is 180 ºC. - Page 32 - fine beef filets must be placed on the shelf closest to the kitchen. the grill - Rolled roasts, poultry and others Timer (Except 56SB/56SX and 76SB/76SX) must be placed on the center shelf. Timer knob To use the grill, you have to activate the timer. Follow the directions below.
-
Page 33: Cleaning And Maintenance
Grill knob 5. Cleaning and Maintenance As the oven knob is the same that turns the grill on, after using the cooker, be sure it is off. The light next to the knob indicates if the grill is working General cleaning or not. - Page 34 At last, fit the shelf in the clips. Care with self-cleaning oven (Models 56SB and 56SX) If occur accidentally a high concentration of fat on the 1. Open the oven door completely; inside walls of the oven with self-cleaning coating, due 2.
-
Page 35: Troubleshooting
10 seconds to disable the blockage gas system. Oven door misty Moisture between glasses. Depending on atmospheric conditions it is normal. Turn the oven on and wait a few minutes When the suggested solutions are not sufficient, call an Electrolux Service Station. - Page 36 1 kg to avoid it becomes too dry. If the piece of meat is lean, use oil, margarine or a little * Models 56SB, 56SX, 76SB and 76SX do not have triple crown burner of both. Margarine and oil will be unnecessary if Baking oven advice the piece of meat is greasy.
- Page 37 Start cooking of red meat in a high temperature, so with low edge (a recipient with high edge difficult reduce it to finish cooking the inside. The cooking heat input), or directly over the shelf, putting a temperature of white meat can be moderate large cake form on the bottom shelf to collect fat from the beginning to the end.
- Page 38 Bread (3 un.) Time Fish Shelf position Temperature ºC (minutes Whole stuffed fish (2.5kg) Times and Temperatures Table – Large oven (Models 56STB, 56STX, 56DTB, 56DTX, 56SB and 56SX) Oven Cooking Time Candies Shelf position Temperature ºC (minutes Medium cake Time...
-
Page 39: Technical Specifications
8. Technical Specifications Model Height with lid closed (mm) - minimum 930/940 930/940 Height with lid open (mm) - minimum 1510 1510 Height oof cooktop (mm) – minimum Width (mm) Depth (mm) Depth with oven door open (mm) 1120 1120 Voltage (V) 127/220 127/220... - Page 40 9. Characteristics Table (Models 56STX, 56STB, 56DTB and 56DTX) 56STB 56STX 56DTB 56DTX 56SB/56SX Characteristics Removable balanced lid Medium burner Large burner Triple crown burner Gas blockage - oven Sí Sí Sí Sí Sí Oven net volume – liters 67,7...
- Page 41 10. Electric Diagram 56STB / 56STX / 76STX / 76STB PLUG LAMP LAMP SWITCH IGNITION SWITCH GRILL SWITCH GRILL RE- SISTANCE IGNITOR VOLTAGE 4 BURNERS - 5 SPARK PLUGS SELECTOR 5 BURNERS - 6 SPARK PLUGS SPARK PLUGS SPARK PLUGS GRILL LIGHT 56DTB / 56DTX / 76DTB / 76DTX PLUG...
- Page 42 56SB / 56SX / 76SB / 76SX SUBTITLE AM - YELLOW AZ - BLUE BL - WHITE NA - ORANGE MA - BROWN NE - BLACK VE - GREEN RO - RED LAMP LAMP OVEN BURNER/LAMP SWITCH...
- Page 43 IMPORTANT: a) Keep around the appliance free of combustible materials, gasoline and other flammable vapors or liquids; b) Do not obstruct the flow of combustion gases from the oven or grill; c) Ii must not be used as a space heater; d) If you smell gas: open the windows, do not operate electric switches, extinguish all flames closing the general valve and immediately call the Leak Service Suppression...
- Page 44 A01810701 Rev.A Ene/16...