Yamaha CRX-N560 Owner's Manual
Network cd receiver
Hide thumbs
Also See for CRX-N560:
- Owner's manual (90 pages) ,
- Owner's manual (182 pages) ,
- Firmware update procedure (4 pages)
Table of Contents
Advertisement
Available languages
Available languages
Quick Links
Advertisement
Chapters
Table of Contents

Related Manuals for Yamaha CRX-N560


Summary of Contents for Yamaha CRX-N560
- Page 1 Net wor k CD R eceiver OW NE R ’S MANUAL MANUAL DE INS TR UCCIONES Read the suppl ied b o ok l et “S afet y B ro chure” b efore u s ing t he u nit. Lea el “Fol l eto d e seguri d ad ”...
-
Page 2: Table Of Contents
Contents Introduction Listening to external sources Troubleshooting ..4 ..19 ..33 Supplied accessories..4 General..33 More on playback About this manual..4 Network..34 ..20 iPod..35 Shuffle playback..20 Part name Disc..36 ..5 Repeat playback..20 USB devices..36 Playback information..21 Front panel..5 FM reception..37 Adjusting sound quality..22 Rear panel..6 Messages on the front panel display..38 Front panel display..7... - Page 3 Awesome! Great sound!! The sound from a PC is something else! ..17, 18 High-resolution sound is played back ..22 Anytime, anywhere, music! Convenient App! My smartphone as a remote control ..18 Songs in my iPhone from More on music speakers wirelessly..26 A variety of external devices (Blu-ray/ DVD/mobile music player etc.) can...
-
Page 4: Introduction
Introduction Confirm the package contents and useful points of this manual. Supplied accessories About this manual • How to operate this unit is described mainly using the remote control. • Illustrations may differ from actual item depicted. Batteries (× 2) •... -
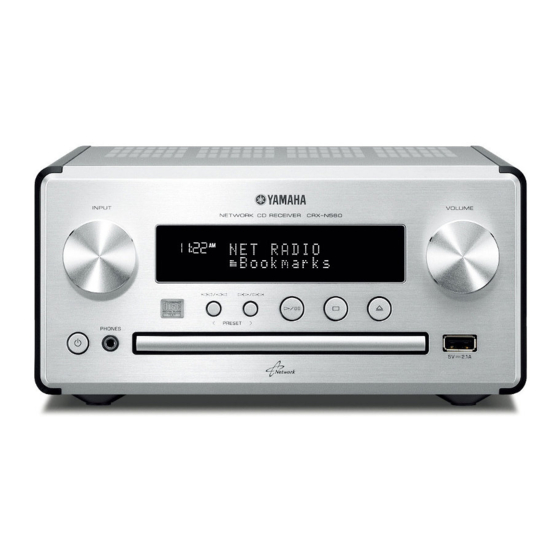
Page 5: Part Name
Part name Familiarize yourself with all parts and these functions. Remote control receiver Front panel INPUT Turn left or right to change the audio source. (The source is shown on the front panel display.) P.14, 16, 18) PRESET</> ( P.24) A (Power) ( P.12) PHONES... -
Page 6: Rear Panel
Power cable ( P.12) Rear panel DC OUT terminal Supplies power to the Yamaha AV accessories from this terminal. When using this, set [Use Accessory] in [System Config] from the option setting, to [YES] ( P.31). For details, refer to the owner’s manual supplied with the accessory. -
Page 7: Front Panel Display
Part name Front panel display Clock Sleep timer indicator Adjusting display brightness Displays the time when the power is on. Lights up when the sleep timer is set ( P.29). You can adjust the brightness of the front panel display by pressing the DIMMER button on the TUNED indicator Shuffle/repeat indicator remote control (... -
Page 8: Remote Control
Part name Infrared signal transmitter (REPEAT) ( P.20) Remote control TIMER ( P.28) (Open/close the disc tray) ( P.14) SLEEP ( P.29) Source buttons Switch the audio source to be played. Numeric buttons ( P.14) HOME ( P.16, 18, 25) RETURN ( P.14, 16, 18, 25) Audio control, cursor control buttons... -
Page 9: Preparations
Preparations Connect speakers or antenna and turn the unit on. Do not connect the power cable of the unit until you have finished connecting all cables. Connecting the speakers Right speaker Remove the insulation from the end of Left speaker the speaker cable to expose the bare wires. -
Page 10: Connecting Antenna
Preparations Connecting antenna Supplied antenna Connect the supplied antenna to the unit. Install it with pins where the unit can obtain good reception. • Be sure to stretch out the antenna as the illustration shows. • If radio reception with the supplied antenna is not satisfactory, a commercially available outdoor antenna may improve reception. -
Page 11: Connecting To The Network
Preparations Connecting to the Mobile device This unit network You can play back music files stored on your PC, mobile devices, DLNA*-compatible NAS, or audio contents on the Internet, by connecting this unit to the network. You can also operate the unit with your mobile device. * Digital Living Network Alliance Connect the unit to the network as shown Broadband... -
Page 12: Turning On The Power
Preparations Status in standby/eco standby Turning on the power Standby Eco standby Charging of iPod/USB devices — Plug the power cable into the wall outlet Enable/disable the wake-up and press — timer* • The unit turns on. Operation of the source •... -
Page 13: Setting The Network Devices
Setting the network devices Configure your devices connected to the network to play back music files stored on your PC or NAS, or configure your mobile device to control this unit. Mobile devices Configure the media sharing setting of Configure the settings to access your NAS. Install the dedicated application your PC ( P.17). -
Page 14: Listening To Cd
Listening to CD This unit allows playback of audio CDs and data CDs in which the MP3/WMA files are recorded. For details on playable CDs, see “Supported devices/medias” (P.39). • Files on a data CD are played back in Turn INPUT to select [CD]. Or, press alphanumeric order. -
Page 15: Listening To Ipod/Usb Devices
Turn INPUT to select [USB] or press guaranteed. • Yamaha and suppliers do not accept any liability on the remote control. for the loss of data saved on an iPod or a USB device connected to the unit. - Page 16 Listening to iPod/USB devices Switching the information display of iPod Remote control operation for iPods/USB • When operating your iPod with Yamaha’s devices application “NETWORK PLAYER CONTROLLER,” the information display switches to the extended mode. Skip to the beginning of the song being...
-
Page 17: Listening To The Songs In The Computer
Check the “Share my media to” box, select the unit and computer (Windows Media Player 11 or later). In “CRX-N560” icon, and click “Allow.” here, setting with Windows Media Player 12 in Windows 7 is taken as an example. -
Page 18: Playing Back Songs In The Pc
Listening to the songs in the computer • If playback is not possible, make sure this unit and Playing back songs in the PC (server) are connected to the same router P.11). the PC Operating from your mobile device Press repeatedly and select Once you install the app “NETWORK PLAYER [Server]. - Page 19 Listening to external sources This unit allows playback of external devices, such as a DVD player or mobile music player. Use the terminal (DIGITAL IN 1/2 or AUX 1/2) according to the device to be connected ( P.6). For the connection of each external device, refer to its supplied owner’s manual. Unplug the power cable of the unit and connect the external device to the unit.
-
Page 20: More On Playback
More on playback You can enjoy music in varied song order or sound quality, and view music information during playback. Operations described in this section apply to all devices, such as PC (server), iPod, USB device, or CD. • Shuffle playback and repeat playback can be Shuffle playback performed at the same time (except Press... -
Page 21: Playback Information
More on playback • Characters shown on the front panel display are Playback information alphanumerics only. • Information is not displayed when the iPod display mode is the standard mode ( P.16). Song title, elapsed time, etc., can be shown on the front panel display. -
Page 22: Adjusting Sound Quality
More on playback Option menu regarding sound quality Adjusting sound quality (Setting value. Bold: default) Equalizer Use the option setting to adjust sound quality. Adjusts low frequency [EQ Low], middle frequency [EQ Mid], and high frequency [EQ High]. The setting is also Press applied when using headphones. -
Page 23: Listening To Fm Radio Stations
Listening to FM radio stations To listen to FM radio stations, connect the supplied antenna. See “Connecting antenna” (P.10) for connecting the antenna to the unit. • If station reception is weak, you can tune into a Tuning in FM stations station manually by pressing the TUNING button repeatedly. -
Page 24: Selecting Preset Fm Stations
Listening to FM radio stations • To cancel manual preset setting, press Manual preset OPTION Deleting a preset station Tune into a station you want to store Use the option setting to delete a preset station. P.23). Press when the source is FM. Press - Option menu is shown on the front panel display. -
Page 25: Listening To Internet Radio
Listening to Internet radio You can listen to world-wide radio stations via Internet. Make sure that the unit is connected to the Internet properly ( P.11). • Playback information can be shown by pressing Press repeatedly to select [Net the DISPLAY button while Internet radio is played Radio]. -
Page 26: Listening To The Music With Airplay
• The source automatically switches to [AirPlay] • Tap/click on the iPod/iTunes screen and (except in the eco standby mode). select a device other than CRX-N560 from the Play back songs with iTunes. speaker list. Or, change the source to other than AirPlay. -
Page 27: Using The Clock
Using the clock Once you set the clock, you can play your favorite song or radio program as an alarm. • The clock setting will be lost if you disconnect the Setting the clock power cable from the wall outlet for about a week. Set the clock again. -
Page 28: Setting The Wake-Up Timer
Using the clock • Set the clock before setting the wake-up timer. Setting the wake-up • Wake-up timer is not available when [Power saving] is set to [Eco]. Set it to [Normal] ( P.12). timer • You can also set the wake-up timer using the Music or beep will be started at the time you set. -
Page 29: Sleep Timer
Using the clock • When the setting completes, [Completed!] is • If the source is removed from the unit after the shown and lights up on the front panel wake-up timer is set, the unit will beep at the start- display. -
Page 30: Updating The Firmware
USB memory device. • Update starts. The firmware can be downloaded from the OPTION Yamaha Website. To update the firmware using a USB memory • When update finishes, messages are shown in the device following order: “Update success.”, “Please…”, and You can download the firmware to the USB memory “power off!.”... -
Page 31: Option Settings
Option settings Option settings allow you to configure the unit to suit how you will use it. • To set [Advanced Setup] in the option menu, press Press the OPTION button on the remote control while • Option menu is shown on the front panel display pressing and holding (stop button) of the unit, then proceed to step 3. -
Page 32: Option Menu List
P.12). Status System MAC Address Shows MAC address. Config Network Selects whether or not to supply power to a Yamaha Use Accessory accessory connected through the DC OUT jack. Info System ID Shows the system ID. Firm Version Shows the firmware version of the unit. -
Page 33: Listening To External Sources
Refer to the table below when the unit does not function properly. If your problem is not listed below or if the instruction below does not help, turn off the unit, disconnect the power cable, and contact the nearest authorized Yamaha dealer or service center. -
Page 34: Network
Troubleshooting Network Problem Cause Solution Enable the DHCP server function on your router and set [DHCP Enabled] of [Network Config] in the option menu to [YES] on the unit. If you want to The network feature does not function. The network parameters (IP address) have not been obtained properly. configure the network parameters manually, check that you are using an IP address which is not used by other network devices in your network P.32). -
Page 35: Ipod
Troubleshooting Problem Cause Solution In [Advanced Setup] in the option menu of the unit, set [MAC Add.Filter] to The MAC address filter is enabled on the unit. [OFF] or specify the MAC address of your mobile devices to allow it to access to the unit ( P.32). -
Page 36: Disc
Troubleshooting Problem Cause Solution The iPod is not connected properly. Reconnect the iPod to the USB jack ( P.15). The iPod does not charge up. The iPod is not supported by this unit. Use a supported iPod ( P.39). The unit is in the eco standby mode. Set [Power Saving] to [Normal] with the option setting ( P.12). -
Page 37: Fm Reception
Troubleshooting FM reception Problem Cause Solution Make sure the antenna is connected properly and change the position of The antenna is not connected properly. the antenna ( P.10). FM stereo reception is noisy. The radio station you selected may be far from your area, or the antenna Use a commercially available outdoor antenna. -
Page 38: Messages On The Front Panel Display
Troubleshooting Messages on the front panel display Message Cause Solution There is a problem with the signal path from your iPod to this unit. Reconnect the iPod. The iPod/USB device being connected is not supported by the unit. Use a supported iPod/USB device ( P.39). -
Page 39: Supported Devices/Media And File Formats
Supported devices/media and file formats Note Handling discs Supported devices/ iPod is licensed on the condition that individuals perform • Do not touch the surface of the disc. privately duplication and playback of uncopyrighted Hold a disc by its edge or center hole. medias material or material legally approved of duplication and •... - Page 40 Supported devices/media and file formats File format File format the unit supporting is as follows. DLNA™ and DLNA CERTIFIED™ are trademarks or registered AirPlay works with iPhone, iPad, and iPod touch with iOS trademarks of Digital Living Network Alliance. All rights 4.3.3 or later, Mac with OS X Mountain Lion, and Mac and PC DLNA/USB reserved.
-
Page 41: Specifications
Specifications Player section Amplifier section Media CD, CD-R/RW Maximum output power 32 W + 32 W (6 Ω 1 kHz, 10% THD) Audio format Audio CD, MP3, WMA Total harmonic distortion AUX1 1 kHz/12.5 W 0.05% or less Type Semiconductor laser GaAs/GaAlAs EQ High (treble)/EQ Mid (middle)/EQ Low EQ control (bass): ±10 dB... - Page 42 Índice Introducción Escuchar canciones en el Utilización del reloj ..4 ..27 ordenador Accesorios suministrados..4 Ajuste del reloj..27 ..17 Acerca de este manual..4 Ajuste del temporizador de activación..28 Configuración del uso compartido de multimedia de Temporizador de apagado..29 los archivos de música..17 Nombre de la pieza ..5 Reproducción de canciones en el PC..18...
- Page 43 ¡Increíble! ¡Un sonido espectacular! ¡La música del ordenador suena como nunca! ..17, 18 Sonido de alta resolución ..22 ¡Mi música en cualquier parte! ¡La app más práctica! El smartphone como mando a distancia Más ..18 información Escuchar las canciones de mi iPhone por los altavoces de forma inalámbrica ..26...
-
Page 44: Introducción
Introducción Compruebe los contenidos del paquete y los puntos más importantes de este manual. Accesorios suministrados Acerca de este manual • Las instrucciones de utilización de la unidad utilizan como ejemplo principalmente el mando a distancia. • Las ilustraciones pueden no coincidir con el producto Pilas (×... -
Page 45: Nombre De La Pieza
Nombre de la pieza Familiarícese con todas las piezas y sus funciones. Receptor de mando a distancia Panel delantero INPUT Gire hacia la izquierda o la derecha para cambiar la fuente de audio. (La fuente aparece en el visualizador del panel delantero.) P.14, 16, 18) PRESET</>... -
Page 46: Panel Trasero
Cable de alimentación ( P.12) Panel trasero Terminal DC OUT Proporciona alimentación a los accesorios AV de Yamaha desde este terminal. Al utilizar este terminal, ajuste [Use Accessory] en el apartado [System Config] de los ajustes de opciones, en [YES] ( P.31). -
Page 47: Visualizador Del Panel Delantero
Nombre de la pieza Visualizador del panel delantero Reloj Indicador del temporizador de apagado Ajuste del brillo de la pantalla Muestra la hora cuando la alimentación está activada. Se enciende cuando el temporizador de apagado está Puede ajustar el brillo del visualizador del panel ajustado ( P.29). -
Page 48: Mando A Distancia
Nombre de la pieza Transmisor de señal infrarroja (REPEAT) ( P.20) Mando a distancia TIMER ( P.28) (Abrir/cerrar la bandeja de disco) ( P.14) SLEEP ( P.29) Botones de fuente Permiten cambiar la fuente de audio reproducida. Botones numéricos ( P.14) HOME ( P.16, 18, 25) -
Page 49: Preparativos
Preparativos Conecte los altavoces o la antena y encienda la unidad. No conecte el cable de alimentación de la unidad hasta que haya terminado de conectar todos los cables. Conexión de los Altavoz derecho altavoces Altavoz izquierdo Retire el aislamiento del extremo del cable de los altavoces para dejar al descubierto los hilos expuestos. -
Page 50: Conexión De La Antena
Preparativos Conexión de la antena Antena suministrada Conecte la antena suministrada a la unidad. Fíjela con chinchetas en un lugar que permita obtener una buena recepción. • Asegúrese de extender la antena tal y como muestra la ilustración. • Si la recepción de radio con la antena suministrada no es buena, es posible adquirir por separado una antena exterior para mejorar la recepción. -
Page 51: Conexión A La Red
Preparativos Conexión a la red Dispositivo móvil Esta unidad Puede reproducir archivos de música almacenados en su PC, en dispositivos móviles, en NAS compatibles con DLNA* o contenidos de audio de Internet conectando esta unidad a la red. También puede controlar la unidad desde su dispositivo móvil. -
Page 52: Encendido De La Unidad
Preparativos Estado en el modo de espera/espera Eco Encendido de la Espera Espera Eco unidad Carga de iPod/dispositivos — Conecte el cable de alimentación en la Activación/desactivación del — temporizador de activación* toma de corriente y pulse Utilización de los botones de Menos de 6 m •... -
Page 53: Ajuste De Los Dispositivos De Red
Ajuste de los dispositivos de red Configure sus dispositivos conectados a la red para reproducir archivos de música almacenados en su PC o NAS o configure su dispositivo móvil para controlar esta unidad. Dispositivos móviles Configure el uso compartido de Configure los ajustes para acceder a su Instale la aplicación especial “NETWORK multimedia de su PC (... -
Page 54: Escuchar Cd
Escuchar CD Esta unidad permite la reproducción de CD de audio y CD de datos con archivos MP3/WMA grabados. Para obtener información sobre los CD que pueden reproducirse, consulte “Dispositivos y soportes compatibles” (P.39). • Los archivos de un CD de datos se reproducen en Gire INPUT para seleccionar [CD]. -
Page 55: Escuchar Ipod/Dispositivos Usb
No se garantizan la reproducción y Gire INPUT para seleccionar [USB] o alimentación de todos los iPod o dispositivos USB. • Yamaha y sus proveedores declinan toda pulse en el mando a distancia. responsabilidad por la pérdida de los datos guardados en un iPod o dispositivo USB Conecte el iPod a la toma USB. - Page 56 Escuchar iPod/dispositivos USB Cambio del modo de visualización de un iPod Control de iPod/dispositivos USB con el • Si controla el iPod con la aplicación de Yamaha mando a distancia “NETWORK PLAYER CONTROLLER”, la información mostrada se presenta en el modo ampliado.
-
Page 57: Escuchar Canciones En El Ordenador
Windows Media 11 o posterior). En este ejemplo, se Marque la casilla “Compartir mi multimedia utiliza la configuración con Reproductor de Windows con”, seleccione el icono “CRX-N560” y haga Media 12 y Windows 7. clic en “Permitir”. Haga clic en “Aceptar” para salir. -
Page 58: Reproducción De Canciones En El Pc
Escuchar canciones en el ordenador • Si no es posible reproducir, asegúrese de que esta Reproducción de unidad y el PC (servidor) están conectados al mismo router ( P.11). canciones en el PC Operaciones desde el dispositivo móvil Pulse repetidamente y seleccione Una vez que haya instalado la app “NETWORK [Server]. -
Page 59: Escuchar Fuentes Externas
Escuchar fuentes externas Esta unidad permite reproducir fuentes externas, como un reproductor de DVD o un reproductor de música portátil. Utilice el terminal (DIGITAL IN 1/2 o AUX 1/2) correcto, en función del dispositivo que vaya a conectar ( P.6). Para conectar un dispositivo externo, consulte el manual de instrucciones suministrado con cada dispositivo. Desconecte el cable de alimentación de la unidad y conecte el dispositivo externo a la unidad. -
Page 60: Más Información Sobre La Reproducción
Más información sobre la reproducción Puede disfrutar de las canciones en diferentes órdenes o con diferentes calidades de sonido y ver información sobre la música durante la reproducción. Las operaciones descritas en este apartado son aplicables a todos los dispositivos, como un PC (servidor), un iPod, un dispositivo USB o un CD. •... -
Page 61: Información De Reproducción
Más información sobre la reproducción • Los caracteres que aparecen en el visualizador del Información de panel delantero son únicamente alfanuméricos. • La información no aparece si el iPod está reproducción configurado en el modo de visualización estándar P.16). En el visualizador del panel delantero pueden aparecer el título de la canción o el tiempo transcurrido. -
Page 62: Ajuste De La Calidad Del Sonido
Más información sobre la reproducción Menú de opciones de calidad de sonido Ajuste de la calidad del (Valor de ajuste. Negrita: predeterminado) sonido Equalizer Ajusta las frecuencias bajas [EQ Low], las frecuencias medias [EQ Mid] y las frecuencias altas [EQ High]. Este Utilice estas opciones para ajustar la calidad del sonido. -
Page 63: Escuchar Emisoras De Radio Fm
Escuchar emisoras de radio FM Para escuchar emisoras de radio FM, conecte la antena suministrada. Consulte “Conexión de la antena” (P.10) para obtener más información sobre cómo conectar la antena a la unidad. • Si la recepción de la emisora es débil, puede Sintonizar emisoras FM sintonizar una emisora manualmente pulsando el botón TUNING... -
Page 64: Selección De Emisoras Fm Memorizadas
Escuchar emisoras de radio FM • Para cancelar la memorización manual, pulse Memorización manual OPTION Eliminación de una emisora memorizada Sintonice la emisora que desee Utilice el ajuste de opciones para eliminar una almacenar ( P.23). emisora memorizada. Pulse con FM como fuente seleccionada. Pulse - Aparece el menú... -
Page 65: Escuchar Radio Por Internet
Escuchar radio por Internet Ahora, tiene la posibilidad de escuchar emisoras de radio de todo el mundo por Internet. Asegúrese de que la unidad esté correctamente conectada a Internet ( P.11). • Puede ver la información de reproducción Pulse repetidamente para pulsando el botón DISPLAY mientras se seleccionar [Net Radio]. -
Page 66: Escuchar Música Con Airplay
Anulación de AirPlay • Toque o haga clic en en la pantalla del iPod/ Reproduzca las canciones con iTunes. iTunes y seleccione un dispositivo que no sea CRX-N560 en la lista de altavoces. También puede elegir otra fuente que no sea AirPlay. -
Page 67: Utilización Del Reloj
Utilización del reloj Una vez configurado el reloj, puede utilizar su canción o programa de radio favorito como alarma. • Los ajustes del reloj se perderán si desconecta el Ajuste del reloj cable de alimentación de la toma de pared durante aproximadamente una semana. -
Page 68: Ajuste Del Temporizador De Activación
Utilización del reloj • Antes de configurar el temporizador de activación, Ajuste del temporizador ajuste el reloj. • El temporizador de activación no está disponible de activación si [Power saving] está ajustado en [Eco]. Ajústelo en [Normal] ( P.12). La música o el pitido empezará a sonar a la hora definida. •... -
Page 69: Temporizador De Apagado
Utilización del reloj • Una vez finalizado el ajuste, aparece [Completed!] y se • Si se desconecta la fuente de la unidad después enciende en el visualizador del panel delantero. de ajustar el temporizador de activación, la unidad emitirá un pitido a la hora definida para el encendido. -
Page 70: Actualización Del Firmware
OPTION actualice el firmware utilizando un dispositivo de memoria USB. Puede descargar el firmware en el sitio web de Yamaha. • Una vez finalizada la actualización, aparecen los siguientes mensajes en este orden: “Update Actualización del firmware a través de un success.”, “Please…”... -
Page 71: Ajustes De Opciones
Ajustes de opciones Los ajustes de opciones permiten configurar la unidad en función de sus preferencias. • Para configurar [Advanced Setup] en el menú de Pulse opciones, pulse el botón OPTION del mando a • Aparece el menú de opciones en el visualizador distancia mientras mantiene pulsado el botón (parada) de la unidad. -
Page 72: Lista De Opciones Del Menú
Muestra la dirección MAC. Config Selecciona si se proporciona alimentación o no a un Network Use Accessory accesorio Yamaha conectado a través de la toma DC OUT. Info System ID Muestra el ID del sistema. Firm Version Muestra la versión del firmware de la unidad. -
Page 73: Resolución De Problemas
Consulte la tabla inferior cuando la unidad no funcione correctamente. Si su problema no aparece en la lista a continuación, o si las instrucciones no le sirven de ayuda, apague la unidad, desenchufe el cable de alimentación y póngase en contacto con un centro Yamaha de atención al cliente o concesionario autorizado. -
Page 74: Red
Resolución de problemas Problema Causa Solución Active la función del servidor DHCP en su router y ajuste [DHCP Enabled] del menú [Network Config] en [YES] en la unidad. Si desea configurar los La función de red no funciona. Los parámetros de red (dirección IP) no se han obtenido correctamente. parámetros de red manualmente, compruebe que está... -
Page 75: Ipod
Resolución de problemas Problema Causa Solución En [Advanced Setup], en el menú de opciones de la unidad, ajuste [MAC El filtro de dirección MAC está activado en la unidad. Add.Filter] en [OFF] o especifique la dirección MAC de sus dispositivos móviles para permitir el acceso a la unidad ( P.32). -
Page 76: Disco
Resolución de problemas Problema Causa Solución El iPod no está conectado correctamente. Vuelva a conectar el iPod a la toma USB ( P.15). El iPod no se carga. El iPod no es compatible con esta unidad. Utilice un modelo de iPod compatible ( P.39). -
Page 77: Recepción Fm
Resolución de problemas Recepción FM Problema Causa Solución Asegúrese de que la antena está conectada correctamente y cambie la La antena no está conectada correctamente. posición de la antena ( P.10). La recepción estéreo por FM tiene ruido. Es posible que la emisora de radio seleccionada esté lejos de su zona o que Utilice una antena para exteriores disponible en el mercado. -
Page 78: Mensajes Del Visualizador Del Panel Delantero
Resolución de problemas Mensajes del visualizador del panel delantero Mensaje Causa Solución Hay un problema con la trayectoria de señal de su iPod a esta unidad. Vuelva a conectar el iPod. El iPod/dispositivo USB conectado no es compatible con la unidad. Utilice un modelo de iPod/dispositivo USB compatible ( P.39). -
Page 79: Dispositivos, Soportes Y Formatos De Archivo Compatibles
Dispositivos, soportes y formatos de archivo compatibles Nota • No utilice discos de formas no convencionales, como por Dispositivos y soportes ejemplo en forma de corazón. La licencia concedida para la utilización de iPod establece • No utilice discos con muchos arañazos o con grietas en su que los usuarios solo pueden copiar y reproducir para su compatibles uso privado material sin derechos de autor o material con... - Page 80 Dispositivos, soportes y formatos de archivo compatibles Formatos de archivo La unidad es compatible con los siguientes formatos de DLNA™ y DLNA CERTIFIED™ son marcas comerciales o archivo. AirPlay es compatible con iPhone, iPad y iPod touch con iOS marcas comerciales registradas de Digital Living Network 4.3.3 o posterior, Mac con OS X Mountain Lion y Mac y PC Alliance.
-
Page 81: Especificaciones
Especificaciones Sección del reproductor Sección del amplificador Soportes CD, CD-R/RW Potencia de salida máxima 32 W + 32 W (6 Ω 1 kHz, 10% THD) Formato de audio CD de audio, MP3, WMA Distorsión harmónica total AUX1 1 kHz/12,5 W 0,05% o menos Tipo Láser semiconductor GaAs/GaAlAs... - Page 82 目录 简介 聆听电脑中的歌曲 更新固件 ..4 ..17 ..30 随机配件 ..4 设定音乐文件媒体共享 ..17 播放 PC 中的歌曲 ..18 选项设置 关于本说明书 ..4 ..31 选项菜单列表 ..32 部件名称 聆听外部音频源 ..5 ..19 故障排除 前面板 ..5 ..33 关于播放的更多信息 后面板 ..6 ..20 一般 ..33 前面板显示屏 ..7 随机播放 ..20 网络 ..34 调节显示屏亮度...
- Page 83 太棒了! 非常出色的音质! 从 PC 播放的声音非常 不错! ..17, 18 播放高分辨率声音 ..22 随时随地 享受音乐! 便捷的应用程序!把智能手机当作遥 控器 ..18 关于音乐的 通过音箱无线播放 iPhone 中的歌曲。 ..26 更多信息 可以连接多种外部装置 (蓝光 / DVD/ 移动音频播放器 等) ..19 可以通过音频系统收听网络 电台 ..25...
-
Page 84: 随机配件
简介 确认包装清单及本手册的有用要点。 随机配件 关于本说明书 • 本机的操作方法主要针对遥控器进行描述。 • 图示可能与实际描述的对象有所不同。 • 本手册中描述的 “iPod” 也可能指的是 “iPhone” 或 电池 (× 2) “iPad”。 (AA,R6,UM-3) FM 天线 • 符号: 表示与本机的使用及其功能限制有关的注 意事项。 表示为方便使用而提供的补充说明。 遥控器 表示相应的参考页。 检查电池 “+” 和 “-”,并按正确方式将其 插入。 • 当遥控器的操作范围缩小时,请同时更换 2 节电池。... -
Page 85: 部件名称
部件名称 熟悉所有部件和这些功能。 遥控器接收器 前面板 INPUT 向左或向右转动可改变音频源。 (音频源显示在前 面板显示屏上。 ) ( 第 、 、 页) PRESET</> ( 第 页) A (电源) ( 第 页) PHONES 将耳机连接至此插孔。 光盘托盘 ( 第 页) 插孔 ( 第 页) (停止) ( 第 、 、 、 页) (打开... - Page 86 部件名称 电源线 ( 第 页) 后面板 DC OUT 端子 通过此端子为 Yamaha AV 配件供电。在使用时,从 选项设置的 [System Config] 中将 [Use Accessory] 设 定为 [YES] ( 第 31 页) 。有关详情,请参阅配件 附带的使用说明书。 NETWORK 端子 ( 第 页) 使用市售网线连接至网络。 天线端子 ( 第 页) DIGITAL IN 1 端子...
-
Page 87: 前面板显示屏
部件名称 前面板显示屏 时钟 睡眠定时器指示 调节显示屏亮度 第 29 页) 。 当电源开启时显示时间。 当设定了睡眠定时器时点亮 ( 按遥控器上的 DIMMER 按钮可调节前面板显示 第 8 页) 。 屏的亮度 ( TUNED 指示 随机 重复指示 • 每按一下按钮就会改变亮度:亮 (默认) 、中 当您将 iPod、 CD、 USB 装置或电脑设定为随机或重 当本机调入电台时点亮。 等或暗。 第 20 页) 。 复播放时点亮... -
Page 88: 遥控器
部件名称 红外线信号发射器 ( REPEAT ) ( 第 页) 遥控器 TIMER ( 第 页) (打开 关闭光盘托盘) ( 第 页) 音频源按钮 SLEEP ( 第 页) 切换要播放的音频源。 数字按钮 ( 第 页) HOME ( 第 、 、 页) ( 第 、 、 、 页) RETURN 音频控制、光标控制按钮... -
Page 89: 准备工作
准备工作 连接音箱或天线,并打开本机。 在连接好所有缆线之前,请勿连接本机的电源线。 连接音箱 右音箱 撕下音箱缆线端的绝缘层,露出裸 左音箱 线。 15 mm 按照图示,将音箱连接至本机。 • 分别准备音箱或音箱缆线。 音箱缆线 • 关于连接音箱,请参阅音箱附带的使用说 明书。 低音炮 单声道针口缆线 • 注意不要让裸露的音箱导线互相接触或接触到本机的任何金属部分。否则可能损坏本机和 / 或音箱。 • 确保左右侧 (L、 R)连接和极性 (红色:+,黑色:-)正确。如果连接不正确,音质会不自然。 • 使用阻抗至少为 6 Ω 的音箱。 • 也可将带有内置放大器的低音炮连接到本机。... -
Page 90: 连接天线
准备工作 连接天线 附带的天线 将附带的天线连接至本机。 使用大头针将其安装在本装置接收 信号良好的地方。 • 确保按照图示拉出天线。 • 如果使用附带的天线时无线电接收不良,市售的室外天线可能会改善接收效果。... -
Page 91: 连接至网络
准备工作 连接至网络 移动装置 本机 将本机连接至网络后,可播放存储在 PC、移动装 置、 DLNA* 兼容 NAS 上的音乐文件或者网络上的 音频内容。也可通过移动装置操作本机。 * Digital Living Network Alliance 如右图所示,将本机连接至网络。 • 使用市售 STP (屏蔽双绞线)网线 (CAT-5 或更 高速度的直通缆线)连接。 宽带路由器 网线 互联网 调制解调器 网络附加存储 (NAS) • 有关网络连接的详情,请参阅网络装置的使用说明书。 • 如果您使用的路由器支持 DHCP,则不需要为本机配置任何网络设置。如果您使用的路由器不支持 DHCP,请 在选项设置的 [Network Config] 中配置网络设置 ( 第... -
Page 92: 打开电源
准备工作 待机 省电待机中的状态 打开电源 待机 省电待机 — iPod/USB 装置充电 将电源线插入壁上插座并按 。 — 启用 / 禁用闹铃定时器 * • 本机开启。 音频源按钮的操作 * • 再次按 可关闭本机 (待机模式) 。 装入 / 弹出 CD • “ 省电待机 ” (默认)可减少本机的耗电量,但 6 m 以内 AirPlay — 同时会限制某些功能 (如右表所示) 。 —... -
Page 93: 设定网络装置
设定网络装置 配置连接至网络的装置以播放存储在 PC 或 NAS 上的音乐文件,或配置移动装置以控制本机。 移动装置 配置 的媒体共享设置 配置访问 的设置。 将专门的应用程序 “NETWORK ( 第 页) 。 PLAYER CONTROLLER” 安装至移动 • 如有需要,启用 NAS 的 DHCP 设置。 装置 ( 第 页) 。 • 有关更多详细的设置,请参阅 NAS 附带的使用 说明书。 • 该应用程序支持 iPhone/iPad/iPod touch 和 Android 移动装置。... -
Page 94: 聆听 Cd
聆听 本机可以播放录有 MP3/WMA 文件的音频 CD 和数据 CD。 有关可播放 CD 的详情,请参阅 “ 支持的装置 / 媒体 ” (第 39 页) 。 • 数据 CD 上的文件按照字母数字顺序播放。 转动 以选择 。或者,按 INPUT [CD] • 当 CD 播放停止时,会继续从上次播放歌曲的 遥控器上的 。 开头继续播放。在播放停止时按 会撤销继 续播放。 将 装入光盘托盘。 • 按 打开... -
Page 95: 聆听 Ipod/Usb 装置中的音频
有关可播放 iPod/USB 装置的详情,请参阅 “ 支持的装置 / 媒体和文件格式 ” (第 39 页) 。 • 某些 iPod/USB 装置即使符合要求也可能无法 播放 iPod 正常工作。不保证可以播放所有 iPod/USB 装 置以及对其进行供电。 转动 以选择 ,或者按 • Yamaha 和供应商对连接至本机的 iPod 或 USB INPUT [USB] 装置上所存储数据的损失不承担任何责任。作 遥控器上的 。 为防范措施,建议对重要文件进行备份。 将 iPod 连接至... - Page 96 聆听 iPod/USB 装置中的音频 切换 iPod 的信息显示 装置的遥控操作 iPods/USB • 当通过 Yamaha 的应用程序“NETWORK PLAYER CONTROLLER” 操作 iPod 时,信息显示切换至 跳转至正在播放的歌曲的开头或上一 扩展模式。 首歌曲 (对于 iPod,按住该键可快 DISPLAY 若要切换信息显示模式,按住 按 钮。 退) 。 - 标准模式 (默认) :看着 iPod 的屏幕来操 跳转至下一首歌曲 (对于 iPod,按住 作 iPod,并选择歌曲进行播放。 该键可快进) 。...
-
Page 97: 聆听电脑中的歌曲
Media Player 11 或更新版本) 。在此,以 选择 “ 媒体库 ”,然后选择 “ 媒体共享 ”。 Windows 7 中 Windows Media Player 12 的设置为 例。 勾选 “ 共享媒体的位置 ” 复选框,选择 “CRX-N560” 图标,然后点击 “ 允许 ”。 点击 “ 确定 ” 退出。 启动 上的 Windows Media 。... -
Page 98: 播放 Pc 中的歌曲
聆听电脑中的歌曲 • 如果不能播放,确保本机和 PC (服务器)已 播放 中的歌曲 第 11 页) 。 连接至同一个路由器 ( 反复按 选择 。 [Server] 从移动装置操作 在移动装置中安装了应用程序 “NETWORK 浏览并选择一首歌曲。 PLAYER CONTROLLER” 之后,就可以通过移动装 置操作本机。 显示其他项目。 • 功能 确认所选项目并继续进入下一 - 打开 / 关闭电源,调节音量或其它基本操作 ENTER 层级或开始播放。 - 更改音乐源 HOME 显示顶层项目。 - 显示无线电调谐器信息 RETURN 返回至上一项目。... -
Page 99: 聆听外部音频源
聆听外部音频源 本机可以播放外部装置,如 DVD 播放器或移动音乐播放器。根据要连接的装置使用端子 (DIGITAL IN 1/2 或 AUX 1/2) ( 第 6 页) 。有关连接各外 部装置,请参阅装置附带的使用说明书。 拔下本机的电源线,将外部装置连 接至本机。 • 准备市售缆线以备连接。 将本机的电源线插入壁上插座,按 打开本机。 更改音乐源。 • 根据想要播放的外部装置,按下对应的连 同轴数字音频缆线 接端子 或 。 • 按 将音频源更改为 AUX1/AUX2 (模拟 将音频源更改为 DIGITAL 输入) ,按 3.5 mm 立体声迷 光纤缆线... -
Page 100: 关于播放的更多信息
关于播放的更多信息 可以不同歌曲顺序或音质播放音乐,并可在播放期间查看音乐信息。 本章节描述的操作适用于所有装置,如 PC (服务器) 、 iPod、 USB 装置或 CD。 • 随机播放和重复播放可以同时执行 ( 除 随机播放 外) 。 在播放期间按 。 • 每按一次该按钮,前面板显示屏上的随机播放 指示就会如下切换。 执行随机播放。 * 未显示 不执行随机播放。 * 随机播放的范围取决于正在播放的媒体。 重复播放 在播放期间按 。 • 每按一次该按钮,前面板显示屏上的重复播放 指示就会如下切换。 重复播放正在播放的歌曲。 执行重复播放。 * 未显示 不执行重复播放。 * 重复播放的范围取决于播放媒体。 SHUFFLE REPEAT... -
Page 101: 播放信息
关于播放的更多信息 • 前面板显示屏上显示的字符只有字母数字。 播放信息 • 当 iPod 显示模式为标准模式时,不会显示信 第 16 页) 。 息 ( 歌曲标题、已播放的时间等可显示在前面板显示 屏上。 在播放期间按 。 eora • 每按一次 ,显示按照如下顺序切换。 USB/iPod/AirPlay/Server 歌曲标题 * 播放时间 歌曲剩余时间 * 专辑标题 光盘剩余时间 * 艺术家姓名 1、 3 歌曲标题 * 播放时间 专辑名称 * 艺术家姓名 * *1 如果无法获取歌曲标题,可能不会显示文件标题。... -
Page 102: 调节音质
关于播放的更多信息 关于音质的选项菜单 调节音质 (设置值。粗体:默认) Equalizer 使用选项设置调节音质。 调节低频 [EQ Low]、中频 [EQ Mid] 和高频 [EQ High]。 此设置在使用耳机时也适用。 按 。 至 +10) (-10 至 • 前面板显示屏上显示选项菜单。 Balance 调节左、右音箱的音量平衡。此设置在使用耳机时 按 选择所需项目并按 。 不适用。 (Lch. +10 至 至 Rch. +10) --CENTER-- 按 更改所需项目并按 。 Music Enhancer 恢复因压缩丢失的音乐元素。... -
Page 103: 收听 Fm 电台
收听 电台 若要收听 FM 电台,请连接附带的天线。 有关将天线连接至本机,请参阅 “ 连接天线 ” (第 10 页) 。 TUNING • 如果电台接收很差,可反复按 电台调谐 按钮手动调谐至一个电台。 按 。 按住 。 TUNING • 开始自动调谐,当调入一个电台时,自动 停止调谐。 RADIO TUNING • 自动预设会将现存的所有电台更换为新存储的 预设 电台 电台。 自动预设 • 最多可以预设 30 个 FM 电台。 •... -
Page 104: 选择预设的 Fm 电台
收听 电台 • 若要取消手动预设设置,请按 。 手动预设 OPTION 删除预设电台 调谐至想要存储的电台 使用选项设置删除预设电台。 ( 第 页) 。 当音频源是 FM 时按 。 - 前面板显示屏上显示选项菜单。 按 。 - 若要取消删除预设电台,请按 。 ENTER • 预设编号在前面板显示屏上闪烁。 选择 [Preset Delete] 并按 按 。 按 选择要删除的预设编号。 按 。 - 预设电台被删除,前面板显示屏上显示 按... -
Page 105: 收听网络电台
收听网络电台 可通过互联网收听全世界的电台。 第 11 页) 。 确保本机已正确连接至互联网 ( DISPLAY • 当正在播放网络电台时,按 按钮 反复按 选择 。 [Net Radio] 可显示播放信息。每按一次该按钮,信息如下 改变。 浏览互联网并选择一个电台。 电台名称 (默认) 歌曲标题 播放时间 • 可以通过选择[Net Radio]作为本机上的音频源, • 遥控功能如下所示。 然后利用 PC 上的网页浏览器访问以下网站, 将您喜爱的网络电台加入 “ 收藏夹 ” 文件夹。 显示其他项目。 http://yradio.vtuner.com/ 确认所选项目并继续进入下一 若要使用此功能,需要本机的... -
Page 106: 使用 Airplay 听音乐
省电待机模式中除外) 。 播放 iTunes 示例 打开本机,启动 iTunes 。 • 如果 iTunes 能够识别本机, iTunes 的画面 上会显示 。 点击 ,选择本机的名称。 清除 AirPlay • 轻触 / 点击 iPod/iTunes 画面上的 并从音 • 音频源自动切换至 [AirPlay](在省电待机模 箱列表中选择 CRX-N560 以外的装置。或者, 式中除外) 。 更改至 AirPlay 以外的音频源。 使用 播放歌曲。 iTunes... -
Page 107: 使用时钟
使用时钟 设定时钟之后,可以播放您喜爱的歌曲或电台节目作为闹铃。 • 如果从壁上插座断开电源线约一周,时钟设置 设定时钟 将会丢失。再次设定时钟。 按 。 DISPLAY • 在设定时钟时,如果按 按钮,时 钟格式 (12 小时制 /24 小时制)将改变。 • 前面板显示屏上显示选项菜单。 通过 选择 [System Config] 并按 。 通过 选择 并 [Clock Setting] 按 。 1、 5 OPTION 设定日期和时间。 RETURN • 通过 更改设置并按 确认。... -
Page 108: 设定闹铃定时器
使用时钟 • 在设定闹铃定时器之前先设定闹钟。 设定闹铃定时器 • 当 [Power saving] 设为 [Eco] 时,闹铃定时器不 可用。将其设为 [Normal] ( 第 12 页) 。 在您设定的时间,音乐或哔哔声将会响起。 • 也可使用选项设置设定闹铃定时器。 按住 。 按 。 - 前面板显示屏上显示设置菜单。 • 前面板显示屏上显示 [Timer Setting] 和时 间,且 和小时数闪烁。 选择 [Timer Setting] 并按 按 。 执行左侧的步骤... -
Page 109: 睡眠定时器
使用时钟 • 当设置完成时,前面板显示屏上会显示 • 如果在设定了闹铃定时器之后从本机删除音频 [Completed!],且 点亮。 源,本机将在设定的开始时间发出哔哔声。 • 如果到达开始时间时正在播放任何音乐源, 闪烁,播放将继续进行。 • 在设定了闹铃定时器之后,可在本机开启时按 TIMER 按钮来启用或禁用定时器。 按 。 • 若要停止哔哔声,按 或 A ;否则将在 60 分 钟后停止。 • 在您设定的时间,本机进入待机模式,哔 哔声响起。 * 当音乐源设为 AUX、 Server、 DIGITAL IN 或 • 如果想在设定的时间播放音乐,在本步骤 AirPlay 时,本机在到达开始时间时将发出哔 中,选择一个音频源进行播放,然后再按 哔声。... -
Page 110: 更新固件
• 当网速不够快或本机通过无线网络适配器连接 按 。 到无线网络时,则可能无法进行网络更新,具 体取决于无线连接的情况。在此情况下,可再 次尝试或使用 USB 存储装置更新固件。固件 通过 选择 并按 。 [Network] 可从 Yamaha 网站下载。 • 更新开始。 使用 存储装置更新固件 可将固件下载至 USB 存储装置,并将 USB 存储 装置连接至本机上的 USB 插孔。 OPTION ENTER • 在步骤 4 中选择 [USB], 并按 按钮开始 • 当更新完成后,依次显示以下信息:... -
Page 111: 选项设置
选项设置 选项设置用于根据您的使用情况配置本机。 • 若要在选项菜单中设定 [Advanced Setup],按 按 。 OPTION 遥控器上的 按钮,同时按住本机上 (停止按钮) ,然后执行步骤 3。 的 • 前面板显示屏上显示选项菜单 第 32 页) 。 ( 通过 选择所需选项菜单并按 。 通过 更改设置并按 。 • 如果需要设定子菜单,重复步骤 3。 • 按 取消设置并返回至上一层级。 • 如果还要设定另一个菜单项,重复步骤 2 1、 4 和步骤 3。 OPTION 按... -
Page 112: 选项菜单列表
设定省电待机 ( 显示本机和网络的连接状态。 Status Auto Power Timer 8H 设定本机自动进入待机模式 ( 第 12 页) 。 MAC Address 显示 MAC 地址。 System Config Network Info 选择是否为通过 DC OUT 插孔连接的 Yamaha System ID 显示系统 ID。 Accessory 配件供电。 Network 显示出现在网络上的本机名称。 Firm Version Name 显示本机的固件版本。... -
Page 113: 故障排除
故障排除 当本机工作不正常时,请参阅下表。如果您遇到的问题没有列在下表,或下表给出的指导不起作用,请关闭本机,断开电源线,并就近联络 Yamaha 授权的经销商或服务中心。 首先,检查每条缆线的接头是否已牢固地插入每台装置的插孔中。 一般 问题 原因 解决方案 本机在电源打开后立刻进入待机模式。 电源线未正确连接。 请牢固连接电源线。 本机工作不正常。 按住前面板上的 A 10 秒以上以初始化并重新启动本机。 (如果问题 内部微电脑因外部电击 (例如闪电或过量静电)或电源电压较低而 仍然存在,请从壁上插座中拔出电源线并在 30 秒或更长时间之后再 无法关闭电源。 突然停止。 次插入。 ) 用前面板上的 INPUT 或遥控器上的音频源按钮选择合适的音频源 选择了不合适的音频源。 第 5、 8 页) 。 ( 无声音。 第 9 页) 。... - Page 114 故障排除 网络 问题 原因 解决方案 在路由器上启用 DHCP 服务器功能,并在本机上将选项菜单中 [Network Config] 的 [DHCP Enabled] 设定为 [YES]。如想手动配置网络 网络功能不起作用。 未正确获取网络参数 (IP 地址) 。 参数,请确保使用的 IP 地址与网络中其他网络装置使用的地址不同 第 32 页) 。 ( 从正在播放的文件夹中删除本机不支持的文件 (包括图片文件或隐 播放停止 (歌曲不能持续播放) 。 服务器中存在本机不支持的文件。 藏文件) 。 配置共享设置,并选择本机作为共享音乐内容的装置 媒体共享设置不正确。 第 17 页) 。 (...
-
Page 115: Ipod
故障排除 问题 原因 解决方案 在本机选项菜单的 [Advanced Setup] 中,将 [MAC Add.Filter] 设定为 已在本机上启用 MAC 地址过滤器。 [OFF],或指定移动装置的 MAC 地址,以允许其访问本机 第 32 页) 。 ( 请检查网络连接和路由器设置,然后将本机和移动装置连接至同一 本机和移动装置未在同一网络中。 专用于移动装置的应用程序检测不到 网络。 本机。 当移动装置连接至备用 SSID 时,对连接至首选 SSID 或 LAN 的装置的 移动装置已连接至支持多 SSID 的路由器的备用 SSID。 访问会受限 (只有互联网访问可用) 。将移动装置连接至首选 SSID。 暂时断开网络,检查本地网络,并将希望使用的网络装置连接至同... -
Page 116: Usb 装置
故障排除 光盘 问题 原因 解决方案 在装入光盘后不开始播放。 第 39 页) 。 本机装入的光盘可能不兼容。 使用本机支持的光盘 ( 有些按钮操作不起作用。 第 39 页) 。 光盘可能脏了。 将光盘擦拭干净 ( 第 39 页) 。 按本机上的 或遥控器上的 本机装入的光盘可能不受支持。 使用本机支持的光盘 ( 后播放未立即开始。 如果将本机从寒冷处带到温暖处,光盘读取激光头上可能形成了结 等待一两个小时,直到本机恢复到室温后再重试。 露。 装置 问题 原因 解决方案 未将 USB 装置牢固连接至 USB 插孔。 关闭本机,重新连接... -
Page 117: Fm 接收
故障排除 接收 问题 原因 解决方案 第 10 页) 。 天线未牢固连接。 确保天线牢固连接,并改变天线的位置 ( FM 立体声接收嘈杂。 所选电台可能离您所在的区域很远,或者天线输入不良。 使用市售的室外天线。有关详情,请咨询专业商店。 使用市售的室外天线。有关详情,请咨询专业商店。 自动调谐不工作。 所选电台可能离您所在的区域很远,或者天线输入不良。 使用手动调谐方法 ( 第 23 页) 。 第 23、 24 页) 。 无法选择预设电台。 预设 (记忆)可能已被删除。 重新预设电台 ( 即使使用良好的 FM 天线或室外天线仍 可能出现了多路反射或其它无线电干扰。 改变天线的高度、方向或位置。 然有失真,无法获得清晰接收。... -
Page 118: 前面板显示屏上的信息
故障排除 前面板显示屏上的信息 信息 原因 解决方案 从 iPod 到本机的信号路径有问题。 重新连接 iPod。 Unknown 本机不支持正在连接的 iPod/USB 装置。 使用本机支持的 iPod/USB 装置 ( 第 39 页) 。 iPod 的软件版本较老。 从 Apple 网站上下载最新的 iTunes 软件,更新 iPod 软件版本。 Timer not work 本机处于省电待机模式。 通过选项设置将 [Power Saving] 设定为 [Normal] ( 第... - Page 119 支持的装置 媒体和文件格式 注 使用光盘 支持的装置 媒体 iPod 经过许可,个人可以自行复制和播放未加密材 • 请勿触碰光盘的表面。拿光盘时, 料或法律上允许复制和播放的材料。侵犯版权是法律 请拿在光盘边缘或中心孔处。 所禁止的。 • 在光盘标签面上书写时请使用软笔 尖的笔。 光盘 • 请勿将胶带、密封剂、胶水等弄到光盘上。 安装了 Windows Media Player 11 或 Windows Media Player 12 的 PC。 • 请勿使用保护盖以防止刮擦。 • 本机可与光盘上或光盘套上印有以下任意标志的音频 • 请勿让异物残留在光盘托盘上。 CD、 CD-R/RW (ISO 9660 格式)一起使用。 •...
- Page 120 支持的装置 媒体和文件格式 文件格式 本机支持的文件格式如下: DLNA™ 和 DLNA CERTIFIED™ 是 Digital Living Network AirPlay 可与 iPhone、 iPad 和 iPod touch (iOS 4.3.3 或 Alliance 的商标或注册商标。保留所有权利。未经授 DLNA/USB 更新版本) , Mac (OS X Mountain Lion)以及 Mac 和 权,严禁使用。 PC (iTunes 10.2.2 或更新版本)一起使用。 • 本机支持播放 WAV (仅限 PCM 格式) 、 MP3、 “Made for iPod”、...
- Page 121 规格 播放器部分 放大器部分 CD、 CD-R/RW 媒体 32 W + 32 W (6 Ω 1 kHz, 10% THD) 最大输出功率 音频 CD、 MP3、 WMA 音频格式 总谐波失真 AUX1 1 kHz/12.5 W 0.05% 以下 半导体激光 GaAs/GaAlAs 类型 EQ High (高音) /EQ Mid (中音) / EQ 控制...
- Page 122 목차 소개 컴퓨터의 곡 듣기 펌웨어 업데이트 ..4 ..17 ..30 부속된 액세서리 음악 파일의 미디어 공유 설정 .... 옵션 설정 본 설명서에 대하여 에서 곡 재생 ....31 옵션 메뉴 목록 ..각부 명칭 외부 음원 듣기 ..5 ..19 문제...
- Page 123 끝내주는 사운드 음질이 다른 사운드 ..17, 18 고해상도 사운드 재생 ..22 언제 어디서나 음악 듣기 편리한 앱 내 스마트폰을 리모컨으로 사용 ..18 음악 내 의 곡을 스피커에 iPhone 이외의 기능 서 무선으로 듣기 ..26 다양한 외부 기기 (Blu-ray/DVD/ 모바일 음악 플레이어 등 연결...
-
Page 124: 부속된 액세서리
소개 패키지 내용물과 본 설명서의 유용한 기능을 확인합니다 부속된 액세서리 본 설명서에 대하여 • 본 기기의 조작 방법을 주로 리모컨을 사용하여 설명 합니다 • 그림은 기재된 실제 항목과 다를 수도 있습니다 배터리 × • 본 설명서에 나오는 은 또는 를 "iPod"... -
Page 125: 각부 명칭
각부 명칭 각부 명칭과 해당 기능을 숙지하십시오 리모컨 수신기 전면 패널 INPUT 왼쪽 또는 오른쪽으로 돌려 오디오 음원을 변경합니다 음원은 전면 패널 디스플레이에 표시됩니다 페이지 ( 14, 16, 18 페이지 PRESET</>( 24 전원 페이지 )( 12 PHONES 이 잭에 헤드폰을 연결합니다 디스크... - Page 126 각부 명칭 전원 케이블 페이지 후면 패널 ( 12 단자 DC OUT 이 단자에서 액세서리에 전원을 공급합니 Yamaha AV 다 이 항목을 사용하는 경우 옵션 설정의 [System 에서 를 로 설정합니다 Config] [Use Accessory] [YES] 페이지 자세한 내용은 액세서리에 부속된 설명...
- Page 127 각부 명칭 전면 패널 디스플레이 시계 취침 예약 타이머 표시등 디스플레이 밝기 조정 전원이 켜진 시간을 표시합니다 취침 예약 타이머가 설정되면 점등됩니다 페이지 리모컨의 DIMMER 버튼을 눌러 전면 패널 디스플 ( 29 레이의 밝기를 조정할 수 있습니다 페이지 표시등 임의 재생 반복...
- Page 128 각부 명칭 적외선 신호 송신기 페이지 리모컨 (REPEAT)( 20 페이지 디스크 트레이 열기 닫기 페이지 TIMER( 28 )( 14 페이지 음원 버튼 SLEEP( 29 재생할 오디오 음원을 전환합니다 숫자 버튼 페이지 ( 14 페이지 HOME( 16, 18, 25 페이지 RETURN( 14, 16, 18, 25 오디오...
-
Page 129: 준비
준비 스피커 또는 안테나를 연결하고 기기를 켭니다 모든 케이블 연결을 마칠 때까지 기기의 전원 케이블을 연결하지 마십시오 스피커 연결 오른쪽 스피커 구리선이 노출되도록 스피커 케이블 왼쪽 스피커 끝부분의 절연 피복을 벗깁니다 15 mm 그림에 나오는 것처럼 스피커를 기기에 연결합니다 스피커 •... -
Page 130: 안테나 연결
준비 안테나 연결 부속된 안테나 부속된 안테나를 기기에 연결합니다 핀으로 설치하면 기기의 수신 성능을 높일 수 있습니다 • 그림처럼 안테나를 펼치십시오 • 부속된 안테나의 라디오 수신 성능이 만족스럽지 못한 경우 시판되는 옥외 안테나를 사용하면 수신 성능이 향상될 수 있습니다... - Page 131 준비 네트워크에 연결 모바일 장치 본 기기 본 기기를 네트워크에 연결하여 모바일 장치 및 호환 에 저장된 음악 파일 또는 인터넷의 오디 DLNA* 오 콘텐츠를 재생할 수 있습니다 모바일 장치로 본 기기 를 작동할 수도 있습니다 * Digital Living Network Alliance 오른쪽에...
- Page 132 준비 대기 에코 대기의 상태 전원 켜기 대기 에코 대기 장치 충전 — iPod/USB 전원 케이블을 콘센트에 꽂고 을 누릅니다 모닝콜 타이머 활성화 비활 — • 기기가 켜집니다 성화 을 다시 누르면 장치가 꺼집니다 대기 모드 • 음원 버튼 작동 에코...
-
Page 133: 네트워크 장치 설정
네트워크 장치 설정 또는 에 저장된 음악 파일을 재생하도록 네트워크에 연결된 장치를 구성하거나 본 기기를 제어하도록 모바일 장치를 구성합니다 모바일 장치 의 미디어 공유 설정을 구성합니다 에 액세스하도록 설정을 구성합니다 전용 응용 프로그램 "NETWORK PLAYER ( 17 CONTROLLER" 페이지 를 모바일 장치에 설치합니다 •... -
Page 134: Cd 듣기
듣기 본 기기로 파일이 기록된 오디오 와 데이터 를 재생할 수 있습니다 MP3/WMA 재생 가능한 에 대한 자세한 내용은 지원되는 장치 미디어 페이지 를 참조하십시오 " "(39 • 데이터 의 파일이 영숫자순으로 재생됩니다 INPUT 을 돌려 [CD] 를 선택합니다 또는 재생이... -
Page 135: Ipod/Usb
장치에서는 재생 또는 전원 공급이 보 iPod/USB 장되지 않습니다 INPUT 을 돌려 [USB] 를 선택하거나 와 공급업체는 본 기기에 연결된 또 • Yamaha iPod 리모컨의 를 누릅니다 는 장치에 저장된 데이터의 손실에 대해 어 떠한 책임도 지지 않습니다 예방 차원에서 중요 iPod 을... - Page 136 장치 듣기 iPod/USB 의 정보 표시 전환 iPod 장치용 리모컨 조작 iPod/USB 의 • Yamaha "NETWORK PLAYER CONTROLLER" 응용 프로그램으로 을 작동하면 정보 표시가 iPod 재생 중인 곡의 시작 부분이나 이전 곡으로 확장 모드로 전환됩니다 건너뜁니다 의 경우 빨리 되감으려면...
-
Page 137: 컴퓨터의 곡 듣기
선택합니다 이상 여기에서는 에서 Media Player 11 Windows 7 로 설정하는 예를 제시합니다 " 내 미디어 공유 " 상자를 선택하고 "CRX-N560" Windows Media Player 12 아이콘을 선택한 다음 " 허용 " 을 클릭합니다 에서 Windows Media Player 12 를 종료하려면... -
Page 138: Pc 에서 곡 재생
컴퓨터의 곡 듣기 • 재생이 되지 않는 경우 본 기기와 서버 가 동 에서 곡 재생 일한 라우터에 연결되어 있는지 확인하십시오 페이지 ( 11 을 반복적으로 누르고 [Server] 를 선 모바일 장치에서 조작 택합니다 모바일 장치에 "NETWORK PLAYER CONTROLLER" 앱을 설치하면 모바일 장치로 본 기기를 조작할 수 곡을... -
Page 139: 외부 음원 듣기
외부 음원 듣기 본 기기를 통해 플레이어 또는 모바일 음악 플레이어 등의 외부 장치를 재생할 수 있습니다 연결할 장치에 해당하는 단자 또는 를 (DIGITAL IN 1/2 AUX 1/2) 사용하십시오 페이지 각 외부 장치의 연결은 부속된 설명서를 참조하십시오 본 기기의 전원 케이블을 뽑고 외부 장치 를... -
Page 140: 재생에 대한 추가 정보
재생에 대한 추가 정보 다양한 곡 순서 또는 음질로 음악을 재생하고 재생 중에 음악 정보를 볼 수 있습니다 이 단원에서 설명된 기능은 서버 장치 또는 등 모든 장치에 적용됩니다 ), iPod, USB • 임의 재생과 반복 재생은 동시에 수행할 수 있습 임의... - Page 141 재생에 대한 추가 정보 • 전면 패널 표시등에는 영숫자 문자만 표시됩니다 재생 정보 디스플레이 모드가 표준 모드인 경우 정보 • iPod 가 표시되지 않습니다 페이지 ( 16 전면 패널 디스플레이에서 곡 제목 경과 시간 등을 볼 수 있습니다 재생 중에 를...
- Page 142 재생에 대한 추가 정보 음질과 관련된 옵션 메뉴 음질 조정 설정값 굵은 글꼴 기본값 Equalizer 옵션 설정을 사용하여 음질을 조정할 수 있습니다 낮은 주파수 중간 주파수 및 높은 주 [EQ Low], [EQ Mid] 파수 를 조정합니다 이 설정은 헤드폰 사용 시 [EQ High] 을...
-
Page 143: Fm 라디오 방송 듣기
라디오 방송 듣기 라디오 방송을 들으려면 부속된 안테나를 연결하십시오 본 기기에 안테나를 연결하는 방법은 안테나 연결 페이지 을 참조하십시오 " "(10 • 방송 수신이 약하면 TUNING 버튼을 반 방송국 튜닝 복적으로 눌러 수동으로 방송국을 튜닝할 수 있 습니다 를 누릅니다 TUNING 을... -
Page 144: 선국한 Fm 방송국 선택
라디오 방송 듣기 • 수동 선국 설정을 취소하려면 을 누릅니다 수동 선국 OPTION 선국한 방송국 삭제 저장하려는 방송국을 튜닝합니다 옵션 설정을 사용하여 선국한 방송국을 삭제합니다 ( 23 페이지 음원이 이면 을 누릅니다 를 누릅니다 - 전면 패널 디스플레이에 옵션 메뉴가 나타납 ENTER •... -
Page 145: 인터넷 라디오 청취
인터넷 라디오 청취 인터넷을 통해 전세계 라디오 방송을 들을 수 있습니다 기기가 인터넷에 제대로 연결되었는지 확인하십시오 페이지 ( 11 • 인터넷 라디오가 재생되는 동안 DISPLAY 버튼 을 반복적으로 눌러 [Net Radio] 를 선 을 눌러 재생 정보를 볼 수 있습니다 버튼을... -
Page 146: Airplay 로 음악 듣기
을 클릭하고 기기의 이름을 선택합 소거 AirPlay 니다 화면에서 을 누르고 클릭하고 • iPod/iTunes 스피커 목록에서 이외의 다른 장치를 CRX-N560 • 음원이 자동으로 로 전환됩니다 에코 대 [AirPlay] 선택합니다 또는 음원을 가 아닌 다른 음 AirPlay 기 모드 제외 원으로 변경합니다... -
Page 147: 시계 사용
시계 사용 시계를 설정하면 즐겨 듣는 곡이나 라디오 프로그램을 알람으로 재생할 수 있습니다 • 콘센트에서 전원 케이블을 뽑은 상태로 주일 정 시계 설정 도 지나면 시계 설정이 지워집니다 시계를 다시 설정하십시오 을 누릅니다 DISPLAY • 시계를 설정할 때 버튼을 누르면 시계 •... - Page 148 시계 사용 • 모닝콜 타이머를 설정하기 전에 시계를 설정하십 모닝콜 타이머 설정 시오 이 로 설정된 경우 모닝콜 타 • [Power saving] [Eco] 설정된 시간에 음악 또는 비프음이 시작됩니다 이머를 사용할 수 없습니다 로 설정하십 . [Normal] 시오 페이지 ( 12 를...
- Page 149 시계 사용 • 설정이 완료되면 전면 패널 디스플레이에 • 모닝콜 타이머가 설정된 후에 기기에서 음원이 가 나타나고 이 점등됩니다 [Completed!] 제거되면 시작 시 기기에서 비프음이 울립니다 • 시작 시 음악 음원이 재생되면 이 깜박이고 재생이 계속됩니다 • 모닝콜 타이머 설정 후 기기가 켜지면 TIMER 버...
-
Page 150: 펌웨어 업데이트
할 수도 있습니다 이런 경우에는 메모리 장 릅니다 치를 사용하여 다시 시도하거나 펌웨어를 업데이 트하십시오 펌웨어는 웹사이트에서 다 Yamaha • 업데이트가 시작됩니다 운로드할 수 있습니다 OPTION 메모리 장치를 사용하여 펌웨어를 업데이트하 려면 • 업데이트가 완료되면 메모리 장치로 펌웨어를 다운로드하고 해당... -
Page 151: 옵션 설정
옵션 설정 옵션 설정을 통해 기기를 사용하기에 적합한 방식으로 구성할 수 있습니다 • 옵션 메뉴에서 을 설정하려면 [Advanced Setup] 을 누릅니다 기기의 중지 버튼 을 누른 상태로 리모컨의 OPTION 버튼을 누른 다음 단계로 진행합니다 • 전면 패널 디스플레이에 옵션 메뉴가 나타납니 다... -
Page 152: 옵션 메뉴 목록
( 12 System Info 시스템 를 표시합니다 System ID Config 잭을 통해 액세서리에 전원을 공 DC OUT Yamaha 네트워크에 나타나는 기기의 이름을 표시합니다 Network Name 급할지 여부를 선택합니다 Accessory 기기의 펌웨어 버전을 표시합니다 Firm Version 기기의 펌웨어를 업데이트합니다 페이지 Firm Update... -
Page 153: 문제 해결
본 기기가 올바르게 작동하지 않을 경우에는 아래의 표를 참조하십시오 해당 문제가 아래의 표에 없거나 아래의 설명이 도움이 되지 않을 경우 본 기기를 끄고 전원 케이블을 분리한 다음 가까운 지정 판매점이나 서비스 센터에 연락하십시오 Yamaha 먼저 각 케이블의 커넥터가 각 장치의 잭에 단단히 꽂혀 있는지 확인하십시오 일반사항 문제... - Page 154 문제 해결 네트워크 문제 원인 해결 방법 라우터에서 서버 기능을 활성화하고 기기의 옵션 메뉴에서 DHCP 의 를 로 설정하십시오 네트워크 [Network Config] [DHCP Enabled] [YES] 네트워크 기능이 작동하지 않습니다 네트워크 매개변수 주소 를 올바르게 가져오지 않았습니다 매개변수를 수동으로 구성하려면 사용하려는 주소가...
-
Page 155: Ipod
문제 해결 문제 원인 해결 방법 기기의 옵션 메뉴의 에서 를 로 [Advanced Setup] [MAC Add.Filter] [OFF] 본 기기에서 주소 필터가 활성화되어 있습니다 설정하거나 모바일 장치의 주소를 기기에 액세스할 수 있도록 지정 하십시오 페이지 ( 32 네트워크 연결과 라우터의 설정을 확인한 다음 동일한 네트워크에 본 기 본... -
Page 156: 디스크
문제 해결 문제 원인 해결 방법 이 올바로 연결되지 않았습니다 을 잭에 다시 연결하십시오 페이지 iPod iPod ( 15 이 충전되지 않습니다 본 기기에서 해당 이 지원되지 않습니다 지원되는 을 사용하십시오 페이지 iPod iPod iPod ( 39 기기가 에코 대기 모드 상태입니다 옵션... -
Page 157: Fm 수신
문제 해결 수신 문제 원인 해결 방법 안테나가 올바로 연결되었는지 확인하고 안테나의 위치를 변경하십시오 안테나가 올바로 연결되지 않았습니다 페이지 ( 10 스테레오 수신 시 잡음이 들립니다 선택한 라디오 방송국이 해당 지역으로부터 멀리 있거나 안테나 입력이 시판되는 옥외 안테나를 사용하십시오 자세한 내용은 전문 판매점에 문 약합니다... -
Page 158: 전면 패널 디스플레이의 메시지
문제 해결 전면 패널 디스플레이의 메시지 메시지 원인 해결 방법 에서 본 기기까지의 신호 경로에 문제가 있습니다 을 다시 연결하십시오 iPod iPod 연결된 장치가 본 기기에서 지원되지 않습니다 지원되는 장치를 사용하십시오 페이지 iPod/USB iPod/USB ( 39 Unknown 의 웹사이트에서 최신 소프트웨어를... -
Page 159: 지원되는 장치 / 형식
지원되는 장치 미디어 및 파일 형식 참고 디스크 취급 지원되는 장치 미디어 은 저작권이 없는 자료 또는 법적으로 복제 및 재생이 iPod • 디스크 표면을 만지지 마십시오 디스 승인된 자료의 개인적인 복제 및 재생을 수행하는 조건으 크 가장자리나 가운데 구멍을 잡으십 로... - Page 160 지원되는 장치 미디어 및 파일 형식 파일 형식 본 기기에서는 다음과 같은 파일 형식을 지원합니다 ™ 및 ™ 는 DLNA DLNA CERTIFIED Digital Living Network 는 이상이 설치된 및 AirPlay iOS 4.3.3 iPhone, iPad iPod 의 상표 또는 등록 상표입니다 모든...
-
Page 161: 제품 사양
제품 사양 재생 부문 앰프 부문 미디어 CD, CD-R/RW 최대 출력 32 W + 32 W(6 Ω 1 kHz, 10% THD) 오디오 형식 오디오 총 고조파 왜곡 미만 CD, MP3, WMA AUX1 1 kHz/12.5 W 0.05% 유형 반도체 레이저 고음 중음... - Page 162 Information about software Redistributions of source code must retain the above the Software is furnished to do so, subject to the following copyright notice, this list of conditions and the following conditions: Información sobre el software disclaimer. The above copyright notice and this permission notice shall Redistributions in binary form must reproduce the above be included in all copies or substantial portions of the copyright notice, this list of conditions and the following...
- Page 163 (2) If only executable code is distributed, then the FOR A PARTICULAR PURPOSE AND NONINFRINGEMENT. IN THIS SOFTWARE IS PROVIDED BY THE REGENTS AND accompanying documentation must state that “this NO EVENT SHALL THE AUTHORS OR COPYRIGHT HOLDERS BE CONTRIBUTORS “AS IS” AND ANY EXPRESS OR IMPLIED software is based in part on the work of the Independent LIABLE FOR ANY CLAIM, DAMAGES OR OTHER LIABILITY, WARRANTIES, INCLUDING, BUT NOT LIMITED TO, THE IMPLIED...
- Page 164 About PNG Reference Library About RC4 Algorithm Magnus Holmgren Greg Roelofs ibpng versions 1.2.6, August 15, 2004, through 1.4.5, Copyright Mocana Corp 2003-2005. All Rights Reserved. Tom Tanner December 9, 2010, are Copyright © 2004, 2006-2010 Glenn Randers-Pehrson, and are distributed according to the same Proprietary and Confidential Material.
- Page 165 (2) Altered source versions must be plainly marked as such, and must not be misrepresented as being the original software. (3) This notice may not be removed or altered from any source distribution. Do not disassemble, decompile, or reverse engineer the software included in Yamaha AV products.
- Page 166 © 2013 Yamaha Corporation Printed in Malaysia ZH10730...