Table of Contents
Advertisement
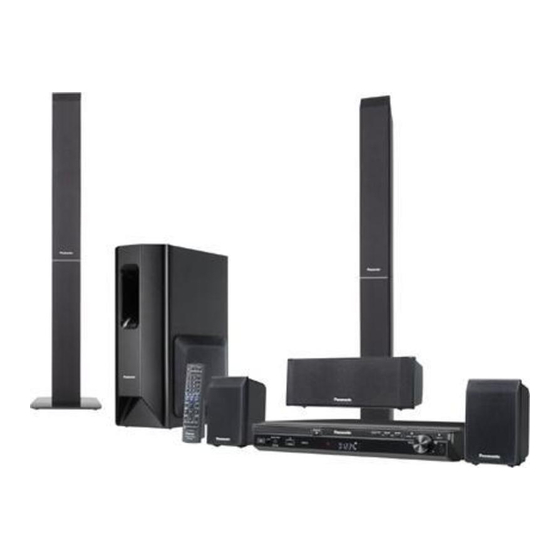
The illustration shows SC-PT550 for Continental Europe.
Before connecting, operating or adjusting this product, please read the instructions
completely. Please keep this manual for future reference.
Your unit may not look exactly the same as illustrated.
The player plays DVD-Video marked with labels containing the
region number or "ALL".
Region
Continental Europe, the Middle East, South Africa,
Saudi Arabia and Kuwait
Southeast Asia and Thailand
Australia and N.Z.
For Continental Europe
Example:
2
Wireless system
Wireless surround speaker connection for SC-PT850W.
USB connection for MP3 players
E
GCS GCT GC GS GN
DVD Home Theater Sound System
Number
2
3
ALL
5
Operating Instructions
Model No.
2
3
4
11
page
37
page
SC-PT550
SC-PT850
SC-PT850W
RQTX0038-3B
Advertisement
Table of Contents

Related Manuals for Panasonic SC-PT550


Summary of Contents for Panasonic SC-PT550
- Page 1 The illustration shows SC-PT550 for Continental Europe. Before connecting, operating or adjusting this product, please read the instructions completely. Please keep this manual for future reference. Your unit may not look exactly the same as illustrated. The player plays DVD-Video marked with labels containing the region number or “ALL”.
-
Page 2: Caution For Ac Mains Lead
Operations in these instructions are described mainly with the remote control, but you can perform the operations on the main unit if the controls are the same. Unless otherwise indicated, all illustrations shown are of SC-PT550 for Continental Europe. System... - Page 3 TÄMÄ LAITE ON TARKOITETTU KÄYTETTÄVÄKSI LEUDOSSA ILMASTOSSA. VÄHENNÄ TULIPALON, SÄHKÖISKUN TAI LAITTEISTON VAHINGOITTUMISEN VAARAA • TÄTÄ LAITETTA EI SAA ALTISTAA SATEELLE, KOSTEUDELLE, ROISKEILLE TAI TIPPUVILLE NESTEILLE. LAITTEEN PÄÄLLE EI SAA MYÖSKÄÄN ASETTAA MITÄÄN NESTEELLÄ TÄYTETTYÄ ESINETTÄ, KUTEN MALJAKKOA. • KÄYTÄ VAIN SUOSITELTUJA LISÄVARUSTEITA. •...
-
Page 4: Safety Precautions
CAUTION: Change the voltage setting to suit the AC voltage in your area. (\ page 12). Note that the unit will be seriously damaged or fail to operate correctly if this setting is not made correctly. Safety precautions Placement Set the unit up on an even surface away from direct sunlight, high temperatures, high humidity, and excessive vibration. -
Page 5: Table Of Contents
Table of contents GETTING STARTED Caution for AC Mains Lead ...2 Safety precautions ...4 Accessories ...6 Placement of speakers ...7 Preparing the remote control ...8 Speaker assembly ...9 Speaker installation options ... 10 Wireless system connection Connect the surround speaker cables to the wireless system ... 11 Connecting the wireless system to the power supply / Connecting the digital transmitter ... -
Page 6: Accessories
Accessories Please check and identify the supplied accessories. 1 Remote control For Continental Europe (N2QAYB000093) For Southeast Asia, Thailand, the Middle East, South Africa, Saudi Arabia and Kuwait (N2QAYB000094) For Australia and N.Z. (N2QAYB000095) For Continental Europe (N2QAYB000095) For Southeast Asia, Thailand, the Middle East, South Africa, Saudi Arabia and Kuwait (N2QAYB000096) -
Page 7: Placement Of Speakers
This is the normal operation of the product working to assure the best possible performance of your home theater system. If the interference persists, try moving the other devices to another location outside the range of the wireless system or move the wireless system nearer to the main unit. -
Page 8: Preparing The Remote Control
Set your surround free! Optional Panasonic wireless accessory (example: SH-FX65) You can enjoy surround speaker sound wirelessly when you use the optional Panasonic wireless accessory (example: SH-FX65). For details, please refer to the operating instructions for the optional Panasonic wireless accessory. -
Page 9: Speaker Assembly
Speaker assembly Preparation • To prevent damage or scratches, lay down a soft cloth and perform assembly on it. • For assembly, use a Phillips-head screwdriver. • There is no difference between the right and left speakers and stands. • For optional wall mount (\ page 10). Make sure you have all the indicated components before starting assembly, setup, and connection. -
Page 10: Speaker Installation Options
Speaker assembly (continued) Speaker installation options Speaker installation options 7 Attaching to a wall You can attach all of the speakers (except subwoofer) to a wall. • The wall or pillar on which the speakers are to be attached should be capable of supporting 10 k per screw. Consult a qualifi... -
Page 11: Wireless System Connection
For Southeast Asia, Thailand, the Middle East, South Africa, Saudi Arabia, Kuwait, Australia and N.Z. Remove the digital transmitter cover before installing any optional Panasonic wireless accessory. • Replace the cover when the digital transmitter is not in use. Push! You can use the blunt end of a writing instrument to push here until the cover pops out. -
Page 12: Simple Setup
Simple setup Making the connections Making the connections Connect the AC mains lead only after all other connections have been made. • Ensure that you have the complete accessories before making the connections. Conserving power The main unit consumes a small amount of power, even when it is standby mode (approx. 0.8 W). To save power when the unit is not to be used for a long time, unplug it from the household mains socket. -
Page 13: Connect To Various Television Terminals.
• Set “Video Output Mode” (\ page 24, Picture Menu). VIERA Link (“HDAVI Control”) If your Panasonic television is a VIERA Link compatible television, you can operate your television synchronising with home theater operations or vice versa (\ page 39). -
Page 14: Performing Quick Setup
Performing QUICK SETUP The QUICK SETUP screen assists you to make necessary settings. To display the picture from this main unit, switch on the television and change the television’s input mode which is connected to this main unit (example : VIDEO 1, AV 1, etc.). To change your television’s input mode, refer to its operating instructions. -
Page 15: Disc Information
fi nalized on the device it was recorded on. Closing the session will also work. MPEG4 data recorded with the Panasonic SD multi cameras or DVD video recorders [conforming to SD VIDEO specifi cations (ASF standard)/MPEG4 (Simple Profi le) video system/G.726 audio system]. -
Page 16: Overview Of Controls
Overview of controls Main unit Main unit Standby/on switch [y/I] (18) Press to switch the unit from on to standby mode or vice versa. In standby mode, the unit is still consuming a small amount of power. MUSIC PORT jack Connect an external device (37) Auto speaker setup (38) Connect a USB device (37) -
Page 17: Remote Control
EXT-IN: USB (37), AV (40), AUX (36), D-IN (40), MUSIC P. (37) Start up and play a disc automatically, Control both the home theater system and the television (39) Adjust the volume of the main unit (34) Basic operations for play (19) Show a disc menu or play list (19) Select or confi... -
Page 18: Disc - Basic Play
Disc — Basic play Using the main unit Using the main unit Power on. Load a disc in the tray. • Load double-sided discs so the label for the side you want to play is facing up. • For DVD-RAM, remove the disc from its cartridge before use. - Page 19 Stop The position is memorised while “RESUME” is on the display. • Press [3, PLAY] to resume. • Press [7, STOP] again to clear the position. Pause • Press [3, PLAY] to resume playback. Search (during play) • Play speed increases up to 5 steps. •...
-
Page 20: Advanced Play
Advanced play Displaying current playback condition Functions Menu (\ page 23) Off (No on-screen display) 7 Basics Example: Current playback number Playback condition Play mode 7 Details Example: Audio information Subtitle information Angle information Aspect of current title Total play time of current title •... -
Page 21: Playing Data Discs Using Navigation Menus
Playing data discs using navigation menus Playing data discs Selecting “Play as Data Disc” in Other Menu (\ page 26) will be effective if the following functions are not available to play WMA, MP3, JPEG, MPEG4 or DivX video contents. •... -
Page 22: Playing Highmat™ Discs / Playing Ram And Dvd-R/-Rw (Dvd-Vr) Discs
Playing data discs using navigation menus (continued) Playing HighMAT™ discs To select the item. • Repeat this step if necessary. Example: Menu: Takes you to the next menu which shows play lists or another menu To change the menu background Press [FUNCTIONS]. -
Page 23: Using On-Screen Menus
[5, ∞]. To show thumbnail images (with multiple subtitles) (SVCD only) for subtitles that are not displayed. “On” or “Off” appears only with discs that contain subtitle on/off information (Subtitle on/off information cannot be recorded using Panasonic DVD Recorders). RQT8043... -
Page 24: Other Settings
Using on-screen menus (continued) Functions Menu (continued) Marker (VR) To recall a marker recorded on DVD- Video recorders Press [5, ∞] ] Press [ENTER] Angle (with multiple angles) To select a video angle Rotate To rotate pictures Picture Other Settings Play Speed (Motion picture part) To change play speed... -
Page 25: Audio Menu
Other Settings (continued) Picture Menu (continued) Transfer If you have chosen “xxx p” (progressive) or Mode “1080i” (interlace) ( page 24, “Video Output Mode”), select the method of conversion for progressive output to suit the type of material. • The setting will return to Auto or Auto1 when the disc tray is opened, the unit is turned off or another source is selected. -
Page 26: Confi Rming Hdmi Information
Using on-screen menus (continued) Other Settings (continued) Display Menu (continued) Manual To zoom in and out manually Zoom – in 0.01-unit steps from “x1.00” to “x1.60” – in 0.02-unit steps from “x1.60” to “x2.00” – in 0.05-unit steps from “x2.00” to “x4.00” •... -
Page 27: Changing The Player Settings
Changing the player settings HDMI Item Setting • If you have not performed QUICK SETUP (\ page 14), the QUICK SETUP screen appears. The settings remain intact even if you switch the unit to standby. • Underlined items are the factory settings in the following table. •... - Page 28 Changing the player settings (continued) QUICK SETUP enables successive settings of the items in the shaded area. Player settings (continued) 7 “Video” tab TV Aspect Choose the setting to suit your television and preference. TV Type Select to suit the type of television. Time Delay When connected with a Plasma display, adjust if you notice the audio is out of...
-
Page 29: Changing The Delay Time Of The Speakers
Player settings (continued) 7 “Display” tab Menu Language On-Screen Messages • On Background during Play • Black Select background during JPEG, MPEG4 and DivX video playback. 7 “Others” tab FL Dimmer • Bright Change the brightness of the unit’s • Auto: The display is dimmed, but brightens when you perform some operations. display. -
Page 30: Tips For Making Data Discs
• You can play MPEG4 data [conforming to SD VIDEO specifi cations (ASF standard)/MPEG4 (Simple Profi le) video system/G.726 audio system] recorded with Panasonic SD multi cameras or DVD video recorders with this unit. • The recording date may differ from that of the actual date. -
Page 31: About Divx Vod Content
About DivX VOD content DivX Video-on-Demand (VOD) content is encrypted for copyright protection. In order to play DivX VOD content on this unit, you fi rst need to register the unit. Follow the online instructions for purchasing DivX VOD content to enter the unit’s registration code and register the unit. -
Page 32: Using The Radio
Using the radio Manual tuning To select “FM”. (main unit) To select “MANUAL”. (main unit) To select the frequency. (main unit) Press and hold [4 TUNE 3] until the frequency starts scrolling to start automatic tuning. Tuning stops when a station is found. Presetting the channel Up to 30 stations can be set for FM. -
Page 33: Using Sound Effects
Using sound effects Note • The following sound effects may not be available or have no effect depending on the type of source, disc as well as recording format or, when headphones are used. • You may experience a reduction in sound quality when these sound effects are used with some sources. -
Page 34: Adjusting The Volume Of Each Speaker: Speaker Level Adjustments
Using sound effects (continued) Adjusting the volume of each speaker: Speaker level adjustments This is one of the ways to get appropriate surround effects. Preparation While stopped and no on-screen display is shown To output a test signal. Front left R: Front right RS: Right surround LS: Left surround... -
Page 35: Enjoying Karaoke With Other Sources / Mic Volume Adjustment
Enjoying karaoke with other sources This works only in USB mode. Start play. Refer to (\ page 37) for Optional USB connection and operation. To display the karaoke menu on the television. (Press and hold) Make the selection Example: WMA/MP3 Karaoke Settings Karaoke Mode Key Control... -
Page 36: Operating Other Equipment
(not included) For Southeast Asia, Thailand, the Middle East, South Africa, Saudi Arabia, Kuwait, Australia and N.Z. This audio connection will enable you to play audio from your television through your home theater system. Television (not included) Rear panel of this main unit competent technician. -
Page 37: Optional Music Port Connection And Operation / Optional Usb Connection And Operation
Optional Music Port connection and operation The Music Port allows you to connect and enjoy music from an external device (example: MP3 player) through your home theater system. Preparation To avoid distorted sound, make sure that any equalizer function of your external device is turned off. -
Page 38: Adjusting The Speaker Output Level Automatically: Auto Speaker Setup
File name Still pictures Music Video MPEG4 For Panasonic D-Snap/DIGA Adjusting the Speaker output level automatically: Auto speaker setup Adjusting the Speaker output level automatically: Auto speaker setup For Australia and N.Z. For Continental Europe For Southeast Asia, Thailand, the Middle East, South Africa, Saudi Arabia, Kuwait, Australia and N.Z. -
Page 39: Using The Viera Link "Hdavi Control
What is VIERA Link “HDAVI Control”? VIERA Link “HDAVI Control” is a convenient function that offers linked operations of this unit, and a Panasonic television (VIERA) under “HDAVI Control”. You can use this function by connecting the equipment with the HDMI cable. See the operating instructions for connected equipment for operational details. -
Page 40: Operating The Television / Operating The Cable Tv Box, Digital Broadcasting Or Satellite Receiver
Operating other equipment (continued) Operating the television Operating the television You can use the remote control to operate a Panasonic television. Aim the remote control at the television. To switch the television on or off To switch the television’s video input mode... -
Page 41: Troubleshooting Guide
Reset all the settings to Factory Preset. The VIERA Link function does not • Depending on the condition of the home theater system or the connected respond. Other products respond to the • Change the remote control operating mode. - Page 42 Troubleshooting guide (continued) 7 A-B repeat Point B is automatically set. 7 Menus The Setup menu cannot be accessed. 7 Sound abnormal or improper Sound is distorted. Effects do not work. Humming is heard during play. No sound 7 Picture abnormal or unviewable The picture on the television is not displayed correctly or disappears.
- Page 43 7 Progressive video There is ghosting when • This problem is caused by the editing method or material used on DVD-Video, progressive or HDMI output is on. • Disable the HDMI AV OUT connection and use other video connections. Make the Pictures not in progressive output.
-
Page 44: Language Code List
Troubleshooting guide (continued) 7 Television displays “ ” “Cannot play group xx, content xx” “Cannot display group xx, content xx” “Group xx, content xx is protected” “Check the disc” “This disc may not be played in your region” No on-screen display. “Authorization Error”... -
Page 45: Glossary
Glossary CPPM (Content Protection for Prerecorded Media) A copy protection system used for DVD-Audio fi les. This unit supports CPPM. Decoder A decoder restores the coded audio signals on DVDs to normal. This is called decoding. DivX DivX is a popular media technology created by DivX, Inc. DivX media fi... -
Page 46: Specifi Cations
1000 W (Sub sampling is 4:0:0, 4:2:0, 4:2:2 or 4:4:4). Extremely long and narrow pictures may not be displayed. MPEG4 data recorded with Panasonic SD multi cameras or DVD video recorders Conforming to SD VIDEO specifi cations (ASF standard)/MPEG4 (Simple Profi le) video system/G.726 audio system... -
Page 47: Video Section
VIDEO SECTION Video system PAL625/50, PAL525/60, NTSC Composite video output Output level Terminal For Southeast Asia, Thailand, the Middle East, South Africa, Saudi Arabia, Kuwait, Australia aand N.Z. For Continental Europe For Continental Europe S-video output Y output level C output level NTSC;... -
Page 48: Maintenance
(Cleaning the lens is generally not necessary although this depends on the operating environment.) Matsushita Electric Industrial Co., Ltd. Web Site: http://panasonic.net CAUTION! THIS PRODUCT UTILIZES A LASER. USE OF CONTROLS OR ADJUSTMENTS OR PERFORMANCE OF PROCEDURES OTHER THAN...