Yamaha BD-S1065 Owner's Manual
Hide thumbs
Also See for BD-S1065:
- Release note (4 pages) ,
- Owner's manual (104 pages) ,
- Owner's manual (156 pages)
Table of Contents
Advertisement
Quick Links
Download this manual
See also:
Owner's Manual
Advertisement
Table of Contents

Related Manuals for Yamaha BD-S1065


Summary of Contents for Yamaha BD-S1065
- Page 1 BLU-RAY DISC PLAYER LECTEUR DE BLU-RAY DISC BD-S1065 OWNER’S MANUAL MODE D’EMPLOI MANUAL DE INSTRUCCIONES QUICK...
-
Page 2: Important Safety Instructions
IMPORTANT SAFETY INSTRUCTIONS Read these operating instructions carefully before using the unit. Follow the safety instructions on the unit and the applicable safety instructions listed below. Keep these operating instructions handy for future reference. Read these instructions. Protect the power cord from being walked on or pinched Keep these instructions. - Page 3 - and, most importantly, without affecting your sensitive hearing. Since hearing damage from loud sounds is often undetectable until it is too late, Yamaha and the Electronic Industries Association’s Consumer Electronics Group recommend you to avoid prolonged exposure from excessive volume levels.
- Page 4 12 Only voltage specified on this unit must be used. Using this unit with a higher voltage than specified is dangerous and may cause fire, damage to this unit, and/or personal injury. Yamaha will not be held responsible for any damage resulting CLASS 1 LASER PRODUCT LASER KLASSE 1 PRODUKT from use of this unit with a voltage other than specified.
-
Page 5: Table Of Contents
Contents JPEG File Playback .......... 28 1. INTRODUCTION Playing back still images in sequence......28 Playing back still images in a selected folder ....28 About Discs ............2 Playing back Slide Show..........28 Types of Discs that Can Be Used with This Player..2 Setting slide show speed/repeat playback..... -
Page 6: Introduction
INTRODUCTION About Discs ■ Types of Discs that Can Be Used Region management information with This Player Model BD-Video DVD-Video Australia Region code “B” or Region number “4” – The following discs can be played back in this “ALL” or “ALL” Player. -
Page 7: Discs That Cannot Be Used With This Player
About Discs ■ Discs that Cannot Be Used with When using the unit to play a CD-RW/R disc with still images stored (recorded). This Player – With CD-RW/R discs on which still images are The following discs cannot be played back or will not play mixed in with music or movies, you will be able to back properly on this Player. -
Page 8: Disc Precautions
Wipe any dirt off the playing surface with a soft cloth. Cleaning the Pick Up Lens – Never use commercially available cleaning discs. The use of these discs can damage the lens. – Request the nearest service center approved by Yamaha to clean the lens. -
Page 9: Getting Started
Getting Started ■ Supplied accessories ■ Copyright Make sure the following accessories are provided with the – Audio-visual material may consist of copyrighted product. works which must not be recorded without the authority of the owner of the copyright. Refer to Remote Batteries (x2) relevant laws in your country. -
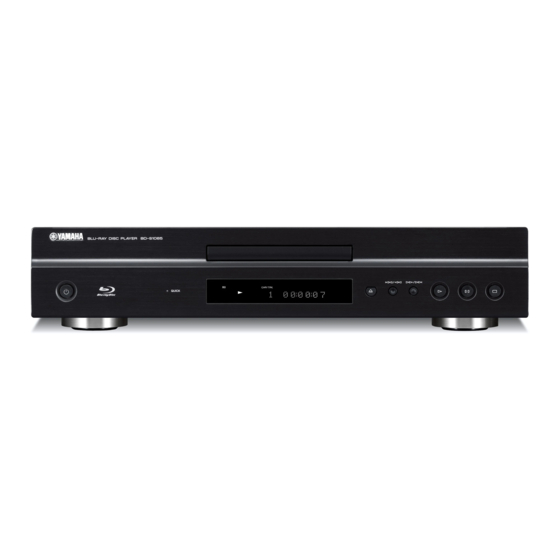
Page 10: Controls And Functions
Controls and Functions ■ Front panel QUICK 1 p (Power) (p. 20) (Search forward/Skip forward) (p. 20) 2 QUICK indicator (p. 33) (Play) (p. 20) 3 Front panel display (p. 16) 4 Disc tray (p. 20) (Pause) (p. 20) (Stop) (p. 20) (Eject) (p. -
Page 11: Remote Control
EXIT RETURN ID function You can change the remote control ID to prevent unwanted operation of the other Yamaha player such as SLOW/SKIP DVD player. If you have changed the remote control ID, STATUS make sure that you select the same ID for the main unit. -
Page 12: Connection
CONNECTION Introduction to Connections This Player is equipped with the terminals/jacks listed below. Find the corresponding terminal/jack on your video/audio equipment. We recommend that you use the HDMI terminal which provides high quality digital audio and video on a single connection. If you use the other terminals/jacks, connect the video first. Then connect the audio. ■... -
Page 13: Hdmi Connection
HDMI Connection ■ Connecting to the HDMI Terminal – You can enjoy high quality digital picture and sound through the HDMI terminal. – Firmly connect an HDMI cable (commercially available) to the HDMI terminals (1 and 2). – See page 38 for information on the audio output formats. –... -
Page 14: Video Connections
Video Connections ■ Connecting to the Component Jacks – You can enjoy accurate color reproduction and high quality images through the component jacks. – Firmly connect a component video cable (commercially available) to the component jacks (1 and 2). Caution! Be sure to turn off this Player and the equipment before making any connections. -
Page 15: Connecting To The S Video Or Video Jack
Video Connections ■ Connecting to the S Video or Video Jack – Connect either the S-video jack or video jack. – Firmly connect a S-video cable (commercially available) to the S-video jacks or a video pin cable (supplied) to the video jacks (1 and 2, or 3 and 4). -
Page 16: Audio Connections
Audio Connections ■ Connecting to the Digital Audio Jack/Terminal – You can connect audio equipment or the TV to the DIGITAL OUT Jack/terminal. – Firmly connect a digital audio pin cable (commercially available) or optical cable (commercially available) to the coaxial digital audio jack or optical digital audio terminal (1 and 2, or 3 and 4). -
Page 17: Connecting To The Audio Jacks
– You can connect a subwoofer to the SUBWOOFER jack directly. When you connect TV to this Player directly, connect an active subwoofer such as Yamaha Active Servo Processing Subwoofer System to this jack. – You need to select “7.1ch Audio Output” in “Settings” - “Audio Video Settings” - “Audio Out” to output the audio signal from the 8ch discrete jacks. -
Page 18: Broadband Internet Connection
Broadband Internet Connection ■ Connecting to the NETWORK terminal and USB BD STORAGE/SERVICE terminal – You can enjoy a variety of contents with interactive functions by connecting to the internet when playing BD-LIVE compatible discs. Refer to pages 24 and 25 regarding further information on BD-LIVE functions. –... -
Page 19: Other Connections
Player. Then plug into AC CONTROL (OUT/IN) jacks (1 and 2, or 3 and outlet. – If your AV receiver is a Yamaha product and has the capability to transmit SCENE control signals, you can use the SCENE function. -
Page 20: Disc Playback
DISC PLAYBACK Before Starting Playback ■ Loading the Batteries in the ■ Turning the Power On Remote Control OPEN/CLOSE DIMMER VIDEO-RESET SUBTITLE AUDIO ANGLE QUICK 1 Press the part and slide the battery compartment cover off. 2 Insert the two supplied batteries (AAA, R03, UM-4), Turning the power on following the indications (+/–) on the inside of the Press p on the remote control or on the Player to turn on... -
Page 21: Setting The On-Screen Display Language
TOP MENU/TITLE LIST POP UP MENU uploading. To check for the availability of a software update, visit http://www.yamaha.co.jp/english/product/av/down/ agreement.html. ENTER When a software update is performed, the software update data must be written onto the USB memory... -
Page 22: Setting The Audio Output
Before Starting Playback – The current version of this unit software and the Hint version of the update file on the USB memory device are displayed. To update this Player software – You can clear the 4-digit number by pressing with update file, select “Yes”, and press ENTER. - Page 23 Before Starting Playback Notes – HDMI control function may not work properly depending on the TV. – Functions other than ones shown above may work depending on the TV or AV receiver. – In order to make the HDMI control function available, set up settings for the HDMI control function on ALL the components (this Player, TV, and AV receiver).
-
Page 24: Bd/Dvd/Cd Playback
BD/DVD/CD Playback This section explains playback of commercially available Buttons Functions BD Video and DVD Video discs (like movies), CDs, and Pauses or stops playback recorded DVD-RW/R discs. Skips backward/Skips forward ■ Loading a Disc Search backward/Search forward (search) Pauses playback Playback The search speed will change each time you press the button. -
Page 25: Repeat Playback
BD/DVD/CD Playback ■ Repeat Playback Repeat Playback of a Specified Part DVD-V DVD-R DVD-RW AUDIO CD Note ENTER – Some operations in the following playback function cannot be performed depending on the specifications EXIT RETURN of the disc. 1 Press REPEAT during playback. SLOW/SKIP 2 Press to select “Scene Selection”, then press... -
Page 26: Using Bd/Dvd Menus
BD/DVD/CD Playback ■ Using BD/DVD Menus Using the pop-up menu This section explains how to play back a BD/DVD video BD-V disc with a top menu, disc menu or pop-up menu. The titles listed in the top menu and a disc guide (for options 1 Press POP UP MENU during playback. - Page 27 BD/DVD/CD Playback Playback by selecting a title Playback by selecting a chapter 1 Load a recorded disc. 1 Press B while the Thumbnail screen is displayed. – The Title List screen is displayed. – The chapter screen is displayed. Program Program Program Chapter...
-
Page 28: Using The Audio Cd Playback Menu
BD/DVD/CD Playback ■ Using the Audio CD Playback – The “Functions” menu is activated. Menu AUDIO CD When you load an audio CD, following screen is displayed. Select Enter Return Track select 2 Press to select the desired setting, then press ENTER. -
Page 29: Function Control Screen
Notes displayed vary depending on the programs provided through the internet. Operate by following the – Yamaha cannot guarantee that all brands’ USB directions on the screen. memory devices will operate with this player. – Do not use a USB extension cable when connecting... -
Page 30: Function Control Operation Procedure
BD/DVD/CD Playback Function control operation procedure Functions which can be set TOP MENU/TITLE LIST POP UP MENU OPEN/CLOSE DIMMER VIDEO-RESET ENTER SUBTITLE AUDIO ANGLE EXIT RETURN SLOW/SKIP STATUS SEARCH ON SCREEN CLEAR ENTER SETUP P in P REPEAT 1 Press ON SCREEN during playback. TOP MENU/TITLE LIST POP UP MENU –... -
Page 31: Displaying The Disc Information
BD/DVD/CD Playback ■ Displaying the disc information Icons Functions Descriptions – Shows the currently selected subtitle language. If subtitles are provided in other languages, you can switch to Subtitle SLOW/SKIP Language your preferred language. STATUS You can also select the subtitle Press STATUS during playback. -
Page 32: Jpeg File Playback
JPEG File Playback 4 Press to replace one image with another. CD-R CD-RW JPEG JPEG – The same operation can be performed by pressing – Press RETURN if you wish to return to the folder TOP MENU/TITLE LIST POP UP MENU selection screen. -
Page 33: Settings
SETTINGS Settings The “Menu” enables various audio/visual settings and adjustments on the functions using the remote control unit. Menu/Submenu Function Page Audio Video Settings TV Aspect Ratio Sets the screen aspect ratio of the connected TV, and adjust the video output. -
Page 34: Audio Video Settings
Settings – You can use ENTER on the lower right of the Audio Video Settings Number buttons instead of ENTER in the Cursor Speaker Settings buttons. Quick Start 6 Press to select the parental control level for Auto Power Off DVD VIDEO, BD-ROM, and then select the country HDMI Control Playback Setting... -
Page 35: Hdmi Video Out
Settings No video output when 1080p signal is output from the HDMI terminal. HDMI Video Out This sets the resolution of the HDMI video output. – If the video equipment connected to each of the Some TV are not fully compatible with the Blu-ray disc terminals is not compatible with the resolution of the player, which may cause the image distortion. -
Page 36: Dynamic Range Control
Settings 5 Press to select a speaker you want to Note configure, then press ENTER. L (Front Left), C (Center), R (Front Right), RS – When “Secondary Audio” is set to “On”, PCM is (Surround Right), RB (Surround Back Right), LB automatically selected as the audio output mode. -
Page 37: Quick Start
Settings ■ Quick Start Country code Sets the country code. Refer to the Country Code List (page 38) This turns the Quick Start function on and off. because the ratings differ according to the country. When the Quick Start function is on: –... -
Page 38: Version
Settings ■ Version 5 Press to select “Change”, then press ENTER. When you select “Version”, the system software version is Current Ethernet setup info. displayed. IP Address : Auto Setup ■ System Reset Netmask : Auto Setup Gateway : Auto Setup You can reset all settings to the factory presets. - Page 39 Settings – The Ethernet connection speeds can be set when you – When inputting other values (IP address, etc.); select “Yes”, then press ENTER. “Numeric” / “Edit” – As automatic detection is made (factory preset 3 Press to select a number/character, then press mode), this setting is not normally necessary.
-
Page 40: Usb Memory Management
If you want to delete only the unneeded software update data after the software is updated, delete the Note data on the USB memory device using a PC. – Yamaha cannot guarantee that all brands’ USB memory devices will operate with this Player. -
Page 41: Software Update
Settings Erase Erases BD-VIDEO data on USB memory. Format Erase all contents on USB memory including protected contents. Note – Data which has been saved to the Player’s internal memory (game score, etc.) will also be deleted. 6 Press , select “Yes”, and press ENTER. 7 Start the process. - Page 42 Settings Country Code List USA / CANADA / JAPAN / GERMANY / FRANCE / UK / ITALY / SPAIN / SWISS / SWEDEN / HOLLAND / NORWAY / DENMARK / FINLAND / BELGIUM / HONG KONG / SINGAPORE / THAILAND / MALAYSIA / INDONESIA / TAIWAN /PHILIPPINE / AUSTRALIA / RUSSIA / CHINA Language List English / Français / Deutsch / Italiano / Español / Japanese / Svenska / Nederlands...
-
Page 43: Additional Information
Refer to the table below when this unit does not function properly. If the problem you are experiencing is not listed below or if the instruction below does not help, turn off this unit, disconnect the power cable, and contact the nearest authorized Yamaha dealer or service center. ■ Power... -
Page 44: Sound
Troubleshooting Screen freezes and operation buttons – Press , then restart playback. do not work. – Turn off the power and turn on the power again. – If the power is not turned off, perform a reset. (Page 41) – Is the disc damaged or dirty? Check the condition of the disc. (Page 4) There is just audio with no video. -
Page 45: Other
Player is ready for use. – When the problem persists even after performing a reset, unplug the power cable and plug it in again. If this does not solve the problem, contact the nearest service center approved by Yamaha. Keylock function You can set the keylock to prevent accidental operations. -
Page 46: Glossary
Glossary AVCHD Interlace format AVCHD is a new format (standard) for high definition Interlace format shows every other line of an image as a video cameras that can be used to record and play high- single “field” and is the standard method for displaying resolution HD images. -
Page 47: Specifications
The copyrights for the software components and various relevant documents included with this product that were developed or written by Yamaha are owned by Yamaha and are protected by the Copyright Act, international treaties, and other relevant laws. This product also makes use of freely distributed software and software components whose copyrights are held by third parties. -
Page 48: Information About Software
Information about software Información sobre el software This product uses the following software. For information (copyright, etc) about each software, read the original sentences stated below. ■ About linux and busybox conditions, and telling the user how to view a copy of this License. (Exception: if the Program itself is interactive but does not normally print such an GNU GENERAL PUBLIC LICENSE announcement, your work based on the Program is not required to print an... - Page 49 It is not the purpose of this section to induce you to infringe any patents or other The hypothetical commands ‘show w’ and ‘show c’ should show the appropriate parts property right claims or to contest validity of any such claims; this section has the sole of the General Public License.
- Page 50 Note that it is possible for a library to be covered by the ordinary General Public If distribution of object code is made by offering access to copy from a designated License rather than by this special one. place, then offering equivalent access to copy the source code from the same place satisfies the requirement to distribute the source code, even though third parties are not GNU LIBRARY GENERAL PUBLIC LICENSE compelled to copy the source along with the object code.
- Page 51 10. Each time you redistribute the Library (or any work based on the Library), the <one line to give the library’s name and a brief idea of what it does.> recipient automatically receives a license from the original licensor to copy, Copyright (C) <year>...
- Page 52 For example, on rare occasions, there may be a special need to encourage the widest 3. You may opt to apply the terms of the ordinary GNU General Public License possible use of a certain library, so that it becomes a de-facto standard. To achieve this, instead of this License to a given copy of the Library.
- Page 53 It may happen that this requirement contradicts the license restrictions of other LIBRARY “AS IS” WITHOUT WARRANTY OF ANY KIND, EITHER proprietary libraries that do not normally accompany the operating system. Such a EXPRESSED OR IMPLIED, INCLUDING, BUT NOT LIMITED TO, THE contradiction means you cannot use both them and the Library together in an executable IMPLIED WARRANTIES OF MERCHANTABILITY AND FITNESS FOR A that you distribute.
- Page 54 SHALL THE OpenSSL PROJECT OR ITS CONTRIBUTORS BE LIABLE FOR Jean-loup Gailly Mark Adler ANY DIRECT, INDIRECT, INCIDENTAL, SPECIAL, EXEMPLARY, OR jloup@gzip.org madler@alumni.caltech.edu CONSEQUENTIAL DAMAGES (INCLUDING, BUT NOT LIMITED TO, If you use the zlib library in a product, we would appreciate *not* receiving lengthy PROCUREMENT OF SUBSTITUTE GOODS OR SERVICES;...
-
Page 55: Laser Safety
LASER Specification: SA172WJ CAUTION: CLASS 2 VISIBLE AND INVISIBLE LASER Class 1 LASER Product RADIATION WHEN OPEN. DO NOT STARE INTO THE BEAM. ACHTUNG: BEI GEÖFFNETER ABDECKUNG IST SICHTBARE UND UNSICHTBARE LASERSTRAHLUNG DER KLASSE 2 IM Wave length: 788 nm (CDs)/654 nm (DVDs)/405 nm GERÄTEINNEREN VORHANDEN. - Page 56 © 2009 Yamaha Corporation All rights reserved. Printed in Malaysia WU26340...