
Related Manuals for Sony VPL-VW665


Summary of Contents for Sony VPL-VW665
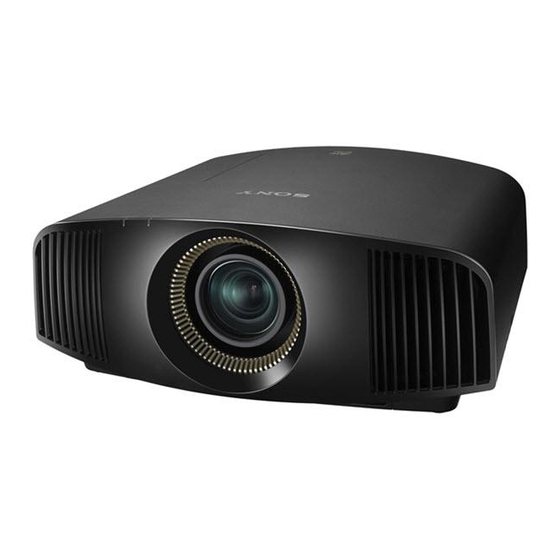
- Page 1 4-580-175-01 (1) Video Projector Quick Reference Manual ____________ Guide de référence rapide __________ VPL-VW665 VPL-VW365 © 2015 Sony Corporation Printed in Japan...
-
Page 2: Table Of Contents
About the Quick Reference Manual This Quick Reference Manual explains the installation and basic operations for projecting pictures. It also describes important notes and cautions to which you have to pay attention when handling and using this unit. Refer to “Warning Indicators” and “Replacing the Lamp,” as necessary. For details on the operations, refer to the Operating Instructions contained in the supplied CD- ROM. - Page 3 If you have any questions about this product, to the proper ratings (Voltage, Ampere). you may call; Sony Customer Information Service Center If you have questions on the use of the above 1-800-222-7669 or http://www.sony.com/ Power Cord / Appliance Connector / Plug, please consult a qualified service personnel.
- Page 4 SONY visit http://www.sony.com/psa/warranty Model: VPL-VW665 for important information and complete VPL-VW365 terms and conditions of Sony’s limited Responsible party: Sony Electronics Inc. warranty applicable to this product. Address: 16535 Via Esprillo, For the customers in Canada San Diego, CA 92127 SONY LIMITED WARRANTY - Please U.S.A.
- Page 5 On repacking Notes on security Save the original shipping carton and • SONY WILL NOT BE LIABLE FOR packing material; they will come in handy if DAMAGES OF ANY KIND you ever have to ship your unit. For...
-
Page 6: Notes On Installation And Usage
OR SECURITY PROBLEMS OF ANY Notes on Installation KIND. • Depending on the operating environment, and Usage unauthorized third parties on the network may be able to access the unit. When connecting the unit to the network, be sure to confirm that the network is protected Unsuitable installation securely. -
Page 7: Unsuitable Conditions
Hot and humid Do not install the unit anywhere other than on a level surface or on the ceiling. Installing the unit in such a location may result in uneven color uniformity or reduce the reliability of the effects of the lamp. If the unit is tilted up or down, the image on the screen may be trapezoidal. -
Page 8: Safety Precautions For Installing The Unit On A Ceiling
For dealers • When the projector is mounted on the ceiling, a Sony bracket or recommended equivalent must be used for installation. • Be sure to secure the cabinet cover firmly when installing to the ceiling firmly. -
Page 9: Preparing
Note If you have lost or damaged the CD-ROM, you Insert the batteries E can purchase a new one from your Sony dealer side first. or Sony service counter. CAUTION Danger of explosion if battery is incorrectly replaced. -
Page 10: Installing The Unit
(test pattern). Then adjust the adjust the focus, size, and position. focus of the picture by pressing the M/m/ </, buttons. VPL-VW665 b Adjust the picture size. Press the PATTERN button repeatedly to display the Lens Zoom adjustment window (test pattern). Then adjust the size of the picture by pressing the M/m/ </, buttons. - Page 11 proper position of the picture by pressing the M/m/</, buttons. Lens adjustment window (test pattern) 1.78:1 (16:9) 1.33:1 (4:3) 2.35:1 1.85:1 The dashed lines show the screen sizes of each aspect ratio. For more information, refer to “Connections and Preparations” in the Operating Instructions contained in the supplied CD-ROM.
-
Page 12: Connecting The Unit
HDMI cable (not supplied) : Video signal flow Use a high speed HDMI cable on which the cable type logo is specified. (Sony products are recommended.) For more information, refer to “Connections and Preparations” in the Operating Instructions contained in... -
Page 13: Selecting The Menu Language
Step 4 Selecting the Menu Language You can select the language for displaying the menu and other on-screen displays. The factory default setting is English. To change the current menu language, set the desired language with the menu screen. Press MENU. Press M/m/</, to select a language, and press The menu appears. -
Page 14: Projecting
Step 5 Projecting Note Projecting the Picture Never disconnect the AC power cord while the indicator is flashing. Turn on both the unit and the You can turn off the unit by holding the ?/1 equipment connected to the unit. (ON/STANDBY) button for about 1 second, instead of performing the above steps. -
Page 15: Selecting The Picture Viewing Mode
CINEMA FILM 1 Picture quality suited to reproducing the highly dynamic and clear images typical of master positive film. CINEMA FILM 2 VPL-VW665 Picture quality suited for HDR content, with the highest dynamic range and many colors. VPL-VW365 Picture quality suited to reproducing the rich tone and color... -
Page 16: Error Handling
Note When a warning indicator other than the above starts flashing, and the symptom persists even after carrying out the above methods, consult with qualified Sony personnel. If there is any problem or an error message appears on the screen, refer to “Error Handling” in the Operating... -
Page 17: Replacing The Lamp
Place the unit on the cloth. Tools you need to get started: Note • Projector Lamp (Optional) Be sure that the unit is placed on a stable VPL-VW665: LMP-H280 surface. VPL-VW365: LMP-H220 • Standard Phillips screwdriver While pressing the part indicated •... - Page 18 Push in the new lamp by the handle securely until it reaches the end, and then tighten the 3 screws. Note Be careful not to touch the optical block inside the unit. Close the lamp door (inner cover), and then tighten the screw. Loosen the 3 screws on the lamp with the Phillips screwdriver.
- Page 19 For additional information, Notes • The unit will not turn on unless the lamp is see www.sony.com/ securely installed in place. mercury...
- Page 20 A propos du Guide de référence rapide Ce Guide de référence rapide décrit l’installation et les procédures de base de projection des images. Vous y trouverez également des mises en garde et des remarques importantes qu’il convient de respecter au cours de la manipulation et de l’utilisation de cet appareil. Reportez-vous à...
- Page 21 AVERTISSEMENT termes et conditions de la garantie limitée 1. Utilisez un cordon d’alimentation (câble de Sony applicable à ce produit. secteur à 3 fils)/fiche femelle/fiche mâle avec des contacts de mise à la terre conformes à la réglementation de sécurité...
- Page 22 assurer une protection maximale, remballer Précautions l’appareil tel qu’il avait été emballé en usine. À propos du visionnage d’images Sécurité vidéo 3D • S’assurer que la tension de service de votre Consignes de sécurité projecteur est identique à la tension locale. •...
- Page 23 Remarques sur l’utiliser. l’installation et Remarques sur la sécurité l’utilisation • Sony ne peut être tenue responsable de tout dommage, de quelque nature que ce soit, résultant d’une incapacité à mettre en place des mesures de sécurité Installation déconseillée adaptées pour les dispositifs de transmission, de fuites de données...
- Page 24 Mauvaise ventilation Endroits très poussiéreux ou enfumés Laisser un dégagement de plus de 30 cm pouces) autour de l’appareil. Conditions inappropriées Éviter ce qui suit pendant l’utilisation de Endroits chauds et humides l’appareil. Inclinaison vers l’avant/arrière et vers la gauche/droite Éviter d’incliner l’appareil à...
- Page 25 Confiez l’installation à un professionnel ou à un installateur expérimenté. Pour les revendeurs • Quand le projecteur est fixé au plafond, un support Sony ou un support équivalent recommandé doit être utilisé pour l’installation. • Vous devez fermer le couvercle du cabinet solidement lors de l’installation au...
-
Page 26: Préparation
Remarque Si vous avez perdu ou endommagé le CD-ROM, vous pouvez acheter un CD-ROM de remplacement auprès de votre représentant Sony ou du service clientèle Sony. ATTENTION Il y a danger d’explosion s’il y a remplacement incorrect de la batterie. -
Page 27: Installation De L'appareil
Etape 2 Installation de l’appareil VPL-VW665 Positionnez l’appareil de façon à ce que l’objectif soit parallèle à l’écran. Après avoir branché le cordon d’alimentation à l’appareil, branchez le cordon d’alimentation secteur à une prise murale. Avant de l’appareil S’allume en a Réglez la mise au point. - Page 28 VPL-VW365 Fenêtre de réglage de l’objectif (mire d’essai) 1,78:1 (16:9) 1,33:1 (4:3) 2,35:1 a Réglez la mise au point. Appuyez à plusieurs reprises sur le bouton PATTERN pour afficher la fenêtre de réglage Focus d’objectif (mire d’essai). Réglez ensuite la mise au point 1,85:1 de l’image en appuyant sur les boutons Les lignes pointillées indiquent les tailles...
-
Page 29: Raccordement De L'appareil
: Flux du signal vidéo Utilisez un câble HDMI haute vitesse qui porte le logo du type de câble. (Il est recommandé d’utiliser des produits Sony.) Pour plus d’informations reportez-vous à « Raccordements et préparatifs » dans le Mode d’emploi que vous trouverez... -
Page 30: Sélection De La Langue Du Menu
Etape 4 Sélection de la langue du menu Appuyer sur M/m pour sélectionner Vous pouvez sélectionner la langue d’affichage du menu et d’autres affichages à « Language », puis appuyer sur , ou l’écran. Le réglage en usine par défaut est l’anglais. -
Page 31: Projection
Etape 5 Projection L’alimentation s’arrête complètement et Projection de l’image vous pouvez débrancher le cordon d’alimentation. Mettez sous tension cet appareil et Remarque l’appareil qui y est raccordé. Ne jamais débrancher le cordon d’alimentation lorsque l’indicateur clignote. Appuyez sur INPUT pour afficher la Vous pouvez mettre l’appareil hors tension en palette d’entrée sur l’écran. - Page 32 CINEMA FILM 1 Qualité d’image adaptée à la reproduction d’images hautement dynamiques et nettes, typiques d’un chef-d’œuvre du cinéma. CINEMA FILM 2 VPL-VW665 Qualité d’image adaptée au contenu HDR, avec la plage dynamique la plus élevée et de nombreuses couleurs. VPL-VW365 Qualité...
-
Page 33: Indicateurs D'avertissement
élevée. Assurez-vous que rien ne colmate les orifices de ventilation et que l’appareil n’est pas utilisé à haute altitude. Trois fois Le ventilateur est défectueux. Consultez le service après-vente Sony. (Clignote en (Clignote en rouge) rouge) Les deux indicateurs clignotent Remarque Lorsqu’un indicateur d’avertissement autre que celui ci-dessus commence à... -
Page 34: Remplacement De La Lampe
Voici les outils dont vous avez besoin débranchez le cordon d’alimentation pour commencer : secteur. • Lampe pour projecteur (en option) VPL-VW665 : LMP-H280 Lorsque vous disposez l’appareil sur VPL-VW365 : LMP-H220 une surface plane comme un bureau, • Un tournevis cruciforme standard etc., mettez un chiffon sur la surface... - Page 35 Desserrez la vis du couvercle de la Remarques lampe (couvercle intérieur) avec un • À l’exception des 3 vis spécifiées, ne tournevis cruciforme, puis ouvrez le desserrez aucune autre vis. couvercle de lampe. • Tenez la lampe par la poignée pour la retirer et la fixer.
- Page 36 Fermez le couvercle de la lampe. Sélectionnez « Oui ». Mise en garde N’introduisez pas les doigts dans la fente de remplacement de la lampe et veillez à ce qu’aucun liquide ou objet ne tombe à l’intérieur de la fente pour éviter tout risque d’électrocution ou d’incendie.
- Page 37 Mettre à disposition de la lampe usagée Pour les clients aux États-Unis et au Canada La lampe contient du mercure. Disposez selon les lois locales, provinciales et fédérales applicables. Pour de plus amples informations, voir www.sony.com/mercury...