Table of Contents
Advertisement
Available languages
Available languages
Quick Links
Memory Card Drive/Lecteur de carte mémoire
DEUTSCH
ITALIANO
ESPAÑOL
Before operating this product, please read the instructions carefully and save this manual for
future use.
Avant d'utiliser l'appareil, lire attentivement ce mode d'emploi, et le conserver a des fins de ref-
erence ulterieure.
在操作本机之前,请仔细阅读本说明书,并将说明书妥善保管,以备将来使用。
お買い上げいただき、まことにありがとうございました。
この取扱説明書をよくお読みのうえ、正しくお使いください。
特に「安全上のご注意」は、ご使用前に必ずお読みいただき、安全にお使いください。
お読みになったあとは、保証書と一緒に大切に保管し、必要なときにお読みください。
F0606T0 -F @
Printed in Japan
Operating Instructions/Mode d'emploi
Fur Erlauterungen in Deutsch, konsultieren
Sie bitte die mitgelieferte CD-ROM.
Per le istruzioni in italiano, vedere il CD-
ROM in dotazione.
Para la explicación en español, consulte
el CD-ROM suministrado.
操作手册 / 取扱説明書
驱动器 /メモリーカードドライブ
AJ-
Model No.
P
E
MC
中
文
日
本
語
VQT0X89
Advertisement
Chapters
Table of Contents

Related Manuals for Panasonic AJ-PCD20E


Summary of Contents for Panasonic AJ-PCD20E
- Page 1 Operating Instructions/Mode d’emploi Memory Card Drive/Lecteur de carte mémoire DEUTSCH ITALIANO ESPAÑOL Before operating this product, please read the instructions carefully and save this manual for future use. Avant d’utiliser l’appareil, lire attentivement ce mode d’emploi, et le conserver a des fins de ref- erence ulterieure.
-
Page 2: Read This First
Read this first! For AJ-PCD20P and AJ-PCD20E WARNING: TO REDUCE THE RISK OF FIRE OR SHOCK HAZARD, DO NOT EXPOSE THIS EQUIPMENT TO RAIN OR MOISTURE. TO REDUCE THE RISK OF FIRE OR SHOCK HAZARD, KEEP THIS EQUIPMENT AWAY FROM ALL LIQUIDS. USE AND STORE ONLY IN LOCATIONS WHICH ARE NOT EXPOSED TO THE RISK OF DRIPPING OR SPLASHING LIQUIDS, AND DO NOT PLACE ANY LIQUID CONTAINERS ON TOP OF THE EQUIPMENT. -
Page 3: Fcc Notice
Model Number: AJ-PCD20P Trade Name: PANASONIC Responsible Party: Panasonic Corporation of North America One Panasonic Way, Secaucus, NJ 07094 Support contact: Panasonic Broadcast & Television Systems Company 1-800-524-1448 This device complies with Part 15 of FCC Rules. Operation is subject to the following two... - Page 4 If you lose the fuse cover the plug must not be used until a replacement cover is obtained. replacement fuse purchased from your local Panasonic Dealer. indicates safety information. FOR U.K. ONLY How to replace the fuse 1. Open the fuse compartment with a screwdriver.
-
Page 5: Table Of Contents
Features ..........5 Supplied Accessories (AJ-PCD20P/AJ-PCD20E) ....5 Parts and their Functions . -
Page 6: Overview
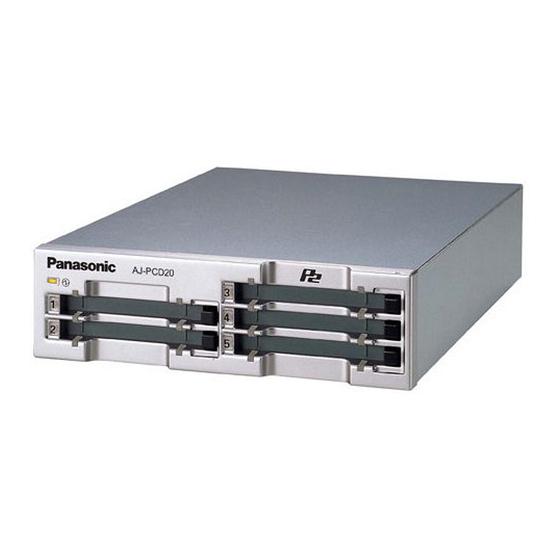
The P2 drive features five card slots. It enables high-speed data transfer using a USB 2.0 or IEEE1394b interface. It can be used as either an external or an internal drive. Supplied Accessories (AJ-PCD20P/AJ-PCD20E) AC adapter Mounting screws (8) Rubber feet (4) -
Page 7: Parts And Their Functions
Parts and their Functions Front Panel (1)Power Indicator This indicator lights up in green when the P2 drive is running. (2)Status Indicator This indicator lights up in green during access to a P2 card. <Note> Do not remove the P2 card during access of the card, otherwise files may be corrupted, or the P2 card may fail. -
Page 8: Inserting A P2 Card
Inserting a P2 Card When inserting a P2 card into the slot in the P2 drive, make sure you keep the card horizontal as you ease it in. Forcing the card in on an angle may cause a problem. Write-protection of P2 Card A P2 card has a write-protect switch. -
Page 9: To Connect The P2 Drive To A Personal Computer For External Use
Installation (continue) To Connect the P2 drive to a Personal Computer for External Use Attach the rubber feet to the dimples on the base of the P2 drive. Dimples Start the personal computer. Plug the AC adapter supplied with the P2 drive into the DC IN 16V socket on the P2 drive. - Page 10 In Windows, to remove a USB cable or an IEEE1394b cable, select “Safely Remove Hardware” in the “Task Tray” and stop the “Panasonic P2 Series USB/SBP2 Device” before removing the cable. On an Apple Macintosh, to remove an IEEE1394b cable, drag the icon of the P2 card to “Trash”...
-
Page 11: To Mount The P2 Drive In A Personal Computer 5-Inch Bay
Installation (continue) To Mount the P2 drive in a Personal Computer 5-inch Bay Turn OFF the personal computer’s power. Undo the six screws and remove the cover. USB 2.0 IEEE 1394b DC IN 16V Mount the P2 drive in a 5-inch bay on the personal computer. - Page 12 Installation (continue) Start the personal computer and verify that it recognises the P2 drive. <Note> In Windows XP, some card slots of the P2 drive may be assigned drive names that have already been assigned to existing networks. Reassign network drive names if your personal computer does not display all five card slots.
-
Page 13: Ieee1394B Driver For Windows
IEEE1394b Driver for Windows This driver is for the IEEE1394b interface for the P2 card on this unit. 1) Before installation System requirements for the IEEE1394b driver are as follows. Windows XP Professional SP2 or higher RAM: 512 MB or more (1 GB or more is recommended) ®... -
Page 14: Confirmation Of Installation Of The Ieee1394B Driver
IEEE1394b Driver for Windows 3) Confirmation of installation of the IEEE1394b driver Confirm whether the IEEE1394b driver is installed properly in accordance with the following procedures. Connected this unit to a personal computer using IEEE1394b. Open Control Panel from the Start menu, and select System properties. -
Page 15: Ieee1394B Driver For Macintosh
IEEE1394b Driver for Macintosh This driver is for the P2 card on this unit. Installation of the IEEE1394b driver Insert the installation CD. Double-click the Macintosh folder on the Double-click the AJ-PCD20 folder. Double-click “P2Drive Install.dmg” in the AJ-PCD20 folder. Double-click “P2Drive Install.pkg”. -
Page 16: Specifications
Specifications AC 100 V - 240 V, 0.9 A - 0.5 A, 50 - 60 Hz (AC adapter input) DC 16 V, 0.6 A (when used with AC adapter) DC 12 V, 0.8 A (when mounted in a personal computer) indicates safety items. - Page 17 Information on Disposal for Users of Waste Electrical & Electronic Equipment (private households) This symbol on the products and/or accompanying documents means that used electrical and electronic products should not be mixed with general household waste. For proper treatment, recovery and recycling, please take these products to designated collection points,where they will be accepted on a free of charge basis.
- Page 18 Lire ces informations en premier ! AVERTISSEMENT: POUR RÉDUIRE LES RISQUES D’INCENDIE OU DE CHOC ÉLECTRI- QUE, ÉVITEZ D’EXPOSER CET APPAREIL À LA PLUIE OU À L’HUMI- DITÉ. POUR RÉDUIRE TOUT RISQUE DE FEU OU DE CHOC ÉLECTRIQUE, ÉLOIGNER L’APPAREIL DES LIQUIDES - UTILISER ET RANGER UNI- QUEMENT DANS UN ENDROITNE RISQUANT PAS DE RECEVOIR DES GOUTTES OU D’ÊTRE ASPERGÉ...
- Page 19 Fonctions ..........3 Accessoires fournis (AJ-PCD20P/AJ-PCD20E) ..... 3 Pièces et leurs fonctions .
-
Page 20: Présentation
Le lecteur P2 est doté de cinq emplacements de carte. Il permet le transfert de données à haute vitesse via une interface USB 2.0 ou IEEE1394b. Il peut être utilisé comme lecteur externe ou interne. Accessoires fournis (AJ-PCD20P/AJ-PCD20E) Adaptateur courant alternatif Vis de montage (8) -
Page 21: Pièces Et Leurs Fonctions
Pièces et leurs fonctions Panneau avant (1) Voyant de mise sous tension Ce voyant s’allume (couleur verte) lorsque le lecteur P2 fonctionne. (2) Indicateur d’activité Ce voyant s’allume (couleur verte) lors de l’accès à la carte P2. <Remarque> Ne retirez pas la carte P2 pendant l’accès à la carte car cela peut endommager les fichiers ou provoquer une défaillance de la carte P2. -
Page 22: Insertion D'une Carte P2
Insertion d’une carte P2 Lors de l’insertion d’une carte P2 l’emplacement dans le lecteur P2, assurez-vous de maintenir la carte horizontale lorsque vous la glissez dans l’emplacement. Si vous forcez la carte sur un angle, vous risquez de rencontrer des problèmes. Protection de la carte P2 contre l’écriture Une carte P2 est équipée d’un commutateur de protection contre l’écriture. -
Page 23: Pour Connecter Un Lecteur P2 À Un Ordinateur Personnel Pour Une Utilisation Externe
Installation (suite) Pour connecter un lecteur P2 à un ordinateur personnel pour une utilisation externe Fixez les pieds en caoutchouc dans les rainures sur le socle du lecteur P2. Rainures Démarrez l’ordinateur personnel. Branchez le câble adaptateur CA fourni avec le lecteur P2 dans la prise d’entrée CC de 16V du lecteur P2. - Page 24 IEEE1394b, sélectionnez “Retirer le matériel en toute sécurité” dans la barre des tâches et arrêter le “Dispositif USB/SBP2 Séries P2 Panasonic” avant de retirer le câble. Sous Apple Macintosh, pour retirer un câble IEEE1394b, glissez l’icône de la carte P2 sur la “Corbeille”, confirmez...
-
Page 25: Pour Monter Le Lecteur P2 Dans L'emplacement 5 Pouces D'un Ordinateur Personnel
Installation (suite) Pour monter le lecteur P2 dans l’emplacement 5 pouces d’un ordinateur personnel Mettez l’ordinateur personnel HORS tension. Dévissez les six vis, puis retirez le couvercle. USB 2.0 IEEE 1394b DC IN 16V Montez le lecteur P2 dans l’emplacement 5 pouces de l’ordinateur personnel. - Page 26 Installation (suite) Démarrez l’ordinateur personnel et vérifiez qu’il reconnaît le lecteur P2. <Remarque> Sous Windows XP, il est possible que des noms de lecteurs déjà affectés à des réseaux existants soient affectés à certains emplacements de cartes du lecteur P2. Réaffectez les noms du lecteur réseau si votre ordinateur personnel n’affiche pas les cinq emplacements de cartes.
-
Page 27: Pilote Ieee1394B Pour Windows
Pilote IEEE1394b pour Windows Ce pilote est destiné à l’interface IEEE1394b pour la carte P2 sur cet appareil. 1) Avant l’installation configuration requise IEEE1394b est la suivante : S.E: Windows XP Professionnel SP2 ou supérieur RAM: 512 Mo ou plus (1 Go ou plus conseillé) Processeur : ®... -
Page 28: Confirmation D'installation Du Pilote Ieee1394B
Pilote IEEE1394b pour Windows 3) Confirmation d’installation pilote IEEE1394b Confirmez pilote correctement installé conformément procédure suivante. Appareil raccordé à l’ordinateur personnel via l’interface IEEE1394b. Ouvrez le panneau de configuration du menu Démarrage et sélectionner afficher les propriétés de système. Sélectionnez l’onglet Propriétés de système et appuyez sur le bouton Gestionnaire de périphérique. -
Page 29: Pilote Ieee1394B Pour Macintosh
Pilote IEEE1394b pour Macintosh Ce lecteur est destiné à la carte P2 sur cet appareil. Installation du pilote IEEE1394b Introduisez le CD d’installation. Double-cliquez sur le dossier Macintosh du Double-cliquez sur le dossier AJ-PCD20. Double-cliquez sur “P2Drive Install.dmg” dans le dossier AJ-PCD20. Double-cliquez sur “P2Drive Install.pkg”. -
Page 30: Spécifications
Spécifications CA 100 V - 240 V, 0,9 A - 0,5 A, 50 - 60 Hz (entrée adaptateur CA ) CC 16 V, 0,6 A (si utilisé avec un adaptateur CA) CC 12 V, 0,8 A (si monté dans un ordinateur personnel) Informations concernant la sécurité. - Page 31 Informations relatives à l’évacuation des déchets, destinées aux utilisateurs d’appareils électriques et électroniques (appareils ménagers domestiques) Lorsque ce symbole figure sur les produits et/ou les documents qui les accompagnent, cela signifie que les appareils électriques et électroniques ne doivent pas être jetés avec les ordures ménagères.
-
Page 32: 请先阅读
请先阅读! 警告: 为了减少火灾或触电的危险,不要让本机受到雨淋或放置在潮湿的地方。 为减少火患或电击的危险,本设备应避开一切使用液体的场合,并只能存 放在没有滴液或溅液危险的地方,也不要在本设备顶端放置任何液体容 器。 注意事项: 为了减少起火或电击的危险以及烦人的干扰,请只使用推荐的附件。 注意事项: 交流电源插座(主插座)必须安装在靠近设备的地方,以便于接近。请从 AC 插座拔下电源线插头,使设备与 AC 插座完全分离。 AC 适配器 未使用时,请从 AC 插座拔下 AC 电源插头。 本机必须接地。 为了保证本机操作安全,必须将三芯电源插头插入标准的三孔插座,而此插座是通过 一般的住宅地线妥善接地的。 本机使用的外接线必须是三芯的,正确布线与接地。外接线的错误连接是产生死亡事 故的主要原因。 本机工作正常并不意味电源已接地且安装得十分安全。为了您的安全,如果对电源的 有效接地有任何怀疑,请向合格的电工咨询。 表示安全信息。... - Page 33 同样,在本使用说明书中, Macintosh OS X”表示。 本产品相关软件信息 本产品中包括基于 GNU General Public License(GPL) 和 GNU Lesser General Public License(LGPL) 授权的软件,顾客有权获得、变更和再次发布这些软件的源代码。 GPL/LGPL 的内容收藏在主机附带的安装 CD 中。 请参看名为 LDOC 的目录。 (又, 其内容 以原文 (英文)记载。 ) 另外,请浏览下述网站以获得源代码。 http://panasonic.biz/sav/ 恕不答复有关顾客获得的源代码内容的咨询。 ® ® ® 、 Windows Windows ® ®...
-
Page 34: 概 览
在 AJ-PCD20 连接至个人计算机时,从 CD-ROM 安装所需的驱动程序。 有关详情,请参阅安装手册和本文档中的 “用于 Windows 的 IEEE1394b 驱动程 序” (第 10 页)或 “用于 Macintosh 的 IEEE1394b 驱动程序” (第 12 页) 。 概 览 AJ-PCD20 (以下称为 “P2 驱动器” )是使用 USB 2.0或 IEEE1394b 接口的数据传输设备, 专用于 P2卡。 P2 驱动器可以将使用适用于 P2 卡的记忆卡摄像机拍摄的剪辑数据高速传输至个人计算机 (Windows/Apple Macintosh)。... -
Page 35: 部件及其功能
部件及其功能 前面板 (1) 电源指示灯 此指示灯在 P2 驱动器运行时呈绿色亮 起。 (2) 状态指示灯 此指示灯在存取 P2 卡的过程中呈绿色 亮起。 < 注 > 在卡存取过程中不要取出P2卡, 否则文 件可能会损坏或 P2卡发生故障。 (3) 卡插槽 P2 驱动器的卡插槽专用于P2卡。 P2 驱动器无法用于除P2卡以外的卡。 (4) EJECT (弹出)按钮 要取出 P2卡, 按下此按钮使其弹出, 然 后再按一次。 < 注 > 仅限于 Windows 2000:打开 “我的 电脑”并使用鼠标右键选择要取出卡... -
Page 36: 插入 P2 卡
插入 P2 卡 将 P2 卡插入 P2 驱动器的插槽中时, 请确保 使卡保持水平以轻松插入。 以某个角度强行插入卡可能会导致故障。 P2 卡的写保护 P2 卡 配有 写保 护开 关。将此 开关 设置 为 “PROTECT(保护) ”可以避免写入和删除 数据。 注:当 P2 卡插在 P2 驱动器中时,写保护开 关无效。 要使开关设置生效, 请确保从 P2 驱 动器中取出 P2 卡,设置开关,然后重新插 入卡。 安 装 将... -
Page 37: 将 P2 驱动器连接到个人计算机以用于外置使用
安 装 ( 继续 ) 将 P2 驱动器连接到个人计算机以用于外置使用 将橡胶脚垫安装至 P2驱动器底部的凹 洞。 凹洞 启动个人计算机。 将P2驱动器随附的AC适配器插入P2驱 动器上的 DC IN 16V插孔。 P2 驱动器将启动。 USB 2.0 IEEE 1394b (要通过 USB 2.0连接) 将 USB 2.0 电缆 B 连接器插入 P2 驱动 器上的 USB 2.0 连接器中, 然后将 A 连 接器插入个人计算机的主板上的... - Page 38 算机无法显示全部五个卡插槽,请重 新指定网络驱动器名称。 在 Windows 中,要移除 USB 电缆或 IEEE1394b 电缆,请在 “任务栏” 中选择 “安全移除硬件” ,然后在移 除电缆之前停止 “Panasonic P2 Series USB/SBP2 Device” (Panasonic P2 系列 USB/1394b 设 备) 。 在 Apple Macintosh 中,要移除 IEEE1394b 电缆,请将 P2 卡的图标 拖至 “回收站” ,然后在移除电缆之 前确认 P2 卡图标已消失。...
-
Page 39: 在个人计算机 5 英寸盘中安装 P2 驱动器
安 装 ( 继续 ) 在个人计算机 5 英寸盘中安装 P2 驱动器 关闭个人计算机的电源。 旋下六颗螺丝并取下外壳。 IEEE 1394b USB 2.0 DC IN 16V 在个人计算机的5英寸盘中安装P2驱动 器。安装时使用 P2驱动器随附的螺 丝。 有关安装 5 英寸盘驱动器的指导方法, 请参阅计算机的说明手册。 固定螺丝的孔 (其它面相同。 ) < 注 > 在某些类型的个人计算机中, P2 驱 动器可能无法牢固固定。 如果所有 5 英寸盘都被占用,则需要 取下其中的内置驱动器,以便腾出空... - Page 40 安 装 ( 继续 ) 启动个人计算机,验证它是否能够识别 P2 驱动器。 < 注 > 在 Windows XP中, 系统已经为某些P2 驱动器的卡插槽指定了分配至现有网络 的驱动器名称。如果个人计算机无法显 示全部五个卡插槽,请重新指定网络驱 动器名称。...
-
Page 41: 用于 Windows 的 Ieee1394B 驱动程序
用于 Windows 的 IEEE1394b 驱动程序 此驱动程序用于本设备上 P2 卡的 IEEE1394b 接口。 1) 安装前 IEEE1394b 驱动程序的系统要求如下所示。 Windows XP Professional SP2 或 更高版本 RAM: 512 MB 或以上(建议使用 1 GB 或 以上) ® CPU: 建议使用 Pentium 上 < 注 > 不支持 Windows 2000 中的 IEEE1394b 连 接。... - Page 42 用于 Windows 的 IEEE1394b 驱动程序 3) 确认安装 IEEE1394b 驱动程序 按照以下步骤确认IEEE1394b驱动程序是否 已正确安装。 使用 IEEE1394b 将本设备连接至个人 计算机。 从 “开始”菜单中打开 “控制面板” , 然后选择 “系统”以显示系统属性。 在系统属性中选择 “硬件”标签,然后 按下 “设备管理器”按钮。 打开 “MATSHITA AJ-PCD20# IEEEE 1394 SBP2 Device”的树 状结 构以 开 启属性。 在属性中选择驱动程序标签,然后按下 驱动程序的详情按钮。 如果以下文件包含在显示的驱动程序文 件列表中,则 IEEE1394 驱动程序已正 确安装。...
-
Page 43: 用于 Macintosh 的 Ieee1394B 驱动程序
用于 Macintosh 的 IEEE1394b 驱动程序 本驱动程序适用于本设备的 P2 卡。 安装 IEEE1394b 驱动程序 插入安装 CD。 双击 CD 中的Macintosh文件夹。 双击 AJ-PCD20 文件夹。 双击 AJ-PCD20文件夹中的 “P2Drive Install.dmg” 。 双击 “P2Drive Install.pkg” 。 当驱动程序安装开始时,请遵循安装屏 幕中的指示。 < 注 > 通 过 安 装 本 驱 动 程 序,可 以 使 用 IEEE1394b (Firewire 800) 将本设备连接... -
Page 44: 规 格
规 格 AC 100 V - 240 V, 0.9 A - 0.5 A, 50 - 60 Hz (AC适配器输入) DC 16 V, 0.6 A (使用AC 适配器时) DC 12 V, 0.8 A (安装到个人计算机时) 表示安全项目。 外部尺寸 (宽 a 高 a 深) 148.4 mm a 42.5 mm a 199.5 mm (不包括突出部件)... - Page 45 在欧盟以外其它国家的废物处置信息 此符号仅在欧盟有效。 如果要废弃此产品,请与当地机构或经销商联系,获取正确的废弃方法。 中 文 C-14...
- Page 46 目 次 安全上のご注意 ......... 2 概 要...
-
Page 47: 安全上のご注意
安全上のご注意 お使いになる人や他の人への危害、財産への損害を未然に防止するため、必ずお守り いただくことを、次のように説明しています。 表示内容を無視して誤った使い方をしたときに生じる危害や損害の程度を、次の表 示で区分し、説明しています。 この表示の欄は、 「死亡または重傷などを負う可能性が想定さ 警告 れる」内容です。 この表示の欄は、 「傷害を負う可能性または物的損害のみが発 注意 生する可能性が想定される」内容です。 お守りいただく内容の種類を、次の絵表示で区分し、説明しています。 (下記は、絵表示の一例です。 ) このような絵表示は、気をつけていただきたい「注意喚起」内 容です。 このような絵表示は、してはいけない「禁止」内容です。 このような絵表示は、 必ず実行していただく 「強制」 内容です。 不安定な場所に置かない 落ちたり、倒れたりして、けが の原因になります。 付属品・オプションは、指定の製 品を使用する 本体に誤って指定外の製品を 使用すると、 火災や事故を起こ す原因になります 必ずお守りください 警告 分解や改造をしない 内部には電圧の高い部分があ り、 感電や火災の原因になりま す。また、使用機器を損傷する ことがあります。 分解禁止... - Page 48 電源コード・プラグが破損するよ うなことはしない (傷つけたり、加工したり、熱器 具に近づけたり、無理に曲げた り、ねじったり、引っ張ったり、 重いものを載せたり、 束ねたりし ない) 傷んだまま使用すると、火災・ 感電・ショートの原因になりま す。 コードやプラグの修理は、お買い上 げの販売店にご相談ください。 コンセントや配線機器の定格を 超える使い方や、交流 100 V ∼ 240 V以外での使用はしない たこ足配線等で、 定格を超える と、 発熱による火災の原因にな ります。 雷が鳴り出したら、 本機や電源プ ラグには触れない 感電の原因になります。 接触禁止 指定のカバー以外は外さない 火災や感電の原因になります。 分解禁止 点検・整備・修理は、お買い上げの 販売店にご依頼ください。 警告 異常があったときは、AC アダプ ターの電源プラグを抜く 内部に金属や水などの液体、 異 物が入ったとき...
- Page 49 内部に金属物を入れたり、 水など の液体をかけたりぬらしたりし ない ショートや発熱により、火災・ 感電・故障の原因になります。 機器の上や近くに液体の入った花び んなどの容器や金属物を置かないで ください。 本機の放熱を妨げない 押し入れや本箱など、 狭いとこ ろに入れないでください テ ー ブ ル ク ロ ス を 掛 け た り、 じゅうたんや布団の上に置か ないでください 内部に熱がこもり、 火災の原因 になります。 電源プラグやコネクターを抜く ときは、コードを引っ張らない コードが傷つき、 火災や感電の 原因になります。 必ずプラグやコネクターを持って抜 いてください。 警告 電源プラグのほこりなどは、 定期 的にとる...
- Page 50 ない コードが傷つき、 火災や感電の 原因になります。 また、コードが引っかかって、 けがの原因になります。 本製品に関するソフトウェア情報 本製品には、GNU General Public License(GPL)ならびに GNU Lesser General Public License(LGPL)に基づきライセンスされるソフトウェアが含まれており、お客様は、これらの ソフトウェアのソースコードの入手・改変・再配布の権利があることをお知らせいたします。 GPL/LGPL の内容については、 本機に付属したインストール CD に収められています。 LDOC と いう名前のフォルダを参照してください。 (なお、原文(英文)で記載しております。 ) また、ソースコードの入手については、下記のホームページをご覧ください。 http://panasonic.biz/sav/ なお、お客様が入手されたソースコードの内容等についてのお問い合わせは、ご遠慮く ださい。 注意 本機の上に重いものを置いたり、 乗ったりしない 落下したり倒れたりして壊 れ、けがの原因になります。 重量で外装ケースが変形し、 内部部品が破損すると、火 災・故障の原因になります。 専用のACアダプター以外は使用 しない...
-
Page 51: 概 要
パーソナルコンピュータと バをパーソナルコンピュータにインストールしてください。 詳しくはインストールマニュアル 、および本書の「Windows 用 IEEE1394b ドライ バー」 (13 ページ) 、あるいは「Macintosh 用 IEEE1394b ドライバー」 (15 ページ) をご参照ください。 概 要 AJ-PCD20(以降“本機”と記載)は、USB 2.0、および IEEE1394b インタ−フェ−スを使用し た P2 カード専用のデータ転送装置です。 本機は、P2 カード用メモリーカードカメラレコ−ダ−で撮影したクリップデ−タをパーソナルコン ピューター(Windows/Apple Macintosh)へ高速転送することを可能にします。 P2 カードに記録されたクリップの転送やコピー、また、ダイレクト編集をサポートします。 特 長 5 つのカ−ドスロットを装備 USB 2.0/IEEE1394bインタ−フェ−スを用いた高速デ−タ転送が可能 外付け型としても、内蔵型としても使用可能 同梱品(AJ-PCD20) AC アダプタ AC アダプタ用電源ケ−ブル... -
Page 52: 各部の名称と働き
各部の名称と働き フロントパネル (1) (2) (1)パワ−インジケ−タ 本機が動作可能な状態のとき、緑色に点灯し ます。 (2)ステ−タスインジケ−タ P2 カードにアクセス中は、緑色に点滅しま す。 < ノート > ファイルが壊れたり、P2 カード故障の原因 となりますので、アクセス中は P2 カードを 抜かないでください。 (3)カードスロット 本機のカードスロットは P2 カード専用で す。 P2 カード以外では動作しません。 (4)EJECT ボタン 一度ボタンを押し、ボタンが飛び出た状態に して、もう一度押し込むと P2 カードを取り 出すことができます。 < ノート > Windows 2000 で使用されている場合 は、まず、... -
Page 53: P2 カードの挿入
P2 カードの挿入 本機のカードスロットにP2カードを挿入すると きは、必ず、P2 カードを水平に挿入してくださ い。 斜めのまま、 無理に挿入すると故障の原因になり ます。 P2 カードへの書き込み保護 P2 カードにはライトプロテクトスイッチがあり ます。このスイッチを「PROTECT」側にする と、書き込みや消去を防止することができます。 なお、ライトプロテクトスイッチは、挿入状態の まま切り替えても機能しません。 スイッチの切り 替えを有効にするには、一度 P2 カードを抜き、 スイッチを切り替えた後、再度挿入してくださ い。 設置について パーソナルコンピューター(Windows/Apple Macintosh)との接続は、2 つの方法があります。 1. 本機を外付け型としてパーソナルコンピューター(Windows/Apple Macintosh)と接続する 2. デスクトップ型パーソナルコンピューター(Windows)の 5 インチベイに内蔵する PROTECT 書き込み禁止スイッチ 書き込み禁止スイッチ を 「PROTECT] 側にす を... -
Page 54: 外付け型としてパーソナルコンピューターに接続する場合
設置について (続き) 外付け型としてパーソナルコンピューターに接続する場合 ゴム足を、本機の底面にあるくぼみに合わ せて、はり付けます。 くぼみ パーソナルコンピューターを起動します。 本機に付属の AC アダプタを、 本機の DC IN 16V 端子に接続します。 本機が起動します。 IEEE 1394b USB 2.0 (USB 2.0 で接続する場合) 本機の USB コネクターに USB 2.0 ケーブ ルの B コネクターを接続し、USB 2.0 ケーブルのもう片方(A コネクター)を、 パーソナルコンピューターの USB 2.0 ポートに接続します。 USB 2.0 USB 2.0 コネクター... - Page 55 Windows XP で使用されている場合、既に割 り当てられているネットワークのドライブ名 とカードスロット (本機) のドライブ名が重複 するときがあります。カードスロット全て(5 個) が表示されない場合は、 ネットワークドラ イブの割り当てを設定し直してください。 DC IN 12V Windowsで使用されている場合、 USBケーブ ル、または IEEE1394b ケーブルを抜くとき は、タスクトレイの「ハードウェアの取り外 し」を 選 択 し て「Panasonic P2 Series USB/SBP2 Device」を停止してからケーブ ルを抜いてください。 Apple Macintosh で使用されている場合、 IEEE1394b ケーブルを抜くときは、P2 カー ドのアイコンを「ゴミ箱」にドラッグし、P2 カードのアイコンが消えたことを確認してか らケーブルを抜いてください。 6 ピンタイプ...
-
Page 56: パーソナルコンピューターの 5 インチベイに内蔵する場合
設置について (続き) パーソナルコンピューターの 5 インチベイに内蔵する場合 パーソナルコンピューターの電源を OFFに します。 ネジ 6 本を外し、化粧カバーを外します。 IEEE 1394b USB 2.0 本機をパーソナルコンピューターの5インチ ベイに取り付けます。取り付けるときは、 本機に同梱のネジを使用してください。 5インチベイドライブの取り付け方法につ いては、パーソナルコンピューターの取扱 説明書を参照してください。 ネジ止め用穴 (反対側も同様) < ノート > パーソナルコンピューターの機種によっ ては、確実な固定ができない場合があり ます。 5 インチベイに空きがない場合は、あらか じめ内蔵されたドライブを取り外す必要 があります。 取り付け後、フロントパネルが操作可能 な機種で、ご使用いただけます。 J-11 DC IN 16V DC IN 12V USB 2.0 コネクター... - Page 57 設置について (続き) パーソナルコンピューターを起動して、本 機を認識しているか確認してください。 < ノート > Windows XP で使用されている場合、すで に割り当てられているネットワークのドラ イブ名とカードスロット(本機)のドライ ブ名が重複するときがあります。カードス ロット全て(5 個)が表示されない場合は、 ネットワークドライブの割り当てを設定し 直してください。 日 本 語 J-12...
-
Page 58: Windows 用Ieee1394Bドライバー
Windows 用 IEEE1394b ドライバー 本ドライバーソフトは、P2 カードの内容を、本 機で IEEE1394b インターフェースを使用して 参照するためのソフトウエアです。 1) インストールの前に IEEE1394b ド ラ イ バ ー を イ ン ス ト ー ル す る パーソナルコンピューターは、 下記の条件を満た している必要があります。 Windows XP Professional SP2 以 上 RAM 512MB 以上(1GB 以上推奨) ®... -
Page 59: Ieee1394B ドライバーのインストール状態確認
Windows 用 IEEE1394b ドライバー 3) IEEE1394b ドライバーの インストール状態確認 IEEE1394b ドライバーが正しくインストール されているかの確認は、下記の手順で行います。 本機を IEEE1394b でパーソナルコン ピューターに接続します。 「スタート」メニューより「コントロールパ ネル」を開き、 「システム」を選択してシス テムのプロパティを表示します。 システムのプロパティで「ハードウェア」 タブを選択し、 「デバイスマネージャ」ボタ ンをクリックします。 デバイスマネージャで「ディスクドライブ」 のツリーを開き、 「MATSHITA AJ- PCD20 #1 IEEE 1394 SBP2 Device」 を右クリックしてプロパティを開きます。 プロパティの「ドライバ」タブを選択し、 「ドライバの詳細」ボタンをクリックしま す。 表示されるドライバファイル一覧の中に、 「p2sbp2.sys」 「p2cmgr.dll」 「p2csvc.exe」... -
Page 60: Macintosh用 Ieee1394B ドライバー
Macintosh 用 IEEE1394b ドライバー 本ドライバーソフトは、P2 カードの内容を、本 機で参照するためのソフトウエアです。 IEEE1394b ドライバーの インストール インストール CD を挿入します。 CD 内の Macintosh フォルダーをダブルク リックします。 AJ-PCD20 フォルダーをダブルクリックし ます。 AJ-PCD20 フォルダーの中にあるディスク イメージモジュール「P2Drive Install.dmg」をダブルクリックします。 「P2Drive Install.pkg」をダブルクリック します。 本ドライバーソフトのインストールを開始 しますので、インストール画面の指示に 従ってインストールを行ってください。 < ノート> 本ドライバーをインストールすることにより、 Macintosh 環境と本機を IEEE1394b (Firewire800) で接続して、高速にデータを 転送できるようになります。 P2 カードのフォーマットは、必ず他の... -
Page 61: アフターサービス
アフターサービス お買い上げの販売店がご不明の場合は、当社(裏表紙)までご連絡ください。 ※ 内容により、お近くの窓口をご紹介させていただく場合がございますので、ご了承ください。 保証書(別添付) お買い上げ日 ・ 販売店名などの記入を必ずお確 かめの上、 お買い上げの販売店からお受け取り ください。 内容をよくお読みいただいた上、 大切に保存し てください。 万一、 保証期間内に故障が生じた場合には、 保 証書記載内容に基づき、 「無料修理」させてい ただきます。 保証期間:お買い上げ日から本体 1 年間 補修用性能部品 当社では、 メモリーカードドライブの補修用性 能部品を、製造打ち切り後、8 年間保有してい ます。 ※ 補修用性能部品とは、その製品の機能を維 持するために必要な部品です。 修理を依頼されるとき この取扱説明書を再度ご確認の上、 お買い上げの 販売店までご連絡ください。 ◆ 保証期間中の修理は. . . 保証書の記載内容に従って、... -
Page 62: 定 格
定 格 AC 100 V - 240 V、0.9 A - 0.5 A 50 - 60 Hz (AC アダプタ入力) DC 16 V、0.6 A (AC アダプタ使用時) DC 12 V、0.8 A (パーソナルコンピューター内蔵時) は安全項目です。 外形寸法( 幅×高さ×奥行き ) 148.4 mm× 42.5 mm×199.5 mm (突起部は含みません... - Page 63 ヨーロッパ連合以外の国の廃棄処分に関する情報 このシンボルマークは EU 域内でのみ有効です。 製品を廃棄する場合には、最寄りの市町村窓口、または販売店で、正しい廃棄 方法をお問い合わせください。 日 本 語 J-18...
- Page 64 PANASONIC BROADCAST & TELEVISION SYSTEMS COMPANY UNIT COMPANY OF PANASONIC CORPORATION OF NORTH AMERICA Executive Office: One Panasonic Way 4E-7, Secaucus, NJ 07094 (201) 348-7000 EASTERN ZONE: One Panasonic Way 4E-7, Secaucus, NJ 07094 (201) 348-7196 Southeast Region: (201) 348-7162 WESTERN ZONE: 3330 Cahuenga Blvd W., Los Angeles, CA 90068 (323) 436-3500...