Table of Contents
Advertisement
Advertisement
Table of Contents

Related Manuals for GoPro HERO 5 SESSION


Summary of Contents for GoPro HERO 5 SESSION
- Page 1 USER MANUAL...
- Page 2 Wenn Sie dieses Benutzerhandbuch Чтобы загрузить это руководство in einer anderen Sprache пользователя на другом JOIN THE GOPRO MOVEMENT herunterladen möchten, besuchen языке, посетите страницу Sie gopro.com/help. gopro.com/help. このユーザーマニュアルの他言 Per scaricare questo manuale facebook.com/GoPro...
-
Page 3: Table Of Contents
TABLE OF CONTENTS TABLE OF CONTENTS Your HERO5 Session Important Messages Getting Started Resetting Your Camera QuikCapture Mounting Your Camera Camera Icons Removing the Door Changing Modes + Settings Maintenance Capturing Video Battery Capturing Photos Troubleshooting Capturing Time Lapse Content Customer Support Controlling Your Camera with Your Voice Trademarks... -
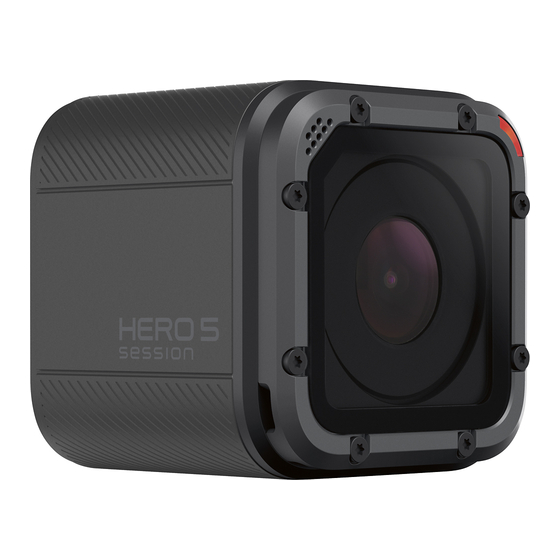
Page 4: Product View And Parts
The battery charges to 100% in about 2 hours. For more battery information, see Battery (page 70). PRO TIP: For fastest charging, use GoPro’s Supercharger (sold separately). You can charge your camera with a USB-compatible wall charger or auto charger. - Page 5 UPDATING YOUR CAMERA SOFTWARE WARNING: Use caution when using your GoPro as part of To get the latest features and best performance from your GoPro, make your active lifestyle. Always be aware of your surroundings to sure your camera is always using the most current software. When you avoid injury to yourself and others.
-
Page 6: Quikcapture
GETTING STARTED QUIKCAPTURE DISPLAYING STATUS INFO Press the Menu button to cycle through status information about your camera. QuikCapture is the fastest way to capture video or time lapse content with HERO5 Session. Because the camera is powered on only when it is recording, you also conserve battery power. -
Page 7: Camera Icons
CAMERA ICONS CAMERA ICONS Language Time Lapse Photos Auto Low Light LEDs Time Lapse Video Auto-Rotation Looping Video Beeps Megapixels Burst Photos Video + Photo Night Lapse Photo Color Video Format Night Photo Date/Time Video Resolution Photo (Single) Delete Video Stabilization Exposure Value Protune White Balance... -
Page 8: Changing Modes + Settings
NAVIGATING YOUR GOPRO CHANGING MODES + SETTINGS Your HERO5 Session has three modes: CHANGING MODES + SETTINGS You can change almost all video and photo settings using the buttons on • Video the camera. To access all settings and modes, see Accessing All Modes and •... -
Page 9: Capturing Video
CAPTURING VIDEO CAPTURING VIDEO 3. Press the Shutter button. Your camera beeps and the status lights In Video mode, HERO5 Session has three capture modes: blink during recording. 4. To stop recording, press the Shutter button again. The camera Video: Captures video. Available in all resolutions. stops recording, beeps several times, and automatically powers off to maximize battery life. -
Page 10: Capturing Photos
CAPTURING PHOTOS CAPTURING PHOTOS In Photo mode, HERO5 Session has three capture modes. Photos are 4. To power off the camera, press the Menu button to move to Exit captured at a resolution of 10MP. Photo Mode, then press the Shutter button to select it. CAPTURING PHOTOS IN THE MODE THAT YOU USED LAST TIME Photo: Captures a single photo. -
Page 11: Capturing Time Lapse Content
CAPTURING TIME LAPSE CONTENT CAPTURING TIME LAPSE CONTENT e. Press the Menu button to move to the check mark, then press the In Time Lapse mode, HERO5 Session has three capture modes: Shutter button to confirm the selection. 3. Press the Shutter button. Your camera beeps once, then beeps once Time Lapse Photo: Captures a series of photos at specified for each photo that is captured. -
Page 12: Controlling With Voice
Voice Control works best in close proximity to your GoPro. • Mode commands are useful if you want to quickly select a mode and Note: When you first turn on your camera, your GoPro allows you to select a voice then use the Shutter button to capture. -
Page 13: Playing Back Your Content
PLAYING BACK VIDEOS AND PHOTOS ON AN HDTV before issuing a new command. To play back videos and photos on your HDTV, connect the GoPro HDMI adapter (sold separately) to the USB-C port of your camera. 1. Connect the GoPro HDMI adapter to the USB-C port of your camera. -
Page 14: Offloading Your Content
PRO TIP: To offload files to a computer using a card reader (sold separately) and your computer’s file explorer, connect the card reader to PRO TIP: After you subscribe to GoPro Plus, you can use Quik for desktop the computer, then insert the microSD card. You can then transfer files to to offload your files to your computer. -
Page 15: Accessing All Modes And Settings
Note: When your camera is connected to the app or remote, it remains on in standby mode after capturing video or photos. When you turn off your camera with the Capture app or a GoPro remote, 1. Download Capture to your mobile device from the Apple ©... -
Page 16: Video Mode
VIDEO MODE: CAPTURE MODES VIDEO MODE: CAPTURE MODES LOOPING VIDEO Video mode contains three capture modes: Video, Video + Photo, and Looping. Each capture mode has its own settings. Use Looping to you continuously record video, but save only the moments that you want. - Page 17 VIDEO MODE: SETTINGS VIDEO MODE: SETTINGS VIDEO RESOLUTION Use this table to help you determine the best resolution for your activity. Video resolution (RES) refers to the number of horizontal lines in the video. Also consider the capabilities of your computer or TV to be sure your For example, 720p means that the video has 720 horizontal lines, each with hardware can support the selected resolution.
- Page 18 ASPECT RATIO Mid-range field of view that removes the GoPro video resolutions use two aspect ratios: either 16:9 or 4:3. Standard fisheye effect found in the Wide FOV. Good for televisions and editing programs use 16:9. Footage shot in 4:3 is 33%...
- Page 19 VIDEO MODE: SETTINGS VIDEO MODE: SETTINGS HERO5 SESSION VIDEO RESOLUTIONS Video Screen Aspect Resolution (NTSC/ Video Resolution Ratio Screen Aspect (RES) PAL) Resolution (NTSC/ Resolution Ratio SuperView, (RES) PAL) 1080p 60/50 1920x1080 16:9 Wide, Linear 30/25 Wide 3840x2160 16:9 SuperView, 30/25 1080p Wide, Medium,...
- Page 20 When recording in high-performance video modes, capture shorter video clips when in stationary use, and/or limit your use of features that increase power consumption, such as the GoPro Capture app. To control your camera remotely at higher temperatures, use a GoPro remote or Remo (Waterproof Voice Activated Remote) (both sold separately) instead of Capture.
- Page 21 (page 52). Video + Photo Intervals PRO TIP: Easily create GoPro-style videos using GoPro Studio (included Available photo intervals for Video + Photo range are 5 (default), 10, 30, in Quik for desktop). Learn more and download this free software to your and 60 seconds.
-
Page 22: Photo Mode
PHOTO MODE: CAPTURE MODES PHOTO MODE: CAPTURE MODES Photo mode contains three capture modes: Photo, Night, and Burst. All BURST photos are captured at 10MP. Each capture mode has its own settings. Burst captures up to 30 photos in 1 second, so it is perfect for capturing fast-moving activities. - Page 23 PHOTO MODE: SETTINGS PHOTO MODE: SETTINGS FIELD OF VIEW (FOV) (PHOTOS) RATE Your camera includes several FOV options for photos. All photos are This setting applies only to Burst. Available rates: captured at 10MP. • 30 photos in 1, 2, 3, or 6 seconds •...
-
Page 24: Time Lapse Mode
You can also capture photos over a long time frame, then convert them into a video using GoPro Studio (included with Quik for desktop). The default for Time Lapse Photo is Wide, with the default interval set at 0.5 second. - Page 25 TIME LAPSE MODE: SETTING TIME LAPSE MODE: SETTINGS TIME LAPSE VIDEO RESOLUTION AND FOV Description In Time Lapse mode, resolution and FOV apply only to Time Lapse Video. Mid-range field of view that removes the fisheye Video resolution refers to the number of horizontal lines in the video. Higher distortion.
-
Page 26: Protune
TIME LAPSE MODE: SETTINGS TIME LAPSE MODE: SETTINGS Night Lapse Photo Interval SHUTTER (TIME LAPSE) Interval determines the rate at which photos are captured. Night Lapse intervals are Continuous, 5, 10, 15, 20, and 30 seconds, and 1, 2, 5, 30, and Within Time Lapse mode, this setting applies only to Night Lapse Photo. - Page 27 Protune gives content creators more flexibility and workflow efficiency than ever before. Color Setting Resulting Color Profile Protune is compatible with professional color correction tools, GoPro Studio GoPro Color Provides GoPro color-corrected profile (same great (included with the Quik desktop app) and other video and photo editing (default) color as when Protune is turned off).
- Page 28 PROTUNE PROTUNE ISO Limit Shutter ISO applies only to the Video capture mode. This setting determines The Shutter setting in Protune applies only to Video and determines the the camera’s sensitivity to light in low-light environments, and creates a amount of time that the shutter is open. The options available for this tradeoff between brightness and resulting image noise.
-
Page 29: Customizing Your Camera
CUSTOMIZING YOUR CAMERA PROTUNE Exposure Value Compensation (EV Comp) DATE AND TIME Exposure Value Compensation affects the brightness of your video or Your camera’s date and time are automatically set when you connect your photo. Adjusting this setting can improve image quality when shooting in camera to Capture or Quik for desktop. - Page 30 CUSTOMIZING YOUR CAMERA CUSTOMIZING YOUR CAMERA This setting determines whether the camera status lights are on or off. AUTO-ROTATION This setting lets you determine if you want your captured video or photo to VOICE CONTROL LANGUAGE be upside down or right-side up. This setting applies only when using the camera with Voice Control or Remo Setting Description...
- Page 31 SD FULL Card is full. Delete files or swap card. connected to Capture or a GoPro remote. REPAIRING FILE Camera is unable to read card formatting. If the camera is connected to the app or remote, Reformat the card in the camera.
-
Page 32: Restoring Factory Settings
RESETTING YOUR CAMERA MOUNTING YOUR CAMERA RESTORING FACTORY SETTINGS ATTACHING YOUR CAMERA TO MOUNTS Follow the steps below to reset all settings and the camera’s password. To attach your HERO5 Session camera to a mount, you need a frame This option is useful if you are reselling your camera and want to remove all and a mounting buckle and/or thumb screw, depending on the mount customization. - Page 33 Floaty to keep your camera afloat (both sold separately). Tether automatically changes the orientation of your image to be right-side up. the frame to the mount by looping the tether over the small bar behind the mounting fingers. For more information, visit gopro.com.
- Page 34 WARNING: To avoid injury, do not use a tether when mounting the camera on a helmet. For more information on mounts, see gopro.com. WARNING: If using your camera with a GoPro mount or strap intended for use with a helmet, always select a helmet that meets the applicable safety standard.
-
Page 35: Removing The Door
REMOVING THE DOOR MAINTENANCE Follow these guidelines to get the best performance from your camera: In some situations, such as connecting the Karma drone (sold separately), it might be more convenient to access the ports if the door is removed. •... - Page 36 You can capture video and photos while the camera is plugged in to a device can damage the GoPro camera battery and could USB charging adapter, or the GoPro Wall Charger or Auto Charger with result in fire or leakage. With the exception of the GoPro Supercharger (sold separately), only use chargers marked: the included USB cable.
-
Page 37: Troubleshooting
HOW DO I TURN OFF MY CAMERA? upper left of the status screen. To exit the menu and turn off the camera, If HERO5 Session is not connected to Capture or a GoPro remote, it press the Menu button . - Page 38 CUSTOMER SUPPORT GoPro is dedicated to providing the best possible service. To reach GoPro Support, visit gopro.com/help. TRADEMARKS GoPro, HERO, Protune, and SuperView are trademarks or registered trademarks of GoPro, Inc. in the U.S. and internationally. Other names and marks are the property of their respective owners.