Table of Contents
Advertisement
Advertisement
Table of Contents

Related Manuals for Orion HP-2300


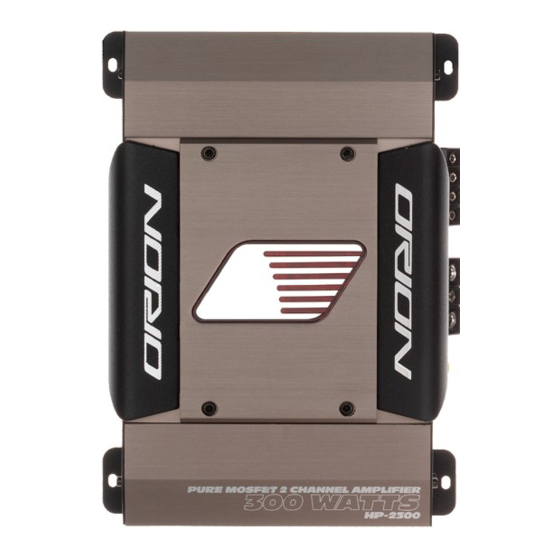
Summary of Contents for Orion HP-2300
- Page 1 HP-2300 HP-2300 HP-2400 HP-2400 HP-2600 HP-2600 HP-4600 HP-4600...
-
Page 2: Table Of Contents
HP-2300, HP-2400, HP-2600 Connections ........4... -
Page 3: Introduction
HP-2300 - 50 Watts per channel, two-channel amplifier with dual built-in high- ● pass and low-pass 12dB/octave crossover centered at 100Hz and Intelli-Bass. The HP-2300 is capable of 3, 2, or 1 channel operation with a maximum power of 150 Watts into 4W mono. ●... -
Page 4: Record Your Serial Number And Date
Serial Number: __________________________________________________ Date of Purchase: __________________________________________________ Purchased from: __________________________________________________ END PANEL LAYOUTS HP-2300, HP-2400, HP-2600 Controls HI INPUT INPUT L CH R CH Hi Input (high level input) - Accepts 1V to 10V input from the head unit’s speaker output. -
Page 5: Hp-2300, Hp-2400, Hp-2600 Connections
ATC Fuse - ATC fuses protect the amplifier against internal electrical damage and is meant to protect the amplifier only. All other power connections should be fused at the source. The HP-2300 has (1) 20-amp, the HP-2400 has (1) 30-amp, the HP-2600 has (2) 20-amp fuses. -
Page 6: Hp4600 Connections
RCA Input Channels 1 through 4 - accepts RCA input from a head unit, pream- plifier, or equalizer. These inputs are configured by the Input Mode switch posi- tion (refer to item 11 below). RCA Line Output - provides easy connection to additional amplifiers. Gain Control - continuous adjustment for full power output. - Page 7 supply a remote turn on signal. DO NOT connect this terminal to constant (+) 12 volt. GND - power return connection. Connect this terminal directly to the sheet metal chassis of the vehicle, using the shortest wire necessary to make this connection. Always use wire of the same gauge or larger than the (+) 12 volt power wire.
-
Page 8: Cea Specifications
CEA SPECIFICATIONS H H P P - - 2 2 3 3 0 0 0 0 Power Output: 50 Watts RMS x 2 at 4 ohms and < 1% THD+N Signal to Noise Ratio: -70 dBA (reference 1 Watt into 4 ohms) Additional Power Output: 75 Watts RMS x 2 at 2 ohm at 14.4 Supply<1% THD+N H H P P - - 2 2 4 4 0 0 0 0 Power Output: 75 Watts RMS x 2 at 4 ohms and <... -
Page 9: Specifications
SPECIFICATIONS Amplifier Section HP-2300 Power Output 4W 50 x 2 (Watts) 1 Power Output 2W 75 x 2 (Watts) 2 Power Output 4W 150 x 1 (Watts) Bridged Amplifier > 55% into 2W load Efficiency at max. power Externally Bridgeable... -
Page 10: Specifications-Continued
SPECIFICATIONS—CONTINUED Amplifier Section Power Output 4W (Watts) 1 Power Output 2W (Watts) 2 Power Output 4W (Watts) Bridged Amplifier Efficiency Externally Bridgeable Remote Bass Function Distortion at Rated Power Frequency Response Linear Bandwidth Damping Factor Input Sensitivity Supply Voltage Range Protection Terminal Wire Gauge... -
Page 11: Amplifier Settings
AMPLIFIER SETTINGS Signal Input and Output Configurations Depending on your model, the input section of the amplifier consists of gain controls, high pass and low pass crossovers controls, Intelli-Bass control and RCA inputs and outputs. The input section makes it easy to adapt this amplifier to most system configurations. Input Gain These Orion amplifiers have level adjustments to allow for easy integration with any source unit. -
Page 12: High-Pass Crossover
High-Pass Crossover When the switch is to the left (FULL position), the high-pass crossover is bypassed. When the switch is in the middle (HIGH position), the high-pass crossover is active. The high-pass crossover is continuously variable from 50Hz to 500Hz. Input Gain The Orion amplifiers have gain adjustments with an input sensitivity range from 200mV up to 5V on the RCA inputs and 1V to 10 on the high-level inputs. -
Page 13: Infinite Baffle Example High-Pass Set At 30Hz
Infinite Baffle Example High-Pass Set at 30Hz By removing low frequency signal that the woofer cannot produce, the woofer can play its capable range louder. The first example is an infinite baffle situation. The left graph displays the frequency response of a 12-inch woofer in an infinite baffle application without the high-pass filter, with the filter and with the filter and the INTELLi Q set to +3dB. -
Page 14: Sealed Example High-Pass Set At 30Hz
Sealed Example High-Pass Set at 30Hz In this example, the frequency has been increased to 30 Hz. Up to 6 dB of boost is capable at this frequency. With +6dB of boost, the woofer has more output down to 23 Hz. The overall usable output is increased. -
Page 15: Amplifier Wiring
Power Connections ● Orion HP-2300 Fuse Size: 1 x 20 AMP ATC. ● Orion HP-2400 Fuse Size: 1 x 30 AMP ATC. Orion HP-2600 Fuse Size: 2 x 20 AMP ATC. -
Page 16: Speaker Connections Hp-2300, Hp-2400, And Hp-2600
Speaker Connections HP-2300, HP-2400, and HP-2600 One Channel/Two Channel Configuration The Orion HP-2300/2400/2600 amplifiers offer two positive and two negative output termi- nals for ease of connecting channel 1 and/or 2 outputs to the speakers. The amplifier is sta- ble to 2W. See diagrams below. - Page 17 Three Channel (Channel 1, Channel 2, Bridged) Channels 1 and 2 are configured for two-channel stereo operation. ● Front channel lowest recommended impedance is 2W stereo. ● The third output is configured for a single channel bridged output. ● The bridged outputs lowest recommended impedance is 4W. ●...
-
Page 18: Speaker Connections Hp-4600
Speaker Connections HP-4600 The Orion HP-4600 amplifier offer four positive and four negative output terminals for ease of connecting channel 1, 2, 3, and 4 outputs to the speakers. The amplifier is stable to 2W. See diagrams below. Four Channel Stereo Configuration Channel 1/2 and channel 3/4 lowest recommended impedance is 2W stereo. - Page 19 Three Channel Stereo/Bridged Configuration Channels 1/2 are configured for 2-channel stereo operation. ● Channel 1/2 lowest recommended impedance is 2W stereo. ● Channels 3/4 are configured for a single channel bridged output. ● Channel 3/4 lowest recommended impedance is 4W. ●...
- Page 20 Tri-Mode Six Channel Configuration Lowest recommended impedance is 2W stereo and 4W bridged mono. ● Front and rear outputs must be set for full range operation. ● Passive crossovers must be used on all components and frequencies must not overlap. ●...
-
Page 21: Amplifier Installation
AMPLIFIER INSTALLATION Choosing Mounting Locations The location of your amplifier will depend on several important issues. Due to the low pro- file size of the Orion amplifiers, there are many possible installation locations that will yield satisfactory amplifier performance. Always mount the amplifier in a place that protects the amplifier from the elements. -
Page 22: Tools Of The Trade
Power for systems with a single amplifier can be supplied by most automotive electrical sys- tems. Systems with multiple amplifiers may require a higher capacity battery, alternator or the use of a storage capacitor. We strongly recommend the use of a Directed Audio Essentials power capacitor with an extra battery in larger stereo systems. -
Page 23: Set Up And Troubleshooting
Step 8 Connect power wires to the amplifier (ground first, then 12 V(+) and REM). Do not connect the battery at this time. Step 9 Connect the RCA and speaker wires to the amplifier. Check the quality of your speakers and signal connections. This will determine the ultimate per- formance of your Orion amplifier. -
Page 24: Adjusting The Sound Of The System
Step 7 If the output is clear and undistorted, continue to the Adjusting the Sound of the System section of this manual. Adjusting the Sound of the System Once you have checked the system's operation, adjust the sound of the system. Adjusting the sound of the system is accomplished by setting the level controls and adjusting the internal crossovers. -
Page 25: Troubleshooting Tips
Troubleshooting Tips Symptom Probable Cause No output Low or no remote turn-on Fuse blown Power wires not connected Check power wire and ground Audio input not connected Check RCA connections and Speaker wires not connected Speakers are blown Audio cycles on and off Thermal protection engages when amplifier heat sink... - Page 26 Symptom Probable Cause Distorted output Internal crossover not set properly for speakers Speakers are blown Poor bass response Speakers wired with wrong Check speaker polarity and fix polarity causing cancellation as needed. at low frequencies Crossover set incorrectly Impedance load at amplifier Check speaker impedance load, is too low Battery fuse blowing...
- Page 27 © 2005 Directed Electronics, all rights reserved...
- Page 28 NOTES ____________________________________________________ ____________________________________________________ ____________________________________________________ ____________________________________________________ ____________________________________________________ ____________________________________________________ ____________________________________________________ ____________________________________________________ ____________________________________________________ ____________________________________________________ ____________________________________________________ ____________________________________________________ ____________________________________________________ ____________________________________________________ ____________________________________________________ ____________________________________________________ ____________________________________________________ ____________________________________________________ ____________________________________________________ ____________________________________________________ ____________________________________________________ ____________________________________________________ ____________________________________________________ ____________________________________________________ ____________________________________________________ ____________________________________________________ ____________________________________________________ ____________________________________________________ ____________________________________________________ ____________________________________________________ ____________________________________________________ ____________________________________________________ ____________________________________________________ © 2005 Directed Electronics, all rights reserved...
- Page 29 Warranty LIMITED TWO YEAR CONSUMER WARRANTY: Directed Electronics promises to the original purchaser, to replace this product should it prove to be defective in workmanship or material under normal use, for a period of two years from the date of purchase by the dealer as indicated by the date code marking of the product PROVIDED the product was installed by an authorized Directed dealer.