Sony HAP-S1 User Manual
Hdd audio player system
Hide thumbs
Also See for HAP-S1:
- Service manual (130 pages) ,
- Reference manual (50 pages) ,
- Quick start manual (19 pages)
Table of Contents
Advertisement
HDD AUDIO PLAYER SYSTEM HAP-S1
About the HDD AUDIO PLAYER SYSTEM
Features of the HDD AUDIO PLAYER SYSTEM [1]
Playable audio file formats [2]
How to make and enter selections [3]
How to input characters [4]
System requirements for computers connected to the HDD AUDIO PLAYER [5]
Required network environment [6]
Supplied accessories [7]
Supported applications
HAP Music Transfer [8]
HDD Audio Remote [9]
Help for HAP Music Transfer/HDD Audio Remote [10]
Preparations
What you need to do before starting to use the HDD AUDIO PLAYER [11]
Prep 1. Connecting speakers [12]
Prep 2. Connecting to a network with a LAN cable (only when using a wired LAN) [13]
Prep 3. Turning on the HDD AUDIO PLAYER [14]
Prep 4. Configuring the initial settings of the HDD AUDIO PLAYER [15]
Prep 5. Configuring the settings of a computer to use HAP Music Transfer [16]
Operating the HDD AUDIO PLAYER from your smartphone or tablet (using HDD Audio
Remote) [17]
Preparing the remote control [18]
Connections
Advertisement
Table of Contents

Related Manuals for Sony HAP-S1


Summary of Contents for Sony HAP-S1
- Page 1 HDD AUDIO PLAYER SYSTEM HAP-S1 About the HDD AUDIO PLAYER SYSTEM Features of the HDD AUDIO PLAYER SYSTEM [1] Playable audio file formats [2] How to make and enter selections [3] How to input characters [4] System requirements for computers connected to the HDD AUDIO PLAYER [5]...
-
Page 2: Table Of Contents
Connecting to a computer [19] Connecting speakers [20] Connecting an amplifier [21] Connecting other playback equipment [22] Connecting an external hard disk drive [23] Connecting an external CD drive [24] Connecting headphones [25] Network connections (wired LAN) Required network environment [26] Connecting the HDD AUDIO PLAYER to a network automatically [27] Connecting the HDD AUDIO PLAYER to a network manually [28] Wi-Fi network connections (wireless LAN) - Page 3 Selecting playback methods [42] Registered music file information [43] Standby modes [44] Listening to the sound from externally connected devices [45] Internet radio Listening to the TuneIn Internet radio programs [46] Music copy from a CD Copying music files from a CD [47] Useful functions Copying music files from a CD [48] Deleting music files from the HDD AUDIO PLAYER (when operating on the HDD AUDIO...
- Page 4 Play Queue screen [64] Settings menus Network Settings [65] HDD Settings [66] Audio Settings [67] System Settings [68] Network Update [69] Backups Backing up data [70] Backing up music files in the HDD AUDIO PLAYER to your computer (for Windows) [71] Backing up music files in the HDD AUDIO PLAYER to your computer (for Mac) [72] Returning backup music files from your computer to the HDD AUDIO PLAYER (for Windows) [73]...
-
Page 5: Hdd Audio
Connections [87] Hard disk drive [88] Help for HAP Music Transfer/HDD Audio Remote [89] If the problem is not solved [90] Dealing with problems/Inquiries Standby modes [91] Forced shutdown of the HDD AUDIO PLAYER [92] Messages for protecting the HDD AUDIO PLAYER [93] Other messages [94] When a notification about a new version of the software appears on the display [95] Customer support websites [96]... - Page 6 playback that is not affected by the network environment. You can use HAP Music Transfer, an application designed for HDD AUDIO PLAYER SYSTEM, to automatically transfer audio files from your computer to the HDD AUDIO PLAYER SYSTEM. High quality audio playback The HDD AUDIO PLAYER SYSTEM can play High-Resolution Audio files such as 192 kHz/24 bit, 96 kHz/24 bit, or DSD (Direct Stream Digital) audio files.
-
Page 7: Audio
with sampling frequencies up to 96 kHz for signals input through the OPTICAL IN jack. 176.4 kHz and 192 kHz sampling frequencies are not supported.) Playing other formats may produce noise or even damage the speakers if played at a high volume. -
Page 8: System
ATRAC (ATRAC3, ATRAC3plus, ATRAC Advanced Lossless) Extensions: .oma, .aa3 Bit rate: 48 kbps - 352 kbps (ATRAC3plus) Bit rate: 132 kbps (ATRAC3) Sampling frequency: 44.1 kHz Quantization bits: 16 bits Note No copy protected files in any of the above formats can be played. If you transfer copy protected files to the HDD AUDIO PLAYER, music information of the copy protected files will appear in gray and you will not be able to select it. -
Page 9: System Requirements For Computers Connected To The Hdd Audio
When the character input screen appears during operations, enter characters as follows: A: Character input area B: Keyboard area C: OK 1. Turn the jog dial left or right to select a character in the keyboard area, and then push the jog dial in to enter the selection. -
Page 10: Required Network
AUDIO PLAYER, can be used in the following system environment: Windows 10 Home Windows 10 Pro Windows 8.1 Windows 8 Windows 8 Pro Windows 7 Starter Service Pack 1 or later Windows 7 Home Basic Service Pack 1 or later Windows 7 Home Premium Service Pack 1 or later Windows 7 Professional Service Pack 1 or later Windows 7 Ultimate Service Pack 1 or later... - Page 11 Note You need to connect the HDD AUDIO PLAYER to a network that can access the Internet if you want to listen to Internet radio programs (*). The Internet radio service may not be available depending on your country or region. Wired LAN (using a LAN cable) LAN (10/100/1000) port: 1000BASE-T/100BASE-TX/10BASE-T...
-
Page 12: Supplied
Communications may be cut off depending on signal conditions. The HDD AUDIO PLAYER does not support 5 GHz band Wi-Fi. The data transfer rate for IEEE 802.11g and IEEE 802.11n (2.4 GHz) devices may be affected by interference when used with IEEE 802.11b products. Also, products using IEEE 802.11g and IEEE 802.11n automatically lower the transfer rate to maintain compatibility with IEEE 802.11b products. - Page 13 Models except for China: For Android devices: Google Play For iPhone/iPod touch/iPad: App Store Models for China: For Android devices: Access http://www.sony-asia.com/support and then enter “HDD Audio Remote” in the search box to locate the download page. For iPhone/iPod touch/iPad: App Store...
-
Page 14: What You Need To Do Before Starting To Use The Hdd Audio
[10] Supported applications Help for HAP Music Transfer/HDD Audio Remote Help for HAP Music Transfer or HDD Audio Remote can be displayed from the following website. http://rd1.sony.net/help/ha/hap1/ [11] Preparations What you need to do before starting to use the HDD AUDIO PLAYER After you purchase the HDD AUDIO PLAYER, you need to connect the external equipment and configure settings before you can listen to music. -
Page 15: Playing Music
Refer to the HAP Music Transfer Help for details on operations. 7. Play music files transferred to the HDD AUDIO PLAYER. Choose your desired method of playback from each topic under “Playing music files” in this Help Guide. Note The HDD AUDIO PLAYER is equipped with a built-in antenna for wireless LAN. Make sure to keep a distance between the HDD AUDIO PLAYER and speakers or other devices to maintain good wireless communication. - Page 16 : SPEAKERS terminals of the HDD AUDIO PLAYER : Speaker cords (not supplied) : Speaker (R) : Speaker (L) Note The HDD AUDIO PLAYER is equipped with a built-in antenna for wireless LAN. Make sure to keep a distance between the HDD AUDIO PLAYER and speakers or other devices to maintain good wireless communication.
-
Page 17: Prep 3. Turning On The Hdd Audio
: Internet : Modem : Router : LAN cables (only one cable is supplied) : LAN (10/100/1000) port of the HDD AUDIO PLAYER : Computer [14] Preparations Prep 3. Turning on the HDD AUDIO PLAYER When you have made all connections with the other devices, connect the supplied AC power cord (mains lead), then turn on the HDD AUDIO PLAYER. -
Page 18: Prep 4. Configuring The Initial Settings Of The Hdd Audio
The power lamp lights up in green. [15] Preparations Prep 4. Configuring the initial settings of the HDD AUDIO PLAYER When you turn on the HDD AUDIO PLAYER for the first time, it automatically enters the initial settings mode. You can configure the initial settings of the HDD AUDIO PLAYER easily by following the instructions on the screen. - Page 19 1. Download the HAP Music Transfer application from the following website: Models for the USA and Canada: http://esupport.sony.com/swu/8812 Models for Europe: www.sony.eu/support Models for China: http://www.sony-asia.com/support 2. Install HAP Music Transfer. Install the application by following the instructions on the screen.
-
Page 20: Preparing The Remote
For Android devices: Google Play For iPhone/iPod touch/iPad: App Store Models for China: For Android devices: Access http://www.sony-asia.com/support and then enter “HDD Audio Remote” in the search box to locate the download page. For iPhone/iPod touch/iPad: App Store [18] Preparations Preparing the remote control Open the lid of the remote control and insert two R03 (size-AAA) batteries. - Page 21 as when transferring music files stored on your computer to the HDD AUDIO PLAYER for the first time. The Wi-Fi (wireless LAN) function of the HDD AUDIO PLAYER turns off when you select the wired LAN setting. Using a wired LAN connection Connect the LAN cable (only one cable is supplied) between the LAN (10/100/1000) port on the rear panel of the HDD AUDIO PLAYER and a router.
-
Page 22: Connecting An
[20] Connections Connecting speakers You need to connect speakers to the HDD AUDIO PLAYER. Note Make sure that the AC power cord (mains lead) of the HDD AUDIO PLAYER is unplugged when connecting any other cord. Connect speakers to the SPEAKERS terminals on the rear panel of the HDD AUDIO PLAYER as shown in the illustration below. -
Page 23: Connecting Other Playback
The HDD AUDIO PLAYER has an internal amplifier, but you can connect an external amplifier as well. Note Make sure that the AC power cord (mains lead) of the HDD AUDIO PLAYER is unplugged when connecting any other cord. Connect an amplifier to the D/A DIRECT・LINE OUT jacks on the rear panel of the HDD AUDIO PLAYER using an audio cord (not supplied) as shown in the illustration below. - Page 24 You can connect other playback equipment such as the Super Audio CD player to the HDD AUDIO PLAYER and enjoy playback from that equipment through the speakers or headphones of the HDD AUDIO PLAYER. Note Make sure that the AC power cord (mains lead) of the HDD AUDIO PLAYER is unplugged when connecting any other cord.
-
Page 25: Connecting An External Hard Disk
When connecting through LINE IN jacks : LINE IN jacks of the HDD AUDIO PLAYER : Audio cord (not supplied) : Analog output jacks of other equipment [23] Connections Connecting an external hard disk drive You can connect an external hard disk drive (USB storage) to the EXT port on the rear panel of the HDD AUDIO PLAYER. -
Page 26: Connecting An External Cd
: EXT port of the HDD AUDIO PLAYER : External hard disk drive (USB storage) [24] Connections Connecting an external CD drive You can connect an external CD drive to the EXT port on the rear panel of the HDD AUDIO PLAYER and use the [Import CD] function to copy music files stored on a CD directly to the internal hard disk drive of the HDD AUDIO PLAYER. -
Page 27: Front
: EXT port of the HDD AUDIO PLAYER : External CD drive [25] Connections Connecting headphones You can connect headphones to the PHONES jack on the front panel of the HDD AUDIO PLAYER. Note When headphones are connected, no sound is output from the speakers. Connect headphones to the PHONES jack on the front panel of the HDD AUDIO PLAYER as shown below. - Page 28 The Internet radio service may not be available depending on your country or region. Wired LAN (using a LAN cable) LAN (10/100/1000) port: 1000BASE-T/100BASE-TX/10BASE-T (The network speed may differ depending on the network environment.) LAN cable: We recommend using a LAN cable that is Cat5 or higher. A normal-type cable is also recommended, as some flat-type LAN cables are easily affected by noise.
-
Page 29: Connecting The Hdd Audio Player To A Network
802.11g and IEEE 802.11n automatically lower the transfer rate to maintain compatibility with IEEE 802.11b products. The normal transfer rate may be regained by changing the channel settings of your access point. When the data transfer rate is not as fast as expected, changing the wireless channel on the access point may increase the rate. -
Page 30: Required Network
manually You can enter the IP address and other network information manually to connect the HDD AUDIO PLAYER to a wired network. Make sure that you have information such as the IP address, subnet mask, default gateway and primary/secondary DNS in advance. 1. - Page 31 You can transfer audio files from your computer to the HDD AUDIO PLAYER by connecting both to the same network, either by a wired or wireless connection. Confirm the supported environment described below. Note You need to connect the HDD AUDIO PLAYER to a network that can access the Internet if you want to listen to Internet radio programs (*).
-
Page 32: Selecting A Wi-Fi (Wireless Lan) Connection
Device configuration Signal conditions Surrounding environment (wall material, etc.) Software in use Communications may be cut off depending on signal conditions. The HDD AUDIO PLAYER does not support 5 GHz band Wi-Fi. The data transfer rate for IEEE 802.11g and IEEE 802.11n (2.4 GHz) devices may be affected by interference when used with IEEE 802.11b products. -
Page 33: Method 3. Setting Up A Network Connection By Adding A New Access
key (WEP key or WPA key) manually without using the WPS method. Confirm the network name (SSID) and security key (WEP key or WPA key) of your wireless LAN router/access point in advance, then refer to the following link for details. Method 3. - Page 34 Note If you cannot connect to a network correctly, the following reasons are possible. Try the connection again or use another connection method. You pressed the WPS button more than two minutes after selecting [Start] in step 4. The WPS button may have to be pressed and held for about two minutes (depending on the router). You cannot cancel the connection after the HDD AUDIO PLAYER has started connecting to the network.
- Page 35 An editing display and keyboard appear. 6. Enter the security key (WEP/WPA). For details on how to use the keyboard, see “How to input characters.” 7. When you have finished entering the security key, select [Next]. 8. When the setup is completed, select [OK]. Note You can enter 5, 13 or 26 alphanumeric characters and/or symbols for a WEP key or 8 to 63 alphanumeric characters and/or symbols for a WPA key.
- Page 36 point]. 5. Select [Manual registration]. An input space for the network name (SSID) appears on the screen. 6. When the input space for the network name (SSID) is surrounded by a white box, push the jog dial in. An editing display and keyboard appear. 7.
- Page 37 1. Select [Settings] - [Network Settings] - [Internet Settings]. 2. Select [Wireless Setup]. 3. Select [Select access point]. The HDD AUDIO PLAYER starts searching for the available access point. 4. When the list of available network names (SSID) is displayed, select [Add a new access point].
- Page 38 with sampling frequencies up to 96 kHz for signals input through the OPTICAL IN jack. 176.4 kHz and 192 kHz sampling frequencies are not supported.) Playing other formats may produce noise or even damage the speakers if played at a high volume.
-
Page 39: Transferring Music Files From A Computer To The Hdd Audio
Install the HAP Music Transfer application on your computer and then transfer music files using the application. Download site of HAP Music Transfer: Install HAP Music Transfer on your computer. Models for the USA and Canada: http://esupport.sony.com/swu/8812 Models for Europe: www.sony.eu/support Models for China: http://www.sony-asia.com/support For details on operations of HAP Music Transfer, refer to the HAP Music Transfer Help. -
Page 40: Remote
You can also transfer music files from your smartphone or tablet using the HDD Audio Remote application. However, do not transfer music files from your smartphone or tablet and HAP Music Transfer at the same time. Do not transfer music files from two or more smartphones or tablets at the same time. Hint A wired LAN connection enables you to transfer music files more quickly. -
Page 41: Playback
Note Do not disconnect an external hard disk drive from the HDD AUDIO PLAYER while playing a track stored in the external hard disk drive. Hint Each transferred music file becomes available for selection once it is registered to the HDD AUDIO PLAYER. - Page 42 [39] Playing music Deleting music files from the HDD AUDIO PLAYER (when using the HAP Music Transfer) You can delete music files from the HDD AUDIO PLAYER using the HAP Music Transfer application. 1. Perform one of the following operations. For Windows: Select [Explore HAP] from (the HAP Music Transfer icon) on the task tray of your...
-
Page 43: Playing Tracks Using Sensme™
“SensMe™ channels” is a function that analyzes and automatically categorizes music tracks according to their mood and tempo using the 12 TONE ANALYSIS technology developed by Sony. You can enjoy channels that suit your mood or the time of the day. -
Page 44: Playing Tracks In
Emotional: Plays ballads. Dance: Plays rhythm, rap and R & B music. Extreme: Plays loud and powerful music. Note The HDD AUDIO PLAYER must be connected to the Internet to categorize music files using SensMe™ channels, as SensMe™ channels analyzes music files and accesses the Gracenote server to obtain music information. - Page 45 1. Select [Playlists] in the Home screen. 2. Select the desired playlist. 3. Select a track. Playback starts. Details of displayed items The following playlists are created automatically: Newly added : Tracks that are newly added to the HDD AUDIO PLAYER. Up to 100 tracks are displayed in reverse chronological order.
-
Page 46: Selecting Playback
If you install the HDD Audio Remote application on your smartphone or tablet, you can create playlists of tracks you like using the application. [42] Playing music Selecting playback methods You can operate and configure various playback settings, such as shuffle play and repeat play, using the Playback Options menu. -
Page 47: Registered Music File
is set to [On], you cannot set the Tone Control function. Go to album: You can go directly from the currently playing track to the album to which the track belongs. Get music info: The HDD AUDIO PLAYER accesses the Gracenote server to obtain music information on the track currently playing. - Page 48 transfer them to the HDD AUDIO PLAYER. The HDD AUDIO PLAYER utilizes music information about the album name, album artist name, album art image, track name, track artist name, track number and track genre from each music file. The method of embedding music information differs depending on the music file management software or tag editing software.
-
Page 49: Listening To The Sound From Externally Connected
The HDD AUDIO PLAYER has two types of standby mode: normal standby mode and Network Standby mode. Standby mode Press the button to switch to standby mode so that you can save power. (The HDD AUDIO PLAYER enters this standby mode if the Network Standby mode is disabled. The HDD AUDIO PLAYER cannot be operated through the network.) Network Standby mode In this mode, the network function is activated even when the HDD AUDIO PLAYER is in... -
Page 50: Listening To The Tunein Internet Radio
This function is not for selecting an external hard disk drive as an external device. 1. Select [External Input] in the Home screen. 2. Select the name of the input port to which the desired audio source is connected. 3. Start playing music on the externally connected device. Note Only the LPCM 2ch audio format can be played when the signal is input through the OPTICAL IN or COAXIAL IN jack. -
Page 51: Copying Music Files From A
Before using, please read the TuneIn End User License Agreement. You must agree to the End User License Agreement in order to use TuneIn. If you select [Internet Radio] in step 1, an End User License Agreement may appear on the screen. - Page 52 screen in the same way as music files transferred from your computer. Note Be sure to use an external CD drive that is powered through the AC adaptor and connect it to a power outlet. Successful operations with power supply from the HDD AUDIO PLAYER are not guaranteed.
- Page 53 To remove the CD and return to the Home screen, select [Exit]. Copied music files are stored in the [HAP_Internal/Imported] folder. Format to encode in WAV: PCM data stored on the CD is saved without compression. The WAV format consumes more hard disk capacity, by making the file size larger, but requires less CPU power for playback than the FLAC format.
-
Page 54: Copying Music Files From A
end of the list. When [Without verification and retries (Fast)] is selected, no error information is displayed. Read errors: Displays the number of failed read attempts. Data interpolation errors: Displays the number of times that interpolated data is taken as the read data. When the results of two consecutive read attempts are found inconsistent, the HDD AUDIO PLAYER repeats up to 20 read attempts. - Page 55 A selection screen for the copy speed appears. 6. Select either [With verification and retries (Slow)] or [Without verification and retries (Fast)] (*2). A selection screen for the album information appears (*3). The HDD AUDIO PLAYER automatically accesses the Gracenote server based on the record information of the CD and obtains the album information of the CD.
- Page 56 Album information selection The HDD AUDIO PLAYER obtains the album information that seems consistent with the CD you want to copy from the Gracenote server, based on the record information of the CD. When it finds more than one possible albums on the Gracenote server, it displays multiple possible albums. When it finds no possible album, select the [Data not found on server.] option.
- Page 57 However, you cannot display the Options screen if you have selected [All Albums]. From the Playback screen: Push the jog dial in while playing a track you want to delete. 2. Select [Delete]. 3. Select [Yes]. The selected track, album, or folder will be deleted. Note You can delete pre-installed sample files, but they will be restored if you perform the Factory Reset function.
-
Page 58: Using The Dsee Hx
The Explorer window (for Windows) or the Finder (for Mac) opens and icon(s) of the available shared folder(s) appear. ([HAP_Internal] appears for the internal hard disk drive and [HAP_External] appears for the external hard disk drive if one is connected.) 2. - Page 59 HDD AUDIO PLAYER. Hint DSEE in DSEE HX stands for Digital Sound Enhancement Engine, a high range compensation and fine sound restoration technology developed independently by Sony. 1. Select [Settings] – [Audio Settings] from the Home screen. 2. Select [DSEE HX].
-
Page 60: Using The Dsee
HDD AUDIO PLAYER. Hint DSEE stands for Digital Sound Enhancement Engine, a high range compensation and fine sound restoration technology developed independently by Sony. 1. Select [Settings] – [Audio Settings] from the Home screen. 2. Select [DSEE]. - Page 61 3. Select [Auto]. The DSEE function automatically works for compressed audio sources and PCM audio sources with lossless compression. The DSEE lamp lights up while the DSEE function is active. Note You cannot set the DSEE HX function and the DSEE function concurrently to [Auto]. Setting the DSEE function to [Auto] changes the DSEE HX function setting to [Off].
- Page 62 treble can each be adjusted between levels –10 and +10. 1. Select [Settings] - [Audio Settings] from the Home screen. 2. Select [Tone Control]. The Tone Control screen appears. 3. Push the jog dial in again. The Tone Control setup screen appears with the bass gain icon ( ) highlighted.
-
Page 63: Play Queue
[55] Useful functions Adding tracks to “Favorites” You can add to tracks you like and to tracks you dislike. If you add to tracks, the tracks will be registered to “Favorites”, and you can later select one of these tracks from “Favorites”... -
Page 64: Registered Music File
Playing tracks in “Favorites” If you add to tracks, the tracks will be registered to “Favorites” and you can later select one of these tracks from “Favorites” or play all of your favorite tracks together. 1. Select [Favorites] in the Home screen. 2. -
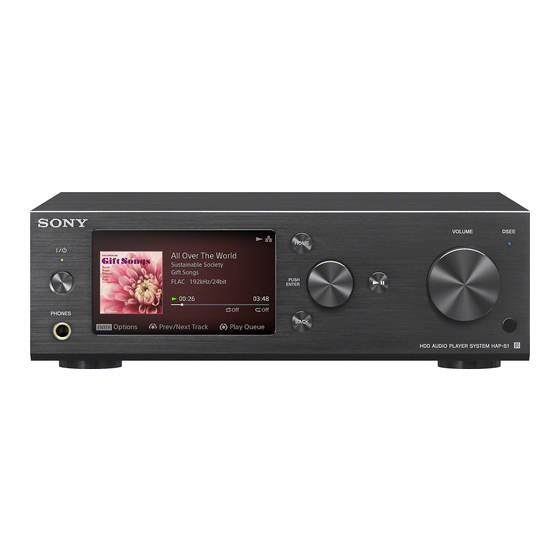
Page 65: Front Panel
The HDD AUDIO PLAYER utilizes music information about the album name, album artist name, album art image, track name, track artist name, track number and track genre from each music file. The method of embedding music information differs depending on the music file management software or tag editing software. -
Page 66: Rear Panel
(Power) button Turns the HDD AUDIO PLAYER on and off. 2. Power lamp When the HDD AUDIO PLAYER is turned on, this lamp lights up in green. 3. LCD display 4. HOME button Displays the Home screen. 5. Jog dial (PUSH ENTER) Turn this dial to select items displayed on the screen. -
Page 67: Remote Control
1. OPTICAL IN jack 2. COAXIAL IN jack 3. LAN (10/100/1000) port 4. EXT port ( 5. AC IN jack 6. D/A DIRECT・LINE OUT (analog output) L/R jacks The D/A DIRECT・LINE OUT jacks directly output analog signals through the D/A converter without using any internal connectors or signal switchers. -
Page 68: Home Screen
(Power) button Turns the HDD AUDIO PLAYER on and off. (Play/Pause) button Starts and pauses playback. 3. VOLUME +/– buttons Adjusts the volume. 4. MUTING button Mutes the sound. To deactivate the muting, press the MUTING button again or press the VOLUME + button. - Page 69 1. Home menu display area Displays category menus such as Genres, Artists, Albums and Tracks, and other menu items including the Settings menu. Selectable items are listed below: Now Playing Genres Artists Albums Tracks Folders SensMe™ channels Playlists Favorites Internet Radio External Input Import CD Settings...
-
Page 70: Playback Screen
The counter shown beside this icon indicates the number of unanalyzed files. Icon for the sleep timer: (the sleep timer is set) Options menus on list screens From the Home screen, select Albums, Tracks, or Folders to display the list screen, and then push and hold the jog dial in while selecting an item in the list of albums, tracks, or folders to display the Options menu. - Page 71 1. Playback file information Displays the album art, track name, artist name, album name and file name. 2. Guide area Displays hints or guides for operations you can perform while playing a track. 3. Favorite status of the track Displays the favorite status of the current track. You can add to tracks you like, and if the track currently playing has , this will be displayed in this area.
- Page 72 If you turn the jog dial for two clicks or more while the playback screen is displayed, the Play Queue screen appears. [63] Parts and controls Playback Options screen If you push the jog dial in while playing a track, the Playback Options screen appears. You can configure various playback settings, such as playback modes and sound quality settings, from the Playback Options screen.
- Page 73 sound quality remains the same) Tone Control: You can change the sound quality using this function. When the Tone Control Bypass function is set to [On], you cannot set the Tone Control function. Go to album: You can go directly from the currently playing track to the album to which the track belongs. Get music info: The HDD AUDIO PLAYER accesses the Gracenote server to obtain music information on the track currently playing.
-
Page 74: Network Settings
The favorite status ( ) is displayed on the right of each track. When you start playing by selecting [Folders] from the Home screen, the file names are displayed instead of the track names on the Play Queue screen. Hint You can turn the jog dial to select a track and push it in to play the selected track. -
Page 75: Audio Settings
Formatting an external hard disk drive (Format External HDD) Removing the external hard disk drive safely (Remove External HDD Safely) [67] Settings menus Audio Settings Using the DSEE HX function Using the DSEE function Using the Tone Control Bypass function (Tone Control Bypass) Using the Tone Control function (Tone Control) Using the Gapless Playback function (Gapless Playback) Using the Volume Normalization function (Volume Normalization) -
Page 76: Backing Up
Receiving notifications about software updates (Software Update Notification) Displaying the current system information (System Information) Displaying the software license (Software License) Resetting to the factory default (Factory Reset) [69] Settings menus Network Update Updating the software (Network Update) [70] Backups Backing up data We recommend you arbitrarily have a backup of contents stored on the hard disk drive of the HDD AUDIO PLAYER, which are copies of contents on your computer. - Page 77 Make sure that the HDD AUDIO PLAYER is turned on. 1. Open the context menu of HAP Music Transfer from (the HAP Music Transfer icon) on the task tray of your computer and then select [Explore HAP]. The Explorer window opens and icon(s) of the available shared folder(s) appear. ([HAP_Internal] appears for the internal hard disk drive and [HAP_External] appears for the external hard disk drive if one is connected.) 2.
- Page 78 the Dock of your computer and then select [Explore HAP]. The Finder opens and icon(s) of the available shared folder(s) appear. ([HAP_Internal] appears for the internal hard disk drive and [HAP_External] appears for the external hard disk drive if one is connected.) 2.
- Page 79 2. Select [HAP_Internal] (to select the internal hard disk drive) or [HAP_External] (to select the external hard disk drive), and then keep selecting folders until you reach the folder of the music files you want to restore. 3. Copy the music files from your computer to the HDD AUDIO PLAYER by drag and drop. Note Do not transfer music files while returning backup files from your computer to the HDD AUDIO PLAYER using HAP Music Transfer.
-
Page 80: Playable Audio File
3. Copy the music files from your computer to the HDD AUDIO PLAYER by drag and drop. Note Do not transfer music files while returning backup files from your computer to the HDD AUDIO PLAYER using HAP Music Transfer. Do not transfer music files from your smartphone or tablet while returning backup files from your computer to the HDD AUDIO PLAYER. - Page 81 Extensions: .flac, .fla Sampling frequency: 44.1 kHz, 48 kHz, 88.2 kHz, 96 kHz, 176.4 kHz, 192 kHz Quantization bits: 16 bits, 24 bits ALAC Extensions: .m4a Sampling frequency: 44.1 kHz, 48 kHz, 88.2 kHz, 96 kHz, 176.4 kHz, 192 kHz Quantization bits: 16 bits, 24 bits MP3 (MPEG-1/2 Audio Layer-3) Extensions: .mp3...
-
Page 82: Design And
[76] Specifications/Notes Design and specifications AUDIO POWER SPECIFICATIONS POWER OUTPUT AND TOTAL HARMONIC DISTORTION (for the USA and Canada only): With 4 ohm loads, both channels driven, from 20 - 20,000 Hz; rated 32 watts per channel minimum RMS power, with no more than 10% total harmonic distortion from 250 milliwatts to rated output. - Page 83 Jack section Input section COAXIAL IN Input impedance: 75 ohms Supported playback format: LPCM 2ch Sampling frequency: 44.1 kHz, 48 kHz, 88.2 kHz, 96 kHz, 176.4 kHz, 192 kHz Quantization bits: 16 bits, 24 bits OPTICAL IN Supported playback format: LPCM 2ch Sampling frequency: 44.1 kHz, 48 kHz, 88.2 kHz, 96 kHz Quantization bits: 16 bits, 24 bits LINE IN 1, 2...
-
Page 84: Software Updates For The Hdd Audio
"Settings" menu and select "Network Update". For details on updates, see the Sony website.] you will be notified on the screen: (The HDD AUDIO PLAYER is set to notify you of updates, as the [Software Update Notification] function is set to [On] as the factory default setting). -
Page 85: When Registering Music Files To The Hdd Audio
When registering music files to the HDD AUDIO PLAYER When music files are transferred to the HDD AUDIO PLAYER, a counter indicating the number of transferred and unanalyzed music files appears beside (the icon that indicates the transfer and registration status). Once music files are transferred, the HDD AUDIO PLAYER starts analyzing files and registering them to the HDD AUDIO PLAYER. -
Page 86: Notes On The Internal Hard Disk
Be aware that all of the existing data on the hard disk drive will be erased (data covered by copyright laws). In regards to storage and disposal of the replaced hard disk drive, Sony will employ strict controls within reasonable limits, and assume full responsibility to ensure that third parties, including business partners to whom the storage and disposal work is delegated, do not mishandle the data on the hard disk drive. -
Page 87: Disclaimer Regarding Services Offered By Third
HDD AUDIO PLAYER failure, or when the data of a recording is lost or damaged as a result of the HDD AUDIO PLAYER or external media/recording device failure or repair undertaken to the HDD AUDIO PLAYER. Sony will not restore, recover, or replicate the data under any circumstances. - Page 88 Sony Corporation. “DSEE” and “DSEE HX” are registered trademarks of Sony Corporation. SensMe™ and the SensMe™ logo are trademarks or registered trademarks of Sony Mobile Communications AB. Microsoft, Windows, Windows Vista and Windows Media are either trademarks or registered trademarks of Microsoft Corporation in the United States and/or other countries.
- Page 89 T-1380008 All other trademarks and registered trademarks are trademarks or registered trademarks of their respective holders. In this Help Guide, TM and ® marks are not specified. [85] Troubleshooting General The power is automatically turned off. The power is automatically turned on. The remote control does not work.
- Page 90 Some tracks are not displayed. Playback stopped. Tracks belonging to the same album are registered to different albums. Tracks belonging to different albums are registered to one album. The album art image displayed on the HDD AUDIO PLAYER is different from that displayed in the music file management software on your computer or does not display.
- Page 91 Help for HAP Music Transfer/HDD Audio Remote Help for HAP Music Transfer or HDD Audio Remote can be displayed from the following website. http://rd1.sony.net/help/ha/hap1/ [90] Troubleshooting If the problem is not solved Using the Clear Database function or the Reset to Default Settings function (Special Mode)
-
Page 92: Standby Mode
The HDD AUDIO PLAYER has two types of standby mode: normal standby mode and Network Standby mode. Standby mode Press the button to switch to standby mode so that you can save power. (The HDD AUDIO PLAYER enters this standby mode if the Network Standby mode is disabled. The HDD AUDIO PLAYER cannot be operated through the network.) Network Standby mode In this mode, the network function is activated even when the HDD AUDIO PLAYER is in... - Page 93 1. Press and hold on the HDD AUDIO PLAYER for 5 seconds or more. The power lamp flashes three times and then the power turns off. After a while, the HDD AUDIO PLAYER is automatically rebooted and enters the standby mode or the Network Standby mode.
- Page 94 Update function, the message [A new version of the software is available. Update the software now? To update later, go to the "Settings" menu and select "Network Update". For details on updates, see the Sony website.] is displayed. (The [Software Update Notification] function is set...
- Page 95 [96] Dealing with problems/Inquiries Customer support websites Please access the following support websites for information on your HDD AUDIO PLAYER. For customers in the USA: http://esupport.sony.com/ For customers in Canada: http://esupport.sony.com/CA/ For customers in Europe: www.sony.eu/support For customers in China: http://www.sony-asia.com/support...
- Page 96 The Wi-Fi (wireless LAN) function of the HDD AUDIO PLAYER turns off when you select the wired LAN setting. 1. Select [Settings] - [Network Settings] in the Home screen. 2. Select [Internet Settings]. 3. Select the desired method of connection. In the case of [Wired Setup]: There are two connection methods: automatic connection and manual connection.
- Page 97 You can edit the device name of the HDD AUDIO PLAYER that is displayed on a network. 1. Select [Settings] - [Network Settings] in the Home screen. 2. Select [Device Name]. The current network device name is displayed. 3. When the input space for the network device name is surrounded by a white box, push the jog dial in.
- Page 98 external hard disk drive changes according to the status, such as [Not Connected] if no external hard disk drive is connected, [Unformatted] if the hard disk drive is not formatted, or [Not Available] if the hard disk drive is not available. The file system is also displayed for external hard disk drives.
- Page 99 5. When rescanning of the hard disk drive is complete, select [OK]. Note Performing the Rescan HDD functions (except for the differing items scan) restores the information of the music files. Music information edited by HDD Audio Remote is therefore reset.
- Page 100 Note After formatting, the file system of the external hard disk drive becomes ext4. External hard disk drives that have been formatted by the HDD AUDIO PLAYER cannot be used on your computer (Windows/Mac). If you want to use the external hard disk drive with your computer, refer to the operating instructions of your computer’s OS and format it on your computer.
- Page 101 The DSEE function does not work for sound input from devices that are connected to the external input jacks of the HDD AUDIO PLAYER. Hint DSEE stands for Digital Sound Enhancement Engine, a high range compensation and fine sound restoration technology developed independently by Sony.
- Page 102 1. Select [Settings] – [Audio Settings] from the Home screen. 2. Select [DSEE]. 3. Select [Auto]. The DSEE function automatically works for compressed audio sources and PCM audio sources with lossless compression. The DSEE lamp lights up while the DSEE function is active.
- Page 103 You can adjust bass and treble to your desired tone using the Tone Control function. Bass and treble can each be adjusted between levels –10 and +10. 1. Select [Settings] - [Audio Settings] from the Home screen. 2. Select [Tone Control]. The Tone Control screen appears.
- Page 104 Using the Gapless Playback function (Gapless Playback) When the Gapless Playback function is set to [Auto], the HDD AUDIO PLAYER plays tracks without the silent part between tracks. This is useful for playing albums of concerts or other live music. The Gapless Playback function works with DSD, WAV, AIFF, FLAC, ALAC and WMA Lossless music file formats.
- Page 105 during playback. Even if you play tracks from multiple albums with different volume levels in random order (shuffle play), this function stops the volume from increasing or decreasing for different tracks, allowing natural change in volume during playback. When this function is set to [Off] (factory default setting), the volume level is not adjusted. 1.
- Page 106 Controlling the brightness (Brightness) You can adjust the screen to your desired brightness to suit the brightness of your surroundings. If you set the brightness to [Off], the DSEE lamp goes off. 1. Select [Settings] - [System Settings] in the Home screen. 2.
- Page 107 Resetting the product (performing the Factory Reset function) Displaying an alert message to notify the user of an operational error Setting the Network Standby function (Network Standby) When you set the Network Standby function to [On], you can start up or operate the HDD AUDIO PLAYER via the network even when the HDD AUDIO PLAYER is in standby mode.
- Page 108 Note The Auto Standby function does not work during the following processes: Updating the software Formatting the hard disk drive Rescanning a hard disk drive Resetting the product (performing the Factory Reset function) When the Sleep timer is working Transferring music files from a computer Playing music via external input Hint When the remaining time until the HDD AUDIO PLAYER enters the standby mode is less...
-
Page 109: Update Notification
A software update is started. Formatting of the hard disk drive is started. Rescanning of the hard disk drive is started. The HDD AUDIO PLAYER is manually turned off. The product is reset. (The factory reset function is performed.) The Sleep timer is set to off. Hint When the remaining time until the sleep timer activates is less than 60 seconds, the remaining time is shown on the screen. - Page 110 3. When you have confirmed the current system information, select [Close]. Displaying the software license (Software License) This topic explains how to display the software license of the software installed on the HDD AUDIO PLAYER. 1. Select [Settings] - [System Settings] in the Home screen. 2.
- Page 111 before you performed the Factory Reset function, select the backup folder and check “Watch” in the Contents Settings window of HAP Music Transfer. Go to the Transfer Settings window and select [Clear] for [Transferred Files List] to delete the transfer history, and then automatically or manually transfer the files.
- Page 112 the specific time you set has elapsed. If the top of the HDD AUDIO PLAYER is covered, the internal protector activates and the HDD AUDIO PLAYER automatically turns off. Remove the object(s) covering the upper panel of the HDD AUDIO PLAYER and turn the power on again. When the [Network Standby] function is set to [On], the HDD AUDIO PLAYER automatically turns on when a music file transfer is performed by HAP Music Transfer or the HDD Audio Remote application installed on your smartphone or tablet.
-
Page 113: Playable Audio File
Depending on your network environment the HDD AUDIO PLAYER may not be displayed in the Connection window. For details, refer to the help guide of HAP Music Transfer. Try transferring the music files to the HDD AUDIO PLAYER by dragging and dropping. For details, refer to “You want to transfer music files to the HDD AUDIO PLAYER by dragging and dropping but do not know how. -
Page 114: Playable Audio File
to the HDD AUDIO PLAYER by dragging and dropping. Do not transfer music files to the HDD AUDIO PLAYER by dragging and dropping from two or more computers at the same time. You want to transfer music files to the HDD AUDIO PLAYER by dragging and dropping but do not know how. - Page 115 or more computers at the same time. Cannot operate the HDD AUDIO PLAYER through HDD Audio Remote. Make sure that the HDD AUDIO PLAYER is turned on. Check the network connection. Make sure that the smartphone/tablet where HDD Audio Remote is installed is connected to the same network as the HDD AUDIO PLAYER.
- Page 116 Only 2ch tracks are supported in any of the playable file formats. Tracks other than 2ch tracks cannot be played. DRM (Digital Rights Management)-protected music files cannot be played. Confirm the audio file formats that can be played. If the HDD AUDIO PLAYER is being used with a television, speakers, video deck or tape deck and is placed too close to that equipment, noise may result.
- Page 117 the playback of that album. If you want to play a file with , select the track from the list directly. Music files of a length of 2 seconds or less cannot be played back. Some tracks are not displayed. If you add to tracks you dislike, the tracks are not displayed in the Play Queue.
- Page 118 Edit the album name and album artist name of all music files you want to include together in same album so they are the same using tag editing software on your computer, and then transfer (*) those music files to the HDD AUDIO PLAYER. However, problems may occur in the music file management software if you are using that on your computer to edit.
- Page 119 management software on your computer or does not display. Some music file management software may not embed album art images to music files. In this case, the album art image may be different from that displayed in the music file management software on your computer because the HDD AUDIO PLAYER obtains the album art image from the Gracenote database using tag information of the music file.
- Page 120 attempted by the HDD AUDIO PLAYER, the music information may not be correctly displayed. In such a case, check the music file management software settings, or change the text encoding type by selecting [Settings] - [System Settings] - [Text encoding] and copy the file again.
- Page 121 Note The TuneIn Internet radio service may not be available depending on your country or region. Your computer cannot connect to the network after you press the WPS button. If you connect the HDD AUDIO PLAYER to the network using the WPS (Wi-Fi Protected Setup) function, the wireless settings of your wireless LAN router/access point may change automatically, and as a result, your computer may not be able to connect to the network.
- Page 122 Press the BACK button to return to the previous screen, and try [Select access point] again. If the wireless LAN router/access point you want is still not detected, select [Add a new access point.] from the network list to add a new wireless LAN router/access point. The wireless LAN router/access point may be set to “stealth mode.”...
- Page 123 The HDD AUDIO PLAYER is compatible with the ext4 and FAT file systems. If the external hard disk drive has a different file system, format it using the Format External HDD function of the HDD AUDIO PLAYER. If you cannot format it, check the following: Check that the USB cable used to connect the external hard disk drive is connected firmly and is not damaged.
-
Page 124: Audio Player
You can delete music files from the HDD AUDIO PLAYER in the following ways. Display the Options screen from the list screen or Playback screen and then select [Delete] to delete music files. Use the HAP Music Transfer application installed on your computer to delete music files. The information of an external hard disk drives does not appear on the HDD AUDIO PLAYER. - Page 125 drive. Any music files stored on the external hard disk drive will be deleted if you format the external hard disk drive using the HDD AUDIO PLAYER. Also, you won’t be able to use the external hard disk drive with other devices such as a computer, because the external hard disk drive (USB storage) is formatted only for the HDD AUDIO PLAYER.
- Page 126 We recommend making a backup of all your data before performing the Factory Reset function. Customer support websites Please access the following support websites for information on your HDD AUDIO PLAYER. For customers in the USA: http://esupport.sony.com/ For customers in Canada: http://esupport.sony.com/CA/ For customers in Europe: www.sony.eu/support...
- Page 127 As the WAV LIST chunk does not contain explicit information about which text coding type is used, every music file management software application uses the text encoding type that it assumes to be appropriate in its own way for reading music information. When music information of a WAV file saved by the [Import CD] function is not correctly displayed on your music file management software, changing the text encoding type may solve the problem.