Table of Contents
Advertisement
Available languages
Available languages
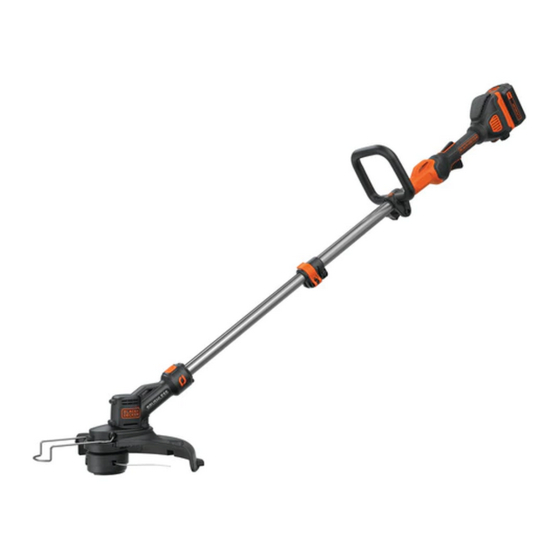
40v MAx* Lithium Trimmer/Edger
INSTRUCTION MANUAL
CATALOg NUMBER
LST540
Thank you for choosing BLACk+DECkER!
PLEASE READ BEfORE RETURNINg ThIS PRODUCT fOR
ANy REASON.
If you have a question or experience a problem with your BLACk+DECkER
purchase, go to http://www.blackanddecker.com/instantanswers
If you can't find the answer or do not have access to the Internet, call
1-800-544-6986 from 8 a.m. to 5 p.m. EST Mon. - fri. to speak with an agent.
Please have the catalog number available when you call.
SAvE ThIS MANUAL fOR fUTURE REfERENCE.
vEA EL ESPANOL EN LA CONTRAPORTADA.
INSTRUCTIvO DE OPERACIÓN, CENTROS DE SERvICIO y PÓLIZA DE gARANTÍA.
ADvERTENCIA: LÉASE ESTE INSTRUCTIvO ANTES DE USAR EL PRODUCTO.
*Maximum initial battery pack voltage (measured without a workload) is 40
volts. The nominal voltage is 36.
kEy INfORMATION yOU ShOULD kNOW:
• The guard must be installed before trimming or edging - if not, the
motor will overheat (page 7).
• When replacing the line, use only .080 inch diameter ROUND line
(B+D Model #SF-080 is recommended) - otherwise the appliance will
not function properly (page 10).
• Do not bump the feed head against the ground - it will disrupt the
feed mechanism.
• For use only with lithium-ion 36v or 40v Max* batteries.
To register your new product, visit
www.BlackandDecker.com/NewOwner
Advertisement
Table of Contents

Related Manuals for Black & Decker LST540


Summary of Contents for Black & Decker LST540
- Page 1 40v MAx* Lithium Trimmer/Edger INSTRUCTION MANUAL CATALOg NUMBER LST540 Thank you for choosing BLACk+DECkER! PLEASE READ BEfORE RETURNINg ThIS PRODUCT fOR ANy REASON. If you have a question or experience a problem with your BLACk+DECkER purchase, go to http://www.blackanddecker.com/instantanswers If you can’t find the answer or do not have access to the Internet, call 1-800-544-6986 from 8 a.m.
-
Page 2: Safety Guidelines - Definitions
SAFETY GUIDELINES - DEFINITIONS It is important for you to read and understand this manual. The information it contains relates to protecting YOUR SAFETY and PREVENTING PROBLEMS. The symbols below are used to help you recognize this information. DANGER: Indicates an imminently hazardous situation which, if not avoided, will result in death or serious injury. -
Page 3: Functional Description
• CHECK DAMAGED PARTS – Before herbicides and pesticides further use of the appliance, a guard or • arsenic and chromium from other part that is damaged should be chemically treated lumber carefully checked to determine that it will to reduce your exposure to these operate properly and perform its intended chemicals, wear approved safety equipment function. -
Page 4: Important Safety Instructions For Battery Chargers
IMPORTANT SAFETY Recommended Minimum Wire Size INSTRUCTIONS FOR BATTERY for Extension Cords CHARGERS Minimum Gage for Cord Sets SAVE THESE INSTRUCTIONS: This Volts Total Length of Cord in Feet 120V 0-25 26-50 51-100 101-150 manual contains important safety (0-7,6m) (7,6-15,2m) (15,2-30,4m) (30,4-45,7m) instructions for battery chargers. -
Page 5: Storage Recommendations
• Do not incinerate the battery pack exaMPle, do not Place BatteRy In even if it is severely damaged or aPRons, PocKets, aPPlIance Boxes, is completely worn out. the battery PRoduct KIt Boxes, dRaWeRs, etc., pack can explode in a fire. toxic fumes WIth loose naIls, scReWs, Keys, and materials are created when battery etc. -
Page 6: Important Charging Notes
Recharge discharged batteries as soon d. If charging problems persist, take as possible after use or battery life may the appliance, battery pack and be greatly diminished. charger to your local service center. 4. The battery pack should be recharged CHARGER DIAGNOSTICS when it fails to produce sufficient This charger is designed to detect certain... -
Page 7: Installing And Removing The Battery Pack
INSTALLING AND REMOVING THE • Keeping the guard square to the trimmer head slide it fully into place BATTERY PACK until the retaining tab clicks into place WARNING: MaKe suRe the (Ensure that the guide rails (D1) on the sWItch Is not actuated When guard (11) are correctly aligned with the ReMovInG oR InstallInG BatteRy. - Page 8 ADjUSTING THE POSITION OF THE SETTING TRIMMING OR EDGING MODE AUxILIARY HANDLE (FIG. G) (FIGURE I, j AND K) The auxiliary handle can be adjusted to • The trimmer can be used in trimming provide optimum balance and comfort. mode as shown in figure I or in edging •...
- Page 9 EDGING SWITCHING ON AND OFF • Do not use the trimmer to create edges • To switch the trimmer on, press in and or trenches. hold the lock off button (3), depress • Guide the trimmer as shown in figure N. the variable speed trigger (1).
- Page 10 done along sidewalks or other abrasive becoming trapped under the spool. surfaces or heavier weeds are being cut. • Align the spool cap tabs with the slots on the spool housing (figure P). CLEARING jAMS AND TANGLED • Snap the spool cap back on as shown LINE (FIGURES O, P, Q) in figure Q by depressing lugs and pressing into spool housing.
-
Page 11: Maintenance Warning
becomes dislodged, replace in correct in layers. Do not crisscross figure T. position before inserting a new spool • When the wound cutting line reaches as shown in figure R. the recesses (S4), cut the line and • Unfasten the end of the cutting line dock it in the spool line slots (S5) . -
Page 12: Troubleshooting
Troubleshooting PROBLEM SOLutiOn Trimmer runs slowly. • Fully depress the variable speed trigger. The level of trigger depression affects speed. • Remove battery from trimmer. • Check that the spool housing can rotate freely. Carefully clean it if necessary. • Check that the cutting line does not protrude more than approximately 4-13/16 inches (122mm) from the spool. -
Page 13: Service Information
THE RBRC™ SEAL SERVICE INFORMATION All BLACk+DECkER Service Centers The RBRC™ (Rechargeable are staffed with trained personnel to Battery Recycling Corporation) provide customers with efficient and Seal on the LI-ION battery (or reliable power tool service. Whether you battery pack) indicates that the need technical advice, repair, or genuine costs to recycle the battery (or battery factory replacement parts, contact the... - Page 14 TAILLE-BORDURE / COUPE-BORDURE AvEC PILE AU LIThIUM DE 40 v MAx* MODE D’EMPLOI NUMERO DE CATALOgUE LST540 Merci d’avoir choisi BLACk+DECkER! Consulter le site Web www.BlackandDecker.com/NewOwner pour enregistrer votre nouveau produit. à LIRE AvANT DE RETOURNER CE PRODUIT POUR qUELqUE RAISON qUE CE SOIT : Si des questions ou des problèmes surgissent après l’achat d’un produit...
- Page 15 LIGNES DIRECTRICES EN MATIèRE DE SéCURITé - DéFINITIONS est important que vous lisiez et compreniez ce mode d’emploi. Les informations qu’il contient concernent VOTRE SÉCURITÉ et visent à ÉVITER TOUT PROBLÈME. Les symboles ci-dessous servent à vous aider à reconnaître cette information. DANGER : Indique une situation dangereuse imminente qui, si elle n’est pas évitée, causera la mort ou des graves blessures.
-
Page 16: Description Fonctionnelle
pouvant causer le cancer, les anomalies pas utilisés, les outils doivent être rangés à congénitales et d’autres dangers pour la l’intérieur, dans un endroit sec et verrouillé, reproduction. Voici quelques exemples de hors de portée des enfants. • ÊTRE VIGILANT – Ne pas utiliser ces produits chimiques : l’appareil en cas de fatigue ou de •... -
Page 17: Directives De Sécurité Importantes Pour Les Chargeurs De Piles
DIRECTIVES DE SÉCURITÉ des risques d’incendie, de chocs électriques ou d’électrocution. IMPORTANTES POUR LES • Pour utiliser un chargeur à CHARGEURS DE PILES l’extérieur, le placer dans un endroit CONSERVEz CES INSTRUCTIONS: sec et utiliser une rallonge conçue Ce manuel contient des consignes de pour l’extérieur. -
Page 18: Directives De Sécurité Importantes Pour Les Blocs-Piles
retirer le bloc-piles ne réduira pas ces • NE PAS éclabousser le bloc-piles ni risques. l’immerger dans l’eau ou dans tout autre liquide. cela peut entraîner une défaillance • NE JAMAIS tenter de connecter 2 prématurée de l’élément. chargeurs ensemble. •... - Page 19 Pouvant entReR en contact avec FONCTION DE SUSPENSION DU BLOC-PILES CHAUD/FROID elles et PRovoqueR un couRt- cIRcuIt. REMARQUE : IL NE FAUT PAS Lorsque le chargeur détecte qu’une LAISSER DE PILES AU LI-ION DANS LES pile est excessivement chaude ou BAGAGES ENREGISTRÉS.
-
Page 20: Montage Et Réglage
INSERTION ET RETRAIT DU BLOC- ces conditions. Suivre les procédures de charge. On peut également recharger à PILES tout moment un bloc-piles partiellement AVERTISSEMENT : VEILLER À déchargé sans affecter sa longévité. NE PAS ACTIONNER LA DÉTENTE 5. Tout corps étranger conducteur, tel que notamment la laine d’acier, le papier LORS DE LA POSE OU DU RETRAIT DU d’aluminium ou toute accumulation de... -
Page 21: Notice D'utilisation
les guides (D1) du pare-main (11) sont bien alignés sur ceux (D2) de la tête de coupe (D3) (figure D).La patte de verrouillage (D4) doit encliqueté dans la fente de logement (D5). • Bien fixer le pare-main au moyen de la vis (E1) (figure E). -
Page 22: Mise En Marche Et Arrêt
TOUT MORCEAU DE FIL MÉTALLIqUE, DE pierres, des morceaux de métal et d’autres objets peuvent être jetés à CORDE OU D’OBjETS SIMILAIRES QUI grande vitesse par la ligne. La coupe et POURRAIENT S’ENCHEVÊTRER DANS LE la garde sont conçus pour réduire le FIL ROTATIF OU AVEC LA BOBINE. - Page 23 CONSEjOS ÚTILES PARA CORTAR • Utilice la punta de la cuerda para realizar el corte; no empuje el cabezal de la cuerda contra el césped sin cortar. Para lograr trabajos de calidad, utilice la guía de borde a lo largo de elementos como cercos, casas y canteros.
- Page 24 fil se bloque. Pour désobstruer l’ensemble, suivre les étapes suivantes. • Retirer le bloc-piles du taille-bordure. • Appuyer sur les languettes de dégagement logées sur le couvercle de la bobine comme le montre la figure O, puis retirer directement le couvercle. MISE EN GARDE : Pour éviter d’endommager l’appareil, si le fil de...
- Page 25 les fentes prévues à cet effet (S5). • Faire attention à ce que le fil ne se prenne pas sous la bobine. • Ajuster le capuchon de la bobine • Aligner les languettes du couvercle de sur l’outil comme le décrit la section la bobine sur les encoches du boîtier «...
-
Page 26: Information Sur Les Réparations
La SRPRC , en collaboration avec approuvé par lʼinstitution responsable de BLACk+DECkER et d’autres utilisateurs la conformité peut faire annuler le droit de piles, a établi aux États-Unis des de lʼutilisateur dʼutiliser ce matériel. Cet programmes facilitant le ramassage appareil numérique de la classe B est des piles au LI-ION épuisées. -
Page 27: Depannage
DEPANNAGE PROBLÈME SOLutiOn L’outil fonctionne lentement. • Appuyer à fond sur la détente à vitesse variable. Le niveau de pression sur la détente influence la vitesse. • Retirer la pile de l’outil. Vérifier que le boîtier de la bobine peut tourner librement. Le nettoyer avec précaution si nécessaire. - Page 28 CORTADORA DE CÉSPED INALáMBRICA CON BATERÍA DE IONES DE LITIO DE 40 v MAx* MANUAL DE INSTRUCCIONES CATáLOgO N° LST540 gracias por elegir BLACk+DECkER! visite www.BlackandDecker.com/NewOwner para registrar su nuevo producto. LEA EL MANUAL ANTES DE DEvOLvER ESTE PRODUCTO POR CUALqUIER MOTIvO: Si tiene una consulta o algún inconveniente con su producto BLACk+DECkER,...
-
Page 29: Pautas De Seguridad/Definiciones
PAUTAS DE SEGURIDAD/DEFINICIONES Es importante que lea y comprenda este manual. La información que contiene se relaciona con la protección de SU SEGURIDAD y la PREVENCIÓN DE PROBLEMAS. Los símbolos que siguen se utilizan para ayudarlo a reconocer esta información. PELIGRO: indica una situación de peligro inminente que, si no se evita, provocará... -
Page 30: Descripción De Las Funciones
de cáncer, defectos congénitos u otros drogas o medicamentos. • CONSERVE LAS HERRAMIENTAS problemas reproductivos. Algunos ADECUADAMENTE: siga las ejemplos de estas sustancias químicas: instrucciones en la sección de • compuestos en los fertilizantes • compuestos en los insecticidas, mantenimiento. Mantenga los mangos secos, limpios y libres de aceite y grasas. - Page 31 INSTRUCCIONES DE el riesgo de dañar el enchufe o el cable. • Asegúrese de que el cable esté ubicado SEGURIDAD IMPORTANTES de modo que no lo pise o se tropiece PARA LOS CARGADORES DE con él y que no esté sujeto a daños o BATERíAS tensiones de alguna otra forma.
-
Page 32: Lea Todas Las Instrucciones
BateRía Puede encendeRse sI se una reparación. el armado incorrecto exPone a chIsPas o llaMas. puede implicar un riesgo de descarga • Cargue los paquetes de baterías solamente eléctrica, electrocución o incendio. en cargadores BLACk+DECkER. • Antes de limpiarlo, desconecte el •... -
Page 33: Procedimiento De Carga
hacer contacto y causar un cortocircuito. BATERíA DAñADA NOTA: Las baterías de IONES DE LITIO no El cargador puede detectar una deben guardarse en el equipaje que se batería débil o dañada. El indicador despacha. LED destellará en el patrón indicado en la etiqueta. -
Page 34: Montaje Y Ajuste
de 16 °C a 27 °C (60 °F a 80 °F). d. Si los problemas de carga persisten, lleve la herramienta, el paquete de baterías y el cargador al centro de mantenimiento local. <18% 4. Se debe recargar el paquete de baterías cuando no produce energía suficiente 18% - 45% para tareas que previamente realizaba... -
Page 35: Instalación Del Mango Auxiliar
HERRAMIENTAS NECESARIAS PARA EL ENSAMBLAjE (NO SUMINISTRADAS): - Destornillador Phillips ADVERTENCIA: Quite la batería antes de intentar la instalación de cualquiera de los siguientes componentes. INSTALACIÓN DEL PROTECTOR (FIGURAS D Y E) ADVERTENCIA: NUNCA OPERE LA HERRAMIENTA SIN EL PROTECTOR ADECUADAMENTE INSTALADO. -
Page 36: Instrucciones De Operación
LIBERACIÓN DE LA CUERDA DE NOTA: El cabezal girará únicamente en CORTE una dirección. Al despacharse de la fábrica, la cuerda de corte está sujeta con cinta a la cubierta del carrete. • quite la cinta que sujeta la cuerda de corte a la cubierta del carrete. -
Page 37: Encendido Y Apagado
ENCENDIDO Y APAGADO • Para encender la podadora, mantenga oprimido el botón de bloqueo en apagado (3) y oprima el gatillo de velocidad variable (1). La velocidad, potencia y tiempo de funcionamiento de la podadora dependen de cuánto oprima el interruptor. Oprimir el gatillo un poco dará... - Page 38 y desgastarán, y el carrete especial de autoalimentación alimentará y recortará automáticamente un nuevo trozo de cuerda. No golpee la unidad contra el suelo para intentar alimentar la cuerda ni por algún otro motivo. La cuerda de corte se desgastará más rápido y necesitará...
- Page 39 ADVERTENCIA: El uso de accesorios no recomendados por BLACk+DECkER para esta herramienta puede ser peligroso. REMPLAzO DEL CARRETE (FIGURAS O, P, Q, R) ADVERTENCIA: Antes de realizar cualquier ensamblaje, ajuste o cambio de accesorios, desconecte el enchufe de la fuente de alimentación. REBOBINADO DEL Dichas medidas de seguridad preventiva CARRETE (FIGURAS S Y T)
- Page 40 DEPANNAGE PROBLEMA SOLUCIÓN • Appuyer à fond sur la détente à vitesse variable. Le niveau de pression sur la La herramienta détente influence la vitesse. funciona lentamente. • Retirer la pile de l’outil. Vérifier que le boîtier de la bobine peut tourner librement.
-
Page 41: El Sello Rbrc
de cuerda (tamaños menores y mayores de cuerda afectarán la funcionalidad del sistema de alimentación automática).• Retire el carrete y comprobar si la palanca en la carcasa de la bobina se puede mover libremente. • Retire el carrete y desconectar la línea de corte y enróllelo en perfectamente otra vez. -
Page 42: Información De Mantenimiento
GARANTíA LIMITADO DE TRES ocurra en una instalación en particular. Si este equipo provoca interferencia perjudicial AñOS PARA USO EN EL HOGAR en la recepción de radio o televisión, lo que Black & Decker (Estados Unidos) Inc. se puede determinar al apagar y encender ofrece una garantía de tres años por el equipo, el usuario debe tratar de corregir cualquier defecto del material o de... - Page 43 · GARANTíA BLACK+DECKER · BLACK+DECKER WARRANTY . SOLAMENTE PARA PROPOSITOS DE MExICO Distributor Name · sello firma del distribuidor Date of purchase · Fecha de compra invoice no. · no. de factura PRODUCT INFOMATION · idEnTiFicación dEl prOducTO Cat. No. · catalogo ó Modelo serial number ·...
-
Page 44: Black+Decker
BLACk & DECkER S.A. DE C.V. BOSQUES DE CIDROS ACCESO RADIATAS NO. 42 COL. BOSQUES DE LAS LOMAS. 05120 MÉXICO, D.F TEL. (01 55) 5326 7100 01 800 847 2309/01 800 847 2312 Cat.No. LST540 Form No. 90629224 August 2015 BLACk+DECkER Copyright 2015 Printed in China ©...