Table of Contents
Advertisement
Advertisement
Chapters
Table of Contents

Related Manuals for Pioneer X-CM52BT

Summary of Contents for Pioneer X-CM52BT
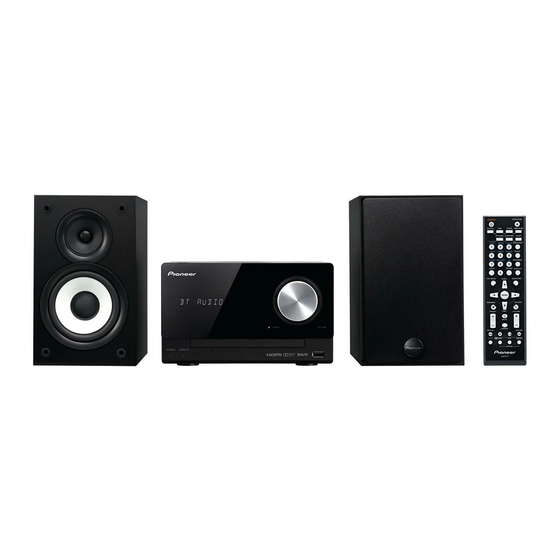
- Page 1 X-CM52BT -K/-W DVD Receiver System Operating Instructions...
- Page 2 A damaged power cord can cause a fire or give you an electrical shock. Check the power cord once in a while. When you find it damaged, ask your nearest PIONEER authorized service center or your dealer for a replacement. S002*_A1_En...
- Page 3 (including products supported by this unit). • Pioneer is not responsible for any malfunction of the compatible Pioneer product due to communication error/malfunctions associated with your network connection and/or your connected equipment.
-
Page 4: Table Of Contents
Thank you for buying this Pioneer product. Please read through these operating instructions so that you will know how to operate your model properly. After you have finished reading the instructions, put them in a safe place for future reference. -
Page 5: Before You Start
Before you start Chapter 1: Before you start • When loading the batteries into the remote control, set What’s in the box them in the proper direction, as indicated by the polarity marks ( and ). Please confirm that the following accessories are in the box •... -
Page 6: Part Names And Functions
Part names and functions Chapter 2: Part names and functions STANDBY/ON Remote control Switches the receiver between standby and on (page 20). Input function buttons Use to select the input source to this receiver (page 20). STANDBY/ON OPEN/CLOSE BT AUDIO ... - Page 7 Part names and functions DVD Receiver control buttons Ex.: DVD-Video Disc Navigator TOP MENU Press to display the top menu of the DVD-Video. MENU/PBC Use to access the DVD menu or VCD PBC menu. HOME/MENU Press to display the menu screen. Use this to change initial settings of the unit (page 34).
-
Page 8: Speaker System
Part names and functions 10 SHIFT Speaker system Press to access the ‘blue’ commands (above the buttons) on the remote. These buttons are marked with an asterisk (*) in this section. 11 OPEN/CLOSE Use to open or close the disc tray (page 20). 12 DVD Receiver control buttons CLOCK/TIMER Use for setting the clock, as well as for setting and... -
Page 9: Attaching The Non-Skid Pads
Part names and functions Attaching the Non-skid pads Rotating the Speaker Badge Apply the accessory non-skid pads to the bottom surfaces of The grill frame speaker badge can be rotated. Operate as the speakers. follows. Grasp the speaker badge (1), pull forward Important (2), and turn left (3). -
Page 10: Front Panel
Part names and functions Front panel TIMER VOLUME PHONES AUDIO IN Main display Remote sensor Receives the signals from the remote control. Volume control Use to set the listening volume (page 15). Disc tray Place the disc, label side up (page 20). Volume illumination Light when the power on. -
Page 11: Top Panel
Part names and functions Top panel STANDBY/ON INPUT STANDBY/ON INPUT Switches the receiver between standby and on (page 20). Selects the input source. Long press to change to BT STANDBY mode. Playback control buttons Selects the desired track or file to be played back. -
Page 12: Connections
Connections Chapter 3: Connections • Do not connect any speakers other than those supplied CAUTION to this system. • Be sure to turn off the power and unplug the power cord • Do not connect the supplied speakers to any amplifier from the power outlet whenever making or changing other than the one supplied with this system. -
Page 13: Connecting Using An Hdmi Cable
Connections The term HDMI and High-Definition Multimedia Interface, This unit’s rear panel and the HDMI Logo are trademarks or registered trademarks of HDMI Licensing, LLC in the United States and other countries. ANTENNA HDMI VIDEO SPEAKERS ANTENNA HDMI COMPONENT UNBAL 75 Ω VIDEO LINE AC IN... -
Page 14: Audio Signals That Can Be Output From This Unit's Hdmi Out Terminal
Connections Audio signals that can be output from Using external antennas this unit's HDMI OUT terminal To improve FM reception • 44.1 kHz to 96 kHz, 16-bit/ 20-bit/ 24-bit 2-channel linear Use a PAL connector (not supplied) to connect an external FM PCM audio (including 2-channel downmixing) antenna. -
Page 15: Getting Started
Getting started Chapter 4: Getting started To turn the power on General control Press the to turn the power on. STANDBY/ON Input function After use: When the on main unit is pressed, the current function Press the to enter the power stand-by ... -
Page 16: Sound Controls
Getting started Sound controls Setting the wake-up timer Used to change the existing timer setting, or to set a new Equalizer timer. When the is pressed, the current mode setting EQUALIZER Press STANDBY/ON to turn the power on. will be displayed. To change to a different mode, press the repeatedly until the desired sound mode appears. -
Page 17: Calling The Wake-Up Timer
Getting started Calling the wake-up timer Using Headphones It can be used to re-use an existing timer setting. Connect to the jack plug of the headphones. As well as steps 1 through 3 in “Setting the When the headphones are connected, there is no sound wake-up timer”. -
Page 18: Ipod/Iphone/Ipad Playback
iPad (4th generation) iPad Air Note • Pioneer does not guarantee that this unit plays iPod/ iPhone/iPad models other than the ones specified. • Some functions may be restricted depending on the model or software version. iPod/iPhone/iPad • iPod/iPhone/iPad is licensed for reproduction of non-... -
Page 19: Stand
iPod/iPhone/iPad playback Set up to stand the iPod/iPhone/iPad. CAUTION • When your iPod/iPhone/iPad is placed on the stand and When using an iPod/iPhone you wish to operate the iPod/iPhone/iPad directly, be Make sure the iPod/iPhone cable is aligned along the groove sure to steady the iPod/iPhone/iPad with the other hand for it on the back of the stand that comes with the unit. -
Page 20: Disc Playback
Disc playback Chapter 6: Disc playback CAUTION Playing discs or files • Do not place two discs in one disc tray. • Do not play discs of special shapes (heart, octagon, etc). Press STANDBY/ON to turn the power on. It may cause malfunctions. -
Page 21: Advanced Dvd, Cd Disc Playback
Disc playback A-B Repeat play Advanced DVD, CD disc playback The specified section within a single title or track is played repeatedly. Press HOME MENU. TOP MENU MENU/PBC TUNE+ STANDBY/ON OPEN/CLOSE The HOME MENU is displayed. TUNER DVD/CD AUDIO IN/LINE ENTER BT AUDIO... -
Page 22: Repeat Play
Disc playback To cancel repeat play: Note • When A-B repeat playback starts, “A-B repeat” will be Use / to select the Repeat Off. displayed on the screen. “RPT OFF” is displayed on the main display. • A-B repeat play is disabled on some discs. •... -
Page 23: Programmed Play
Disc playback Use /// to select the title, chapter, To cancel random play: track or file, then press ENTER. Use / to select the Random Off. “RDM OFF” is displayed on the main display. Program Current Title : 01 Chapter : 001 Program Step Title 1 - 05 Chapter 1 - 004... -
Page 24: Search Mode
Disc playback Search mode About downloading MP3/WMA Plays the specified number or time within the title, chapter, There are many music sites on the internet that you can track or file. download MP3/WMA music files. Follow the instructions from the website on how to download the music files. You can As well as steps 1 through 2 in “A-B Repeat then play back these downloaded music files by burning them to a CD/DVD disc. -
Page 25: Procedure To Playback Divx Or Mp3/Wma/Jpeg File
Disc playback Procedure to playback DivX or MP3/ WMA/JPEG file To play by specifying a file. TOP MENU TUNE+ MENU/PBC STANDBY/ON OPEN/CLOSE DVD/CD TUNER AUDIO IN/LINE ENTER BT AUDIO CLOCK/TIMER SLEEP RETURN HOME/MENU AUDIO SUBTITLE ANGLE EQUALIZER PRESET VOLUME TUNE–... -
Page 26: Usb Playback
WMA/JPEG file To play by specifying a file It is possible to listen to two-channel audio using the USB interface on the front of this receiver. • Pioneer does not guarantee that any file recorded on a TOP MENU MENU/PBC TUNE+... -
Page 27: Playing In The Desired Order (Programmed Play)
USB playback Press / to select desired playback file. Playing in the desired order (Programmed Play) 00:00 / 00:00 320kbps / TEST / MP3 / • This unit can play repeatedly folders stored in the USB storage device. _ _ _ _ •... -
Page 28: Using The Tuner
Using the tuner Chapter 8: Using the tuner Improving poor FM reception: Listening to the radio broadcasts Press ST/MONO repeatedly to select MONO. The following steps show you how to tune in to FM radio This will change the tuner from stereo to mono and usually broadcasts using the automatic (search) and manual (step) improve the reception. -
Page 29: To Recall A Memorised Station
Using the tuner To recall a memorised station Press PRESET +/– to select the desired station. To scan the preset stations The stations saved in the memory can be scanned automatically. (Preset memory scan) Press and hold PRESET +/–. The preset number will appear and the programmed stations will be tuned in sequentially, for 5 seconds each. -
Page 30: Other Connections
Other connections Chapter 9: Other connections Connect the rear panel LINE IN audio jacks to your auxiliary CAUTION playback component. • Before making or changing the connections, switch off the power and disconnect the power cord from the AC outlet. Connecting auxiliary components VIDEO Connect the front panel AUDIO IN mini-plug jack to your... -
Page 31: Bluetooth® Audio Playback
Other trademarks and trade names are those of pairing procedure on it. their respective owners. • The Bluetooth wireless technology enabled device must support A2DP profiles. • Pioneer does not guarantee proper connection and operation of this unit with all Bluetooth wireless technology enabled devices. -
Page 32: Listen To Music On The Unit From A Bluetooth Capable
Bluetooth® Audio playback BT STANDBY Note • The following can be done when the unit is on standby • This unit will be displayed as “X-CM52” on all Bluetooth with the BT STANDBY switched ON. capable devices that you have. •... -
Page 33: Radio Wave Caution
Bluetooth® Audio playback • If you live in a heavily populated residential area Radio wave caution (apartment, townhouse, etc.) and if your neighbor’s microwave is placed near your system, you may This unit uses a 2.4 GHz radio wave frequency, which is a experience radio wave interference. -
Page 34: Changing The Settings
Changing the settings Chapter 11: Changing the settings Settings for DVD/CD and USB playback Press HOME MENU. HOME MENU screen appears. Use /// to select the item, then press ENTER. Use /// to change the setting, then press ENTER. • Closing the HOME MENU screen. Press HOME MENU. -
Page 35: Setting The Hdmi Resolution Settings Back To Their
Changing the settings Digital Audio Out settings Settings What it does HDMI Out Select the audio signals to be output from the HDMI OUT terminal (LPCM (2CH)/Auto/Off ) according to the connected HDMI-compatible device. Video Output settings Settings What it does Change the picture display format (4:3 (Letter Box)/4:3 (Pan &... -
Page 36: Additional Information
If the trouble cannot be rectified even after exercising the checks listed below, ask your nearest Pioneer authorized service center or your dealer to carry out repair work. • If the unit does not operate normally due to external effects such as static electricity disconnect the power plug from the outlet and insert again to return to normal operating conditions. - Page 37 Additional information Problem Check Remedy Folder or file names are not Have you exceeded the maximum Up to 255 folders can be recognized on one disc. Up to 648 files recognized. number of folder or file names this can be recognized within one folder. Depending on the folder unit can recognize? structure, however, this unit may not be able to recognize certain folders or files.
- Page 38 Additional information When connected to an HDMI-compatible device Problem Check Remedy Picture is not displayed. Is the resolution properly set? Set HDMI Resolution properly for the connected device (page 35). Restore HDMI Resolution to the default setting (720x576sp) (page 35). Is the HDMI cable properly Connect the cable securely (all the way in).
-
Page 39: Language Code Table And Country/Area Code Table
Additional information Nauru (na), 1401 Siswati (ss), 1919 Language Code Table and Country/ Nepali (ne), 1405 Sesotho (st), 1920 Area Code Table Norwegian (no), 1415 Sundanese (su), 1921 Occitan (oc), 1503 Swahili (sw), 1923 Language Code Table Oromo (om), 1513 Tamil (ta), 2001 Oriya (or), 1518 Telugu (te), 2005... -
Page 40: Playable Discs And Formats
Additional information Playable discs and formats • Commercially available DVD-Video discs DVD-Video • DVD-R/ -RW/ -R DL and DVD+R/ +RW/ +R DL discs recorded in the Video mode Super Video CDs Super Video CD Video CDs Video CD • Commercially available audio CDs Audio CD •... -
Page 41: Playing Discs Created On Computers Or Bd/Dvd
Additional information Playing discs created on computers or Displaying external subtitle files BD/DVD recorders • The font sets listed below are available for external subtitle files. You can see the proper font set on-screen • It may not be possible to play discs recorded using a by setting the Subtitle Language on page 35 to match computer due to the application settings or computer’s the subtitle file. -
Page 42: Cautions On Use
• Places exposed to direct sunlight but if for some reason it should malfunction due to dust • Humid or poorly ventilated places or dirt, consult your nearest Pioneer authorized service • Extremely hot places center. Although lens cleaners for players are •... -
Page 43: Handling Discs
Additional information Handling discs About iPod/iPhone/iPad Storing • Always place discs in their cases and store them vertically, avoiding hot, humid places, places exposed to direct sunlight and extremely cold places. “Made for iPod” and “Made for iPhone” and “Made for iPad” •... -
Page 44: Specifications
• Tuner section © 2014 PIONEER HOME ELECTRONICS CORPORATION. Frequency Range (FM) ....87.5 MHz to 108 MHz Antenna Input (FM)....75 unbalanced All rights reserved. - Page 45 Additional information...
- Page 46 STANDBY/ON D3-4-2-1-1_B1_Zhtw D3-4-2-2-2a*_A1_Zhtw D3-4-2-1-3_A1_Zhtw D3-4-2-1-7a_A1_Zhtw D58-5-2-2a_A1_Zhtw K041_A1_Zhtw D3-4-2-1-7b*_A1_Zhtw S002*_A1_Zhtw D3-4-2-1-7c*_A1_Zhtw...
- Page 47 K058c_A1_Zhtw • •...
- Page 48 感謝您購買本項先鋒產品。 請詳閱本份操作手冊,方便您正確地操作本項裝置。而在您閱讀過後,請將手冊妥為保存,以備未來參考。 目錄 ....27 01 使用前 依想要的順序播放 (編序播放) ......5 包裝內容物...
-
Page 49: 使用前
使用前 第 1 章: 使用前 • 為了避免電池液洩漏,如果打算長時間不使用遙控器 (一個月或以上) ,請取出電池。如果電池液洩漏,請小 包裝內容物 心擦乾淨電池槽的內部,然後插入新電池。如果電池漏 請在您打開包裝後,確認是否含有以下配件。 液且液體沾到您的皮膚,請用大量清水沖洗。 • 遙控器 • 處理廢舊電池時,請遵守政府條例或適用於貴國或地區 • 電池 ( ) 的環境公共指令規則。 • 電源線 • 揚聲器電線 警告 • 視訊連接線 ( 1.5 m • 切勿在車內或加熱設備附近等受到陽光直射或其他過熱 ) • 的場合中使用或存放電池。否則不僅會導致電池漏液、 線型天線 過熱、爆炸或起火。還會減少電池的使用壽命或效能。 • 防滑墊 iPhone/iPad •... -
Page 50: 零件名稱與功能
零件名稱與功能 第 2 章: 零件名稱與功能 STANDBY/ON 遙控器 切換接收器的待機和開啟模式 (第 頁) 。 輸入功能按鍵 可選擇本接收器的輸入來源 (第 頁) 。 STANDBY/ON OPEN/CLOSE BT AUDIO Bluetooth 用於設定或播放使用 網路的音訊檔案 (第 DVD/CD TUNER AUDIO IN/LINE 頁) 。 數字按鍵 (0 至 9) CLOCK/TIMER BT AUDIO SLEEP 可輸入數字... - Page 51 零件名稱與功能 DVD 接收器控制按鍵 例如: DVD-Video Disc Navigator TOP MENU 按下可顯示 視訊的頂部選單。 MENU/PBC VCD PBC 可存取 選單或 選單。 HOME/MENU 按下以顯示選單螢幕。 Disc Navigator: Title 01- 49: – – 可變更本機的初始設定 (第 頁) 。 Move Select Prev. Next ENTER HOME MENU • Initial Settings (第 頁)...
-
Page 52: 揚聲器系統
零件名稱與功能 10 SHIFT 揚聲器系統 按下可使用遙控器上的 「藍色」命令 (按鍵上方) 。在 本章節中,這些按鍵皆標記有星號 (*) 。 11 OPEN/CLOSE 可開啟或關閉碟盤 (第 頁) 。 12 DVD 接收器控制按鍵 CLOCK/TIMER 可設定時鐘,以及設定和檢查定時功能 (第 頁) 。 高音揚聲器 SLEEP 低音揚聲器 使用睡眠定時功能 請參閱第 頁的 。 低音反射導管 13 聲音控制按鍵 調整音質 (第 頁) 。 揚聲器端子 14 DISPLAY 重要... -
Page 53: 安裝防滑墊
零件名稱與功能 安裝防滑墊 旋轉揚聲器銘牌 將防滑墊配件裝在揚聲器的底部表面。 揚聲器銘牌的護柵框架可以旋轉。操作如下。 緊握揚聲器銘牌 (1) ,向前拉 (2) ,然後向 重要 左轉 (3) 。 • 通常會以垂直位置使用揚聲器。 揚聲器銘牌將會旋轉。 垂直擺放揚聲器時 垂直擺放揚聲器時,請在揚聲器底部表面加上防滑墊。 揚聲器的底部表面 若揚聲器銘牌未旋轉,請執行上述步驟 ,再嘗試後續步驟 至 。 水平擺放揚聲器時 卸下揚聲器護柵。 水平擺放揚聲器時,請在水平揚聲器底部表面加上防滑墊。 水平使用揚聲器時的 底部表面 使用十字螺絲起子,以順時針方向旋轉護柵背 面的螺絲。 揚聲器護柵背面 重要 • 請勿以逆時針方向旋轉螺絲,因為這會造成銘牌掉落。 Zhtw... -
Page 54: 前面板
零件名稱與功能 前面板 TIMER VOLUME PHONES AUDIO IN 主要顯示幕 遙控感應器 接收遙控器的訊號。 音量控制 碟盤 可設定聆聽音量 (第 頁) 。 放置碟片,標籤面朝上 (第 頁) 。 音量燈光 TIMER 指示燈 電源開啟時會亮起。 接收器隨定時功能設定關閉電源時會亮起。 耳機插座 USB 端子 可連接耳機。連接耳機後,揚聲器未輸出任何聲音。 Apple iPod/iPhone/iPad 用於連接 大量儲存裝置或 作為 AUDIO IN 插座 音訊來源 (第 頁) 。 可使用立體聲迷你插孔連接線... -
Page 55: 上方面板
零件名稱與功能 上方面板 STANDBY/ON INPUT STANDBY/ON INPUT 切換接收器的待機和開啟模式 (第 頁) 。 選擇輸入來源。 長按以變更為 BT STANDBY 模式。 播放控制按鍵 選擇要播放的曲目或檔案。可停止播放。停止播放或繼續從 碟盤開啟/關閉按鍵 暫停時間點播放。 可開啟或關閉碟盤 (第 頁) 。 Zhtw... -
Page 56: 連接
連接 第 3 章: 連接 • 這些揚聲器皆已經過防磁處理。不過視安裝位置而定, 小心 若揚聲器系統安裝在非常靠近電視機螢幕的位置,可能 • 確定在每次接線或變更接線之前,關閉電源並從電源插 會發生色彩失真的情形。若發生此情形,請先關閉電視 座上拔下電源線。 機,然後經過 至 分鐘後再開啟。若問題仍在,請 • 完成裝置之間的所有接線後,請連接電源線。 將揚聲器系統遠離電視機。 • 確定揚聲器連接線核心未裸露且與其他連接線核心接 觸。這可能會造成產品故障。 • 請勿允許揚聲器連接線核心接觸接收器本體。 揚聲器連線 • 推動打開突出部分,然後插入裸線。 • 所附的揚聲器電線上,紅色管是用於連接 ( )端子。 將有紅色管電線連接( )端子,另一條電線則連接(–) 端子。 • 兩部揚聲器要放在右側或左側皆可。 左揚聲器 右揚聲器 本機後面板 • 若揚聲器連接線核心接觸接收器本體的任何金屬部分, 可能會破壞揚聲器並導致冒煙和起火。... -
Page 57: 使用 Hdmi 連接線連接
連接 HDMI HDMI High-Definition Multimedia Interface 一詞及 HDMI Logo HDMI Licensing, LLC 本機後面板 和 皆為 在美國及其他國 家的註冊商標。 ANTENNA HDMI VIDEO SPEAKERS COMPONENT UNBAL 75 Ω VIDEO LINE ANTENNA HDMI AC IN AC IN COMPONENT UNBAL 75 Ω VIDEO LINE 視訊連接線 色差視訊連接線... -
Page 58: 可從本機 Hdmi Out 端子輸出的音訊訊號
連接 可從本機 HDMI OUT 端子輸出的音訊訊號 插接 • 44.1 kHz 96 kHz 至 , 位元 位元 位元雙聲道線 型 音訊 (包括雙聲道縮混) 進行或改變接線時,請務必先將電源關掉並從 插座上拔 • 杜比數碼 聲道音訊 掉電源線。 MPEG • 音訊 完成所有連接後,將本機的插頭插入 插座。 本機後面板 • 本產品經過杜比實驗室的授權而製造 。 Dolby 和雙 記號 是杜比實驗室的註冊商標。 VIDEO SPEAKERS AC IN 連接... -
Page 59: 開始操作
開始操作 第 4 章: 開始操作 開啟電源 一般控制 按下 STANDBY/ON 開啟電源。 輸入功能 使用後: 按下主機上的 INPUT 後,目前的功能將變更為不同的模式。 按下 STANDBY/ON 可進入電源待機模式。 重複按下 INPUT 可選擇所需的功能。 附註 DVD/CD USB/IPOD iPod/iPhone/iPad • 在待機模式中,若連接 ,本機會轉變 為充電模式。 LINE AUDIO IN BT AUDIO 設置時鐘 顯示幕亮度控制 按下 DIMMER 可調暗顯示幕的亮度 。 亮度控制可分為四步驟 。 TOP MENU MENU/PBC TUNE+... -
Page 60: 聲音控制
開始操作 聲音控制 設定喚醒定時功能 用於變更現有定時功能設定或設定新的定時功能。 Equalizer 按 STANDBY/ON 開啟電源。 按下 EQUALIZER 後,將顯示目前模式的設定。若要變更為不 同的模式 , 請重複按下EQUALIZER直到出現所需的聲音模式 。 按住 CLOCK/TIMER。 FLAT 按下 / 選擇 「ONCE」或 「DAILY」 ,然 後按下 ENTER。 ACTIVE ONCE – 單次定時功能播放僅適用於一次目前時間。 DAILY – 每日定時功能播放適用於相同的目前的時間和 DIALOGUE 星期幾。 NIGHT 按下 / 選擇 「TIMER SET」 ,然後按下 ENTER。... -
Page 61: 叫用喚醒定時功能
開始操作 叫用喚醒定時功能 使用耳機 可用於重複使用現有的定時功能設定。 連接耳機的插孔插頭。連接耳機後,揚聲器未輸出任何聲音。 以及 「設定喚醒定時功能」中的步驟 1 至 3。 按下 / 選擇 「TIMER ON」 ,然後按 ENTER。 取消喚醒定時功能 TIMER VOLUME 可用於關閉計時器設定。 PHONES AUDIO IN 以及 「設定喚醒定時功能」中的步驟 1 至 3。 按下 / 選擇 「TIMER OFF」 ,然後按 ENTER。 使用喚醒定時功能 按下 STANDBY/ON 關閉電源。 •... -
Page 62: Ipod/Iphone/Ipad 播放
播放 第 5 章: iPod/iPhone/iPad 播放 iPod/iPhone/iPad iPod/iPhone/ http://pioneer.jp/homeav/support/ios/ • 先 鋒 網 站 上 ( 只需連接 至本機 , 您即可享受 iPad iPod/iPhone/iPad 的高品質音效。本機無法透過 HDMI OUT 及 )已公布經開發及測試的 軟體版 iPod/iPhone/iPad COMPONENT VIDEO 端子從 傳輸音樂 、 影 本系統。 iPod/iPhone/iPad iPod/iPhone/iPad 片及影像。... -
Page 63: 播放 Ipod/Iphone/Ipad
iPod/iPhone/iPad 播放 擺放直立架,以直立 iPod/iPhone/iPad。 附註 • 關於使用 iPod/iPhone/iPad iPod/ 的詳細資料,請參閱 使用 iPod/iPhone 時 iPhone/iPad 隨附的手冊。 iPod/iPhone 確定搭配本機的 纜線沿直立架上的溝槽放置。 iPod/iPhone/iPad iPod/iPhone/ • 連接 與本機時,會出現 iPad 重新充電。 (待機模式中也支援此功能。) USB/IPOD iPod/iPhone/iPad • 從 切換為其他功能輸入時 , 直立架背面 播放會暫時停止。 iPod/iPhone/iPad • 當 未播放且未執行任何操作超過 分 鐘後,本機將自動關機。在此情況下,需將自動關機切 換為... -
Page 64: 碟片播放
碟片播放 第 6 章: 碟片播放 小心 播放碟片或檔案 • 請勿在單一碟盤上放置兩張碟片。 • 請勿播放特殊形狀的碟片 (心形、八角形等) 。否則可 按 STANDBY/ON 開啟電源。 能會造成故障。 • 請勿在托盤移動時施力推動。 選擇的輸入顯示在前面板顯示幕上。 • 若托盤在開啟時停電,請等候至電力恢復。 • 播放碟片或檔案時,請在開始前先開啟電視並切換電視 • 請確定將 8 cm 碟片擺放在托盤中央。 輸入。 • 您可變更本機的畫面顯示語言(第 顯示設定 頁的 ) 。 附註 按下遙控器上的 DVD/CD 或重複按主機上的 •... -
Page 65: 進階 Dvd、Cd 碟片播放
碟片播放 A-B 重複播放 進階 DVD、CD 碟片播放 重複播放單一標題或曲目中的特定區段。 按下 HOME MENU。 顯示 HOME MENU。 TOP MENU MENU/PBC TUNE+ STANDBY/ON OPEN/CLOSE TUNER DVD/CD AUDIO IN/LINE HOME MENU ENTER BT AUDIO CLOCK/TIMER SLEEP RETURN HOME/MENU AUDIO SUBTITLE ANGLE EQUALIZER Audio Settings Video Adjust PRESET VOLUME... -
Page 66: 重複播放
碟片播放 取消重複播放: 附註 A-B repeat • 使用 / 選擇 Repeat Off。 重複播放開始後,畫面上將顯示 「 」 。 • 部分碟片會停用 重複播放。 RPT OFF 主顯示幕上會顯示 「 」 。 • 的 重複播放功能只能在標題內進行。 • 的 重複播放功能只能在曲目內進行。 Play Mode • 上的部分場景可能無法進行 重複播放。 A-B Repeat Title Repeat 取消 A-B 重複播放: Repeat Chapter Repeat Random... -
Page 67: 編序播放
碟片播放 使用 /// 選擇標題、章節、曲目或檔 取消隨機播放: 案,然後按 ENTER。 使用 / 選擇 Random Off。 RDM OFF 主顯示幕上會顯示 「 」 。 Program Current Title : 01 Chapter : 001 Program Step Title 1 - 05 Chapter 1 - 004 Play Mode Title 01 Chapter 001 Title 02 Chapter 002... -
Page 68: 搜尋模式
碟片播放 搜尋模式 關於下載 MP3/WMA MP3/WMA 播放指定編號或時間的標題、章節、曲目或檔案。 網際網路上有許多音樂網站可讓您下載 音樂檔 案。請依照網站上說明的指示來下載音樂檔案。在將音樂檔 以及 「A-B 重複播放」中的步驟 1 到步驟 2。 CD/DVD 案燒錄成 碟片後 , 您即可播放這些下載的音樂檔案 。 • 您的下載歌曲/檔案僅限您個人使用。任何未經擁有者 使用 / 選擇 「Search Mode」 ,然後按 許可之其他歌曲用途皆屬違法行為。 ENTER。 關於播放順序 使用/選擇 「Title search」 , 然後按ENTER 將依照儲存在上方資料夾中的檔案順序播放。 或 。 例如:... -
Page 69: Divx Mp3/Wma/Jpeg
碟片播放 播放 DivX 或 MP3/WMA/JPEG 檔案的程序 指定檔案播放。 TOP MENU TUNE+ MENU/PBC STANDBY/ON OPEN/CLOSE DVD/CD TUNER AUDIO IN/LINE ENTER BT AUDIO CLOCK/TIMER SLEEP RETURN HOME/MENU AUDIO SUBTITLE ANGLE EQUALIZER PRESET VOLUME TUNE– ZOOM MEMORY PROGRAM P.BASS 按下 DVD/CD。 按下 / 以選擇 DivX 或 MP3/WMA/JPEG 。 DivX JPEG 若碟片中混合... -
Page 70: Usb 播放
USB 播放 第 7 章: USB 播放 播放 DivX 或 MP3/WMA/JPEG 檔案的程序 播放 USB 儲存裝置 指定檔案播放 可在本接收器的前面板上使用 介面聆聽二聲道音訊。 TOP MENU MENU/PBC • 先鋒不保證在 TUNE+ 儲存裝置上的任何記錄檔案都可以播 STANDBY/ON OPEN/CLOSE 放,也不保證可供應 儲存裝置電源。另請注意,任 何因連接至本機造成的 儲存裝置檔案遺失,先鋒概 DVD/CD TUNER AUDIO IN/LINE 不擔負任何責任。 ENTER BT AUDIO CLOCK/TIMER SLEEP RETURN... -
Page 71: 依想要的順序播放 (編序播放
USB 播放 按下 / 可選擇需播放的檔案。 依想要的順序播放 (編序播放) • 本機可重複播放儲存在 儲存裝置中的資料夾。 00:00 / 00:00 320kbps MP3/WMA • 在含 檔案的 儲存裝置中,最多可讀取 / TEST / MP3 / 個資料夾與 個檔案 (包括不可播放的檔案) 。 _ _ _ _ _ _ _ _ _ _ _ _ 按下... -
Page 72: 使用調諧器
使用調諧器 第 8 章: 使用調諧器 儲存電台預設值 收聽收音機廣播 若您常收聽特定的廣播電台,讓接收器儲存該頻率以便每當 您想要收聽該電台時 (預設調頻)可輕鬆叫出。 此舉可省下 下列步驟向您說明使用自動 (搜尋)及手動 (步進)調頻功 每次手動調頻的麻煩。本機最多可記憶 個電台。 能調頻至 無線電廣播的方式。只要您調頻至電台,即可 記憶該電台的頻率以便之後叫用。有關詳細資訊,請參閱下 AUDIO SUBTITLE ANGLE EQUALIZER 儲存電台預設值 列 。 TOP MENU MENU/PBC TUNE+ ZOOM MEMORY PROGRAM P.BASS TOP MENU MENU/PBC TUNE+ STANDBY/ON OPEN/CLOSE ST/MONO VIDEO MODE BASS/TREBLE ... -
Page 73: 若要叫用記憶的電台
使用調諧器 若要叫用記憶的電台 按下 PRESET +/– 以選擇所需的電台。 若要掃描預設電台 儲存在記憶體中的電台可自動掃描。 (預設記憶掃描) 按住 PRESET +/–。 預設號碼將會出現,並依序調頻至設定的電台,每次約 秒。 找到所需電台後請再按一次 PRESET +/–。 清除所有預設記憶體 按下遙控器上的 TUNER。 按下 CLEAR 直到顯示 「MEM CLR」 。 附註 • 所有電台都將清除。 Zhtw... -
Page 74: 其他接線
其他接線 第 9 章: 其他接線 連接後面板的 LINE IN 音訊插孔至輔助播放設備。 小心 • 進行或改變接線時 , 請務必先將電源關掉並從 插座上 拔掉電源線。 連接輔助設備 VIDEO 連接前面板的 AUDIO IN 迷你型插孔至輔助播放設備。 電視機 • 此方式可用於在本機上播放來自不支援使用 端子的 iPod/iPhone/iPad HDMI 音樂。 COMPONENT L 75 Ω VIDEO LINE 本機後面板 TIMER VOLUME PHONES AUDIO IN 音訊連接線... -
Page 75: Bluetooth 音訊播放
® 音訊播放 Bluetooth 第 10 章: ® 音訊播放 Bluetooth 使用 無線技術播放的音樂 遙控器操作 Bluetooth 您可利用本機隨附遙控器來播放與停止媒體,以及執行其他 操作。 Bluetooth 無線技術裝置: 手機 附註 Bluetooth AVRCP • 無線技術裝置必須支援 協定。 Bluetooth 無線技術裝置: • 無法保證所有 Bluetooth 無線技術裝置的遙控器操作。 數位音樂播放機 Bluetooth 未配備 無線技術的裝置: 與本機配對 (首次註冊) 數位音樂播放機 Bluetooth Bluetooth ® 為能讓本機播放儲存在... -
Page 76: 從本機上聆聽 Bluetooth 裝置的音樂
® 音訊播放 Bluetooth BT STANDBY 附註 • 本機在待機 BT STANDBY 開啟 ON 時 , 可完成下列動作 。 Bluetooth X-CM52 • 本機將在您所有 裝置上顯示為「 」 。 Bluetooth • 選擇一個已有本機連線紀錄的 裝置 (已進行 開始配對。 過配對) ,本機將自動開啟 BT AUDIO 功能。 Bluetooth • 將 裝置靠近本機。 BT STANDBY 設定 •... -
Page 77: 無線電波注意事項
® 音訊播放 Bluetooth 無線電波反射 無線電波注意事項 Bluetooth 本機可收到的無線電波包括直接來自配備 無線技 術 (直射波)裝置的無線電波,以及由牆壁、家具和建築物 2.4 GHz 本機使用 無線電波頻率,該頻段亦可由其他無線系 (反射波)反射與來自各種方向的電波。反射波 (來自阻礙 統使用 (請參閱以下清單) 。若要防止雜訊或通訊中斷,請 物及反射物體)會進一步產生各種反射波,視位置而定,會 勿在該類裝置附近使用本機,或確定這些裝置皆在使用期間 出現各種不同的接收狀況。若因此現象而無法正確接收音訊, 關閉。 Bluetooth 請嘗試移動一下配備 無線技術裝置的位置。此外, • 無線電話 Bluetooth 請注意,當有人跨越或接近本機與配備 無線技術 • 無線傳真機 裝置間的空間時,音訊亦可能會因反射波而受到干擾。 • 微波爐 • 無線 IEEE802.11b/g 裝置 ( )... -
Page 78: 變更設定
變更設定 第 11 章: 變更設定 設定 DVD/CD 及 USB 播放 按下 HOME MENU。 隨即顯示 HOME MENU 畫面。 使用 /// 選擇項目,然後按 ENTER。 使用 /// 變更設定,然後按 ENTER。 • 關閉 HOME MENU 畫面。 按下 HOME MENU。 原廠預設值以 斜體 表示。 重要 • 下列設定適用於碟片或 iPod/iPhone/iPad 儲存裝置內容... -
Page 79: 將 Hdmi 解析度設定設為預設值
變更設定 數位音訊輸出設定 設定 按鍵功能 HDMI HDMI OUT HDMI Out 視所連接的 相容裝置,選擇從 端子 (LPCM (2CH)/Auto/Off)輸出音訊訊號。 視訊輸出設定 設定 按鍵功能 TV Screen 依據連接的電視來變更影像的顯示格式 ( 4:3 (Letter Box) /4:3 (Pan & Scan)/16:9 (Wide)/ 16:9 (Compressed)) 。 HDMI OUT HDMI Resolution 變更從 端子輸出視訊訊號的解析度 (720x576i/ 720x576p /1280x720p/1920x1080i/ 1920x1080p)... -
Page 80: 其他資訊
其他資訊 第 12 章: 其他資訊 故障排除 人們經常錯將不正確之操作當成系統故障或異常。如果您認為本元件有問題,請就以下各重點進行檢查。有時候問題可能出在 其他元件上。請仔細檢查其他使用中的裝置和電器設備。如果在查證過以下各點後問題還是無法改善,請就近洽詢您的先鋒授 權服務中心或經銷商,前來代為維修。 • 如果主機是因為靜電以致無法正常操作,那麼請將電源插頭從插座上拔下再插回來回復至正常操作的狀態。 一般問題 問題 檢查 解決方法 您進行的設定已清除。 電源線是否拔除? 拔除電源線時,將清除您的設定。請重新設定時鐘。若您不想清 除設定,請勿拔除電源線。 、 、 、 、 這不是本機的問題。 視輸入來源及錄製格式而定,音量聽起來可能會不同。 iPod/iPhone/iPad 、調諧器、 BT AUDIO AUDIO IN 、 及 LINE 間的音量各有不同。 º 角操作 (第 使用遙控器無法操作本機。 您操作的位置是否離太遠? 請在距離前面板遙控感應器... - Page 81 其他資訊 問題 檢查 解決方法 本機自動關閉。 若未播放及無操作動作達 分鐘以上,本機會自動關閉電源。 在此情況下,需將自動關機切換為 ON (第 頁) 。 連接 USB 儲存裝置時 問題 檢查 解決方法 無法識別 儲存裝置。 是否正確連接 儲存裝置? 牢牢地連接裝置,並一直到底。 是否用 集線器連接 儲存裝 本機不支援 集線器。直接連接 儲存裝置。 置? 本機是否支援 儲存裝置? 本機僅支援 大量儲存裝置。 本機支援可攜式隨身碟和數位音訊播放裝置。 FAT16 FAT32 僅支援 和 檔案系統。不支援其他檔案系統 exFAT NTFS (...
- Page 82 其他資訊 連接至 HDMI 兼容裝置時 問題 檢查 解決方法 未顯示任何影像。 解析度的設定是否正確? 正確設置用於所連接裝置的 HDMI Resolution (第 頁) 。 將 HDMI Resolution 還原為預設值 (720x576sp) (第 頁) 。 HDMI 連接線的連接是否正確? 牢牢地連接連接線,並一直到底。 ï 1080p 使用某些連接線無法輸出 視訊訊號。 沒有聲音或聲音失真。 HDMI Out 的設定是否正確? 設定 HDMI Out 為 LPCM (2CH)或 Auto (第 頁)...
-
Page 83: 語言代碼表和國家代碼/區碼表
其他資訊 Nauru (na), 1401 Siswati (ss), 1919 語言代碼表和國家代碼/區碼表 Nepali (ne), 1405 Sesotho (st), 1920 Norwegian (no), 1415 Sundanese (su), 1921 語言代碼表 Occitan (oc), 1503 Swahili (sw), 1923 Oromo (om), 1513 Tamil (ta), 2001 語言名稱 (代碼)和輸入代碼: Oriya (or), 1518 Telugu (te), 2005 Japanese (ja), 1001 Frisian (fy), 0625 Panjabi (pa), 1601... -
Page 84: 可播放的碟片及格式
其他資訊 可播放的碟片及格式 • 市售的 DVD-Video 碟片 DVD-Video • 在 「視訊」模式中錄製 DVD-R/-RW/-R DL DVD+R/+RW/+R DL 和 碟片 SVCD SVCD • 市售音訊 音訊 CD • CD-R/-RW/-ROM CD-DA 碟片包含以 格式錄製的音樂 DVD-R/-RW/-R DL CD-R/-RW/-ROM JPEG 錄製在 碟片、 碟片或 儲存裝置上的 檔案 JPEG DVD-R/-RW/-R DL CD-R/-RW/-ROM DivX ®... -
Page 85: 可播放檔案
其他資訊 顯示外部字幕檔案 可播放檔案 • 以下所列為外部字幕檔案所適用的字型組。您可以設置 第 頁的字幕語言,使它符合字幕檔案,以查閱畫面 • 本播放機無法播放以 保護 (數位版權管理)的檔 上正確的字型設置。 案。 • 本機支援以下的語言群組: • 我們不保證本機可播放以下格式( MPEG4-AAC 、 等)以外的檔案。 Afrikaans (af), Basque (eu), Catalan (ca), 群組 1 Danish (da), Dutch (nl), English (en), Faroese 支援的視訊檔格式 (fo), Finnish (fi), French (fr), German (de), Icelandic (is), Irish (ga), Italian (it), Norwegian DivX (no), Portuguese (pt), Rhaeto-Romanic (rm),... -
Page 86: 使用注意事項
其他資訊 關於凝結水 WMA: Windows 檔案屬於進階系統檔案,其中包括使用 如果突然將本機從寒冷的位置移到溫暖的室內 (例如冬天 Media Audio Microsoft 轉碼器壓縮的音訊檔案 。 是由 時) ,或如果安裝本機所在的室內溫度因為有暖氣而突然上 Windows Media Player 開發作為 專用的音訊格式檔案。 升,本機內部 (操作零件和鏡頭上)可能會產生水滴 (凝結 水) 。產生凝結水時,本機無法正常操作和播放。將本機電源 32 kHz/44.1kHz/48 kHz • 本系統支援 (取樣率 : ; 開啟並放置在室溫下約 或 個小時 (時間視凝結情況而 64 kbps 320 kbps 位元率:... -
Page 87: 手拿碟片時
其他資訊 手拿碟片時 關於 iPod/iPhone/iPad 存放 • 務必將碟片放置在包裝盒中並垂直放置,避免放置在高 溫、潮濕和陽光直射與極寒冷的位置。 • 請務必詳讀碟片的注意事項。 Made for iPod iPod Made for iPhone 「 」 (專為 製造) 、 「 」 清潔碟片 iPhone Made for iPad iPad (專為 製造)及 「 」 (專為 製 iPod iPhone iPad • 可能無法播放上有指紋或灰塵的碟片。此時請用清潔布 造)表示該電子配件是專為連接至... - Page 88 ....15 W + 15 W 電源輸出: (1 kHz 10 % T.H.D. Ω , , , © 2014 PIONEER HOME ELECTRONICS CORPORATION 。 • 調諧器部分 版權所有。 ... . .87.5 MHz 108 MHz 頻率範圍 ( )...
- Page 89 其他資訊 Zhtw...
- Page 90 其他資訊 Zhtw...
- Page 91 其他資訊 Zhtw...
- Page 92 253 Alexandra Road, #04-01, Singapore 159936 TEL: 65-6472-7555 PIONEER ELECTRONICS AUSTRALIA PTY. LTD. 5 Arco Lane, Heatherton, Victoria, 3202, Australia, TEL: (03) 9586-6300 PIONEER ELECTRONICS DE MEXICO S.A. DE C.V. Blvd.Manuel Avila Camacho 138 10 piso Col.Lomas de Chapultepec, Mexico, D.F. 11000 TEL: 55-9178-4270 K002_B3_En Printed in China <YOM200145-0023>...