Zennio INZENNIO Z38i Manual
Lcd touch panel with room thermostat
Hide thumbs
Also See for INZENNIO Z38i:
- Product manual (50 pages) ,
- Product manual (55 pages) ,
- Technical documentation (4 pages)
Table of Contents
Advertisement
Quick Links
Advertisement
Table of Contents

Related Manuals for Zennio INZENNIO Z38i


Summary of Contents for Zennio INZENNIO Z38i
- Page 1 INZENNIO Z38i KNX Touch Panel ZN1VI-TP38i Edition 2.1 Version 2.1...
-
Page 2: Table Of Contents
1 BYTE INDICATOR ..................25 2.3.1.10. FLOATING INDICATOR ................... 26 2.3.1.11. SECURITY CONTROL ..................27 2.3.1.12. PRESENCE SIMULATOR .................. 27 2.3.2. SPECIFIC PAGES ....................29 2.3.2.1. SCENES ..................... 29 2.3.2.2. TIMERS ..................... 30 2.3.2.3. CLIMATE ....................33 ZENNiO AVANCE Y TECNOLOGÍA www.zennio.com... - Page 3 SENDING OF "0" DELAY ................48 2.4.2.4. SENDING OF "1" DELAY ................48 2.4.2.5. PERIODICAL SENDING "0" ................. 48 2.4.2.6. PERIODICAL SENDING "1" ................. 49 2.4.2.7. BLOCK ...................... 49 2.5. THERMOSTAT ......................50 ANNEX I. COMMUNICATION OBJECTS ................51 ZENNiO AVANCE Y TECNOLOGÍA www.zennio.com...
-
Page 4: Introduction
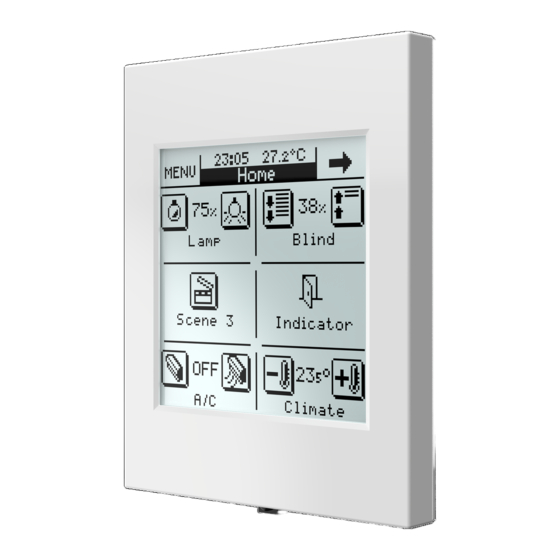
1. INTRODUCTION 1.1. PRODUCT InZennio Z38i is an LCD Touch Panel with Room Thermostat, Binary Inputs and IR Receiver built-in. Some of its most important features are mentioned below: KNX 3.8” back-lighted monochrome Touch Panel 2 independent thermostats configuration Presence simulation... - Page 5 Figure 1.1 shows schematically the screen organization of Touch Panel InZennio Z38i. HOME PAGE Header MENU Page shortout HOME 2 shortout PARAMETRIZABLE Sensor IR Receiver The next schema represents available pages to be “enabled” and its hierarchy. HOME PAGE MENU PAGE...
- Page 6 Next sections in this manual will detail the correct way to configure and program the LCD Panel InZennio Z38i, so that a user can control all (or part of) the KNX installation from a single device. <<PAGES>> Home 1 / Home 2 The “Home”...
-
Page 7: Installation
2. ETS CONFIGURATION To begin with the panel configuration it is necessary to import in ETS a project that contains an InZennio Z38i module of the device or a database .vd file of the product. This manual starts from the "default" product configuration, to gradually configure the device according to the user requirements. - Page 8 Pages: to enable and customize each of the functioning windows: Home 1, Home 2 and specific pages. Inputs: to enable and configure up to 4 inputs in the panel. Thermostats: to enable and configure up to 2 thermostats. ZENNiO AVANCE Y TECNOLOGÍA www.zennio.com...
-
Page 9: General
Display Disabled (touch anywhere to unblock): The display needs a first touch onto it to be unlocked, after this, this can be normally operated. The options related to the display lighting are shown in the next schema (Figure 2.2). ZENNiO AVANCE Y TECNOLOGÍA www.zennio.com... -
Page 10: Startup Indicators Update
2.2.3. HEADER It is possible to select by parameter whether to show or not in the display header the temperature, the time and the date. ZENNiO AVANCE Y TECNOLOGÍA www.zennio.com... -
Page 11: Pair Button Working Mode
Note: The boxes of the Home and Home 2 pages configured as “Binary control” this working mode configuration is not taken into account, since they will carry out the order specified by parameter. ZENNiO AVANCE Y TECNOLOGÍA www.zennio.com... -
Page 12: Remote Controller
DOES NOT have effect in the touch panel. 2.2.6. TEMPERATURE SENSOR CALIBRATION Allow recalibrating the Temperature Sensor referred to the own temperature measured by the sensor itself when the calibration parameter remains unchanged (value “0”). ZENNiO AVANCE Y TECNOLOGÍA www.zennio.com... -
Page 13: Temperature Sending Period
2.- After introducing it correctly, the word “NEW” will appear. That is the moment to insert the new password. 3 - "REPEAT". Insert again the desired new password. The left arrow button allows deleting/cancelling, in case of wrong-typing the digits. ZENNiO AVANCE Y TECNOLOGÍA www.zennio.com... -
Page 14: Pages
Figure 2.3. Password changing from the panel 2.3. PAGES This parameterization section details the enabling and configuration of the different pages of the InZennio Z38i, including the submenus they offer. Figure 2.4. Pages configuration Every enabled page has some parametrizable fields: ZENNiO AVANCE Y TECNOLOGÍA... -
Page 15: Home And Home
Both pages have 6 customizable boxes, to be configured as: binary control, light control, shutter control, climate control, 1 byte control, scene control, temperature control, binary indicator, 1 byte indicator, floating indicator, security control and presence simulator. Every configuration is explained below. ZENNiO AVANCE Y TECNOLOGÍA www.zennio.com... -
Page 16: Binary Control
Button 1 Always enabled by default. Short press: By pressing this button, one the following values will be sent to the bus, through the object "[Home x Box y] Binary control": Nothing, "0", "1" or Toggle ZENNiO AVANCE Y TECNOLOGÍA www.zennio.com... -
Page 17: Light Control
Note: When trying to control compact fluorescent lamps (CFL), an electronically reactance or a specific KNX actuator would be necessary to control their intensity. ZENNiO AVANCE Y TECNOLOGÍA www.zennio.com... - Page 18 Indicator: This will inform users about the brightness percentage applied at any time. Note: In this case, for this indicator to be functional, it is necessary to use a KNX dimmer to give back the brightness applied to the load. ZENNiO AVANCE Y TECNOLOGÍA www.zennio.com...
-
Page 19: Shutter Control
Through its communication objects, users will be able to raise / lower shutters ("Move shutter" and "Stop shutter") and even knowing its exact position at any time ("Shutter Position"). The basic shutter control is made as follows: ZENNiO AVANCE Y TECNOLOGÍA www.zennio.com... -
Page 20: Climate Control
It is possible to access to this (depending on the configuration applied to the function): Control type Choose the specific climate function to control: ZENNiO AVANCE Y TECNOLOGÍA www.zennio.com... -
Page 21: Byte Control
“Value”. Percentage (2 buttons with indicator): To send a percentage. Short press: Rise or lower 1% with every short key press. ZENNiO AVANCE Y TECNOLOGÍA www.zennio.com... -
Page 22: Scene Control
There is an only Communication Object associated with “Scenes”. All the scenes will be always sent through the object “[General] Scenes”. The available options are: ZENNiO AVANCE Y TECNOLOGÍA www.zennio.com... - Page 23 Turn Off the Heating and the A/C Systems Activate the Alarm System. The way to do this: 1. Run the scene to be modified. 2. Turn the light we want it to be the guiding light On ZENNiO AVANCE Y TECNOLOGÍA www.zennio.com...
-
Page 24: Temperature Control
“Temperature indicator”) or Temperature Offset (default range [-10ºC, 10ºC], and the same associated objects). Control range measurable range from -20ºC to 95ºC Icon A pair of icons can be associated to the page box. ZENNiO AVANCE Y TECNOLOGÍA www.zennio.com... -
Page 25: Binary Indicator
Communication Object (a “0” or a “1”) 2.3.1.9. 1 BYTE INDICATOR One byte provides much more information relating to an event than one bit. ZENNiO AVANCE Y TECNOLOGÍA www.zennio.com... -
Page 26: Floating Indicator
Note I: Depending on the data type selected, a different unit symbol will be shown. Note II: To distinguish the thousands, a separation “space” is defined in the number, whereas to distinguish the decimals a “point” is used. ZENNiO AVANCE Y TECNOLOGÍA www.zennio.com... -
Page 27: Security Control
This function is designed to simulate presence in a house once the devices on the KNX installation have been correctly parameterized. Two new Communication Objects become active: Presence simulation (1 bit): enable/disable the function Simulation channel (1 bit): Generate the ON/OFF ZENNiO AVANCE Y TECNOLOGÍA www.zennio.com... - Page 28 Starting time/Finish time This parameter adjusts the time for the daily simulation to start/stop running (once enabled the function). Minimum/Maximum ON/OFF time To adjust by parameter the minimum and maximum ON/OFF time for the devices on the installation. ZENNiO AVANCE Y TECNOLOGÍA www.zennio.com...
-
Page 29: Specific
2.3.2. SPECIFIC PAGES The Touch Panel InZennio Z38i offers four specific free-configuration pages. The enable options which will be described are: Scenes (5 boxes available) Timers (4 boxes available) Climate (6 boxes available) To enable these pages, just go to the Main Menu <<PAGES>> when “Editing Parameters”. -
Page 30: Timers
Function Modify the selected element: Increase the Function Select Hour/Minute element: Change the sent value/s (On/Off) Hours Check/Uncheck Minutes Weekdays Sent value (On/Off) Weekdays Figure 2.9. Timer page with its 4 boxes configured ZENNiO AVANCE Y TECNOLOGÍA www.zennio.com... - Page 31 Please see the following example: It is parameterized in ETS the specific pages 1 and 3 as Timer pages. The Timer page 1 is configured like this: - Box 2 linked to scene number 64. Only for ON ZENNiO AVANCE Y TECNOLOGÍA www.zennio.com...
- Page 32 Timer page configured, in this example, Z38i will send the scene number 11 (linked to the Box 3, in the Timers page 3). ZENNiO AVANCE Y TECNOLOGÍA www.zennio.com...
-
Page 33: Climate
The number of “Specific Pages” to control Climate Systems will mainly depend on the number of different Systems to control in the installation. Figure 2.10. Specific page: Climate ZENNiO AVANCE Y TECNOLOGÍA www.zennio.com... - Page 34 (heating/cooling source off) or in the "1" cycle (heating/cooling source on), which may be useful, for instance, to know when the hating of a house is on and when it is off. Figure 2.11. Activity indicator ON ZENNiO AVANCE Y TECNOLOGÍA www.zennio.com...
- Page 35 In the box, the indicator will show the current offset value. 1-bit object: the 1-bit object "[Clima x] Setpoint Offset sending" is enabled, in order to increment ("1") or decrement ZENNiO AVANCE Y TECNOLOGÍA www.zennio.com...
- Page 36 Auto, “1” for Heating, “14” for Dry, “9” for Fan or “3” for Cooling) will be sent to the climate system. Via the object “Mode Reception”, the panel will receive the status of the ZENNiO AVANCE Y TECNOLOGÍA www.zennio.com...
- Page 37 Comfort, Standby and Economic and it may be known at every moment the current working mode of the system (for achieving this, it will be ZENNiO AVANCE Y TECNOLOGÍA www.zennio.com...
-
Page 38: Technical Alarms
KNX installation (gas, smoke...). The Touch Panel InZennio Z38i can be configured to warn the user in case of incidents inside or outside of the room where the display is installed. - Page 39 Note: When an error or accident is detected on the KNX installation, InZennio Z38i will show the “Technical Alarms Screen”, and a danger icon will appear in the box affected; at the same time, the Panel blinks and emits a “beep” to warn the user. ZENNiO AVANCE Y TECNOLOGÍA www.zennio.com...
-
Page 40: Configuration
Once the warning reception is confirmed by the user (pressing the OK button), the screen will recover its normal state. After 90 seconds, InZennio Z38i display will show again the “Home” default screen. It is really important to know that confirming a warning does not make the Danger icon disappear from the box affected;... - Page 41 BOX 4 (Display Contrast setting): The contrast of the panel can be adjusted from this box. The range for this function lied between 0 and 20. Default value is 12. ZENNiO AVANCE Y TECNOLOGÍA www.zennio.com...
- Page 42 Note II: Take into account that after the reset a few seconds delay could take place respecting correct time; whereas after a bus failure this delay can be much bigger (it depends on the duration of the bus failure). This is the aspect the configuration page shows: ZENNiO AVANCE Y TECNOLOGÍA www.zennio.com...
-
Page 43: Inputs
2.4. INPUTS InZennio Z38i has 4 binary inputs for voltage-free contacts at the user’s disposal; these inputs can be individually configured, and connected to a “push button” or a switch/sensor. Joining an input with the global “common” of the inputs, results in a “Closed Contact”;... -
Page 44: Short Press
The value "0" is sent to the bus. Stop/Step down: Stops the shutter. When talking about shutters with lamellas, this mode allows the user to ZENNiO AVANCE Y TECNOLOGÍA www.zennio.com... - Page 45 ON/OFF orders (to manage the lighting level with an only input). Brighter: Every press on the screen increases the lighting level; this parameter depends on the “Dimming Step” set. A short press reduces the lighting level; a second press stops the “Increase”. ZENNiO AVANCE Y TECNOLOGÍA www.zennio.com...
-
Page 46: Long Press
SCENE This parameter identifies the scene to Run/Save with the corresponding Input. 2.4.1.2. LONG PRESS The configuration options are the same as in Short Press. 2.4.1.3. THRESHOLD TIME This parameter defines the time limit where a short press turns into a long press. ZENNiO AVANCE Y TECNOLOGÍA www.zennio.com... -
Page 47: Response Delay
By selecting a Switch/Sensor input, 1 bit “[Switch/Sensor] Edge” communication object will be sent to the bus every time a rising, falling or both edge (depending on the parameter selected) is detected. ZENNiO AVANCE Y TECNOLOGÍA www.zennio.com... -
Page 48: Rising Edge
Set a period of time to cyclically send value “0” to the bus. I.e., when object “[Switch/Sensor] Edge” detects this value on an incoming edge it will send its value constantly to the bus. If not cyclically sending is needed, please select value 0 in this field. ZENNiO AVANCE Y TECNOLOGÍA www.zennio.com... -
Page 49: Periodical Sending "1
Z38i will ignore any pulsation on the input. When receiving a “0” through this object, the input turns into the “enabled” state again (without taking into consideration the actions carried out while being disabled). ZENNiO AVANCE Y TECNOLOGÍA www.zennio.com... -
Page 50: Thermostat
2.5. THERMOSTAT The InZennio Z38i touch panel offers the possibility to configure up to 2 independent thermostats, which may be controlled if desired, from any of the specific Climate pages, by properly linking the objects associated to the specific Climate page with the specific objects of the thermostat to be monitored and controlled. -
Page 51: Annex I. Communication Objects
From 0% to 670760% -20ºC to 90-101 2bytes 25ºC Last [Home x Box x] Floating point Indicator 95ºC From 0 lux to 670760 lux From -670760 to 670760 from -20ºC to 95ºC [Home x Box x] Temperature indicator ZENNiO AVANCE Y TECNOLOGÍA www.zennio.com... - Page 52 [Ix] [Short Press] Stop/Step Shutter (switched) Short Pr. -> Switching "0/1" [Ix] [Short Press] Dimmer ON Short Pr. -> Sending of 1 (ON) Short Pr. -> Sending of 0 (OFF) [Ix] [Short Press] Dimmer OFF ZENNiO AVANCE Y TECNOLOGÍA www.zennio.com...
- Page 53 1 byte 0-100% Last [Tx] Control variable (Heat) PI control (Continuous) 236.238 1 bit Last [Tx] Additional Cool Temp > (Setpoint+Band) => "1" 237.239 1 bit Last [Tx] Additional Heat Temp < (Setpoint-Band) => "1" ZENNiO AVANCE Y TECNOLOGÍA www.zennio.com...
- Page 54 BECOME USER! http://zennioenglish.zendesk.com TECHNICAL SUPPORT ZENNiO AVANCE Y TECNOLOGÍA www.zennio.com...