NEC LT265 User Manual
Portable projector
Hide thumbs
Also See for LT265:
- Network manual (82 pages) ,
- Installation manual (7 pages) ,
- Specifications (2 pages)
Table of Contents
Advertisement
Advertisement
Table of Contents
Troubleshooting

Related Manuals for NEC LT265


Summary of Contents for NEC LT265
- Page 1 Portable Projector LT265/LT245 User’s Manual...
-
Page 2: Important Information
Important Information Safety Cautions Precautions Please read this manual carefully before using your NEC LT265/LT245 Projector and keep the manual handy for future reference. Your serial number is located on the bottom of your projector. Record it here: CAUTION To turn off main power, be sure to remove the plug from power outlet. - Page 3 The Federal Communications Commission does not allow any modifications or changes to the unit EXCEPT those specified by NEC Solutions (America), Inc. in this manual. Failure to comply with this government regulation could void your right to operate this equipment. This equipment has been tested and found to comply with the limits for a Class B digital device, pursuant to Part 15 of the FCC Rules.
- Page 4 Do not attempt to retrieve any objects that might fall into your projector. Do not insert any metal objects such as a wire or screwdriver into your projector. If something should fall into your projector, disconnect it immediately and have the object removed by a qualified NEC service personnel. 3. Do not place any liquids on top of your projector.
- Page 5 Do not touch them as the pieces of glass may cause injury. If this happens, contact your NEC dealer for lamp replacement. •...
-
Page 6: Table Of Contents
Table of Contents Important Information ... 1. Introduction ... What's in the Box? ... 2 Introduction to the Projector ... 3 Part Names of the Projector ... 5 Carrying the Projector ... 5 Top Features ... 7 Terminal Panel Features ... 8 Part Names of the Remote Control ... - Page 7 Correcting Horizontal and Vertical Keystone Distortion (Cornerstone) ... 43 Making Freehand Drawings on a Projected Image (ChalkBoard) ... 46 Storing Images Displayed on the Projector on the PC card or USB Memory (Capture) ... 47 Preventing Unauthorized Use of the Projector ... 48 Using a USB Memory Device or USB Memory Card Reader ...
-
Page 8: Introduction
Introduction What's in the Box? ... 2 Introduction to the Projector ... 3 Part Names of the Projector ... 5 Carrying the Projector ... 5 Top Features ... 7 Terminal Panel Features ... 8 Part Names of the Remote Control ... 10 Battery Installation ... -
Page 9: What's In The Box
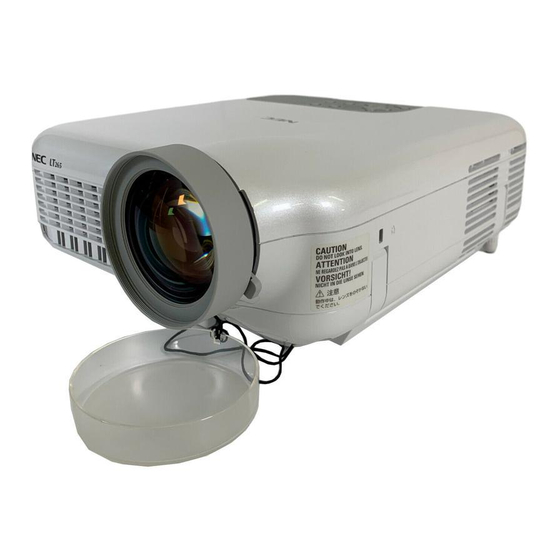
What's in the Box? Make sure your box contains everything listed. If any pieces are missing, contact your dealer. Please save the original box and packing materials if you ever need to ship your Projector. Lens cap (24FT9351) Remote control (7N900491) Power cable (7N080204) US... -
Page 10: Introduction To The Projector
PC control port (mini DIN 8Pin) and LAN support. With input and output flexibility, long lamp life and a full function remote, the LT265/LT245 lets you enjoy larger than life viewing from a compact and easy to setup and use projector. - Page 11 For additional information visit: US : http://www.necvisualsystems.com Europe : http://www.neceurope.com/ Global : http://www.nec-pj.com/ About this user's manual The fastest way to get started is to take your time and do everything right the first time. Take a few minutes now to review the user's manual.
-
Page 12: Part Names Of The Projector
Part Names of the Projector (See page 32) Focus Ring (See page 32) Remote Sensor (See page 12) Ventilation (outlet) Heated air is exhausted from here. Adjustable Tilt Foot Lever (See page 31) Adjustable Tilt Foot (See page 31) This security slot supports the MicroSaver® Security System. MicroSaver® is a registered trademark of Kensington Microware Inc. - Page 13 PC Card Eject Button PC Card Slot Remote Sensor (See page 12) Rear Foot AC Input Connect the supplied power cable's three-pin plug here, and plug the other end into an active wall outlet. (See page 26) Monaural Speaker (2W) Lamp cover (See page 119) Ventilation (outlet)
-
Page 14: Top Features
Top Features 1. POWER Button (ON / STAND BY) Use this button to turn the power on and off when the main power is supplied and the projector is in standby mode. NOTE: To turn on the projector, press and hold this button for a minimum of two seconds. -
Page 15: Terminal Panel Features
This enables you to control the projector using serial communica- tion protocol. The NEC optional serial cable (CA03D) is required to use this port. You can also control the projector by using PC Control Utility 3.0 contained on the supplied User Supportware 2 CD-ROM. - Page 16 PC CARD R AUDIO IN L 12. PC CARD Eject Button Press to eject a PC card partially. 13. PC CARD Slot Insert a PC memory card or NEC optional wireless LAN card here. 11 10 9 3 5 AUDIO OUT...
-
Page 17: Part Names Of The Remote Control
Part Names of the Remote Control POWER LASER PAGE MAGNIFY POINTER DOWN VIDEO COMPUTER S-VIDEO VIEWER PIC-MUTE AUTO ADJ. SLIDE VOLUME HELP ASPECT PICTURE FREEZE 3D REFORM 1. Infrared Transmitter/Laser Pointer Transmits an infrared signal when any button other than LASER is pressed. Direct the remote control toward the remote sensor on the projector cabinet. - Page 18 10. Select Button This button is used for projector’s menu operation and moving the magnified image. This button also works as a computer mouse when the supplied remote mouse receiver is connected with your computer. See page 42. 11. ENTER Button Executes your menu selection and activates items selected from the menu.
-
Page 19: Battery Installation
Battery Installation Remove the battery cover. NOTE: Do not pull the battery cover by force. Doing so can result in it coming off. Operating Range for Wireless Remote Control 7m/22 feet Remote sensor on projector cabinet • The infrared signal operates by line-of-sight up to a distance of about 22 feet/7 m and within a 60-degree angle of the remote sensor on the projector cabinet. -
Page 20: Installation And Connections
Installation and Connections Setting Up the Screen and the Projector ... 14 Selecting a Location ... 14 Throw Distance and Screen Size ... 15 Making Connections ... 17 Enabling the computer’s external display ... 17 Connecting Your PC or Macintosh Computer ... 17 To connect SCART output (RGB) ... -
Page 21: Setting Up The Screen And The Projector
This section describes how to set up your projector and how to connect PCs, video and audio sources. Setting Up the Screen and the Projector Selecting a Location The further your projector is from the screen or wall, the larger the image. The minimum size the image can be is approximately 30 inches (0.8 m) measured diagonally when the projector is roughly 51.2 inches (1.3 m) from the wall or screen. -
Page 22: Throw Distance And Screen Size
B = Vertical distance between lens center and screen cen- C = Throw distance D = Vertical distance between lens center and bottom of screen (top of screen for ceiling application) = Throw angle NOTE: Distances may vary +/-5%. LT265 Screen Size Diagonal Width Height Wide – Tele... - Page 23 Reflecting the Image Using a mirror to reflect your projector's image enables you to enjoy a much larger image. Contact your NEC dealer if you need a mirror system. If you're using a mir- ror system and your image is inverted, use the MENU and SELECT buttons on your projector cabinet or your remote control to correct the orientation.
-
Page 24: Making Connections
Usually, the combination of the ‘Fn” key along with one of the 12 function keys gets the external display to come on or off. For example, NEC laptops use Fn + F3, while Dell laptops use Fn + F8 key combinations to toggle through external display selections. -
Page 25: To Connect Scart Output (Rgb)
SCART is a standard European audio-visual connector for TVs, VCRs and DVD players. It is also referred to as Euro-connector. NOTE: The ADP-SC1 SCART adapter is obtainable from your NEC dealer in Europe. Contact your NEC dealer in Europe for more information. -
Page 26: Connecting An External Monitor
2. Installation and Connections Connecting an External Monitor Audio cable (not supplied) AUDIO OUT AUDIO OUT PC CARD R AUDIO IN L VIDEO IN S-VIDEO IN PC CONTROL COMPUTER 1 IN AUDIO IN COMPUTER 2 IN MONITOR OUT AC IN MONITOR OUT RGB/VGA signal cable (supplied) AUDIO... -
Page 27: Connecting Your Dvd Player With Component Output
Connecting Your DVD Player with Component Output Optional 15-pin - to - RCA (female) 3 cable (ADP-CV1) Component You can connect your projector to a DVD player with component output or Video output. To do so, simply: 1. Turn off the power to your projector and DVD player. 2. -
Page 28: Connecting Your Vcr Or Laser Disc Player
Connecting Your VCR or Laser Disc Player S-Video cable (not supplied) Video cable (not supplied) Audio equipment AUDIO IN Use an RCA or S-Video cable (not provided) to connect the video and use RCA cables (not provided) to connect the audio from your VCR, laser disc player or document camera to your projector. To make these connections, simply: 1. -
Page 29: Connecting To A Network
Explorer 8.0, Viewer PPT Converter and PC Control Utility 3.0) contained on the supplied Projector User Supportware 2.0 CD- ROM, see the supplied “NEC Software Utility Installation Guide”. See also each online help of the software utilities for information about their functions and operations. - Page 30 (B) Example of wireless LAN connection (Network Type Mode: Infrastructure) Access Point To make connection with a wired LAN via an access point, you need to select the Infrastructure mode. From the menu, select [Setup] [Infrastructure]. (C) Example of wireless LAN connection (Network Type To enable direct communication (i.e., peer-to-peer) between personal computers and projectors, you need to select the 802.11 Ad Hoc mode.
-
Page 31: Inserting And Removing A Pc Card
Inserting and Removing a PC Card To insert the NEC optional wireless LAN card or a PC memory card (also referred to as PC card in this manual), follow the steps below. CAUTION: * Direction for Inserting the PC Card The PC card has a top and bottom and must be inserted into the PC card slot in a specific direction. - Page 32 2. Installation and Connections PC Card Type The PC Card slot accepts PCMCIA Type II only. NOTE: The projector does not support NTFS formatted flash memory card or USB memory device. Be sure to use a flash memory card or USB memory device formatted with the FAT32, FAT16 or FAT file system. To format your flash memory card or USB memory device in your computer, refer to the document or help file that comes with your Windows operating systems.
-
Page 33: Connecting The Supplied Power Cable
Connecting the Supplied Power Cable Connect the supplied power cable to the projector. First connect the supplied power cable's three-pin plug to the AC IN of the projector, and then connect the other plug of the supplied power cable in the wall outlet. CAUTION: Do not unplug the power cable from the wall outlet under any one of the following circumstances. -
Page 34: Projecting An Image (Basic Operation)
Projecting an Image (Basic Operation) Turning on the Projector... 28 Selecting a Source ... 30 Adjusting the Picture Size and Position ... 31 Correcting Keystone Distortion ... 33 Optimizing an RGB Image Automatically ... 35 Turning Up or Down Volume ... 35 Using the Laser Pointer ... -
Page 35: Turning On The Projector
This section describes how to turn on the projector and to project a picture onto the screen. Turning on the Projector NOTE: • The projector has two power switches: a main power switch and a POWER (ON/STAND BY) button (POWER ON and OFF on the remote control). - Page 36 Note on Startup screen (Menu Language Select screen) When you first turn on the projector, you will get the Startup menu. This menu gives you the opportunity to select one of the 21 menu languages. To select a menu language, follow these steps: 1.
-
Page 37: Selecting A Source
Selecting a Source Selecting the computer or video source Using the Remote Control Press any one of the COMPUTER 1/2, VIDEO, S-VIDEO, VIEWER or LAN but- tons. Selecting from Source List Press and quickly release the SOURCE button on the projector cabinet to display the Source list. -
Page 38: Adjusting The Picture Size And Position
Adjusting the Picture Size and Position Place your projector on a flat level surface and ensure that the projector is square to the screen. Lift the front edge of the projector to center the image vertically. If the projected image does not appear square to the screen, use the Keystone feature for proper adjustment. - Page 39 3. Projecting an Image (Basic Operation) Zoom Use the ZOOM lever to finely adjust the image size on the screen. Focus Use the FOCUS ring to obtain the best focus.
-
Page 40: Correcting Keystone Distortion
Correcting Keystone Distortion Auto Keystone Correction The Auto Keystone correction feature will correct vertical distortion of a projected image on the screen. No special operation required. Just put the projector on a flat surface. Manual Keystone Correction You can also correct keystone distortion manually. To do so: 1. - Page 41 5. Repeat steps 3 and 4 to correct keystone distortion. 6. After completing Keystone correction, press the ENTER button. The Keystone screen will disappear. • To perform Keystone correction again, press the 3D REFORM button to display the Keystone screen and repeat above steps 1 to 6. NOTE: •...
-
Page 42: Optimizing An Rgb Image Automatically
Optimizing an RGB Image Automatically Adjusting the Image Using Auto Adjust Optimizing an RGB image automatically. Press the Auto Adjust button to optimize an RGB image automatically. [Poor picture] [Normal picture] Press the Auto Adjust button to fine-tune the computer image or to remove any vertical banding that might appear and to reduce video noise, dot interference or cross talk (this is evident when part of your image appears to be shimmer- ing). -
Page 43: Using The Laser Pointer
Using the Laser Pointer You can use the laser to draw your audience's attention to a red dot that you can place on any object. CAUTION: • Do not look into the laser pointer while it is on. • Do not point the laser beam at a person. •... -
Page 44: Turning Off The Projector
Turning off the Projector To turn off the projector: 1. Press the POWER (ON/STAND BY) button on the projector cabinet or the POWER OFF button on the remote control. The "Power Off / Are you sure?" message will appear. 2. Press the ENTER button or the POWER (ON/STANDBY) or the POWER OFF button again. -
Page 45: Convenient Features
Convenient Features Turning Off the Image and Sound ... 39 Freezing a Picture... 39 Using the Pointer ... 39 Enlarging and Moving a Picture ... 40 Getting Integrated Help ... 40 Using a USB Mouse ... 41 Using Remote Mouse Receiver ... 42 Correcting Horizontal and Vertical Keystone Distortion (Cornerstone) ... -
Page 46: Turning Off The Image And Sound
Turning Off the Image and Sound Press the PIC-MUTE button to turn off the image and sound for a short period of time. Press again to restore the image and sound. Freezing a Picture Press the FREEZE button to freeze a picture. Press again to resume motion. NOTE: Pressing the MENU button will display the Capture menu that allows you to capture a freezed image. -
Page 47: Enlarging And Moving A Picture
Enlarging and Moving a Picture You can enlarge the area you want up to 400 percent. To do so: 1. Press the POINTER button to display the pointer. 2. Move the pointer to the area you want to enlarge. 3. Enlarge the selected area. When the MAGNIFY (+) button is pressed, the image is magnified and the magnify icon will be displayed. -
Page 48: Using A Usb Mouse
Using a USB Mouse Using a USB mouse gives you a smooth operation. A commercially available USB mouse can be used. NOTE: There may be some brands of a USB mouse that the projector does not support. Operate the Menus using the USB mouse Mouse Cursor When connecting a USB mouse to the projector, you get a mouse cursor on the screen. -
Page 49: Using Remote Mouse Receiver
Using Remote Mouse Receiver The remote mouse receiver enables you to operate your computer’s mouse functions from the remote control. It is a great convenience for your computer-generated presentations. Connecting the remote mouse receiver to your computer If you wish to use the remote mouse function, connect the mouse receiver and computer. The mouse receiver can be connected directly to the computer’s USB port (type A). -
Page 50: Correcting Horizontal And Vertical Keystone Distortion (Cornerstone)
Correcting Horizontal and Vertical Keystone Distortion (Cor- nerstone) Use the 3D Reform feature to correct keystone (trapezoidal) distortion to make the top or bottom and the left or right side of the screen longer or shorter so that the projected image is rectangular. Cornerstone 1. - Page 51 8. Press the ENTER button. Screen 9. Use the SELECT button to select another icon which points in the direction. On the Cornerstone adjustment screen, select “Exit” or press the EXIT button on the remote control. Screen The confirmation screen is displayed. 10 .Press the SELECT button to highlight the [OK] and press the ENTER button.
- Page 52 Horizontal Cornerstone Max. +/– 35 approx. Keystone LT265: Max. +/– 35 approx. LT245: Max. +/– 30 approx. * The following are conditions under which the maximum angle is achived: • Image is projected in Wide (Zoom lever) • Resolution is XGA Higher resolution than XGA narrows the adjustable range.
-
Page 53: Making Freehand Drawings On A Projected Image (Chalkboard)
Making Freehand Drawings on a Projected Image (ChalkBoard) The ChalkBoard feature allows you to write and draw messages on a projected image. NOTE: The ChalkBoard feature is available only when a USB mouse is used. To display the ChalkBoard tool bar, click the middle button on your mouse or select "ChalkBoard" from the menu. The tool bar contains the following icons. -
Page 54: Storing Images Displayed On The Projector On The Pc Card Or Usb Memory (Capture)
Storing Images Displayed on the Projector on the PC card or USB memory (Capture) The Capture features allows you to capture an image from a source that is currently being displayed. The image is saved as JPEG in the PC card or USB memory. NOTE: •... -
Page 55: Preventing Unauthorized Use Of The Projector
Preventing Unauthorized Use of the Projector Assigning a keyword prevents the projector from being used by unauthorized individuals. Assigning a Keyword for the first time 1. Press the MENU button. The menu will be displayed. 2. Press the SELECT button to highlight the Setup submenu and press the ENTER button. The page tab “Basic”... - Page 56 4. Convenient Features 4. Press the SELECT button four times to highlight “Security”. 5. Press the ENTER button to display the Security screen. 6. Press the ENTER button once to highlight the Keyword entry box and press the ENTER button. The Software keyboard will be displayed.
- Page 57 7. Enter an alphanumeric keyword using the Software keyboard For example, to enter “1234”, follow the steps 7-1 to 7-4 below. NOTE: • Please make a note of your keyword. • Do not use spaces (SP) in your keyword. 7-1. Highlight the number “1” and press the ENTER button. The asterisk “...
- Page 58 Checking If Security is enabled Turn off the projector and turn it back on to check if the Security function is enabled. 1. Press the POWER (ON/STANDBY) button. The "Power Off / Are you sure?" message will appear. Press the ENTER button or the POWER (ON/STANDBY) or the POWER OFF button again. The lamp lights off and the POWER indicator flashes orange.
- Page 59 “OK” and press the ENTER button. The Security Function is now disabled. NOTE: Do not forget your keyword. However, if you forget your keyword, NEC or your dealer will provide you with your Release Code. button to highlight “Disable”.
-
Page 60: Using A Usb Memory Device Or Usb Memory Card Reader
Using a USB Memory Device or USB Memory Card Reader The projector is compatible with either a USB memory device or USB memory card reader which supports the viewer and security features. • To use a USB memory device or USB memory card reader, connect the device to the USB port (type A). -
Page 61: Operation Using An Http Browser
IP address of the projector has been set in the “HOSTS” file of the computer being used. Example 1: When the host name of the projector has been set to “pj.nec.co.jp”, http://pj.nec.co.jp/index.html is specified for the address or the entry column of the URL. - Page 62 Structure of the HTTP Server Power: This controls the power of the projector. On ... Power is switched on. Off ... Power is switched off. Volume: This controls the volume of the projector..Increases the volume adjustment value..Decreases the volume adjustment value. Mute: This controls the mute function of the projector.
- Page 63 Source Select: This switches the input connector of the projector. Computer1 ... Switches to the COMPUTER 1 IN connector. Computer2 ... Switches to the COMPUTER 2 IN connector. Video ... Switches to the VIDEO IN connector. S-Video ... Switches to the S-VIDEO IN connector. Viewer ...
-
Page 64: Using The Projector To Operate A Computer Connected On A Network (Desktop Control Utility 1.0)
4. Convenient Features Using the Projector to Operate a Computer Connected on a Network (Desktop Control Utility 1.0) When Desktop Control Utility 1.0 on the included User Supportware 2 CD-ROM is installed on the computer, that computer can be operated using the projector over a network. For example, say you have a PowerPoint file on a computer in your office that you want to use for a presentation at a meeting. - Page 65 1. Connect the computer to the LAN and make the required settings. 2. Install Desktop Control Utility 1.0 on the computer. • For instructions on installation, refer to the included “NEC Software Utility Installation Guide”. • For instructions on operating the software, see the Desktop Control Utility 1.0’s help file.
- Page 66 Operations on the projector – Connecting to the computer 1. Make the LAN settings on the projector. Make the LAN settings at [Setup] 2. Connect a commercially available USB mouse to the projector. (See page 41) 3. Click anywhere on the screen with the USB mouse. The menu appears.
- Page 67 9. Input the password you made a note of in the previous Step [6] in “Operations on the Computer”. 10. Input the password and click “OK”. The password input window is turned off. 11. Click the PC search icon The PC search window appears. 12.
- Page 68 The following operations are available only with buttons on the projector cabinet or the remote control. Disconnect icon ... Use to cut off communications with the computer. Shift icon ... Select this icon and press the ENTER button to set the shift lock mode. Select this icon and Ctrl icon ...
-
Page 69: Using The Viewer
Using the Viewer Making the Most out of the Viewer Function ... 63 Operating the Viewer Function from the Projector (playback) ... 64 Changing Background Logo ... 70... -
Page 70: Making The Most Out Of The Viewer Function
Both PNG and GIF format support non-interlaced images only. “Index” file is a file created using the Ulead Photo Explore 8.0 contained on the supplied NEC User Supportware 2 CD-ROM. See the supplied“NEC Software Utility Installation Guide” for installing the Ulead Photo Explore 8.0 on your computer. -
Page 71: Operating The Viewer Function From The Projector (Playback)
Operating the Viewer Function from the Projector (playback) This section describes the operation for showing slides created using the Viewer function with the projector. It is also possible to make slides directly from the images projected with the projector. Projecting slides (Viewer) Preparation: Use the Capture feature to store graphic files (JPEG, BMP, non-interlaced GIF or non-interlaced PNG files) in a PC card or USB memory inserted into the projector’s slot. -
Page 72: Viewer Window Elements
Viewer Window Elements Highlight List of folders Information Highlight ... Indicates the selected folder or drive. List of folders ... Indicates folders contained on a PC card or USB memory. Information ... Indicates information of the selected file or folder. Folder: folder name, creation date (month/day/year), creation time (hour/minute). - Page 73 Setting Option for Viewer Play Mode: Manual ... Views a slide manually when the Viewer source is selected. Auto ... Plays back slides automatically when the Viewer source is selected. Interval: Specifies interval time between 5 and 300 seconds. Start: Specifies start screen when the Viewer source is selected.
- Page 74 Exiting Viewer To exit Viewer, switch to another input such as Computer 1, Computer 2, Video, S-Video or LAN. * To switch to another input, there are two ways: * Press the COMPUTER 1, COMPUTER 2, VIDEO, S-VIDEO or LAN button on the remote control. * Press the MENU button on the remote control to display the Viewer menu.
- Page 75 Deleting Captured Images Using the Delete command on the Viewer menu allows you to delete captured images. To delete captured images: Preparation: Make sure that the PC card is inserted into the PC card slot or USB memory into the USB port of the projector.
- Page 76 To delete all the captured images: 1. Repeat steps 1 to 3 in the above described procedure. 2. Press the EXIT button to select the “__CAP__” folder in the directory (pane on the left). Slot 1 3 Fichiers __CAP__ _RESTORE RECYCLED 0000.jpg 1/3 0000.jpg...
-
Page 77: Changing Background Logo
Once you have changed the background from the NEC logo to another, you cannot return the logo to back- ground even by using “Reset”. To put the NEC logo back in the background logo, repeat the above steps. The NEC logo file is included on the supplied User Supportware 2 CD-ROM (/Logo/nec_b_x.jpg). -
Page 78: Using On-Screen Menu
Using On-Screen Menu Using the Menus ... 72 Menu tree ... 73 Menu Elements ... 75 Menu Descriptions & Functions [Source] ... 76 Menu Descriptions & Functions [Adjust] ... 79 Menu Descriptions & Functions [Setup] ... 90 Menu Descriptions & Functions [Information] ... 112 Menu Descriptions &... -
Page 79: Using The Menus
Using the Menus 1. Press the MENU button on the remote control or the projector cabinet to display the menu. Submenu NOTE: The commands such as 2. Press the SELECT buttons on the remote control the projector cabinet to display the submenu. 3. -
Page 80: Menu Tree
Menu tree Menu Item Source Computer1, Computer2, Video, S-Video, Viewer, LAN, Entry List Adjust Basic Brightness Contrast Color Sharpness Wall Color Aspect Ratio Volume Reset Picture Preset Management Signal Type Video Filter Image Options Clock Phase Horizontal Position Vertical Position Blanking Resolution Overscan... - Page 81 Menu Item Setup Installation Orientation Screen LAN Mode Projector Name Communication Speed Options Auto Adjust Auto Start Power Management Fan Mode Default Source Select Signal Select OUT Terminal Tools ChalkBoard Off Timer Mouse Pointer Information Usage Time Remaining Lamp Time, Lamp Hour Meter, Projector Usage Source Page1 Input Terminal, Signal Type, Video Type, Source Name, Entry No.
-
Page 82: Menu Elements
Menu Elements Highlight Radio button Check box Menu windows or dialog boxes typically have the following elements: Highlight ... Indicates the selected menu or item. Solid triangle ... Indicates further choices are available. A highlighted triangle indicates the item is active. Tab ... -
Page 83: Menu Descriptions & Functions [Source]
Photo Explore 8.0 for NEC contained on the CD-ROM. See the supplied NEC Software Utility Installation Guide for installing the Photo Explore 8.0 for NEC. See page for viewing slides. Selects a signal from the LAN port (RJ-45) or the NEC optional wireless LAN card plugged into the projector's card slot. - Page 84 Entry List Use the SELECT buttons on your remote control or the projector cabinet to select the signal and press the ENTER button on the remote control or the projector cabinet to display the Entry Edit Command screen. Entering the Currently Projected Signal into the Entry List 1.
-
Page 85: Entry Edit Command
Entry Edit Command You can edit signals on the Entry List. Load ... Enables you to select a signal from the list. Store ... Enables you to store the currently projected signal. Cut ... Enables you to remove a selected signal from the list and place it on the "clipboard" in the projector. Copy ... -
Page 86: Menu Descriptions & Functions [Adjust]
6. Using On-Screen Menu Menu Descriptions & Functions [Adjust] Basic [Brightness] Adjusts the brightness level or the back raster intensity. [Contrast] Adjusts the intensity of the image according to the incoming signal. [Color] Increases or decreases the color saturation level (not valid for RGB). - Page 87 [Hue] Varies the color level from +/- green to +/-blue. The red level is used as reference. This adjustment is only valid for Video, Component and TV standard inputs (not valid for RGB). [Sharpness] Controls the detail of the image for Video (Not valid for RGB). Using the Wall Color Correction [Wall Color] This function allows for quick adaptive color correction in applications where the screen material is not white.
- Page 88 Selecting Aspect Ratio [Aspect Ratio] (not available for Viewer) Screen Type 4:3 Aspect Ratio allows you to select the best Aspect mode to display your source image. When screen type 4:3 is selected for the source, the following selections will display: 4:3 ...
- Page 89 6. Using On-Screen Menu Controlling Volume [Volume] You can adjust the volume level of the projector speakers and AUDIO OUT (Stereo Mini Jack). Reset To reset the settings for “Basic”, select “Reset” and press the ENTER button. The message "The setting values on page will be reset. Are you sure?” will be displayed. Select “Yes”...
- Page 90 [Detail Settings] This will provide you with three pages of menus that provide more detailed settings. [Page1] Selecting Reference Setting [Reference] This feature allows you to use color correction or gamma values as reference data to optimize for various types of images.
- Page 91 6. Using On-Screen Menu NOTE: * When "Presentation" is selected in "Reference", this function is not available. * When "White Balance" settings has been changed, the color temperature value on screen does not reflect the real color temperature. Adjusting Brightness of White Area [White Peaking] Adjust the brightness of the white areas by using the slide bar.
- Page 92 Selecting Signal Type [Signal Type] Select either the computer signal type or the component signal type. RGB ... Computer signal Component ... Component signals such as Y/Cb/Cr, Y/Pb/Pr NOTE: This feature is available on the computer signal only. If you do not get a better picture even when you set "Signal Select" to "Component"...
- Page 93 Image Options Adjusting Clock and Phase [Clock/Phase] This allows you to manually adjust Clock and Phase. Clock ... Use this item to fine tune the computer image or to remove any vertical banding that might appear. This function adjusts the clock frequencies that eliminate the horizontal banding in the image. This adjustment may be necessary when you connect your computer for the first time.
- Page 94 Selecting Resolution [Resolution] This allows you to activate or deactivate the Advanced AccuBlend feature. Auto ... Turns on the Advanced AccuBlend feature. The projector automatically reduces or enlarges the current image to fit the full screen. Native ... Turns off the Advanced AccuBlend feature. The projector displays the current image in its true resolution. See "Auto Adjust"...
- Page 95 6. Using On-Screen Menu Video Selecting Noise Reduction Level [Noise Reduction] (not available for COMPUTER1/2, Viewer and LAN; available for TV standard inputs) Select one of the three levels for reducing video noise: Low, Medium or High. NOTE: The lower the Noise Reduction level, the better the image quality by way of higher video bandwidth. Selecting Color Matrix [Color Matrix] (not available for COMPUTER1/2, Viewer and LAN;...
- Page 96 Setting Vertical Edges [Vertical Enhancer] This function enhances the vertical edges around objects in the image. NOTE: This function is not available for an RGB and Component signal. Selecting Interlace or Deinterlace [I/P Converter] This function allows you to select between "Interlace" and "Deinterlace". Deinterlace (Auto) ...
-
Page 97: Menu Descriptions & Functions [Setup]
Menu Descriptions & Functions [Setup] Basic Selecting Keystone Mode [Keystone] This feature allows you to correct keystone distortion manually or automatically. Selecting this item will display the Keystone setting menu. Auto ... This feature allows the projector to detect its tilt and correct vertical distortion automatically. Manual ... - Page 98 Selecting Cornerstone Mode [Cornerstone] This option allows you to correct trapezoidal distortion. Selecting this item will display the Cornerstone adjustment screen. See page for more details. NOTE: When "Keystone" is selected, "Cornerstone" is not available. Setting Lamp Mode to Normal or Eco [Lamp Mode] This feature enables you to select two brightness modes of the lamp: Normal and Eco modes.
- Page 99 Menu Selecting Menu Color [Menu Color Select] You can choose a color for the menu. Turning On / Off Source Display and Message [Display Select] Source ... This option turns on or off input name display such as Computer 1/2, Video, and No Input to be displayed in the top right corner of the screen.
- Page 100 Selecting Menu Display Time [Menu Display Time] This option allows you to select how long the projector waits after the last touch of a button to turn off the menu. The preset choices are "Manual", "Auto 5 sec", "Auto 15 sec", and "Auto 45 sec". The "Auto 45 sec" is the factory preset. Manual ...
- Page 101 Setting a Password [Password (Menu)] / [Password (Logo)] A password can be set for your projector to avoid operation by an unauthorized person. When "Password (Menu)" is set, changing the menu from Basic to Advanced will display "Password (Menu)" input screen.
- Page 102 Security The Security function enables you to protect your projector so that the projector will not project a signal unless you enter a keyword. There is also an option to lock the projector by using a registered PC card* as a protect key. Once you have registered your PC card as a protect key, you are required to insert the registered PC card into the PC card slot of the projector each time you turn on the projector.
- Page 103 3. Enter your keyword in the Release Code input screen. You can view the projected image. NOTE: Do not forget your keyword. However, if you forget your keyword, NEC or your dealer will provide you with your Release Code. See more information at the end of this section.
- Page 104 If you've lost your registered PC card, proceed as follows: NOTE: NEC or your dealer will provide you with your Release Code in exchange for your registered keyword and Request Code. See more information at the end of this section.
- Page 105 Installation Selecting Projector Orientation [Orientation] This reorients your image for your type of projection. The options are: desktop front projection, ceiling rear projection, desktop rear projection, and ceiling front projection. NOTE: Selecting one of the other options than “Desktop Front” will force the “Keystone” mode to be “Manual". Selecting Aspect Ratio and Position for Screen [Screen] Screen Type ...
- Page 106 * Last digit of the model code varies depending on which country you live in. For more information, visit the above Website. • To use wireless LAN, insert the NEC optional wireless LAN card (NWL-100*) into the PC Card slot. See "Inserting and Removing a PC Card” on page 24.
- Page 107 To receive error messages or information on the remaining lamp life via e-mail: 1. On the "Mail" tab, select "Alert Mail" and press the ENTER button. A check mark will be placed. 2. Set "Sender's Address", "SMTP Server Name" and "Recipient's Address". Select [OK] and press the ENTER button.
- Page 108 PC Card Profiles (for PC Card): To execute a wireless LAN easily using Image Express Utility 2.0, select “Easy Connection. Up to two settings for the optional wireless LAN card can be stored in memory of the projector. Select "Profile 1" or "Profile 2" and then do settings for "DHCP" and the other options. After doing this, select [OK] and press the ENTER button.
- Page 109 Advanced menu Network Type (required for wireless only) Site Survey: Displays a list of available SSIDs for wireless LAN on site. Select an SSID which you can access. To select an SSID, highlight the SSID and use the SELECT : access point : Ad Hoc PC : WEP enabled NOTE: You cannot connect to a device with the SSID for Channel 14 because it is not displayed in the list.
- Page 110 WEP (required for wireless only) Select this option whether using the WEP (Wired Equivalent Privacy) key for encryption or not. To use encryption, specify WEP key. Disable ... Will not turn on the encryption feature. Your communications may be monitored by someone. 64bit ...
- Page 111 Using Software Keyboard to enter an encryption key 1. Select one of Key 1, Key 2, Key 3 and Key 4 and press the ENTER button. The software keyboard will be displayed. 2. Use the SELECT button to select one key and press the ENTER button. 3.
- Page 112 Mail Alert Mail: Checking this box enables Alert Mail feature. This option notifies your computer of an error message via e-mail when using wireless or wired LAN. The error message will be notified when the projector lamp has reached the end of its usable life or an error occurs in the projector.
- Page 113 Projector Name Specify a unique projector name. Press characters can be used. After entering a name, select [OK] and press the ENTER button. Using Software Keyboard 1 to 0 and Characters ... Use to type in password or keyword. MODE ... Selects one of three modes for alphabet and special characters. SP ...
- Page 114 Options Setting Auto Adjust [Auto Adjust] This feature sets the Auto Adjust mode so that the RGB image can be automatically or manually adjusted for noise and stability. You can automatically make adjustment in two ways: Normal and Fine. Off ... The RGB image will not be automatically adjusted. You can manually optimize the RGB image.
- Page 115 Enabling High Speed Fan Mode [Fan Mode] This option allows you to select two modes for fan speed: Auto mode and High speed mode. Auto ... The built-in fans automatically run at a variable speed according to the internal temperature. High ...
- Page 116 Selecting Signal Format [Signal Select] Computer 1/2 Allows you to set "Computer 1" and "Computer 2" to automatically detect an incoming RGB or component source such as a computer or DVD player. However there may be some RGB and component signals that the projector is unable to detect.
- Page 117 Tools Selecting the ChalkBoard [ChalkBoard] This option displays the ChalkBoard tool bar. The ChalkBoard feature allows you to write and draw messages on a projected image. NOTE: The ChalkBoard feature is available only when a USB mouse is used. To display or hide the ChalkBoard tool bar, click the middle button on your mouse. The tool bar contains the following icons.
- Page 118 Using Off Timer [Off Timer] 1. Select your desired time between 30 minutes and 16 hours: Off, 0:30, 1:00, 2:00, 4:00, 8:00, 12:00, 16:00. 2. Select “OK” and press the ENTER button on the remote control. 3. The remaining time starts counting down. 4.
-
Page 119: Menu Descriptions & Functions [Information]
6. Using On-Screen Menu Menu Descriptions & Functions [Information] Displays the lamp and the projector usage hours, the status of the current signal and settings and LAN settings. This dialog box has seven pages. The information included are as follows: Usage Time Remaining Lamp Time (%) Lamp Hour Meter (H) - Page 120 Source Page1 Input Terminal Signal Type Video Type Source Name Entry No. Source Page2 Horizontal Frequency Vertical Frequency Sync Type Sync Polarity Interlace 6. Using On-Screen Menu...
- Page 121 LAN Built-in This page shows information on settings for the LAN port (RJ-45) IP Address ... Indicates the IP address of the projector when the LAN port (RJ-45) is used. Subnet Mask ... Indicates the subnet mask of the projector when the LAN port (RJ-45) is used Gateway ...
- Page 122 LAN Wireless This page shows information on settings for WEP key for encryption. SSID ... Indicates the identifier (SSID) for your wireless LAN. Mode ... Indicates that "Infrastructure" or "802.11 Ad Hoc" is selected for your communication method WEP ... Indicates your selected datalength encryption: On or Off Channel ...
-
Page 123: Menu Descriptions & Functions [Reset]
Menu Descriptions & Functions [Reset] Returning to Factory Default The Reset feature allows you to change adjustments and settings to the factory preset for sources by the following methods: [Current Signal] Resets the adjustments for the current signal to the factory preset levels. All the items in “Adjust (except “Wall Color”) can be reset. -
Page 124: Maintenance
Maintenance Cleaning the Cabinet ... 118 Cleaning the Lens ... 118 Replacing the Lamp ... 119... -
Page 125: Cleaning The Cabinet
This section describes the simple maintenance procedures you should follow to replace the lamp, and to clean the cabinet and the lens. Cleaning the Cabinet 1. Turn off the projector before cleaning. 2. Clean the cabinet periodically with a damp cloth. If heavily soiled, use a mild detergent. Never use strong detergents or solvents such as alcohol or thinner. -
Page 126: Replacing The Lamp
Eco mode) of use, the lamp bulb may shatter, and pieces of glass may be scattered in the lamp housing. Do not touch them as the pieces of glass may cause injury. If this happens, contact your NEC dealer for lamp replacement. To replace the lamp: 1. - Page 127 4. Insert a new lamp housing until the lamp housing is plugged into the socket. CAUTION Do not use a lamp other than the NEC replacement lamp (LT60LPK). 5. Secure it in place with the two screws. Be sure to tighten the screws.
- Page 128 6. Reattach the lamp cover. 7. Tighten the lamp cover screw. Be sure to tighten the screw. 8. After you install a new lamp, select the menu [Reset] Lamp Time and the Lamp Hour Meter. NOTE: When the lamp exceeds 2100 hours (up to 4100 hours in Eco mode) of service, the projector cannot turn on and the menu is not displayed.
-
Page 129: Appendix
Appendix Troubleshooting ... 123 Specifications ... 126 Cabinet Dimensions ... 128 Pin Assignments of D-Sub COMPUTER 1/2 Input Connector ... 129 Compatible Input Signal List ... 130 PC Control Codes and Cable Connection ... 131 Using Software Keyboard ... 132 Troubleshooting Check List ... -
Page 130: Troubleshooting
Troubleshooting This section helps you resolve problems you may encounter while setting up or using the projector. Indicator Messages Power Indicator Indicator Condition Blinking light Green Orange Steady light Green Orange Status Indicator Indicator Condition Blinking light Green Orange Steady light Orange Lamp Indicator Indicator Condition... - Page 131 Common Problems & Solutions (See also "Power/Status/Lamp Indicator" on page 123.) Problem Check These Items Does not turn on • Check that the power cable is plugged in and that the power button on the projector cabinet or the remote control is on.
- Page 132 Usually, the combination of the ‘Fn” key along with one of the 12 function keys gets the external display to come on or off. For example, NEC laptops use Fn + F3, while Dell laptops use Fn + F8 key combinations to toggle through external display selections.
-
Page 133: Specifications
Specifications This section provides technical information about the LT265/LT245 Projector's performance. Model Number Optical DMD™ Resolution Lens Lamp Image Size Projection Distance Projection Angle Electrical Inputs Outputs USB Port LAN Port Video Compatibility Scan Rate Video Bandwidth Pixel Clock Freq... - Page 134 10.8" (D) 260mm (W) 92mm (H) (not including protrusions) LT265: 6.5 lbs / 2.9 kg LT245: 7.1 lbs / 3.2 kg 41 to 95 F (5 to 35 C), 20% to 80% humidity (non-condensing) 14 to 122 F (-10 to 50 C), 20% to 80% humidity...
-
Page 135: Cabinet Dimensions
8. Appendix Cabinet Dimensions MONITOR COMPUTER AUDIO COMPUTER CONTROL S-VIDEO VIDEO AUDIO USB LAN CARD AUDIO 92 (3.6") CARD POWER ON/STAND REFORM STATUS LAMP SELECT ADJUST AUTO SOURCE 260 (10.24") 57 (2.24") Lens center Lens center Unit: mm (inch) -
Page 136: Pin Assignments Of D-Sub Computer 1/2 Input Connector
Pin Assignments of D-Sub COMPUTER 1/2 Input Connector Mini D-Sub 15 Pin Connector Pin No. RGB Signal (Analog) Green or Sync on Green Blue Ground Ground Red Ground Green Ground Blue Ground No Connection Sync Signal Ground Ground Bi-directional DATA (SDA)* Horizontal Sync or Composite Sync Vertical Sync Data Clock*... -
Page 137: Compatible Input Signal List
DVD YCbCr DVD YCbCr #:Images in above flagged with # are compressed with Advanced AccuBlend on LT265 and LT245. NOTE: Some composite sync signals may not be displayed correctly. Signals other than those specified in the table above may not be displayed correctly. If this should happen, change the refresh rate or resolution on your PC. -
Page 138: Pc Control Codes And Cable Connection
PC Control Codes and Cable Connection PC Control Codes Function Code Data POWER ON POWER OFF INPUT SELECT COMPUTER 1 INPUT SELECT COMPUTER 2 INPUT SELECT VIDEO INPUT SELECT S-VIDEO INPUT SELECT VIEWER PICTURE MUTE ON PICTURE MUTE OFF SOUND MUTE ON SOUND MUTE OFF ON SCREEN MUTE ON ON SCREEN MUTE OFF... -
Page 139: Using Software Keyboard
PC Control Connector (DIN-8P) To RxD of PC To GND of PC To TxD of PC NOTE1: Pins 2, 3, 5, 6 and 8 are used inside the projector. NOTE 2: For long cable runs it is recommended to set communication speed within projector menus to 9600 bps. Using Software Keyboard 1 to 0 and Characters ... -
Page 140: Troubleshooting Check List
Troubleshooting Check List Before contacting your dealer or service personnel, check the following list to be sure repairs are needed also by referring to the “Troubleshooting” section in your user’s manual. This checklist below will help us solve your problem more efficiently. - Page 141 Vertical synch frequency Synch polarity Synch type STATUS Indicator: Steady light Flashing light Remote control model number: Projector Signal cable NEC standard or other manufacturer’s cable? Model number: Length: Distribution amplifier Model number: Switcher Model number: Adapter Model number: Installation environment...
-
Page 142: Travelcare Guide
TravelCare Guide TravelCare - a service for international travelers This product is eligible for "TravelCare", NEC's unique international war- ranty. Please note that TravelCare coverage differs in part from coverage un- der the warranty included with the product. Services offered with TravelCare... - Page 143 +886 2 8500 1420 Email Address: nickliao@nec.com.tw WEB Address: http://www.nec.com.tw (Regions Covered) Taiwan NEC Solutions Asia Pacific Pte. Ltd Address: 401 Commonwealth Drive, #07-02, Haw Par Technocentre, Singapore 149598 Telephone: +65 6 273 8333 Fax Line: +65 6 274 2226 Email Address: tehgh@rsc.ap.nec.com.sg...
- Page 144 Date: TO: NEC or NEC's Authorized Service Station: (Company & Name with signature) Dear Sir (s), I would like to apply your TravelCare Service Program based on attached registration and qualification sheet and agree with your following conditions, and also the Service fee will be charged to my credit card account, if I don't return the Loan units within the specified period.
- Page 145 3) Any fault in the attachments or associated products or components (whether or not supplied by NEC or its agents which do not form part of the Product covered by this warranty); 4) Any act of God, fire, flood, war, act of violence or any similar occur- rence;...
-
Page 146: Limited Warranty
5. In the event a product is returned to NEC Solutions for warranty service, and it is determined that there is no product defect or that the product condition is not covered by this limited warranty, a diagnostic service fee may be charged to the customer. -
Page 147: Declaration Of Conformity
Type of Product: Equipment Classification: Models: We hereby declare that the equipment specified above conforms to the technical standards as specified in the FCC Rules. NEC Solutions (America), Inc. 1250 N. Arlington Heights Road Itasca, Illinois 60143 (630) 467-5000 Projector... -
Page 148: Power Consumption
NEC LT265 GOV/LT245 GOV User’s Manual Supplement This document provides information exclusive to the LT265GOV/LT245GOV. For detailed product and usage information on the projector, read the supplied user documents: CD- ROM, Important Information and Quick Setup Guide. • Selecting Power-saving in Standby Mode... -
Page 149: Indicator Messages
Indicator Messages Power Indicator Indicator Condition Blinking light Green Green Orange Steady light Green Orange Status Indicator Indicator Condition Blinking light Green Orange Steady light Orange Green Lamp Indicator Indicator Condition Blinking light Steady light Green Printed on recycled paper Projector Condition The main power is off 0.5 sec On,...