Table of Contents
Advertisement
Available languages
Available languages
Advertisement
Chapters
Table of Contents

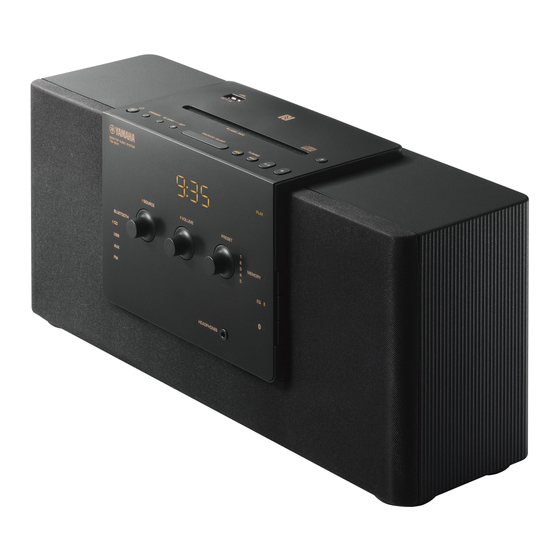
Related Manuals for Yamaha TSX-B141


Summary of Contents for Yamaha TSX-B141
- Page 1 OWNER'S MANUAL MODE D'EMPLOI MANUAL DE INSTRUCCIONES...
-
Page 2: Important Safety Instructions
– and, most importantly, without affecting your sensitive hearing. Since hearing damage from loud sounds is often undetectable until it is too late, Yamaha and the Electronic Industries Association’s Consumer Electronics Group recommend you to avoid prolonged exposure from excessive... - Page 3 “OFF” requirements. Modifications not expressly approved and “ON”, please try to eliminate the problem by by Yamaha may void your authority, granted by the using one of the following measures: FCC, to use the product.
- Page 4 Using an AC adaptor other than the one provided and/or personal injury. Yamaha will not be held may cause fire or damage to this unit. responsible for any damage resulting from use of this 23 Excessive sound pressure from earphones and unit with a voltage other than specified.
-
Page 5: Supplied Accessories
FEATURES Various music sources that emphasize sound quality • Play back music on external devices such as audio/data CDs, USB devices (USB flash drives), and those connected via AUX, and tune in to the radio. • By the Bluetooth technology, you can enjoy clear sound without wired connections (☞ P. 11). •... -
Page 6: Table Of Contents
The mobile device needs to be connected with the unit via Bluetooth connection (☞ P. 11). Due to product improvements, specifications and appearance are subject to change without notice. Google Play https://play.google.com/store/ http://itunes.com/app/dtacontroller apps/details?id=com.yamaha.av. dtacontroller (For users in the U.S.A.) https://itunes.apple.com/us/app/dta- controller-us/id549333293?mt=8 Note If you cannot access the above information, search for “DTA CONTROLLER”... -
Page 7: Names Of Parts And Their Functions
GETTING STARTED NAMES OF PARTS AND THEIR FUNCTIONS Remote control 6 DIMMER Adjusts the brightness of the front panel display ☞ P. 21). • PRESET Selects the preset radio station when using the radio. • FOLDER Switches the playback folder during playback of CDs or USB devices. -
Page 8: Top Panel
NAMES OF PARTS AND THEIR FUNCTIONS Top panel 1 USB port 5 ALARM • Connect a USB device for playback (☞ P. 9). Turns the alarm on/off (☞ P. 18). • Supplies 5 V/1 A to a portable device, such as a 6 SET smartphone, when it is connected with a USB Use to configure the alarm setting (☞... -
Page 9: Front Panel
NAMES OF PARTS AND THEIR FUNCTIONS Front panel BLUETOOTH 1 Front panel display 7 Preset indicator Displays the clock and various information. Shows preset radio station number (☞ P. 14). 2 Illumination sensor 8 MEMORY Measures surrounding illuminance. Do not cover Memorizes radio stations (☞... -
Page 10: Rear Panel
NAMES OF PARTS AND THEIR FUNCTIONS Rear panel 1 FM antenna terminal 5 15V Connect the supplied FM antenna. Connect the supplied AC adaptor and power 2 AM antenna terminal cable. 6 ALARM TYPE (U.S.A. and Canada models) Connect the supplied AM antenna. Sets the alarm type of the IntelliAlarm function 3 GND (☞... -
Page 11: Adjusting The Clock
ADJUSTING THE CLOCK Pin the antenna where the best reception is obtained. Note • The antenna should be stretched out. • If you use an outdoor antenna instead of the supplied antenna, reception will be better. • If radio reception is poor, change the height, direction, or placement of the antenna. -
Page 12: Listening To Cd And Usb Device
PLAYING MUSIC LISTENING TO CD AND USB DEVICE The unit will operate as follows when playing back tracks/files on CD/USB devices. • If the CD/USB device being played back is stopped, the track that was being played back will start playing from the beginning of the track the next time playback begins. -
Page 13: Display Information
LISTENING TO CD AND USB DEVICE Listening to USB device Top/front panel Set SOURCE to USB. Connect a USB device. Playback starts automatically. Playback operations are available with the remote control or this unit. Stop playback before disconnecting the USB device. SOURCE Display information Track or folder and file numbers appear for a... -
Page 14: Repeat Playback
• The power is supplied while the unit is turned on (no matter what source is selected), even in standby mode. • Yamaha will not be held responsible for any damage to the portable device or data loss occurred while using this unit. -
Page 15: Listening To Music From Your Bluetooth Device
• If this unit is connected via Bluetooth to another device, disconnect the Bluetooth connection before you perform the pairing operation (☞ P. 13). Note Yamaha does not guarantee all connections between this unit and Bluetooth device. Front panel Press to turn on the unit. -
Page 16: Listening To A Bluetooth Device
Hold the smartphone over the NFC mark. Perform the pairing operation at the smartphone (for details, please read the owner’s manual of the smartphone). This unit is indicated as “TSX-B141 Yamaha” on the smartphone. mark • If you are prompted for a passkey, enter the numerals “0000”. -
Page 17: Disconnecting A Bluetooth Connection
Connecting from the connecting device In the Bluetooth settings of the connecting device, turn Bluetooth on. From the Bluetooth connection list of the connecting device, choose this unit (TSX-B141 Yamaha). The Bluetooth connection will be established, and the Bluetooth indicator on the front panel display of this unit will light. -
Page 18: Listening To Radio Stations
LISTENING TO RADIO STATIONS Tuning radio stations Top/front panel Set SOURCE to FM/AM (U.S.A. and TUNING Canada models). Press to tune the FM/AM station. Tuning type Operation of TUNING Press and hold down Automatic tuning Press Manual tuning repeatedly. Note SOURCE If you tune to an FM station manually, the sound will be in monaural. -
Page 19: Listening To External Source
USING THE ALARM LISTENING TO EXTERNAL SOURCE Set the unit to standby mode before connecting Rear panel audio cables. Connect external audio device to AUX on the rear panel using a commercially available 3.5 mm (1/8 in) stereo mini plug cable. -
Page 20: Using Alarm Function
USING ALARM FUNCTION IntelliAlarm The unit includes an alarm function (IntelliAlarm) that plays back music sources or set of beeps (built-in alarm) at the set time in a variety of different methods. The alarm function has following features. 3 types of alarms Select from 3 alarm types, combining music and beep sounds. -
Page 21: Alarm Setting
USING ALARM FUNCTION Alarm setting Setting the alarm time and sound Top/front panel Press SET. Alarm indicator ( ) and setting items flash. PRESET Alarm indicator Set the alarm time with PRESET. Rear panel Set the alarm type with ALARM TYPE. Select from SOURCE+BEEP, SOURCE or BEEP. - Page 22 USING ALARM FUNCTION Turning the alarm on/off Top panel Press ALARM. When the alarm is on, the alarm indicator ) is shown, and the alarm time is shown for a while. If you press ALARM again, the alarm indicator ( ) and the alarm will turn off.
- Page 23 USING ALARM FUNCTION Setting Weekly Alarm Setting Weekly Alarm with DTA CONTROLLER With DTA CONTROLLER (☞ P. 2), you can use Weekly Alarm, which allows you to set alarm times respectively for each day of the week. First, make the Weekly Alarm settings on DTA CONTROLLER. IntelliAlarm setting screen (IntelliAlarm icon) in DTA CONTROLLER to open the IntelliAlarm...
- Page 24 USING ALARM FUNCTION Setting Weekly Alarm on the unit Once you have set Weekly Alarm by DTA CONTROLLER, you can select the Weekly Alarm mode in the alarm mode select display of this unit. Press SET. Top panel The alarm indicator ( ) will flash and the alarm mode select display will appear.
-
Page 25: Using The Sleep Timer
OTHER FUNCTIONS AND INFORMATION USING THE SLEEP TIMER You can set the time until the unit automatically enters standby mode. Press SNOOZE/SLEEP a number of Top panel times to set the time until the system enters standby mode. The sleep timer can be set to 30, 60, 90 and 120 minutes. -
Page 26: Troubleshooting
If there is a problem with the unit, check the following list first. If the problem you are experiencing is not listed below or if the instructions below do not help, turn off the unit, disconnect the power cable, and contact the nearest authorized Yamaha dealer or service center. General... -
Page 27: Usb Device Playback
TROUBLESHOOTING CD playback Problem Cause Solution Disc cannot be inserted. The unit is set to Eco Standby mode. Press to cancel Eco Standby mode (☞ P. 4). A disc is already inserted. Press to eject the disc. Some button operations do not The disc loaded into the unit may not be Use a disc supported by the unit (☞... - Page 28 TROUBLESHOOTING Bluetooth Problem Cause Solution Cannot make this unit paired The unit is already connected with Disconnect the already connected another device. Bluetooth device. with the connecting device. The connecting device does not support Perform pairing operations with a device A2DP.
- Page 29 TROUBLESHOOTING FM/AM radio reception Problem Cause Solution Too much noise. The antenna may be connected Make sure the antenna is connected improperly. properly (☞ P. 6, 7) or use a commercially available outdoor antenna. Too much noise during stereo The radio station you selected may be far Try manual tuning to improve the signal from your area, or the radio wave quality (☞...
-
Page 30: Notes On Discs And Usb Devices
HDD, etc. • Do not load a cracked, warped, or glued disc. • Yamaha will not be held responsible for any damage to or • Do not use 8-cm discs. data loss on the USB device occurring while the device is connected to this unit. -
Page 31: Specifications
SPECIFICATIONS PLAYER TUNER • Tuning range • Media ............CD, CD-R/RW U.S.A. and Canada models....87.5 to 107.9 MHz • Audio format ........ Audio CD, MP3, WMA Other models ........87.5 to 108.0 MHz Laser AM............531 to 1611 kHz • Type ......Semiconductor laser GaAs/GaAlAs GENERAL •... - Page 32 2.4 GHz frequency band, a band which can be used without a license. • Bluetooth is a registered trademark of the Bluetooth SIG and is used by Yamaha in accordance with a license agreement. Handling Bluetooth communications • The 2.4 GHz band used by Bluetooth compatible devices is a radio band shared by many types of equipment.
- Page 34 Comme les sons trop forts causent des lésions auditives qui ne peuvent être détectées qu’à long terme, lorsqu’il est trop tard, Yamaha et le Groupe des Entreprises Électroniques Grand Public de l’Association des Industries Électroniques vous déconseillent l’écoute prolongée à des volumes...
- Page 35 Si ce produit devait produire installé selon les instructions du mode d’emploi. Toute des interférences, ce qui peut être déterminé en modification non approuvée expressément par Yamaha « ÉTEIGNANT » et en « RALLUMANT » le produit, peut invalider l’autorisation, accordée par la FCC, l’utilisateur est invité...
- Page 36 14 Ne tentez pas de modifier ni de réparer l’appareil. 2 Installez cet appareil dans un endroit frais, bien aéré, Consultez le service Yamaha compétent pour toute sec et propre - à l’abri de la lumière du soleil, des réparation qui serait requise. Le coffret de l’appareil sources de chaleur, des vibrations, des poussières, de...
-
Page 37: Accessoires Fournis
CARACTÉRISTIQUES Différentes sources musicales qui font ressortir la qualité sonore • Lisez la musique stockée sur des dispositifs externes tels que les CD audio/de données, les dispositifs USB (clés USB) et les dispositifs branchés sur AUX, puis écoutez la radio. •... - Page 38 Le périphérique mobile doit être connecté à l’appareil via Bluetooth (☞ P. 11). Dans un souci constant d’amélioration des produits, les caractéristiques et l’apparence peuvent être modifiées sans préavis. Google Play https://play.google.com/store/ http://itunes.com/app/dtacontroller apps/details?id=com.yamaha.av. dtacontroller (Pour les utilisateurs aux États-Unis) https://itunes.apple.com/us/app/ dtacontroller-us/id549333293?mt=8 Remarque Si vous ne parvenez pas à...
-
Page 39: Nom Des Commandes Et Fonctions Correspondantes
DÉMARRAGE NOM DES COMMANDES ET FONCTIONS CORRESPONDANTES Télécommande 6 DIMMER Règle la luminosité de l’afficheur de la face avant ☞ P. 21). • PRESET Sélectionne la station radio présélectionnée lors de l’utilisation de la radio. • FOLDER Change le dossier de lecture pendant la lecture de CD ou dispositifs USB. - Page 40 NOM DES COMMANDES ET FONCTIONS CORRESPONDANTES Panneau supérieur 1 Port USB Lorsqu’elle est réglée sur A (auto), la luminosité de • Raccordez un dispositif USB pour la lecture l’afficheur de la face avant s’ajuste automatiquement en (☞ P. 9). fonction de la luminosité de la pièce. •...
-
Page 41: Panneau Avant
NOM DES COMMANDES ET FONCTIONS CORRESPONDANTES Panneau avant BLUETOOTH 1 Afficheur de la face avant 7 Indicateur de présélection Affiche l’heure et diverses informations. Indique le numéro de la station radio 2 Capteur de luminosité présélectionnée (☞ P. 14). 8 MEMORY Mesure le niveau d’illumination ambiante. - Page 42 NOM DES COMMANDES ET FONCTIONS CORRESPONDANTES Panneau arrière 1 Borne d’antenne FM 5 15V Branchez l’antenne FM fournie. Branchez l’adaptateur secteur et le câble 2 Borne d’antenne AM d’alimentation fournis. 6 ALARM TYPE (modèles pour les États-Unis et le Canada) Branchez l’antenne AM fournie.
- Page 43 RÉGLAGE DE L’HORLOGE Accrochez l’antenne à l’endroit où la réception est la meilleure. Remarque • L’antenne doit être déployée. • Si vous utilisez une antenne extérieure au lieu de l’antenne fournie, la réception sera meilleure. • Si la réception de la radio est mauvaise, changez la hauteur, le sens ou la disposition de l’antenne.
-
Page 44: Écoute D'un Cd Et D'un Dispositif Usb
ÉCOUTE DE MUSIQUE ÉCOUTE D’UN CD ET D’UN DISPOSITIF USB Cette section décrit le fonctionnement de l’appareil pour la lecture de plages/fichiers sur CD/dispositifs USB. • Quand vous arrêtez puis relancez la lecture du CD/dispositif USB, cet appareil reprend la lecture de la dernière plage lue depuis le début. - Page 45 ÉCOUTE D’UN CD ET D’UN DISPOSITIF USB Écoute d’un dispositif USB Panneau supérieur/avant Réglez SOURCE sur USB. Branchez un dispositif USB. La lecture commence automatiquement. Les opérations de lecture sont disponibles avec la télécommande ou cet appareil. Arrêtez la lecture avant de débrancher le dispositif USB.
- Page 46 • L’alimentation est fournie lorsque l’appareil est sous tension (indépendamment de la source sélectionnée), même en mode de veille. • Yamaha décline toute responsabilité quant aux dommages au dispositif portable ou à la perte de données pouvant se produire lors de l’utilisation de cet appareil.
- Page 47 • Si cet appareil est connecté via Bluetooth à un autre dispositif, désactivez la connexion Bluetooth avant de procéder au jumelage (☞ P. 13). Remarque Yamaha ne garantit pas la réussite de toutes les connexions entre cet appareil et le périphérique Bluetooth. Panneau avant Appuyez sur pour mettre l’appareil...
-
Page 48: Écoute De Musique À Partir De Votre Périphérique Bluetooth
Repère Sur le smartphone, cet appareil est désigné comme suit : « TSX-B141 Yamaha ». • Si vous êtes invité à saisir un code, saisissez les chiffres « 0000 ». • En cas d’échec de la connexion, déplacez lentement le smartphone sur le repère NFC. - Page 49 Dans les réglages Bluetooth du périphérique de connexion, activez la fonction Bluetooth. Dans la liste des connexions Bluetooth du périphérique de connexion, choisissez cet appareil (TSX-B141 Yamaha). La connexion Bluetooth est établie et l’indicateur Bluetooth de l’afficheur de cet appareil s’allume.
-
Page 50: Écoute De Stations Radio
ÉCOUTE DE STATIONS RADIO Syntonisation des stations radio Panneau supérieur/avant Réglez SOURCE sur FM/AM. (Modèles TUNING pour les États-Unis et le Canada) Appuyez sur pour syntoniser la station FM/AM. Type de Utilisation de TUNING syntonisation Syntonisation Maintenez enfoncée la automatique touche Syntonisation Appuyez plusieurs fois sur... -
Page 51: Écoute D'une Source Externe
USING THE ALARM ÉCOUTE D’UNE SOURCE EXTERNE Mettez l’appareil en mode de veille avant de Panneau arrière brancher les câbles audio. Branchez le dispositif audio externe à la prise AUX du panneau arrière avec un câble à mini-fiche stéréo de 3,5 mm disponible dans le commerce. -
Page 52: Utilisation De La Fonction D'alarme
UTILISATION DE LA FONCTION D’ALARME IntelliAlarm Cet appareil est doté d’une fonction d’alarme (IntelliAlarm) qui vous permet de lire les sources musicales souhaitées et/ou de déclencher une sonnerie (alarme intégrée) à l’heure prédéfinie selon différentes méthodes. Voici les caractéristiques de la fonction d’alarme. 3 types d’alarmes Les 3 types d’alarmes permettent de combiner de la musique avec la sonnerie. - Page 53 UTILISATION DE LA FONCTION D’ALARME Réglage de l’alarme Réglage de l’heure de l’alarme et du Appuyez sur SET. Panneau supérieur/avant L’indicateur d’alarme ( ) et les éléments de réglage clignotent. PRESET Indicateur d’alarme Réglez l’heure du réveil avec PRESET. Panneau arrière Réglez le type d’alarme avec ALARM TYPE.
- Page 54 UTILISATION DE LA FONCTION D’ALARME Activation/désactivation de l’alarme Panneau supérieur Appuyez sur ALARM. Quand l’alarme est activée, l’indicateur d’alarme ( ) s’allume et l’heure de l’alarme s’affiche quelques instants. Si vous appuyez à nouveau sur ALARM, l’indicateur d’alarme ) s’éteint et l’alarme est coupée. Lorsque le mode d’alarme est Weekly Alarm (☞...
- Page 55 UTILISATION DE LA FONCTION D’ALARME Réglage de Weekly Alarm Réglage de Weekly Alarm avec DTA CONTROLLER Grâce à l’application DTA CONTROLLER (☞ P. 2), vous pouvez utiliser la fonction Weekly Alarm, qui vous permet de régler des alarmes pour chaque jour de la semaine. Vous devez tout d’abord effectuer les réglages Weekly Alarm sur l’application DTA CONTROLLER.
- Page 56 UTILISATION DE LA FONCTION D’ALARME Réglage de Weekly Alarm sur l’appareil Lorsque vous avez défini Weekly Alarm avec l’application DTA CONTROLLER, vous pouvez sélectionner le mode Weekly Alarm sur l’afficheur de sélection du mode d’alarme de cet appareil. Appuyez sur SET. Panneau supérieur L’indicateur d’alarme ( ) clignote et...
-
Page 57: Utilisation De La Minuterie
AUTRES FONCTIONS ET INFORMATIONS UTILISATION DE LA MINUTERIE Vous pouvez définir le délai avant la mise en veille automatique de l’appareil. Appuyez plusieurs fois sur SNOOZE/ Panneau supérieur SLEEP pour choisir le délai avant la mise en veille du système. Vous pouvez choisir un délai de 30, 60, 90 et 120 minutes. -
Page 58: Guide De Dépannage
Si cet appareil ne semble pas fonctionner normalement, vérifiez les points de la liste suivante. Si l’anomalie constatée n’est pas mentionnée, ou encore si les actions correctives suggérées sont sans effet, mettez l’unité hors tension, débranchez la fiche du câble d’alimentation et prenez contact avec le revendeur ou le centre d’entretien Yamaha agréé. Généralités Anomalies... -
Page 59: Lecture De Cd
GUIDE DE DÉPANNAGE Lecture de CD Anomalies Causes possibles Solution Le disque ne peut pas être L’appareil est réglé en mode de veille Appuyez sur pour annuler le mode de éco. veille éco (☞ P. 4). inséré. Un disque est déjà inséré. Appuyez sur pour éjecter le disque. - Page 60 GUIDE DE DÉPANNAGE Bluetooth Anomalies Causes possibles Solution Impossible de jumeler cet L’appareil est déjà connecté à un autre Déconnectez le périphérique Bluetooth dispositif. déjà connecté. appareil avec le périphérique de connexion. Le périphérique de connexion ne prend Procédez au jumelage avec un pas en charge le profil A2DP.
- Page 61 GUIDE DE DÉPANNAGE Réception de stations FM/AM Anomalies Causes possibles Solution Trop de bruit. L’antenne n’est pas convenablement Vérifiez que l’antenne est correctement raccordée. raccordée (☞ P. 6, 7) ou utilisez une antenne extérieure disponible dans le commerce. Trop de parasites pendant La station sélectionnée est trop éloignée, Essayez d’effectuer la syntonisation ou bien la réception des ondes est...
-
Page 62: Remarques Sur Les Disques Et Dispositifs Usb
• Ne pas utiliser des disques dont la surface est rayée. disques durs externes, etc. à cet appareil. • Ne posez pas de disque fendu, voilé ou présentant des • Yamaha décline toute responsabilité quant aux dommages ou parties collantes. pertes de données enregistrées sur le dispositif USB pouvant se produire lorsqu’un dispositif est relié... - Page 63 CARACTÉRISTIQUES TECHNIQUES LECTEUR SYNTONISEUR • Plage de syntonisation • Supports............CD, CD-R/RW Modèles pour les États-Unis et le Canada • Format audio........CD audio, MP3, WMA ............87,5 à 107,9 MHz Laser Autres modèles........87,5 à 108,0 MHz • Type......Laser semi-conducteur GaAs/GaAlAs AM............
- Page 64 • Yamaha ne garantit pas toutes les connexions sans fil entre cet appareil et les appareils compatibles avec la fonction Bluetooth.
- Page 66 Dado que a menudo el daño auditivo como resultado de sonidos a alto volumen no se puede detectar hasta que es demasiado tarde, Yamaha y el Grupo de Electrónica de Consumo de la Asociación de Industrias Electrónicas le recomendamos que evite la exposición prolongada a niveles excesivos de volumen.
- Page 67 Clase “B”. El productos. Si no encuentra el vendedor adecuado, cumplimiento de estos requisitos le proporciona un póngase en contacto con Yamaha Corporation of nivel razonable de seguridad en cuanto a que el uso de America A/V Division, 6600 Orangethorpe Avenue, este producto en un entorno residencial no tendrá...
- Page 68 1 Para asegurar el mejor rendimiento de este aparato, 14 No intente modificar ni arreglar este aparato. Póngase en contacto con el personal de servicio Yamaha lea atentamente este manual. Y luego guárdelo en un cualificado cuando necesite realizar alguna lugar seguro para poder consultarlo en el futuro en caso de ser necesario.
-
Page 69: Accesorios Incluidos
CARACTERÍSTICAS Reproducción de distintas fuentes de música con la calidad de sonido como máxima prioridad • Reproduzca música de dispositivos externos como CD de audio/datos, dispositivos USB (unidades flash USB) y equipos conectados a través de AUX, y sintonice la radio. •... - Page 70 El dispositivo móvil debe estar conectado a la unidad mediante conexión Bluetooth (☞ P. 11). Debido a mejoras del producto, las especificaciones y el aspecto pueden cambiar sin previo aviso. Google Play https://play.google.com/store/ http://itunes.com/app/dtacontroller apps/details?id=com.yamaha.av. dtacontroller (Para los usuarios de EE. UU.) https://itunes.apple.com/us/app/ dtacontroller-us/id549333293?mt=8 Nota Si no puede acceder a la información anterior, vaya al App Store o a Google Play y busque “DTA CONTROLLER”.
-
Page 71: Nombres De Las Partes Y Sus Funciones
PRIMEROS PASOS NOMBRES DE LAS PARTES Y SUS FUNCIONES Mando a distancia 6 DIMMER Permite ajustar el brillo del visor del panel frontal ☞ P. 21). • PRESET Permite seleccionar la emisora de radio presintonizada al usar la radio. • FOLDER Permite cambiar de carpeta de reproducción al reproducir música de CD o dispositivos USB. -
Page 72: Panel Superior
NOMBRES DE LAS PARTES Y SUS FUNCIONES Panel superior 1 Puerto USB Cuando está activada la opción A (automático), el brillo • Conecte un dispositivo USB para reproducir su del visor del panel frontal se ajusta automáticamente, contenido (☞ P. 9). dependiendo del brillo de la habitación. -
Page 73: Panel Frontal
NOMBRES DE LAS PARTES Y SUS FUNCIONES Panel frontal BLUETOOTH 1 Visor del panel frontal 7 Indicador de emisora presintonizada Muestra el reloj y diferentes datos. Muestra el número de la emisora de radio 2 Sensor de iluminación presintonizada (☞ P. 14). 8 MEMORY Mide la luminosidad del entorno. -
Page 74: Panel Posterior
NOMBRES DE LAS PARTES Y SUS FUNCIONES Panel posterior 1 Terminal para la antena FM 5 15V Conecte la antena FM suministrada. Conecte el adaptador de CA suministrado y el 2 Terminal de la antena AM cable de alimentación. 6 ALARM TYPE (modelos de Estados Unidos y Canadá) Conecte la antena AM suministrada. -
Page 75: Ajuste Del Reloj
AJUSTE DEL RELOJ Fije la antena en la posición que permita obtener la mejor recepción. Nota • La antena debe estirarse. • Si utiliza una antena para exterior en lugar de la antena suministrada, la recepción será mejor. • Si la recepción de radio es mala, cambie la altura, la dirección o el lugar de la antena. -
Page 76: Escuchar Un Cd Y Un Dispositivo Usb
REPRODUCCIÓN DE MÚSICA ESCUCHAR UN CD Y UN DISPOSITIVO USB La unidad funcionará del siguiente modo al reproducir pistas o archivos de CD/dispositivos de USB. • Si se detiene el CD/dispositivo de USB que se está reproduciendo, la pista que se estaba reproduciendo empezará... - Page 77 ESCUCHAR UN CD Y UN DISPOSITIVO USB Escuchar un dispositivo USB Panel superior/frontal Ajuste SOURCE en USB. Conecte un dispositivo USB. La reproducción empezará automáticamente. La reproducción puede controlarse desde el mando a distancia o desde esta unidad. Detenga la reproducción antes de desconectar el dispositivo USB.
- Page 78 • Esta unidad proporciona alimentación mientras está encendida (independientemente de la fuente seleccionada), incluso en el modo de reposo. • Yamaha no asume responsabilidad alguna por los daños que pueda sufrir el dispositivo portátil ni por posibles pérdidas de datos al usar esta unidad.
-
Page 79: Escuchar Música De Un Dispositivo Bluetooth
• Si esta unidad está conectada a través de Bluetooth a otro dispositivo, finalice la conexión Bluetooth antes de iniciar la operación de emparejamiento (☞ P. 13). Nota Yamaha no garantiza todas las conexiones entre esta unidad y el dispositivo Bluetooth. Panel frontal Pulse para encender la unidad. - Page 80 (para obtener más información, consulte el manual de instrucciones del smartphone). Marca Esta unidad aparece con el nombre “TSX-B141 Yamaha” en el smartphone. • Si el sistema le pide una contraseña, introduzca los números “0000”. • Si la conexión falla, mueva lentamente el smartphone sobre la marca NFC.
- Page 81 En los ajustes de Bluetooth del dispositivo de conexión, active Bluetooth. En la lista de conexiones Bluetooth del dispositivo de conexión, seleccione esta unidad (TSX-B141 Yamaha). La conexión Bluetooth se establecerá y el indicador Bluetooth del visor del panel frontal de esta unidad se iluminará.
-
Page 82: Escuchar Emisoras De Radio
ESCUCHAR EMISORAS DE RADIO Sintonización de emisoras de radio Panel superior/frontal Ajuste SOURCE en FM/AM. (Modelos de TUNING EE.UU. y Canadá) Pulse para sintonizar una emisora FM/AM. Tipo de Operación de sintonización SINTONIZACIÓN Sintonización Mantenga pulsado automática Sintonización Pulse varias manual veces SOURCE... -
Page 83: Escuchar Una Fuente Externa
USING THE ALARM ESCUCHAR UNA FUENTE EXTERNA Ponga la unidad en el modo de reposo antes de Panel posterior conectar los cables de audio. Conecte el dispositivo de audio externo al terminal AUX del panel posterior mediante un cable con miniconector estéreo de 3,5 mm de venta en tiendas. -
Page 84: Usar La Función De Alarma
USAR LA FUNCIÓN DE ALARMA IntelliAlarm La unidad incluye una función de alarma (IntelliAlarm) que reproduce fuentes de música o conjunto de sonidos (alarma integrada) a la hora establecida con distintos métodos. La función de alarma incluye las siguientes prestaciones. 3 tipos de alarmas Seleccione entre 3 tipos de alarma, que combinan la música con el sonido de pitido. - Page 85 USAR LA FUNCIÓN DE ALARMA Programación de la alarma Ajuste de la hora de la alarma y el sonido Pulse SET. Panel superior/frontal Parpadearán el indicador de la alarma ( las opciones que pueden configurarse. PRESET Indicador de alarma Configure la hora de la alarma con PRESET.
- Page 86 USAR LA FUNCIÓN DE ALARMA Activar y desactivar la alarma Panel superior Pulse ALARM. Cuando la alarma está activada, se ve el indicador de alarma ( ) y la hora de la alarma se muestra durante un rato. Si pulsa ALARM de nuevo, se desactivarán el indicador de alarma ( ) y la alarma.
- Page 87 USAR LA FUNCIÓN DE ALARMA Programar Weekly Alarm Programar Weekly Alarm con DTA CONTROLLER Con DTA CONTROLLER (☞ P. 2), es posible usar el modo Weekly Alarm, que permite programar la alarma para cada día de la semana. En primer lugar, configure Weekly Alarm en DTA CONTROLLER. Pantalla de ajuste de IntelliAlarm Toque (icono de IntelliAlarm) en DTA...
- Page 88 USAR LA FUNCIÓN DE ALARMA Programar Weekly Alarm en la unidad Una vez establecido Weekly Alarm con DTA CONTROLLER, puede seleccionar el modo Weekly Alarm en el visor de selección del modo de alarma de esta unidad. Pulse SET. Panel superior El indicador de alarma ( ) parpadeará...
-
Page 89: Usar El Temporizador De Apagado
OTRAS FUNCIONES E INFORMACIÓN USAR EL TEMPORIZADOR DE APAGADO Puede programar el tiempo que debe transcurrir para que la unidad acceda automáticamente al modo de reposo. Pulse SNOOZE/SLEEP varias veces para Panel superior programar el tiempo hasta que el sistema entra en modo de reposo. -
Page 90: Solución De Problemas
Si tiene algún problema con la unidad, compruebe primero la siguiente lista. Si el problema que tiene no aparece en la lista a continuación, o si las instrucciones no le sirven de ayuda, apague la unidad, desenchufe el cable de alimentación y póngase en contacto con un centro Yamaha de atención al cliente o concesionario autorizado. - Page 91 SOLUCIÓN DE PROBLEMAS Problema Causa Solución La iluminación del visor frontal El visor frontal está ajustado en AUTO. Ajuste el brillo del visor del panel frontal en una opción que no sea AUTO. O bien, se atenúa. no cubra el sensor de iluminación. El dispositivo USB portátil El dispositivo USB conectado a la Pulse...
- Page 92 SOLUCIÓN DE PROBLEMAS Bluetooth Problema Causa Solución No se puede emparejar esta La unidad ya está conectada a otro Desconecte el dispositivo Bluetooth ya dispositivo. conectado. unidad con el dispositivo de conexión. El dispositivo de conexión no es Solo pueden emparejar dispositivos compatible con el perfil A2DP.
- Page 93 SOLUCIÓN DE PROBLEMAS Recepción de la radio FM/AM Problema Causa Solución Hay demasiado ruido. Es posible que la antena esté conectada Compruebe que la antena está conectada de forma incorrecta. correctamente (☞ P. 6, 7) o utilice una antena para exterior disponible en tiendas. Hay demasiado ruido durante Es posible que la emisora de radio que ha Intente sintonizar la emisora manualmente...
-
Page 94: Notas Sobre Los Discos Ylos Dispositivos Usb
• No utilice discos de 8 cm. • Yamaha no se responsabilizará de los daños causados o las pérdidas de datos en el dispositivo USB que tengan lugar cuando el dispositivo esté conectado a esta unidad. -
Page 95: Especificaciones
ESPECIFICACIONES REPRODUCTOR TUNER • Margen de sintonía • Soportes ............CD, CD-R/RW Modelos para EE.UU. y Canadá • Formato de audio .......CD de audio, MP3, WMA .............De 87,5 a 107,9 MHz Láser Otros modelos ......De 87,5 a 108,0 MHz • Tipo ......Láser semiconductor GaAs/GaAlAs AM............. - Page 96 • Bluetooth es una marca comercial registrada de Bluetooth SIG y Yamaha la usa según un acuerdo de licencia. Gestión de las comunicaciones Bluetooth • La banda de 2,4 GHz usada por dispositivos compatibles con Bluetooth es una banda de radio compartida por muchos equipos diferentes.
- Page 100 © 2015 Yamaha Corporation Printed in China ZR52540...