Table of Contents
Advertisement
Advertisement
Table of Contents

Related Manuals for Vivitar VIV-DF-7000


Summary of Contents for Vivitar VIV-DF-7000
- Page 1 DSLR TTL Flash / Video Light VIV-DF-7000 User’s Manual...
- Page 2 To obtain Warranty Service and Troubleshooting information: Call 1-800-592-9541 in the U.S. or 0-800-917-4831 in the UK or Visit our website at www.vivitar.com. To receive Warranty service along with the name and address of an authorized product service center, the original consumer purchaser must contact us for problem determination and service procedures.
- Page 3 Vivitar One year Warranty (continued) NO WARRANTIES, WHETHER EXPRESS OR IMPLIED, INCLUDING, BUT NOT LIMITED TO, ANY IMPLIED WARRANTIES OF MERCHANTABILITY OR FITNESS FOR A PARTICULAR PURPOSE, OTHER THAN THOSE EXPRESSLY DESCRIBED ABOVE SHALL APPLY. DISTRIBUTOR FURTHER DISCLAIMS ALL WARRANTIES AFTER THE EXPRESS WARRANTY PERIOD STATED ABOVE. NO OTHER EXPRESS WARRANTY OR GUARANTY GIVEN BY ANY PERSON, FIRM OR ENTITY WITH RESPECT TO THE PRODUCT SHALL BE BINDING ON DISTRIBUTOR.
- Page 4 Check to make sure the flash that you have is compatible with your camera. VIV-DF-7000-CAN - Canon Digital E-TTL, E-TTL II cameras & E-TT film cameras VIV-DF-7000-NIK - Nikon Digital TTL, i-TTL Cameras & TTL, i-TTL film cameras VIV-DF-7000-SON - Sony Alpha & Minolta Digital ADI, D Lenses cameras & TTL film cameras...
-
Page 5: Important Safety Instructions
Important Safety Instructions -This flash unit does not function on camcorders. -Misfiring sometimes occurs when the power switch is turned on and off continuously. If this happens, power off the flash for a few seconds before switching it on again. The flash unit will then work normally. - Page 6 Warning Note: This flash unit may freeze up and stop functioning properly when there is insufficient battery power or when the unit is used incorrectly. Always use the ON/OFF switch to power off your flash. Once powered off, wait for several seconds and then replace the batteries when they are drained.
-
Page 7: Specifications
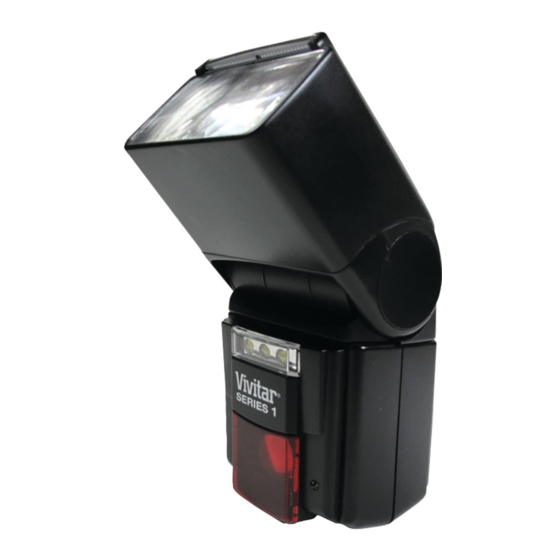
Specifications Flash Guide No. 50(m) at 105mm position (ISO 100) Flash Head 28-35-50-105mm Bounce Angle , 45 ° ° , 60 , 75 ° , 90 ° ° ° ° ° ° Swivel Angle Right 0 ; Left 0 - 180 Power Source Four 1.5V AA size batteries (R6, LR6) Recycling time... - Page 8 A Quick Look at Your Device Reflecting Plate Wide Angle Panel Bounce Angle Zoom Head Indication LED Video Light Battery Compartment Cover AF Beam ON/OFF Switch Mounting Foot MOUNTING FOOT For Canon & For Sony Nikon Cameras Cameras...
- Page 9 Loading Batteries Into Your Flash - Make sure the ON/OFF switch is in the “OFF” position. - Slide the battery compartment cover forward and swing it open. - Insert batteries according to the indicated “+/-“ symbols. - Close the compartment cover and slide it back so that it locks in place - All batteries must be of the same make and have the same charge level;...
- Page 10 Removing the Flash from your Camera -For Canon and Nikon Flashes: Loosen the lock ring and remove the flash by pulling it backwards. -For Sony Flashes: Push the Shoe Release Button (the button marked “PUSH”) and simultaneously pull the flash off by pulling it backwards.
-
Page 11: Using The Flash Function
Using the Integrated LED Video Light An LED video light is built into your flash. This light is primarily useful for taking videos with your digital SLR camera. The light allows you to record video in low light conditions. It is composed of 1 LED with 3 watts of power. - Page 12 Manual Exposure Flash There are some occasions when you may want to set your own flash exposure instead of using automatic controlled exposure. You can set flash for non-automatic flash mode, and select the desired flash power from 6 different levels. -6 orange colored LEDs display the flash power level.
-
Page 13: Bounce And Swivel Flash
Bounce and Swivel Flash Using direct flash to illuminate a subject will result in harsh, unnatural and unattractive shadows. This can be avoided by using bounce and/or swivel flash. The flash head can be tilted to angles of 45° , 60°, 75° or 90° and horizontally rotated 180°... -
Page 14: Red-Eye Reduction
Red Eye Reduction Red-eye reduction function reduces the red-eye phenomenon by emitting pre-flashes before the main flash. To set up this function, please refer to your camera’s instruction manual. (Note: this feature may not be available for all camera models.) Zoom Head The zoom flash head covers focal lengths of 28-35-50-105mm in four stops. -
Page 15: Front And Rear Curtain Synchronization
Front and Rear Curtain Synchronization Some cameras offer the option of rear curtain synchronization (Rear mode) triggering the flash unit at the end of the exposure time. Rear curtain synchronization is particularly advantageous when using slow.shutter speeds (slower than 1/30 sec) or when shooting moving objects that have their own source of light.