PARKZONE DH 98 Mosquito Mk VI Instruction Manual
Hide thumbs
Also See for DH 98 Mosquito Mk VI:
- Instruction manual (14 pages) ,
- Instruction manual (19 pages) ,
- Instruction manual (17 pages)

Related Manuals for PARKZONE DH 98 Mosquito Mk VI


Summary of Contents for PARKZONE DH 98 Mosquito Mk VI
- Page 1 DH 98 Mosquito Mk VI Instruction Manual / Bedienungsanleitung Manuel d’utilisation / Manuale di Istruzioni...
- Page 2 NOTICE All instructions, warranties and other collateral documents are subject to change at the sole discretion of Horizon Hobby, Inc. For up-to-date product literature, visit www.horizonhobby.com and click on the support tab for this product. Meaning of Special Language: The following terms are used throughout the product literature to indicate various levels of potential harm when operating this product: NOTICE: Procedures, which if not properly followed, create a possibility of physical property damage AND little or no possibility of injury.
-
Page 3: Table Of Contents
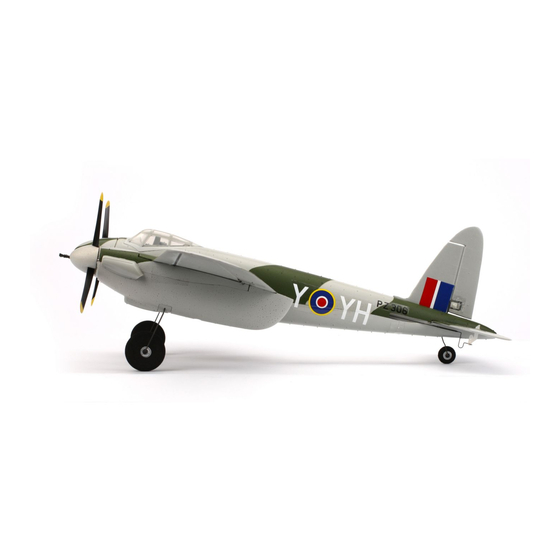
The DH 98 Mosquito MK VI This outstanding replica of the Mosquito Mk VI has been engineered to fl y every bit as good as it looks. Its twin brushless motors deliver impressive speed and climb performance that perfectly complement the smooth, balanced control response. If this is your fi rst twin motor park fl yer, you’ll fi nd the counter-rotating propellers help make tracking during takeoff and landing rollout much easier too. -
Page 4: Transmitter And Receiver Binding
Transmitter and Receiver Binding Binding Procedure Reference Table Read the transmitter instructions for binding to a receiver (loca- “Binding” is the process of programming the receiver to recognize the GUID tion of transmitter’s Bind control). (Globally Unique Identifi er) code of a single specifi c transmitter. You need to Make sure the transmitter is powered OFF. -
Page 5: Battery Installation
• If using another battery, the battery must be at least a 2200mAh 25C battery. • Your battery should be approximately the same capacity, dimensions and weight as the ParkZone Li-Po battery to fi t in the fuselage without changing the center of gravity a large amount. ESC and Receiver Arming Arming the ESCs also occurs after binding as previously described, but subsequent connection of a fl... -
Page 6: E-Fl Ite Retractable Landing Gear
We recommend installing the E-fl ite electric retracts (optional) in the wing before installing the wing on the fuselage. E-fl ite Retractable Landing Gear OPTIONAL (EFLG100, sold separately 1. Remove the tubes (A), inside struts with wheel collars (B) and screws (C) from the fi... -
Page 7: Flap Installation
We recommend installing the Flaps (optional) in the wing before installing the wing on the fuselage. Flap Installation OPTIONAL 1. Carefully cut the tape over each fl ap servo pocket so the paint is not damaged. 2. Install the fl ap servo connectors in the servo pockets, through the wings and out the holes used by the aileron servo wires 3. -
Page 8: Wing Installation
Wing Installation 1. Turn the latch (A) and carefully remove the hatch (B) from the fuselage. 2. Slide the wing tube (C) into the fuselage. CAUTION: DO NOT crush or otherwise damage the wiring when attaching the wing to the fuselage. 3. -
Page 9: Horizontal Tail Installation
Horizontal Tail Installation 1. Slide the horizontal tail tube (A) into the hole in the rear of the fuselage. 2. Install the left and right horizontal tails (B) onto the fuselage as shown. Ensure the control horn faces down. 3. Apply 4 pieces of tape (C) to the fuselage mounts (one on the top and bot- tom of each half of the horizontal tail). -
Page 10: Engine Scoop
fl ight battery with the end of the battery against the front wall of the battery compartment. Make sure the fl ight battery is secured using the hook and loop strap. Aircraft CG and weight is based on a ParkZone 11.1V 2200mAh 25C battery (PKZ1029) installed. 73–83mm 2.90–3.30... -
Page 11: Control Direction Test
Control Direction Test Move the controls on the transmitter to make sure the aircraft control surfaces move correctly and in the proper direction. After performing the Control Test, correctly set the failsafe. Make sure the transmitter controls are at neutral and the throttle and throttle trim are in the low posi- tion, then rebind the aircraft to your transmitter. -
Page 12: Dual Rates
Dual Rates Your DSM2/DSMX full range transmitter features dual rates to help you select High Rate Low Rate the amount of travel that you want from the control surfaces. Aileron 15mm up / 12mm down 12mm up / 8mm down Elevator 10mm up/down 8mm up/down... -
Page 13: Maintenance After Flying
Maintenance After Flying 1. Disconnect the fl ight battery from the ESC (Required for Safety 5. Repair or replace all damaged parts. and battery life). 6. Store the fl ight battery apart from the aircraft and monitor the 2. Power OFF the transmitter. battery charge. -
Page 14: Troubleshooting Guide
Troubleshooting Guide Problem Possible Cause Solution Aircraft will not re- Throttle not at lowest position or throttle trim too high Reset controls with throttle stick and throttle trim spond to throttle but at lowest setting responds to other Throttle servo travel is lower than 100% Make sure throttle servo travel is 100% or greater controls Throttle channel is reversed... -
Page 15: Limited Warranty
Limited Warranty What this Warranty Covers business hours. When sending product into Horizon, please include your RMA Horizon Hobby, Inc. (“Horizon”) warrants to the original purchaser that the number, a list of the included items, and a brief summary of the problem. A product purchased (the “Product”) will be free from defects in materials and copy of your original sales receipt must be included for warranty consider- workmanship at the date of purchase. -
Page 16: Contact Information
Contact Information Country of Purchase Horizon Hobby Phone Number/Email Address Address Horizon Service Center servicecenter.horizonhobby.com/ (Repairs and Repair Requests) RequestForm/ www.quickbase.com/db/ Horizon Product Support United States of 4105 Fieldstone Rd bghj7ey8c?a=GenNewRecord (Product Technical Assistance) America Champaign, Illinois, 61822 USA 888-959-2305 sales@horizonhobby.com Sales 888-959-2305... - Page 17 HINWEIS Allen Anweisungen, Garantien und anderen zugehörigen Dokumenten sind Änderungen nach Ermessen von Horizon Hobby, Inc. vorbehalten. Aktuelle Produktliteratur fi nden Sie unter www.horizonhobby.com im Support-Abschnitt für das Produkt. Begriffserklärung Die folgende Begriffe werden in der gesamte Produktliteratur verwendet, um die Gefährdungsstufen im Umgang mit dem Produkt zu defi nieren: HINWEIS: Verfahren können bei nicht ordnungsgemäßer Durchführung womöglich Schäden an physischem Eigentum UND geringfügige oder keine Verlet- zungen verursachen.
- Page 18 Die DH 98 Mosquito MK VI Diese außergewöhnliche Replika der Mosquito Mk VI fl iegt so fantastisch wie sie aussieht. Die beiden Brushless Antriebsmotoren bieten dabei eindrucksvollen Schub der für satte Leistung und präzise Kontrolle sorgt. Sollte diese ihr erster Twin-Motor Parkfl yer sein nehmen Sie sich bitte die Zeit und lesen diese Bedienungsanleitung. Sie fi nden dort wichtige Information zu der Montage, den empfohlenen Dual Rates, dem Einbau optionaler Teile und vielem mehr.
-
Page 19: Binden Von Sender Und Empfänger
Binden von Sender und Empfänger Bindereferenz Tabelle Lesen Sie die Anleitungen zum Binden an einen Empfänger im Beim Bindevorgang wird der Empfänger des Steuergeräts so programmiert, Handbuch des Senders Position des Binknopfes am Sender. dass er den GUID-(Globally Unique Identifi er)-Code eines einzelnen Send- Stellen Sie sicher, dass der Sender ausgeschaltet ist. -
Page 20: Einsetzen Des Akkus
2200mAh Kapazität und 25C haben. • Ihr Akku sollte ungefähr die gleiche Leistung, die gleichen Abmessungen und das gleiche Gewicht wie der ParkZone Li-Po-Akku haben, um in den Flugzeugrumpf zu passen, ohne den Schwerpunkt stark zu verändern. Armieren des Reglers und Empfängers Das Armieren des Reglers erfolgt nach dem Binden und nach jedem erneutem Anschluss des Akkus. -
Page 21: Elektrisches E-Fl Ite Einziehfahrwerk
Wir empfehlen das optionale elektrische Einziehfahrwerk in die Tragfl äche einzubauen bevor diese am Rumpf montiert wird. Elektrisches E-fl ite Einziehfahrwerk OPTIONAL (EFLG100, separat erhältlich 1. Entfernen Sie das Röhrchen (A) mit der inneren Fahrwerksstrebe und Stell- ring (B) und Schrauben (C) von der linken und rechten Fahrwerksstrebe. Festes Fahrwerk 2. -
Page 22: Montage Der Klappen
Wir empfehlen die Montage der optionalen Klappen in der Tragfl äche vor der Montage der Flächen am Rumpf durchzuführen. Montage der Klappen OPTIONAL 1. Schneiden Sie vorsichtig das Klebeband über der Servoöffnung ein dass die Lackierung nicht beschädigt wird. 2. Führen Sie die Servoanschlüsse in die Servoöffnungen dann durch die Fläche und durch die Öffnungen der Servokabelschächte wieder heraus. -
Page 23: Montage Der Tragfl Äche
Montage der Tragfl äche 1. Drehen Sie den Verschlussriegel und entfernen die Klappe vom Rumpf. 2. Schieben Sie den Flächenverbinder (C) in den Rumpf. ACHTUNG: Quetschen oder beschädigen Sie keine Kabel wenn Sie die Tragfl äche am Rumpf montieren. 3. Schieben Sie die linke und rechte Tragfäche (D und E) auf den Flächen- verbinder und in die Flächenaufnahme am Rumpf während Sie die Servoanschlüsse durch die Öffnungen führen. -
Page 24: Montage Des Höhenruders
Montage des Höhenruders 1. Schieben Sie die Leitwerksverbinder (A) durch die Öffnung im Heck des Flugzeuges. 2. Setzen Sie das rechte und linke Höhenleitwerk (B) wie abgebildet an den Rumpf und achten bitte darauf dass die Ruderhörner nach unten zeigen. 3. -
Page 25: Motorkühlöffnungen
Setzen Sie die den Akku mit dem Ende ganz nach vorne in das Akkufach ein. Stellen Sie sicher, dass der Flugakku mit Klettband gesichert ist. Der Schwerpunkt und das Gewicht wurden mit einem ParkZone 11,1 Volt 2200mAh 25C LiPo Akku (PKZ1029) ermittelt. 73–83mm... -
Page 26: Steuerrichtungstest
Steuerrichtungstest Prüfen Sie ob die Ruderbewegungen zu den Steuerbefehlen am Sender in die richtigen Richtungen arbeiten. Führen Sie nach dem Test die Failsafeeinstellungen durch. Stellen Sie dabei sicher, dass die Ruder auf Neutral und das Gas und die Trimmung in der niedrigsten Stellung befi nden. Führen Sie dann den Bindevor- gang noch einmal durch, dass diese Einstellungen übernommen werden. -
Page 27: Dual Rates
Fliegen gezogen zu lassen um einen Kopfstand zu vermeiden. Fliegen Sie immer auf einem weiten offenen Feld mit ihre ParkZone Mosquito Vermeiden Sie nach dem Aufsetzen scharfe Kurven bis das Flugzeug langsam Ideal dafür ist ein zugelassener Modellfl uglatz. Sollten Sie nicht auf einem genug geworden ist, so dass es nicht mehr auf die Tragfl... -
Page 28: Wartung Nach Dem Flug
Wartung nach dem Flug 1. Trennen Sie den Flugakku vom Regler/ESC (notwendig zur Sicherheit und 5. Reparieren bzw. ersetzen Sie beschädigte Bauteile. Akkuhaltbarkeit). 6. Lagern Sie den Flugakku gesondert vom Flugzeug und überwachen Sie die 2. Schalten Sie den Sender aus. Aufl... -
Page 29: Leitfaden Zur Problemlösung
Leitfaden zur Problemlösung Problem Mögliche Ursache Lösung Das Flugzeug reagi- Das Gas befindet sich nicht im Leerlauf, und/oder die Gas- Steuerungen mit Gassteuerknüppel und Gastrimmung auf niedrigste Ein- trimmung ist zu hoch stellung zurücksetzen ert nicht auf Gas- eingaben, aber auf Gas-Servoweg ist niedriger als 100% Sicherstellen, dass der Gas-Servoweg 100% oder mehr beträgt andere Steuerungen... -
Page 30: Garantieeinschränkungen
Garantieeinschränkungen Warnung Sicherheitshinweise Ein ferngesteuertes Modell ist kein Spielzeug. Es kann, wenn es falsch eing- Dieses ist ein hochwertiges Hobby Produkt und kein Spielzeug. Es muss mit esetzt wird, zu erheblichen Verletzungen bei Lebewesen und Beschädigungen Vorsicht und Umsicht eingesetzt werden und erfordert einige mechanische wie an Sachgütern führen. -
Page 31: Kontakt Informationen
Kontakt Informationen Land des Kaufs Horizon Hobby Telefonnummer/E-Mail-Adresse Adresse Horizon Technischer Service service@horizonhobby.de Christian-Junge-Straße 1 Deutschland Sales: Horizon Hobby GmbH +49 (0) 4121 2655 100 25337 Elmshorn, Deutschland Konformitätsinformationen für die Europäische Union Konformitätserklärung laut Allgemeine Anforderungen (ISO/IEC 17050- Konformitätserklärung laut Allgemeine Anforderungen (ISO/IEC 17050- 1:2004, korrigierte Fassung 2007-06-15);... - Page 32 REMARQUE Toutes les instructions, garanties et autres documents de garantie sont sujets à la seule discrétion de Horizon Hobby, Inc. Veuillez, pour une littérature produits bien à jour, visiter www.horizonhobby.com et cliquer sur l’onglet de support de ce produit. Signifi cation de certains mots : Les termes suivants servent, dans toute la documentation des produits, à...
- Page 33 Chargeur : Li-Po 2 à 3S 300mA à 2A (PKZ1040) Emetteur recommandé: Masse: Requis Requis 4 voies ou plus avec technologie Spektrum 2.4GHz DSM2/ 1200 g DSMX 1260 g avec train rentrant et servos de volets installés Visitez www.parkzone.com pour enregistrer votre produit.
-
Page 34: Affectation (Binding) Entre L'émetteur Et Le Récepteur
Affectation (binding) entre l’émetteur et le récepteur L’affectation est le processus qui programme le récepteur pour qu’il recon- Tableau de référence pour la procédure d’affection naisse le code (appelé GUID - Globally Unique Identifi er) d’un émetteur spéci- 1. Lisez les instructions de l’émetteur relatives au processus d’affec- fi... -
Page 35: Installation De La Batterie
2200 mA 25C. • Votre batterie devrait avoir approximativement les mêmes capacités, dimensions et poids que la batterie Li-Po ParkZone pour se glisser dans le fuselage sans modifi er de façon importante le centre de gravité. Armement du contrôleur L’armement des contrôleurs s’effectue également après la procédure... -
Page 36: Train Rentrant E-Fl Ite
Nous vous recommandons d’installer le train rentrant électrique E-fl ite (optionnel) directement sur l’aile avant de l’avoir installée sur le fuselage. Train rentrant E-fl ite OPTIONNEL (EFLG100, Vendu séparément 1. Retirez les morceaux de durite (A), les vis (C) des bagues et les jambes intérieures (B) des jambes droite et gauche. -
Page 37: Installation Des Volets
Nous vous recommandons d’installer les servos des volets (optionnels) dans l’aile avant de la fi xer au fuselage. Installation des volets OPTIONNEL 1. Découpez délicatement l’adhésif recouvrant les emplacements des servos de volets de façon à ne pas endommager la peinture. 2. -
Page 38: Installation De L'aile
Installation de l’aile 1. Tournez le loquet (A) et retirez délicatement la trappe (B) du fuselage. 2. Glissez la clé d’aile (C) dans le fuselage. ATTENTION: NE PAS pincer ou endommager les câbles quand vous fi xez l’aile au fuselage. 3. -
Page 39: Installation Du Stabilisateur
Installation du stabilisateur 1. Insérez la clé de stabilisateur (A) dans le trou à l’arrière du fuselage. 2. Installez les 2 parties du stabilisateur (B) dans les supports du fuselage comme sur l’illustration. Contrôlez que le guignol est bien dirigé vers le bas. -
Page 40: Ecopes Moteur
Assurez la fi xation de la batterie à l’aide de la sangle auto-agrippante. La masse et l’emplacement du CG sont basés sur l’utilisation d’une batterie ParkZone 11.1V 2200mA 25C (PKZ1029) installée. 73–83mm en arrière du bord d’attaque... -
Page 41: Test De Direction Des Gouvernes
Test de direction des gouvernes Déplacez les manches de l’émetteur pour contrôler que les gouvernes s’orientent dans la bonne direction. Après avoir effectué ce test, réglez le failsafe. Contrôlez que commandes sont au neutre sauf le manche et le trim des gaz qui doivent être en position basse, puis réaffectez le modèle à... -
Page 42: Double-Débattements
Choisissez toujours un espace parfaitement dégagé pour faire voler votre Atterrissage sur le ventre ParkZone Mosquito. L’idéal serait que vous utilisiez une zone de vol homo- Si vous atterrissez sur de l’herbe sans le train d’atterrissage, utilisez la même loguée. Si vous volez dans un site non homologué, veillez à toujours éviter les approche que si vous voliez avec un train d’atterrissage. -
Page 43: Maintenance D'après Vol
Maintenance d’après vol 1. Déconnectez la batterie de vol du contrôleur (impératif pour la sécurité et la 5. Réparez ou remplacez les pièces endommagées. durée de vie de la batterie). 6. Stockez la batterie hors de l’avion et contrôlez régulièrement sa charge. 2. -
Page 44: Guide De Résolution Des Problèmes
Guide de résolution des Problèmes Problème Cause possible Solution L’aéronef ne répond La manette des gaz n’est pas au ralenti (idle) et/ou le trim Réinitialiser les commandes avec la manette des gaz et mettre le trim des pas aux gaz mais des gaz est régléà... -
Page 45: Coordonnées De Garantie Et De Service
Garantie et réparations Durée de la garantie Indications relatives à la sécurité La Garantie exclusive - Horizon Hobby, Inc. (Horizon) garantit que le Produit Ceci est un produit de loisirs perfectionné et non un jouet. Il doit être utilisé acheté (le « Produit ») sera exempt de défauts matériels et de fabrication à sa avec précaution et bon sens et nécessite quelques aptitudes mécaniques ainsi date d’achat par l’Acheteur. -
Page 46: Informations De Conformité Pour L'union Européenne
Informations de conformité pour l’Union Européenne Déclaration de conformité Déclaration de conformité (conformément à la norme ISO/IEC 17050-1) (conformément à la norme ISO/IEC 17050-1) No. HH2013100401 No. HH2013100402 Produit(s) : PKZ Mosquito Mk VI BNF Basic Produit(s) : PKZ Mosquito Mk VI PNP Numéro(s) d'article : PKZ6350 Numéro(s) d'article :... - Page 47 AVVISO Istruzioni, garanzie e tutti gli altri documenti accessori sono soggetti a modifi che a totale discrezione di Horizon Hobby, Inc. Per avere una documentazione aggiornata sul prodotto, visitare il sito Web www.horizonhobby.com e fare clic sulla scheda di supporto per questo prodotto. Signifi...
- Page 48 Il DH 98 Mosquito MK VI Questo eccellente modello, riproduzione del Mosquito Mk VI, è stato progettato per volare sempre così bene quanto è bello. I suoi due motori brushless permetto- no di ottenere velocità e salite impressionanti con una risposta ai comandi regolare e bilanciata. Se questo è il vostro primo modello park fl yer bimotore, troverete che le eliche controrotanti aiutano a tenere facilmente il controllo durante i decolli e gli atterraggi.
-
Page 49: Connessione Trasmettitore E Ricevitore
Connessione trasmettitore e ricevitore Tabella per la procedura di connessione (binding) Leggere le istruzioni per eseguire il binding del trasmettitore a un Il binding è il processo di programmazione del ricevitore dell’unità di con- ricevitore (individuazione del comando di binding del trasmettito- trollo per il riconoscimento del codice GUID (Globally Unique Identifi... -
Page 50: Installazione Della Batteria
Scelta della batteria • Si consiglia di utilizzare la batteria Li-Po ParkZone da 2200 mAh 3S e 11,1 V (PKZ1029). • Se si usa un’altra batteria, la sua capacità deve essere almeno di 2200mAh 25C. -
Page 51: Carrello Retrattile E-Fl Ite
Noi consigliamo di montare il carrello retrattile E-fl ite (opzionale) sull’ala, prima di installare l’ala sulla fusoliera. Carrello retrattile E-fl ite OPZIONALE (EFLG100, venduto separatamente 1. Dalle gambe fi sse destra e sinistra, togliere i tubetti (A), le gambe interne con i collari (B) e le viti (C). -
Page 52: Installazione Dei Fl Ap
Si raccomanda di installare i fl aps (opzionali) nell’ala prima di montarla sulla fusoliera. Installazione dei fl ap OPZIONALE 1. Tagliare accuratamente il nastro su ogni sede dei servi per i fl ap, in modo da non rovinare la verniciatura. 2. -
Page 53: Installazione Dell'ala
Installazione dell’ala 1. Girare il fermo (A) e togliere attentamente dalla fusoliera il portello (B). 2. Inserire il tubo dell’ala (C) nella fusoliera. ATTENZIONE: NON schiacciare o danneggiare in altro modo i cablaggi quando si collega l’ala alla fusoliera. 3. Inserire le semiali destra a sinistra (D e E) sul tubo e poi nella relativa sede sulla fusoliera facendo passare i connettori dei servi attraverso gli appositi fori. -
Page 54: Installazione Piano Di Coda Orizzontale
Installazione piano di coda orizzontale 1. Infi lare il tubo (A) del piano orizzontale nel suo foro sul retro della fusoliera. 2. Installare sulla fusoliera i piani di coda orizzontali destro e sinistro (B), come di vede nel disegno. Accertarsi che le squadrette siano rivolte verso il basso. -
Page 55: Prese D'aria Dei Motori
Installare la batteria consigliata in modo che la sua parte posteriore si trovi contro alla parete anteriore della sua sede. Accertarsi di fi ssare bene la batteria usando delle fascette a strappo. Il baricentro indicato si basa sull’uso di una batteria Li-Po ParkZone 11.1V 2200mAh 25C (PKZ1029). 73–83mm dietro al bordo di entrata dell’ala. -
Page 56: Verifi Ca Direzione Comandi
Verifi ca direzione comandi Muovere i comandi del trasmettitore per essere certi che le superfi ci di comando si muovano nel verso giusto. Dopo aver fatto questo controllo, impostare il failsafe in modo corretto. Dopo essersi accertati che i comandi siano al centro e che il motore con il suo trim siano posizionati completamente in basso, rifare la connessione (bind) tra il modello e il trasmettitore. -
Page 57: Riduzione Corse
Volo fi cienza, per evitare di toccare il terreno con la punta delle ali. Scegliere sempre un ampio spazio aperto per far volare il ParkZone Mosquito Atterraggio sulla pancia L’ideale è di farlo volare in un campo di volo approvato. Se non si effettua il Se si vuole atterrare sull’erba senza il carrello di atterraggio, si deve usare lo... -
Page 58: Manutenzione Dopo Il Volo
Manutenzione dopo il volo 1. Scollegare la batteria di volo dall’ESC (necessario per la sicurezza e per la 5. Riparare o sostituire tutte le parti danneggiate. vita della batteria). 6. Riporre la batteria di volo lontano dall’aereo, controllandone la sua carica. 2. -
Page 59: Guida Alla Soluzione Dei Problemi
Guida alla soluzione dei problemi Problema Possibile causa Soluzione L’aereo non risponde Il motore non è al minimo o il trim è troppo in alto Riportare il comando motore e il suo trim al minimo al comando motore, La corsa del servo motore è inferiore al 100% Accertarsi che la corsa del servo motore sia superiore al 100% ma risponde agli Il canale del motore è... -
Page 60: Durata Della Garanzia
Durata della Garanzia Periodo di garanzia Indicazioni di sicurezza La garanzia esclusiva - Horizon Hobby, Inc., (Horizon) garantisce che i prodotti Questo è un prodotto sofi sticato di hobbistica e non è un giocattolo. Esso deve acquistati (il “Prodotto”) sono privi di difetti relativi ai materiali e di eventuali essere manipolato con cautela, con giudizio e richiede delle conoscenze basi- errori di montaggio. -
Page 61: Informazioni Di Compatibilità Per L'unione Europea
Informazioni di compatibilità per l’Unione Europea Dichiarazione di conformità Dichiarazione di conformità (in conformità con ISO/IEC 17050-1) (in conformità con ISO/IEC 17050-1) N. HH2013100401 N. HH2013100402 Prodotto(i): PKZ Mosquito Mk VI BNF Basic Prodotto(i): PKZ Mosquito Mk VI PNP Codice componente: PKZ6350 Codice(-i) componente(-i): PKZ6375... -
Page 62: Replacement Parts
Parkzone Mosquito: Propelleradapter Adaptateur d’hélice Adattatore elica: Mosquito PKZ6312 Scale Plastics Set: Mosquito Parkzone Mosquito: Scale Kunststoffteile Set de pièces de détails en plastique Set particolari in plastica: Mosquito Parkzone Mosquito: Kabinenhaube PKZ6313 Canopy w/Pilot: Mosquito Cockpit avec pilote : Mosquito Capottina con pilota: Mosquito m.Pilot... -
Page 63: Optional Parts
Optional Parts • Optionale Bauteile • Pièces optionnelles • Pezzi opzionali Part # | Nummer Description Beschreibung Description Descrizione Numéro | Codice Parkzone SV80 Servo mit langem PKZ1081 SV80 Long Lead 3-Wire Servo Servo SV80 câbles longs SV80 servo a 3 fi li con cavo lungo Kabel EFLG100 10-15 Main Electric Retracts E-fl... - Page 64 © 2013 Horizon Hobby, Inc. ParkZone, E-flite, Celectra, EC3, DSM, DSM2, DSMX, DSMX logo, Z-Foam, the BNF logo, Plug-N-Play and ModelMatch are trademarks or registered trademarks of Horizon Hobby, Inc. The Spektrum trademark is used with permission of Bachmann Industries, Inc.