Advertisement
Advertisement
Table of Contents

Related Manuals for Sanyo RM-5090


Summary of Contents for Sanyo RM-5090
- Page 1 RM-5090 INSTRUCTION MANUAL AM/FM Digital Alarm Clock Radio...
- Page 2 PRECAUTIONS CAUTION: THE APPARATUS SHALL NOT BE EXPOSED TO DRIPPING OR SPLASHING. NO OB- JECTS FILLED WITH LIQUIDS, SUCH AS VASES, SHALL BE PLACED ON THE APPARATUS. The rating label is located on the bottom of the unit. Keep the radio away from heating appliances and electric sources that could cause static on the radio such as fluorescent lamps and motors.
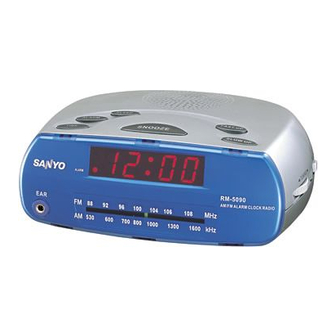
- Page 3 CONTROLS 1. Earphone socket (EAR) 2. PM indicator (PM) 3. Time button (TIME) 4. Volume control (VOLUME) 5. Alarm button (ALARM) 6. Sleep button (SLEEP) 7. Snooze button (SNOOZE) 8. Display 9. Hour button (HOUR) 10. Minute button (MIN) 11. Function switch (ON/OFF/ALARM-RADIO/ALARM-BUZZER) 12.
-
Page 4: Back-Up Battery Installation
BACK-UP BATTERY INSTALLATION Connect a standard 9V (006P/6F22) battery (not included) to the snap-on terminal match- ing the polarity. NOTE: If the time display is blinking when the mains returns after a failure, the back-up battery is exhausted and must be replaced. BATTERY BACK-UP SYSTEM This unit incorporates a battery back-up system which protects the clock, sleep timer and wake-up alarm functions from the mains failure with the battery installed. -
Page 5: Power Supply
POWER SUPPLY Connect the mains lead to an AC 230-240V, 50Hz wall outlet. The function switch is mounted on the secondary side. The unit is not disconnected from mains, even switched off. Earphone Connect earphone (not supplied) to the EAR socket for monitoring or for private listening. The speakers are automatically disconnected when earphone is connected, ADJUSTING THE CLOCK Example:... -
Page 6: Listening To The Radio
LISTENING TO THE RADIO 1. Set the function switch to ON. 2. Set the BAND switch to AM or FM. 3. Turn the TUNING control to tune in a station. 4. Adjust the VOLUME control as desired. 5. To turn the radio off, set the function switch to OFF. Aerials For AM reception, rotate or relocate the unit to a different position to improve the recep- tion of a distant or weak station. -
Page 7: Using The Wake-Up Timer
USING THE WAKE-UP TIMER 1. If you want to wake up with the radio, tune in the station and adjust the volume level first. 2. Set the wake-up time. (See “WAKE-UP TIME SETTING”.) 3. Set the function switch to ALARM-RADIO or ALARM-BUZZER. ALARM-RADIO: Wake up with the radio ALARM-BUZZER: Wake up with the buzzer. -
Page 8: Using The Sleep Timer
USING THE SLEEP TIMER 1. Set the function switch to OFF, ALARM-RADIO or ALARM-BUZZER. 2. Push the SLEEP button. “0:59” (59 minutes) appears. The radio turns on and will turn off automatically after 59 minutes. To select the desired time, while holding the SLEEP button down, push the HOUR (once) or MIN button repeatedly to select the sleep time (up to 1 hour and 59 minutes). -
Page 9: Specifications
FM: 87.5 - 108 MHz Antennas: Specifications subject to change without Built-in ferrite bar and antenna lead notice. wire Power source: AC: 230-240V, 50 Hz DC: 9 V (Clock back-up, 006P type, not supplied) SANYO Electric Co., Ltd. (AU) 1AD6P1P1922-- Printed in China...