Advertisement
Available languages
Available languages
Quick Links
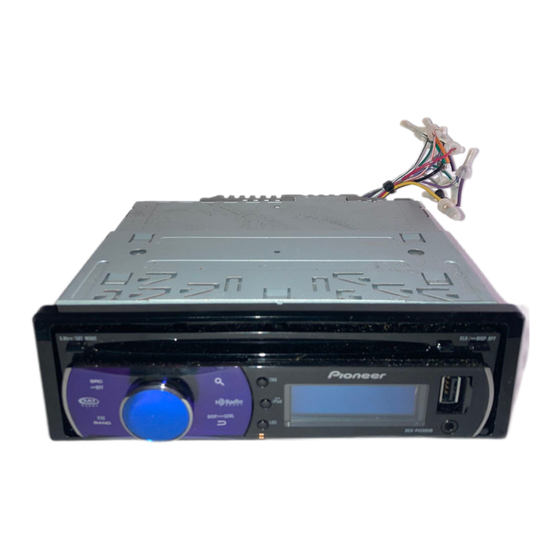
CD RECEIVER
RADIO CD
CD PLAYER
DEH-5250SD
Installation Manual
Manual de instalación
Manual de instalação
Printed in Thailand
<QRD3046-A/N> ES
<KSNNX> <09J00000>
Installation
English
2. Secure the mounting sleeve by
Note
using a screwdriver to bend the
• Check all connections and systems before final
metal tabs (90°) into place.
installation.
• Do not use unauthorized parts. The use of
Dashboard
unauthorized parts may cause malfunctions.
• Consult with your dealer if installation requires
drilling of holes or other modifications of the
vehicle.
• Do not install this unit where:
— it may interfere with operation of the vehicle.
— it may cause injury to a passenger as a result
of a sudden stop.
• The semiconductor laser will be damaged if it
overheats. Install this unit away from hot places
such as near the heater outlet.
• Optimum performance is obtained when the unit is
Mounting sleeve
installed at an angle of less than 60°.
60°
3. Install the unit as illustrated.
Use commercially available parts when
installing.
• When installing, to ensure proper heat dispersal
Nut
when using this unit, make sure you leave ample
space behind the rear panel and wrap any loose
Firewall or
cables so they are not blocking the vents.
metal support
DIN front/rear mount
Metal strap
Screw
This unit can be properly installed either from
"Front" (conventional DIN front-mount) or
"Rear" (DIN rear-mount installation, utilizing
threaded screw holes on the sides of unit
Screw (M4 8)
chassis). For details, refer to the following
installation methods.
DIN Front-mount
1. Insert the mounting sleeve into the
• Make sure that the unit is installed securely
dashboard.
in place. An unstable installation may cause
For installation in shallow spaces, use the
skipping or other malfunctions.
supplied mounting sleeve. If there is enough
space, use the mounting sleeve that came with
the vehicle.
Installation
English
DIN Rear-mount
3. Pull the unit out of the dashboard.
1. Determine the appropriate position
where the holes on the bracket and
the side of the unit match.
2. Tighten two screws on each side.
Truss screw (5 mm × 8 mm)
Mounting bracket
Dashboard or Console
Removing the unit
1. Extend top and bottom of the trim
ring outwards to remove the trim
ring. (When reattaching the trim
ring, point the side with the groove
down.)
Trim ring
• Releasing the front panel allows easier access
to the trim ring.
2. Insert the supplied extraction keys
into both sides of the unit until
they click into place.
Advertisement

Related Manuals for Pioneer DEH-5250SD


Summary of Contents for Pioneer DEH-5250SD
- Page 1 2. Tighten two screws on each side. of a sudden stop. • The semiconductor laser will be damaged if it DEH-5250SD Truss screw (5 mm × 8 mm) overheats. Install this unit away from hot places such as near the heater outlet.
-
Page 2: Instalación
Instalación Español Instalación Español Instalação Português (B) Instalação Português (B) 2. Fije el manguito de montaje Montaje trasero DIN 3. Extraiga la unidad del salpicadero. 2. Fixe a manga de montagem Montagem traseira DIN 3. Puxe a unidade para fora do painel. Nota Nota utilizando un destornillador para... - Page 3 安裝 中文 安裝 中文 2. 使用螺絲起子折彎金屬突出部位 (90°) DIN後座 注意 至定位,藉以固定座套。 1. 選定適當的位置,讓托架孔與本機側面 • 在正式安裝本機之前,請先檢查所有連接和系 密合。 統。 儀表板 • 請勿使用未被認可的零件,否則有可能會引起故 障。 • 如安裝時需要鑽孔或其他改裝,請向經銷商洽 詢。 • 請勿在以下位置安裝本機: — 會妨礙駕駛的地方。 2. 鎖緊各邊的兩顆螺絲。 — 突然剎車時會傷及乘客的地方。 十字螺絲(5 mm × 8 mm) • 半導體鐳射過熱會受損。請勿將本機安裝在高溫 處,如暖氣通風口。 • 安裝本機時與水平面的角度小於60度,本機可達 到最佳性能。...
-
Page 5: Rear Speaker
29. Power amp (sold separately) 1. This product 1. This product 25. To rear output 2. Rear output 2. Rear output 29. Power amp 3. Front output (sold separately) 3. Front output 26. To front output 7. Antenna 7. Antenna 4. - Page 6 Connecting the units English Connecting the units English Conexión de las unidades Español Conexión de las unidades Español Connection Diagram Diagrama de conexión — Place all cables away from hot places, such as — Posicione todos los cables alejados de las WARNING ADVERTENCIA near the heater outlet.
- Page 7 Conexão dos componentes Português (B) Conexão dos componentes Português (B) 連接本機 中文 連接本機 中文 Diagrama de conexão — Fixe todos os cabos com abraçadeiras ou — 請使用規定額定電流的保險絲。 連接圖 ADVERTÊNCIA 警告 fita adesiva. Para proteger os cabos, enrole- — 請勿將揚聲器負極導線直接接地。 os com uma fita adesiva onde fiquem em •...