
Related Manuals for Motorola B801


Summary of Contents for Motorola B801
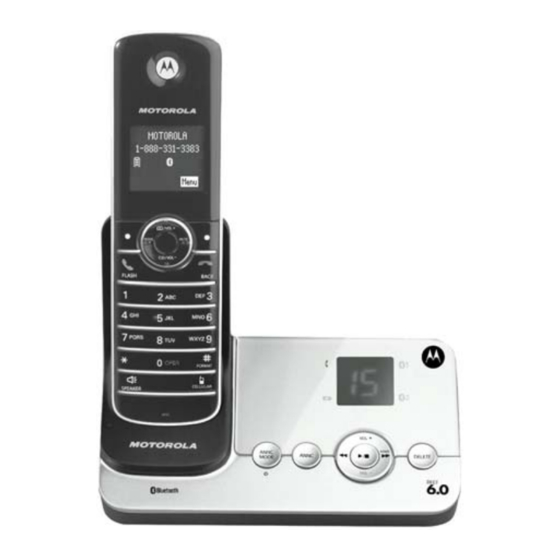
- Page 1 User’s Guide For B801 / B802 / B803 / B804 / B805 DECT 6.0 Cordless Answering System with ® Bluetooth Wireless Technology Warning Use only the adapter and telephone line cord provided in the box.
- Page 2 Motorola Phone! Please retain your original dated sales receipt for your records. For warranty service of your Motorola product, you will need to provide a copy of your dated sales receipt to confirm warranty status. Registration is not required for warranty coverage.
- Page 3 This User’s Guide provides you with all the information you need to get the most from your phone. Before you make your first call you will need to set up your phone. Follow the simple instructions in 'Getting Started', on the next few pages.
-
Page 4: Table Of Contents
1. Getting started ...6 2. Getting to know your phone ...9 3. Using the phone...17 3.1 Introducing Bluetooth... 17 3.2 Bluetooth setup... 19 3.3 Calls... 21 3.3.1 Make a HOME call ... 21 3.3.2 On-hook dialing (pre-dialing) ... 22 3.3.3 Answer a HOME call ... 22 3.3.4 End a HOME call ... - Page 5 6.3.3 Home area code ...40 6.3.4 Base reset ...41 7. Registration ... 41 7.1 Register a handset ...41 7.2 De-register all handsets ...42 8. Using your Answering machine... 43 8.1 Play Messages ...43 8.2 Delete All Messages...44 8.3 Announcement ...44 8.4 Memo ...44 8.5 Set the answer delay...44...
-
Page 6: Getting Started
1. Getting started WARNING • Do not place your phone in the bathroom or other humid areas. • CHOKING HAZARD - SMALL PARTS Not intended for children under 3 yrs. This product is not intended to be used as a toy or play thing. -
Page 7: Connecting The Base
Connecting the base 1. Plug the power adapter with smaller pin plug & telephone line cord into the base. Power adapter with bigger pin plug is for charger (for multi-pack only). 2. Plug the other end of the power adapter & telephone line cord into the wall jack. - Page 8 BATTERY LOW WARNING If the flashes in the display, you will need to recharge the handset before you can use it again. During charging, the will scroll in the display. BATTERY PERFORMANCE In ideal conditions, a fully charged battery pack should give up to 8 hours talk time or up to 100 hours standby time on a single charge.
-
Page 9: Getting To Know Your Phone
2. Getting to know your phone Overview of your handset Getting to know your phone Earpiece Scroll up/ Volume up/ Phonebook In idle mode: press to access the phonebook. In menu mode: press to scroll up. In editing mode: press to move the cursor to the right. During a call: press to increase volume. - Page 10 During a call: press to decrease volume. Call list/phonebook/redial list entry: press to scroll down the list. Talk off/ Back In menu/editing mode/phonebook entry: press to exit to previous level. In pre-dial mode/call list/redial list entry: press to exit to idle. During a call: press to end a call, either home call or cellular call.
-
Page 11: Handset Lcd Display
Handset LCD display Display icons On steadily when the Home line is in use. Off when the Home line is on-hook. On steadily when there is(are) Bluetooth device(s) connected with the telephone base. Off when Bluetooth feature is disabled. On steadily when Bluetooth headset is in use. Off when Bluetooth headset is not in use. -
Page 12: Overview Of The Base
Steadily ON: When the handset is put into base cradle for charging. IN USE LED – RED Steadily ON: When the handset is in use, when the answering machine is answering an incoming call or when you are registering a handset. Getting to know your phone... - Page 13 DELETE During message playback: Delete the current message. In Idle: Press and hold to erase all read messages (applicable only when messages in answering machine are all read) SKIP FORWARD/ MEMO During message playback: Press to skip to play the next message.
-
Page 14: Message Counter Display
13 BLUETOOTH KEYS In Idle, to pair up Bluetooth cellular: Press any one for 2s to initiate cellular pairing mode, the 7-seg LED will display and flash "C x" to initiate cellular pairing mode. X can be 1 or 2 and it depends on which key user pressed. -
Page 15: Navigating The Menus
Paging Paging is useful if you misplace your handset(s). To start the paging tone: • Press on the base. - This starts the paging tone on the handset(s) for 60 seconds. NOTE > When paging, if you press on a handset, the ringer of the handset will be silent but the handset paging feature will not be canceled. -
Page 16: Menu Map
Menu map MAIN MENU DIRECTORY SUB MENU REVIEW STORE CALL LOG DATE & TIME INTERCOM CALL LOG EMPTY SET DATE SET TIME View the call log list SETUP HS SETUP BS RINGER VOLUME BS RING VOL RINGER TONE ANSWER DELAY TONES MESSAGE ALERT LANGUAGE... -
Page 17: Using The Phone
Character map Characters versus key press number ‘ space Using the phone 3. Using the phone Introducing Bluetooth & Your new telephone system with Bluetooth wireless technology has the following features: • Pair Bluetooth enabled mobile phone and (or) headset with the telephone base. - Page 18 Bluetooth mobile phone - Refers to a Bluetooth enabled mobile telephone. CELLULAR line - The communications service provided through your Bluetooth enabled mobile telephone. HOME line - Your conventional telephone land line. Connected - A Bluetooth device can only be used when it is connected to the telephone base.
-
Page 19: Bluetooth Setup
Bluetooth feature and search for a new device. Using the phone 3. Once your Bluetooth enabled mobile phone has found the Motorola B801/B802/B803/B804/B805 telephone base, select it. 4. Using your Bluetooth enabled mobile phone, enter the PIN of the telephone base (the default PIN is 0000) to continue the pairing process. -
Page 20: Auto Connection
While the Bluetooth enabled mobile phone is connected to the telephone base, find the Bluetooth enabled mobile phone’s Bluetooth device list and select Motorola B801/ B802/B803/B804/B805 to manually disconnect the device. (If disconnection is not an option on your Bluetooth enabled... -
Page 21: Calls
Make sure the Bluetooth feature is turned on in your Bluetooth enabled mobile phone. Select Motorola B801/B802/B803/B804/B805 from the paired device list in your Bluetooth enabled mobile phone to reconnect. If the connection is successfully resumed, the... -
Page 22: On-Hook Dialing (Pre-Dialing)
3.3.2 On-hook dialing (pre-dialing) 1. Enter the telephone number. Press corrections when entering the phone number. < 2. Press to dial. 3.3.3 Answer a HOME call < • Press 3.3.4 End a HOME call > • Press or return the handset to the telephone base or charger. -
Page 23: Make A Cellular Call
3.3.7 Make a CELLULAR call 1. Enter the telephone number, and then press 2. Press to make corrections when entering the phone number. 3. If there is only one Bluetooth enabled mobile phone paired up, press again to dial out. Or if there are two Bluetooth enabled mobile phones paired up, press to select the desired one, and then press... -
Page 24: Receive A Home Call While On A Cellular Call
3.3.11 Receive a HOME call while on a CELLULAR call While on a CELLULAR call and there is an incoming HOME < call, will flash on the handset and you will hear a short beep. To answer the incoming HOME call: <... -
Page 25: Call From The Phonebook
To redial a number: < • Press to dial the displayed number from the HOME line. • Press to dial the displayed number from the CELLULAR line. < • Press , then to call the most recently called number (up to 30 digits). While reviewing the redial memory, press displayed number. -
Page 26: Volume Control
3.3.16 Volume control To adjust the listening volume on a handset: Press the listening volume when on a call. Each press of the button increases or decreases the volume level by one increment. NOTES 1. All volume settings (handset and speakerphone) are independent. -
Page 27: Hold
3.3.19 Hold You can place a HOME or CELLULAR call on hold. You will hear an alert tone if you have not taken the call off of hold after 14 minutes. You will hear another alert tone 30 seconds later. At 15 minutes on hold, the call will automatically disconnect. -
Page 28: Intercom
Caller ID history (call log) 1. Press >CALL LOG 2. Press to scroll to 3. Press 4. Press to scroll to the desired number. 5. Press to dial the displayed number. Last number redial (redial list) Press to display and dial the most recently dialed number. -
Page 29: Transfer An External Call To Another Handset
NOTES 1. Before the intercom call is answered, you can cancel > the intercom call by pressing 2. If the called handset is not answered within 100 seconds, or if it is in the directory or caller ID history mode, or on a call, or out of range, the calling handset UNABLE TO CALL TRY AGAIN will show the message >... -
Page 30: Phonebook
3. You can end the intercom call and return to the outside < call by pressing (depending on which call is being transferred) on the transferring handset, or > pressing on the called handset. 4. Phonebook The directory is stored in the telephone base, and is shared by all handsets. -
Page 31: Add An Entry
You can also display the first entry in the directory by pressing twice, then pressing >REVIEW 2. Press to browse through the directory. Entries will be displayed alphabetically by the first letter in the name. Add an Entry 1. Press when in idle mode to enter the feature menu. -
Page 32: Edit An Entry
NOTE The first letter of every word will be capitalized. The remaining letters in a word begin with lower case letters shown in the chart to the right. Edit an Entry When a directory entry is displayed: 1. Press to modify the entry. You will be prompted to EDIT NUMBER . -
Page 33: Caller Id
• If you press once, you will see • If you press twice, you will see • If you press three times, you will see • If you press four times, you will see • If you press five times, you will see NOTES 1. -
Page 34: Caller Id History Information
are in areas offering caller ID service, and if both telephone companies use compatible equipment. Contact your local telephone company and cellular service provider if: • You have both caller ID and call waiting, but as separate services (you may need to combine these services). •... -
Page 35: Memory Match
Memory match If the the last 7 digits of the incoming telephone number match that of a number stored in your directory, the name that appears on the screen will match the corresponding name in your directory. For example, if Christine Smith calls, Chris her name will appear as if this is how you entered into... -
Page 36: Save A Number From The Call List To The Phonebook
Save a number from the call list to the phonebook 1. Follow steps 1 and 2 in section 5.4. 2. Press to copy the entry into your directory. You can edit the name and the number. 3. Press to save. NOTES 1. -
Page 37: Personal Settings
6. Personal settings Using the feature menu, you can customize many of the telephone’s settings. 1. Press when in idle mode (when the phone is not in use) to enter the feature menu. 2. Use to scroll to the feature to be changed. When scrolling through the menu, the top menu item is always >... -
Page 38: Ringer Tone
4. Press to sample each volume level. Level 1 to 5 and Ringer Off are available. 5. Press to save your preference and return to the feature menu. NOTE The ringer volume also determines the ringer volume of the intercom calls and the paging tone for the handset locator feature. -
Page 39: Language
Language In this menu, you can select the language used for all screen displays. When the menu language is changed, the voice prompt language of answering machine will also be changed accordingly. Specific performance may be different from countries. To select a language: 1. -
Page 40: Home Area Code
will provide a visual indication when you have new voicemail messages. NEW VOICEMAIL and the icon will appear on the handset screen(s). NOTE This feature does not indicate new answering system messages recorded on your phone. 6.3.2.1 Clear voicemail indication Use this feature when the telephone indicates there is new voicemail but there is none (for example, when you have accessed your voicemail while away from home). -
Page 41: Base Reset
NOTE If, in the future, your telephone service provider requires you to dial 10 digits to make a local call (area code + phone number), re-program the home area code by following the steps above. With the home area code displayed, press and hold to remove the contents. -
Page 42: De-Register All Handsets
take about 10 seconds to complete the registration. The HANDSET X REGISTERED handset will display denotes the handset number (1-6). There will be a beep sound if the registration is successful. NOTES 1. If the registration is not successful, the display will show NOT REGISTERED . -
Page 43: Using Your Answering Machine
Using your Answering machine 8. USING YOUR ANSWERING MACHINE The answering machine records unanswered calls when it is activated. It can store up to 99 messages within the maximum recording time of 14 minutes. Play Messages In idle: 1. -
Page 44: Delete All Messages
NOTE If Toll Saver setting is selected, the answering machine will pick up after two rings if there are new messages and after four rings if there are no messages. -
Page 45: Turn On/Off The Message Alert
If the message alert is turned on, the base will give a short alert beep at the speaker volume set, when there is a new message recorded on the answering machine. 1. Press when in idle mode to enter the feature menu. -
Page 46: Set The Security Code
Stop any operation, including recording. Listen to a list of remote commands. Skip to the next message during playback. Record a new announcement. Turn the answering system on or off. End remote access (the call will be terminated). Set the security code 1. -
Page 47: Help
• Make sure the Bluetooth function of your Bluetooth enabled mobile phone is turned on. See your mobile phone user's manual for more information. • Remove the Motorola B801/B802/B803/B804/B805 from your mobile phone's Bluetooth device history list (see your mobile phone user's manual for more information). - Page 48 Section 3.2 “Bluetooth setup” for details. I cannot find the Motorola B801/B802/B803/B804/ B805 on my mobile phone • Make sure that the Bluetooth feature is turned on in the telephone base. Carefully follow the setup instructions in Section 3.2 “Bluetooth setup”.
- Page 49 • Make sure the telephone line cord is securely and firmly plugged into the telephone base and the telephone wall jack. • Charge the battery in the handset for at least 16 hours. For optimum daily performance, return the handset to the telephone base or charger when not in use.
- Page 50 I get noise, static, or weak signals even when I’m near the telephone base • You may be able to improve the performance of your phone by installing your new telephone base as far as possible from any other existing telephone system that may already be installed.
- Page 51 My handset does not ring when I receive a call • Make sure that the ringer is not turned off. Refer to the section(s) on ringer selection in this user’s manual. • Make sure the telephone line cord is plugged securely into the telephone base and the telephone jack.
- Page 52 Incomplete messages • If a caller leaves a very long message, part of it may be lost when the system disconnects the call after four minutes. • If the caller pauses for longer than seven seconds, the system stops recording and disconnects the call. •...
-
Page 53: General Information
11. General Information If your product is not working properly... 1. Read this User's Guide or the Quick Start Guide. 2. Visit our website: www.motorola.com 3. Contact Customer Service in the US and Canada at 1-888-331-3383. To order a replacement battery pack, contact customer service or visit our website. -
Page 54: Installation Guidelines
8. Do not overload wall outlets and extension cords. 9. Avoid using during an electrical storm. Use a surge protector to protect the equipment. 10. Do not use this phone to report a gas leak, especially if you are in the vicinity of the gas line. CAUTION To reduce the risk of fire, use only No. -
Page 55: Battery Safety Instructions
7. Clean this product with a soft, damp cloth. Do not use chemicals or cleaning agents to clean this phone. 8. Use only the power supply that came with this unit. Using other power supplies may damage the unit. 9. Because this phone operates on electricity, you should have at least one phone in your home that could operate without electricity in case the power in your home goes out. - Page 56 What Does this Warranty Cover? Subject to the exclusions and limitations contained below, Binatone Electronics International LTD. warrants the Motorola branded consumer products that it manufactures (“Products”) and the Motorola branded or certified accessories sold for use with these Products that it manufactures (“Accessories”) to be free from defects in...
- Page 57 WARRANTIES AND MOTOROLA AND BINATONE ELECTRONICS INTERNATIONAL LTD. MAKES NO OTHER WARRANTIES OR CONDITIONS, EXPRESS OF IMPLIED. IN NO EVENT SHALL MOTOROLA OR BINATONE ELECTRONICS INTERNATIONAL LTD. BE LIABLE, WHETHER UNDER THIS LIMITED WARRANTY OR IN CONTRACT OR TORT (INCLUDING NEGLIGENCE OR...
- Page 58 Product or Accessory to abnormal usage or conditions; or (e) other acts or omissions which are not the fault or neglect of Motorola or Binatone Electronics International LTD., are excluded from coverage. Use of Non-Motorola branded Products and Accessories.
- Page 59 Communication Services. Defects, damages, or the failure of Products or Accessories due to any communication service or signal you may subscribe to or use with the Products or Accessories is excluded from coverage.
- Page 60 interference to radio or television reception, which can be determined by turning the equipment off and on, the user is encouraged to try to correct the interference by one or more of the following measures: • Reorient or relocate the receiving antenna. •...
- Page 61 premises wiring and the telephone network must comply with applicable Part 68 rules and technical requirements adopted by ACTA. A compliant telephone cord and modular plug is provided with this product. It is designed to be connected to a compatible modular jack that is also compliant. An RJ11 jack should normally be used for connecting to a single line and an RJ14 jack for two lines.
- Page 62 If this product is equipped with a corded or cordless handset, it is hearing aid compatible. If this product has memory dialing locations, you may choose to store emergency telephone numbers (e.g., police, fire, medical) in these locations. If you do store or test emergency numbers, please: •...
- Page 63 rien ne garantit que des parasites ne surviendront pas dans une installation particulière. Si cet appareil cause des interférences nuisibles à la réception du téléviseur ou de la radio, ce que vous pouvez déterminer en mettant votre appareil en et hors fonction, nous vous invitons à essayer l'une des mesures correctives suivantes : •...
- Page 64 Unis et aux exigences adoptées par le Conseil d'administration du matériel terminal 'ACTA'. Vous trouverez, sous l'appareil, une étiquette qui contient, entre autres renseignements, une plaque signalétique dans le format 'US: AAAEQ##TXXXX'. Si on vous le demande, vous devez fournir ce numéro à la compagnie de téléphone.
- Page 65 Si cet appareil nuit au réseau téléphonique, la compagnie de téléphone peut décider d'arrêter temporairement votre service téléphonique. Elle est tenue de vous avertir avant d'interrompre le service; si elle ne peut pas vous avertir d'avance, elle le fera dès qu'elle le pourra. On vous donnera l'opportunité...
- Page 66 Cet appareil est conforme aux spécifications techniques d'Industrie Canada. Technical Specifications RF frequency band 1921.536 MHz — 1928.448 MHz Channels Operating temperature 5ºC to 45ºC Telephone base voltage 96 — 130 Vrms (AV voltage, 60Hz) Telephone base voltage 6V DC, 400mA (Adapter output) Handset voltage 2.4V 500mAh Ni-MH battery...
- Page 67 MOTOROLA and the Stylized M Logo, and other Motorola trademarks and trade dress are owned by Motorola, Inc. and are used under license from Motorola, Inc. MOTOROLA and the Stylized M Logo are registered in the US Patent &...