Table of Contents
Advertisement
Advertisement
Table of Contents

Related Manuals for Lenovo 5594-6KX


Summary of Contents for Lenovo 5594-6KX
- Page 1 3U Rack or Tower UPS RT5.0kVA and RT6.0kVA Installation and User's Guide...
- Page 3 3U Rack or Tower UPS RT5.0kVA and RT6.0kVA Installation and User's Guide...
- Page 4 Note Before using this information and the product it supports, read the general information in the Notices section; and read the Safety Information and the Environmental Notices and User Guide on the Lenovo Documentation CD that came with your product.
-
Page 5: Table Of Contents
. 30 Electronic emission notices . . 62 Interrupt time . 30 Configuring battery settings . . 31 Appendix D. Glossary ..67 Retrieving the Event log . . 31 © Copyright Lenovo 2015... - Page 6 Installation and User's Guide...
-
Page 7: Safety
Ennen kuin asennat tämän tuotteen, lue turvaohjeet kohdasta Safety Information. Avant d'installer ce produit, lisez les consignes de sécurité. Vor der Installation dieses Produkts die Sicherheitshinweise lesen. Prima di installare questo prodotto, leggere le Informazioni sulla Sicurezza. © Copyright Lenovo 2015... -
Page 8: Guidelines For Trained Service Technicians
This section contains information for trained service technicians. Inspecting for unsafe conditions Use this information to help you identify potential unsafe conditions in a Lenovo product that you are working on. Each Lenovo product, as it was designed and manufactured, has required safety items to protect users and service technicians from injury. -
Page 9: Guidelines For Servicing Electrical Equipment
Make sure that the insulation is not frayed or worn. 4. Remove the cover. 5. Check for any obvious non-Lenovo alterations. Use good judgment as to the safety of any non-Lenovo alterations. 6. Check inside the system for any obvious unsafe conditions, such as metal filings, contamination, water or other liquid, or signs of fire or smoke damage. -
Page 10: Safety Statements
v Never assume that power has been disconnected from a circuit. Check it to make sure that it has been disconnected. v If you have to work on equipment that has exposed electrical circuits, observe the following precautions: – Make sure that another person who is familiar with the power-off controls is near you and is available to turn off the power if necessary. - Page 11 L001 DANGER Hazardous voltage, current, or energy levels are present inside any component that has this label attached. Do not open any cover or barrier that contains this label. (L001) Safety...
- Page 12 Electrical voltage and current from power, telephone, and communication cables are hazardous. To avoid a shock hazard: v If Lenovo supplied a power cord(s), connect power to this unit only with the Lenovo-provided power cord. Do not use the Lenovo-provided power cord for any other product.
- Page 13 Exchange only with the Lenovo-approved part. Recycle or discard the battery as instructed by local regulations. In the United States, Lenovo has a process for the collection of this battery. For information, call 1-800-426-4333. Have the Lenovo part number for the battery unit available when you call.
- Page 14 C022 CAUTION: This product might be equipped with a hard-wired power cable. Ensure that a licensed electrician performs the installation per the national electrical code. (C022) Installation and User's Guide...
- Page 15 R001 Important: The following general safety information should be used for all rack-mounted devices: DANGER Observe the following precautions when working on or around your IT rack system: v Heavy equipment—personal injury or equipment damage might result if mishandled. v Always lower the leveling pads on the rack cabinet. v Always install stabilizer brackets on the rack cabinet.
-
Page 16: Product Safety
CAUTION: v Do not install a unit in a rack where the internal rack ambient temperatures will exceed the manufacturer’s recommended ambient temperature for all your rack-mounted devices. v Do not install a unit in a rack where the air flow is compromised. Ensure that air flow is not blocked or reduced on any side, front, or back of a unit used for air flow through the unit. - Page 17 The upstream circuit breaker for Normal AC and Bypass AC must be easily accessible. The unit can be disconnected from AC power source by opening this circuit breaker. This circuit breaker is used for backfeed protection and must comply with IEC/EN 62040-1 (the creepage and clearance distances shall meet the basic insulation requirements for pollution degree 2).
- Page 18 Installation and User's Guide...
-
Page 19: Chapter 1. Introduction
Before installing your equipment, read the safety instructions. Then, follow the instructions in this manual for setting up and using the product. To discover the entire range of Lenovo products and the options available for the Lenovo UPS device, we invite you to visit our website or contact your Lenovo representative. -
Page 20: Environmental Protection
CD. End of life Lenovo will process products at the end of their service life in compliance with local regulations. Lenovo works with companies in charge of collecting and eliminating our products at the end of their service life. - Page 21 The battery pack can be removed to comply with regulations and in view of correct disposal. With the Lenovo UPS device, you can eliminate the effects of power disturbances and guard the integrity of your equipment. Providing outstanding performance and reliability, the Lenovo UPS device's unique benefits include: v True online double-conversion technology with high power density, utility frequency independence, and power generator compatibility.
- Page 22 Installation and User's Guide...
-
Page 23: Chapter 2. Presentation
If you are shipping the UPS and its associated EBMs preinstalled in a rack, you must use the shipping bracket kit to prevent damage during shipment. The kit is available from Lenovo. Refer to the instructions in the kit to install the brackets © Copyright Lenovo 2015... -
Page 24: Rear Panels
properly. The brackets are not required when the UPS and EBMs are installed in a pre-positioned rack. Rear panels RS232 communication port USB communication port Dry (relay) contacts communication port Connector for Remote On/Off (ROO) control Figure 1. 5594-5KX Connector for automatic recognition of an additional battery module Connector for remote Power Off (RPO) control... -
Page 25: Accessories
RS232 communication port USB communication port Dry (relay) contacts communication port Connector for Remote On/Off (ROO) control Figure 2. 5594-6KX Connector for automatic recognition of an additional battery module Connector for remote Power Off (RPO) control Slot for UPS Network Management... -
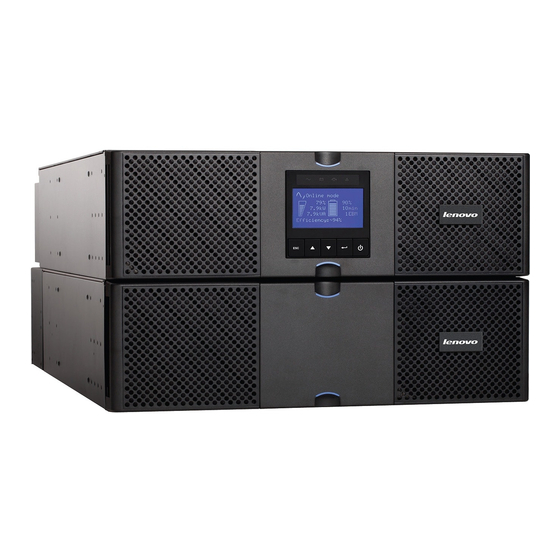
Page 26: Lcd Description
The following table shows the indicator status and description: Indicator Status Description Green The UPS is operating normally on Online or on High Efficiency mode. Orange The UPS is on Battery mode. Orange The UPS is on Bypass mode. The UPS has an active alarm or fault. - Page 27 The following table describes the status information provided by the UPS. Note: If an other indicator appears, see Chapter 8, “Troubleshooting,” on page 43 for additional information. Operation status Cause Description The UPS is Off. Equipment is not powered Standby mode until power ( ) button is pressed.
-
Page 28: Display Functions
Operation status Cause Description The UPS is operating on The UPS is powering and High Efficiency mode High Efficiency mode. protecting the equipment. An overload or a fault has Equipment is powered but Bypass mode occurred or a command has not protected by the UPS. -
Page 29: User Settings
Main menu Submenu Display information or Menu function Register product Links to Lenovo registration website User settings The following table displays the options that can be changed by the user. Submenu Available settings Default settings Local settings Language [language_name] [English]... - Page 30 Submenu Available settings Default settings In/Out settings Output voltage [200V] [208V] [220V] [208V] [230V] [240V] Can be changed only in Standby mode Output frequency [Disabled] Frequency converter: [Enabled] [Disabled] Frequency settable in frequency converter mode Output mode [Network] [Industrial] [Network] Set UPS behavior regarding transfer on Bypass...
- Page 31 Submenu Available settings Default settings On/Off settings Cold start [Enabled] [Disabled] [Enabled] Authorize the product to start on battery power. Forced reboot [Enabled] [Disabled] [Enabled] If mains recover during a shutdown sequence: If set to Enabled, shutdown sequence will complete and wait 10 seconds prior to restart, if set to Disabled, shutdown...
- Page 32 Submenu Available settings Default settings On/Off settings Sleep mode [Enabled] [Disabled] [Enabled] (continued) If Disabled, LCD and communication will turn OFF immediately after UPS is OFF. If Enabled, LCD and communication stays ON 1h 30 min. after UPS is OFF. Remote command [Enabled] [Disabled] [Enabled]...
- Page 33 Submenu Available settings Default settings Battery settings Automatic battery In constant charge [Every ABM cycle] test mode: [No test] [Every day] [Every week] [Every month] In ABM cycling mode: [No test] [Every ABM cycle] Low battery warning [0%] ... [100%] [20%] The alarm triggers when the set...
- Page 34 Installation and User's Guide...
-
Page 35: Chapter 3. Installation
Note: Do not lift the UPS or EBM from the front panel. Figure 4. Unpacking the UPS and Extended Battery Module 2. Discard or recycle the packaging in a responsible manner, or store it for future use. © Copyright Lenovo 2015... -
Page 36: Checking The Accessory Kit
Note: Packing materials must be disposed of in compliance with all local regulations concerning waste. Recycling symbols are printed on Lenovo the packing materials to facilitate sorting. Checking the accessory kit Procedure v Verify that the following additional items are included with the UPS:... -
Page 37: Connecting The Internal Battery Pack
Battery power cable, attached with battery detection cable Stabilizer bracket (4 screws included) Rail kit for 19-inch enclosures Note: Disregard the EBM installation instructions if you are installing the EBM with a new UPS at the same time. Use the UPS instructions to install both the UPS and the EBM. -
Page 38: Connecting The Ebm(S)
To install the UPS: Procedure 1. Remove the center cover of the front bezel. 2. Loosen the two screws to open the left side of the front bezel. 3. Remove the two screws to pull out the metal protection cover of the battery pack. -
Page 39: Rack Installation
Rack installation Preparing the UPS for rack mounting About this task Note: This step requires two people. The UPS is heavy. To ease its rack mounting, you can remove the battery packs from the UPS as explained below. Procedure 1. Remove the center cover of the front bezel. 2. -
Page 40: Rack Mounting Of The Ups And Ebm
Procedure Follow steps 1 to 4 in the illustration for module mounting on the rails. The rails and necessary hardware are supplied by Lenovo. Tower installation About this task To install the unit in a tower configuration: Procedure 1. -
Page 41: Installing The Communication Card
v Adjustment of the orientation of the LCD panel and of the logo. v Adjustment of the angle of vision of the LCD panel. Installing the communication card About this task Follow these steps to install the UPS Network Management Card if it is not preinstalled. -
Page 42: Installation Requirements
Procedure 1. Remove the connector panel blank ( ), which is secured by two screws. 2. Insert the UPS Network Management Card into the slot. Secure the panel by tightening the two screws. Installation requirements Recommended protective devices and cable cross-sections 1. -
Page 43: Chapter 4. Power Cables Connection
Input/Output connection About this task Important: This type of connection must be carried out by qualified electrical personnel. Before carrying out any connection, check that the upstream protection device (Normal AC source) is open "O" (off). © Copyright Lenovo 2015... - Page 44 Always connect the ground wire first. 1. Insert the Normal AC cable through the cable gland. 2. Connect the three cables to the Normal AC source terminal blocks. 3. Insert the Output cable through the cable gland. 4. Connect the three cables to the Output terminal blocks.
-
Page 45: Chapter 5. Operation
Note: Before using this feature, the UPS must have been powered by utility power with output enabled at least once. Battery start can be disabled. See the Cold start setting in ON/OFF settings. To start the UPS on battery power: © Copyright Lenovo 2015... -
Page 46: Shutting Down The Ups
2. Set the upstream circuit breaker (not provided) to the "O" position (Off) to switch off the utility power. Monitoring the UPS operating mode The Lenovo UPS front panel indicates the UPS status through the UPS indicators. See “Control panel” on page 7. Operating modes: descriptions... -
Page 47: Operating Modes: Summary
Bypass mode In the event of a UPS overload or internal failure, the UPS powers your equipment directly from utility power. Battery mode is not available and your equipment is not protected; however, the utility power continues to be passively filtered by the UPS. -
Page 48: Transferring The Ups Between Modes
Note: In High Efficiency mode, the UPS is in Bypass mode and transfers to Battery mode in less than 10 microseconds (ms) when utility power fails. Transfers to High Efficiency (HE) mode will be active after 5 minutes of Bypass voltage monitoring: if Bypass quality is not in tolerance, then the UPS will remain in Online mode. -
Page 49: Configuring Battery Settings
Configuring battery settings Automatic battery test Automatic battery tests are done every week in automatic charging mode and at each cycle in Advanced Battery Management (ABM) mode. The frequency of the tests can be modified using the LCD panel: see "Automatic battery test" in “User settings”... - Page 50 Installation and User's Guide...
-
Page 51: Chapter 6. Communication
RS232 or USB communication port on the UPS. Results The UPS can now communicate with Lenovo power management software. Relay output contacts The UPS incorporates four relay outputs; each one is available with a normally closed or open contact. -
Page 52: Remote On/Off
Status active information: (if contact between pin and common is closed) v Pin 1: not on Bypass v Pin 2: load not protected v Pin 3: not low battery v Pin 4: not on Battery v Pin 5: user common n.o.: contact normally open v Pin 6: on Bypass n.c.: contact normally closed... - Page 53 Important: The RPO circuit is an IEC 60950 safety extra low voltage (SELV) circuit. This circuit must be separated from any hazardous voltage circuits. Note: Important notes: v The RPO must not be connected to any utility-connected circuits. The RPO switch must have a minimum rating of 27 Vdc and 20 mA and be a dedicated latching-type switch not tied into any other circuit.
-
Page 54: Replacing The Communication Card
Note: Always test the RPO function before applying your critical load to avoid accidental load loss. Replacing the communication card About this task Follow these steps to replace the UPS Network Management Card. Procedure 1. Turn off the UPS. 2. Disconnect the network cable. 3. -
Page 55: Chapter 7. Ups Maintenance
Dispose of battery packs in accordance with local regulations. Battery packs can be replaced without turning off the UPS or disconnecting the load. If you prefer to power down to change the battery packs, see Shutting down the UPS. © Copyright Lenovo 2015... -
Page 56: Replacing The Internal Battery Pack
Note: DO NOT DISCONNECT a battery pack while the UPS is in Battery mode. Be aware that the UPS can switch to Battery mode at any time and without warning. Consider all warnings, cautions, and notes before replacingbattery packs. Important: v Servicing should be performed by qualified service personnel knowledgeable of batteries and required precautions. - Page 57 To replace the battery pack: Procedure 1. Remove the center section of the front bezel. 2. Loosen the two screws to open the left side of the front bezel. 3. Remove the two screws to pull out the metal protective cover of the battery pack.
-
Page 58: Replacing The Ebm(S)
Replacing the EBM(s) About this task CAUTION: The weight of this part or unit is more than 55 kg (121.2 lb). It takes specially trained persons, a lifting device, or both to safely lift this part or unit. (C011) To replace the EBM(s): Procedure 1. -
Page 59: Recycling The Used Equipment
Recycling the used equipment Contact your local recycling or hazardous waste center for information on proper disposal of the used equipment. Refer to the Lenovo Systems Environmental Notices and User Guide on the Lenovo Documentation CD for more information. Important: v Do not dispose of batteries in a fire or expose them to temperatures higher than 100°C (212°F). - Page 60 Installation and User's Guide...
-
Page 61: Chapter 8. Troubleshooting
Chapter 8. Troubleshooting The Lenovo UPS is designed for durable, automatic operation. It will alert you whenever operating problems occur. Usually the alarms shown by the control panel do not mean that the output power is affected. Instead, they are preventive alarms intended to alert the user. - Page 62 Conditions Possible cause Action The UPS has been in Battery Battery low Shut down equipment. mode too long. This warning is approximate, and the actual time to shut down might vary significantly. Depending on the UPS load and LED is On. the number of Extended Battery Modules (EBMs), the "Battery 1 beep every 3...
- Page 63 Conditions Possible cause Action Power overload Power requirements exceed the Remove some of the equipment UPS capacity (greater than 100% from the UPS. of nominal; see Appendix A, The UPS continues to operate, “UPS model specifications,” on but it might switch to Bypass page 49 for specific output mode or shut down if the load overload ranges).
-
Page 64: Silencing The Alarm
Conditions Possible cause Action MBP disconnected The HotSwap MBP is not If the HotSwap MBP is detected. connected to the UPS, check that the detection connector is correctly plugged. Silencing the alarm Procedure 1. Press the ESC (Escape) button on the front panel display to silence the alarm. 2. -
Page 65: Chapter 9. Parts Listing
Structural parts: Purchase and replacement of structural parts (components such as the top cover) is your responsibility. If Lenovo acquires or installs a structural part at your request, you will be charged for the installation. - Page 66 Table 3. Parts listing table: Extended battery module (continued) Description Type Part No. 55946BX Tower pedestal feet Tier 1 CRU 00FP825 Ship Bracket for 9PX Tier 1 CRU 00FP827 Installation and User's Guide...
-
Page 67: Appendix A. Ups Model Specifications
Appendix A. UPS model specifications The Lenovo 3U Rack or Tower UPS, model 5594-5KX and model 5594-6KX, is a single-phase UPS unit. Table 4. Power Module model list Model Power Ratings 5594-5KX 5000VA / 4500W at 200V, 208V, 220V, 230V, and 240V output... - Page 68 Output cable 5594-5KX Hardwired (2) IEC 10A (2) IEC 16A (4) IEC 10A group 1 (4) IEC 10A group 2 5594-6KX Table 11. AC input and output 5594-5KX 5594-6KX AC Input power 200-240VAC, 50/60Hz, 1ph, 200-240VAC, 50/60Hz, 1ph, 25A max...
- Page 69 Table 11. AC input and output (continued) 5594-5KX 5594-6KX AC Output power 50/60Hz, 1ph; 50/60Hz, 1ph; 200VAC, 5000VA, 4500W, 200VAC, 6000VA, 5400W, 25.0A; 30.0A; 208VAC, 5000VA, 4500W, 208VAC, 6000VA, 5400W, 24.0A; 28.8A; 220VAC, 5000VA, 4500W, 220VAC, 6000VA, 5400W, 22.7A; 27.3A;...
- Page 70 Table 14. Environmental and safety standards (continued) EMC (Immunity) IEC 61000-2-2 IEC 61000-4-2, Level 3 IEC 61000-4-3, Level 3 IEC 61000-4-4, Level 4 (also on signal ports) IEC 61000-4-5, Level 4, Criteria B IEC 61000-4-6, Level 3 IEC 61000-4-8, Level 4 IEC 61000-4-11 Agency markings CE / cULus / NOM...
- Page 71 Table 16. Communication options (continued) Compatible connectivity UPS Network Management Card cards Communication ports RS-232 (DB9): 1200-19200 bps USB: 19200 bps Relay output contacts (4) relay outputs (normally open or normally closed) Remote On/Off 2 pins jumper (normally open) Remote Power Off 3 pins jumper (normally open or normally closed) Appendix A.
- Page 72 Installation and User's Guide...
-
Page 73: Appendix B. Getting Help
Lenovo to assist you. Use this information to obtain additional information about Lenovo and Lenovo products, and determine what to do if you experience a problem with your Lenovo system or optional device. Note: This section includes references to IBM web sites and information about obtaining service. -
Page 74: Using The Documentation
The troubleshooting information or the diagnostic programs might tell you that you need additional or updated device drivers or other software. Lenovo maintains pages on the World Wide Web where you can get the latest technical information and download device drivers and updates. -
Page 75: Creating A Personalized Support Web Page
In the U.S. and Canada, call 1-800-IBM-SERV (1-800-426-7378). Hardware service and support IBM is Lenovo's preferred service provider for the System x, Flex System and NeXtScale System products. You can receive hardware service through your Lenovo reseller or from IBM. To locate a reseller authorized by Lenovo to provide warranty service, go to http://www.ibm.com/partnerworld and click Business Partner Locator. - Page 76 IBM Taiwan Corporation 3F, No 7, Song Ren Rd. Taipei, Taiwan Telephone: 0800-016-888 Installation and User's Guide...
-
Page 77: Appendix C. Notices
Web sites. The materials at those Web sites are not part of the materials for this Lenovo product, and use of those Web sites is at your own risk. -
Page 78: Trademarks
(TBW). A device that has exceeded this limit might fail to respond to system-generated commands or might be incapable of being written to. Lenovo is not responsible for replacement of a device that has exceeded its maximum guaranteed number of program/erase cycles, as documented in the Official Published Specifications for the device. -
Page 79: Recycling Information
Lenovo makes no representations or warranties with respect to non-Lenovo products. Support (if any) for the non-Lenovo products is provided by the third party, not Lenovo. Some software might differ from its retail version (if available) and might not include user manuals or all program functionality. -
Page 80: Telecommunication Regulatory Statement
Properly shielded and grounded cables and connectors must be used in order to meet FCC emission limits. Lenovo is not responsible for any radio or television interference caused by using other than recommended cables and connectors or by unauthorized changes or modifications to this equipment. - Page 81 EU-Mitgliedsstaaten und hält die Grenzwerte der EN 55022 Klasse A ein. Um dieses sicherzustellen, sind die Geräte wie in den Handbüchern beschrieben zu installieren und zu betreiben. Des Weiteren dürfen auch nur von der Lenovo empfohlene Kabel angeschlossen werden. Lenovo übernimmt keine Verantwortung für die Einhaltung der Schutzanforderungen, wenn das Produkt ohne Zustimmung...
- Page 82 Konformitätserklärung nach Paragraf 5 des EMVG ist die Lenovo (Deutschland) GmbH, Gropiusplatz 10, D-70563 Stuttgart. Informationen in Hinsicht EMVG Paragraf 4 Abs. (1) 4: Das Gerät erfüllt die Schutzanforderungen nach EN 55024 und EN 55022 Klasse A. Nach der EN 55022: „Dies ist eine Einrichtung der Klasse A. Diese Einrichtung kann im Wohnbereich Funkstörungen verursachen;...
- Page 83 Korea Communications Commission (KCC) statement This is electromagnetic wave compatibility equipment for business (Type A). Sellers and users need to pay attention to it. This is for any areas other than home. Russia Electromagnetic Interference (EMI) Class A statement People's Republic of China Class A electronic emission statement Taiwan Class A compliance statement Appendix C.
- Page 84 Installation and User's Guide...
-
Page 85: Appendix D. Glossary
Advanced Battery Management (ABM) A three-stage charging system designed to prolong the service life of Lenovo UPS batteries. By charging the batteries only when necessary, battery life is significantly improved. Charging stage one: quickly recharges battery to approximately 90% of capacity. Charging stage two: fully charges the battery to 100%. - Page 86 Installation and User's Guide...
- Page 88 Part Number: 00WA360 Printed in USA (1P) P/N: 00WA360...